General information
Path parameter/Resource identifier
Internal id is a unique entity identifier from your ERP system.
Dates and date format
All dates/timestamps used in this API should meet ISO 8601 standard.
Pagination
Requests use a pagination pattern that limits the number of items in response and has two values: page number (required) and page size. The initial page number is 0 (zero).
Response media types
API return data as application/json media type.
Custom response headers
Each response has a unique yaypay-uuid header which should be used in support requests or to get your access logs.
Error codes
The following table lists error codes that you might receive as a response to your API calls:
| Error code | Reason | Response example | |
| 400 | Bad request. The request from the client application is not valid |
{ "error": "400 BAD_REQUEST", "message": "Text 'YYYY-MM-DD' could not be parsed at index 0" } |
Wrong date format, invalid content type |
| 401 | Unauthorized |
{ "error": "401 UNAUTHORIZED", "message": "Access is denied" } |
Credentials are missing or incorrect, or you don't have access to the requested scope |
| 403 | Forbidden |
{ "timestamp": "2020-12-24T22:55:03.465109Z[UTC]", "error": "403 FORBIDDEN", "message": "Client with id 7f4da1aeub3jri1f32tXXXXX not found or not active!" } |
Client credentials were used in the wrong environment. You used credentials from the production server on the dev instance, so you passed authentication but you were not authorized to make requests on the dev |
| 404 | Not found |
{ "error": "404 NOT_FOUND", "message": "Transaction with internal id 23423432 and biz id 198 not found!" } |
Internal id used as path variable not found |
| 429 | Response status code indicates the user has sent too many requests in a given amount of time | See the quota limits section for details | |
| 500 | Internal application error | The application was not able to return the response due to an exceptional situation |
YayPay Environments
The YayPay application can run in the following environments:
Developer Environment (i.e. developer.yaypay.com) – As you start to develop your data push and integration to YayPay, you will initially work in this environment to allow you to review your data and change your data uploads in an iterative manner.
Production Environment (i.e. app.yaypay.com for US production or app1.yaypay.com for EU production) – When your integration build and test are completed, and you are ready to send actual production/live data to YayPay, we will work with you to provision a new instance in this environment.
Credentials
To obtain your Client key and Client secret values, you must have an active YayPay account with an admin role assigned to you:
Log in to your YayPay instance running in the developer or production environment.
- Navigate to Settings | Secure Keys to view your Client name value and select the required access levels in OAuth scopes.
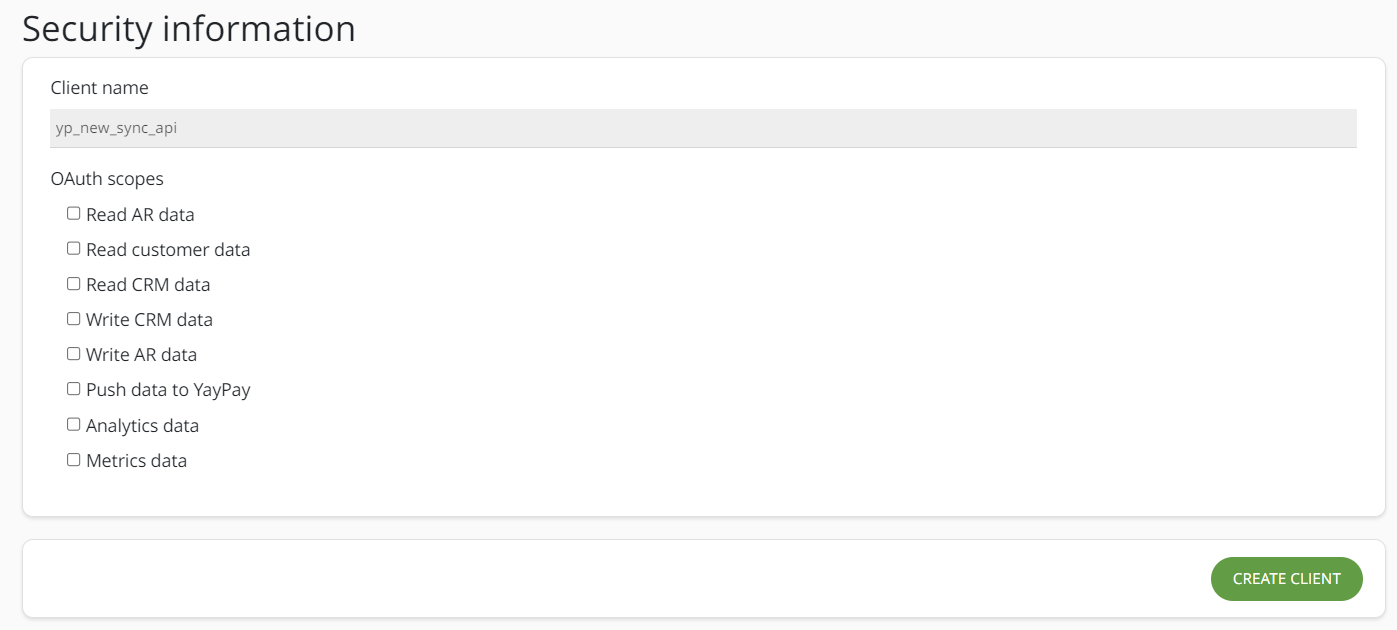 By selecting a scope, you will define what the client is allowed to do with the data using API calls:
Read AR data
Allows the client to access and retrieve accounts receivable (AR) data, which typically includes information about invoices, payments, credit memos, adjustments.
Read customer data
Allows the client to view and retrieve customer data, such as contacts, AR mappings, notes, addresses.
Read CRM data
Allows the client to access and retrieve data from the customer relationship management (CRM) system about customer activities.
Write CRM data
Allows the client to create, update, or modify data within the CRM system.
Write AR data
Allows the client to create, update, or modify accounts receivable (AR) data.
Push data to YayPay
Allows the client to send or push data to YayPay.
Analytics data
Allows the client to access analytics data, which includes aggregated and processed data for generating insights and reports.
Metrics data
Allows the client access specific metrics data, which typically refers to measurable data points or key performance indicators (KPIs) that assess the performance, efficiency, or effectiveness of a system or process.
Click on the CREATE CLIENT button.
-
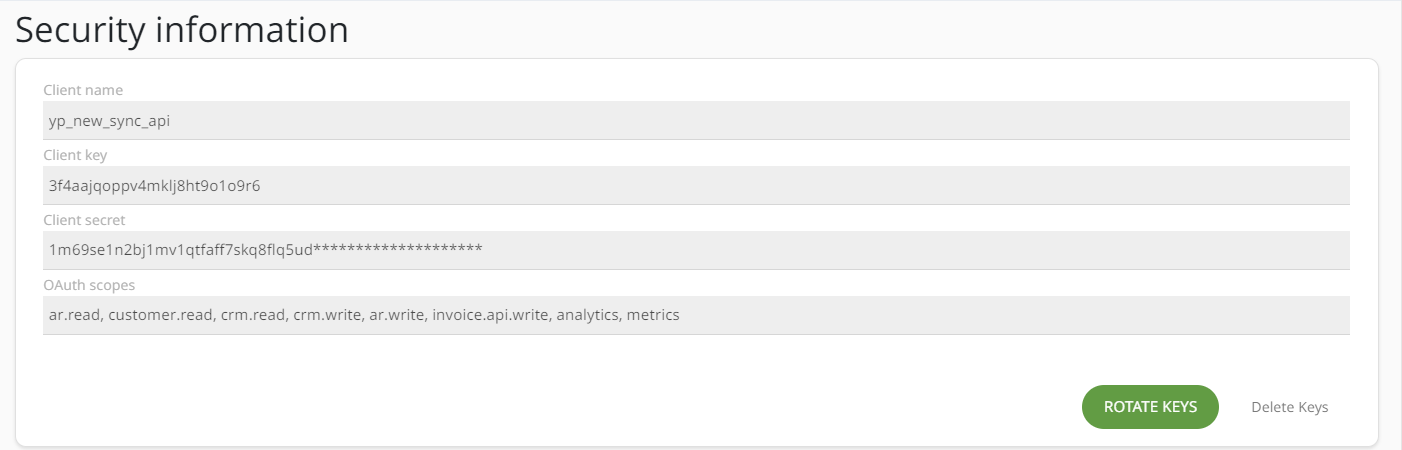
Client key and Client secretvalues will be generated.
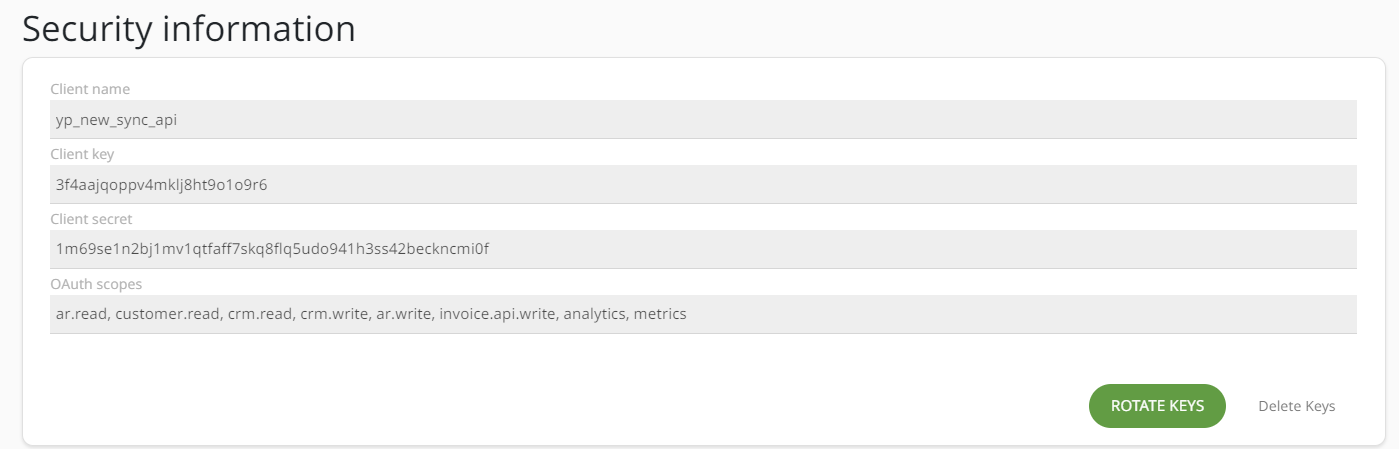
- Save the generated credentials securely.
Data returned by API
Your biz data in YayPay can be logically divided into three logical groups (scopes): AR data (Invoices, Payments Adjustments, etc.), CRM data (Notes, Activities, etc.), and Customer data (Addresses, Contacts, AR mappings, etc.)
AR data
Include: invoices, payments, credit memos, adjustments
All items in AR scope may be in one of two possible statues: OPEN or CLOSED
OPEN items examples:
Invoice is not paid (invoice total does not equal to paid amount), payment is not applied or partially applied (e.g. total payment amount is 100$ but on the invoice(s) allocated only 80$), same works for adjustments or credit memos.
CLOSED items examples:
Invoice is fully paid, payment/adjustment/credit memo unallocated amount is 0
CRM data
Include: customer activities
Customer data
Include: contacts, ar mappings, notes, addresses
Quickstart with Swagger
Sandbox: https://developer.yaypay.com/api/v2/swagger-ui.html
Production US instance: https://app.yaypay.com/api/v2/swagger-ui.html
Production EU instance: https://app1.yaypay.com/api/v2/swagger-ui.html
1. Click on the Authorize button:

2. Enter your client id and client secret and select scope:

3. Click on the Authorize button:

4. And make your first API call:
Request example

Response example

Client Application Authorization
Sandbox URL: https://www.developer.yaypay.com/api/v2/token
Production URL: https://app.yaypay.com/api/v2/token
You must pass client_id and client_secret in the authorization header through Basic HTTP authorization. The secret is Basic Base64Encode(client_id:client_secret).
Content-Type
Must always be 'application/x-www-form-urlencoded'.
Request Parameters in Body
scope: ar.read
Sample Request
POST https://mydomain.com/api/v2/token >Content-Type='application/x-www-form-urlencoded'&Authorization=Basic aSdxd892iujendek328uedj scope=ar.read
Postman example


Sample response
HTTP/1.1 200 OKContent-Type: application/json { "access_token":"eyJz9sdfsdfsdfsd", "token_type":"Bearer", "expires_in":3600}
General quota limits
300 Requests per minute per user (client)
25 000 Requests per day per user (client)
Token endpoint quota limits
50 Requests per hour
Error retries
Warning
Do not retry in case of 4xx errors
Numerous components on a network, such as DNS servers, switches, load balancers, and others can generate errors anywhere in the life of a given request. The usual technique for dealing with these error responses in a networked environment is to implement retries in the client application.
You should retry original requests that receive server (5xx) or throttling errors. However, client errors (4xx) indicate that you need to revise the request to correct the problem before trying again.
The following code demonstrates how to implement a simple retry with exponential backoff in Java.
public enum Results {
SUCCESS,
NOT_READY,
THROTTLED,
SERVER_ERROR
}
public static void doOperationWithRetry() {
int retries = 0;
boolean retry = false;
do {
long waitTime = Math.min(getWaitTimeExp(retries), MAX_WAIT_INTERVAL);
System.out.print(waitTime + "\n");
try {
Thread.sleep(waitTime);
Results result = getData();
if (Results.SUCCESS == result) {
retry = false;
} else if (Results.NOT_READY == result) {
retry = true;
} else if (Results.THROTTLED == result) {
retry = true;
} else if (Results.SERVER_ERROR == result) {
retry = true;
} else {
// Some other error occurred, so stop calling the API.
retry = false;
}
} catch (IllegalArgumentException | InterruptedException e) {
System.out.println("Error sleeping thread: " + e.getMessage());
} catch (IOException e) {
System.out.println("Error retrieving result: " + e.getMessage());
} catch (Exception e) {
System.out.println("Error: " + e.getMessage());
}
} while (retry && (retries++ < MAX_RETRIES));
}
/*
* Returns the next wait interval, in milliseconds, using an exponential
* backoff algorithm.
*/
public static long getWaitTimeExp(int retryCount) {
if (0 == retryCount) {
return 0;
}
long waitTime = ((long) Math.pow(2, retryCount) * 100L);
return waitTime;
}
