The collection workflow works for all the customers assigned to it, however, if you need to create some rules which work for a specific group only, you can use conditions/custom conditions when creating one.
There is a standard set of widely used conditions that can be added to a rule:
for Customer, Payment, and Sales order events there are two standard conditions: "Customer has no billing contact" and "Customer credit limit is not set".
for Invoice events there are three standard conditions: "Customer has no billing contact", "Customer credit limit is not set", and "Invoice has no billing contact".

And there is a custom conditions section that allows you more flexibility in your collection process.
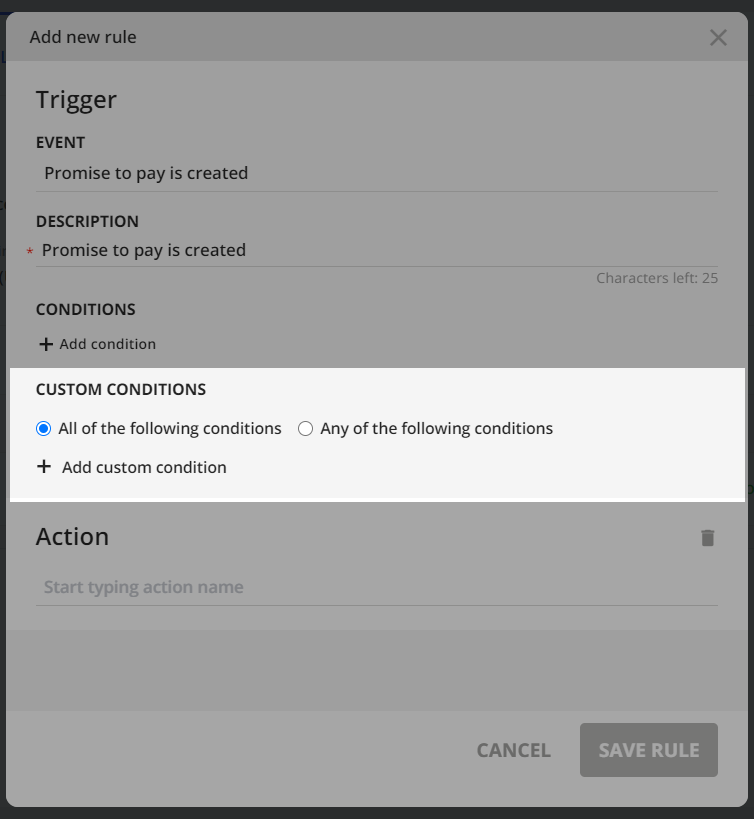
To create a new custom condition:
1. Click on +Add custom condition .
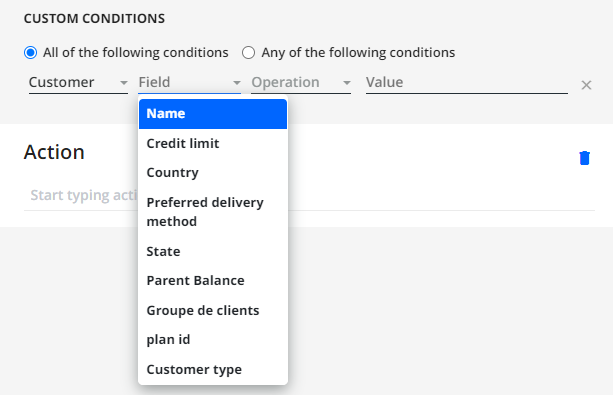
2. Choose Type (Customer/Invoice/Payment).

3. Choose Field: field dropdown contains the standard scope of fields + ERP custom fields on each level of types + System custom fields on each level of types. Also, if your account has Outsourced Mail enabled, the "Preferred Delivery Method" field will also be available as a field in custom conditions.
4. Choose an operation:
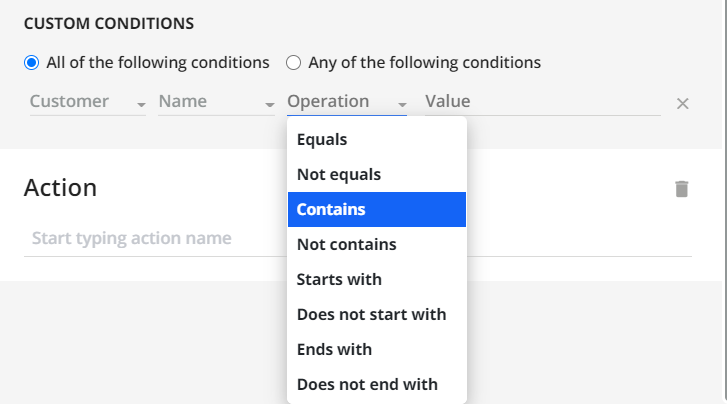
- Equals - use the operator when you want a field to be exactly the same as a value(s) for this condition
- Not Equals - values that are enlisted with this operator don't trigger the action, but values that don't match the enlisted values do trigger the action
- Contains - use the operator when you want a value(s) for this condition to be present as a part of the field value
- Not contains - fields containing values that are enlisted with this operator don't trigger the action, but fields not containing the enlisted values do trigger the action
- Starts with - use the operator when you want a field to start with a value(s) you enlist
- Does not start with - fields starting with values that are enlisted with this operator don't trigger the action, but fields that are not starting with the enlisted values do trigger the action
- Ends with - use the operator when you want a field to end with a value(s) you enlist
- Does not end with - fields ending with values that are enlisted with this operator don't trigger the action, but fields that are not ending with the enlisted values do trigger the action
- Is empty - the set field does not contain any data
- Is not empty - the set field contains data
For Not equals, Not contains, Does not start with, Does not end with you should choose All of the following conditions radio button option, otherwise, it will trigger the event for each condition separately, which means that all existing cases will match either of a condition.
5. Type in a value or multiple values that you want to use, separating each value by a comma.
6. Choose if you add more than 1 condition:
All of the following conditions - the rule will be triggered only if all the conditions are true for a case
Any of the following conditions - the rule is triggered if at least one condition from the list is true for a case

- You can add as many conditions as you need
- You can remove any conditions and edit them
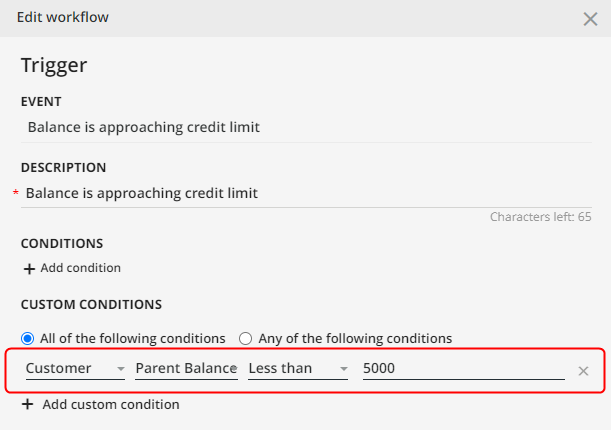
“Parent Balance” custom condition
If you e.g. send correspondence at the parent level, you may benefit from the Parent Balance custom condition setup.
Configure the Parent Balance field using one of the standard operations (Greater than, Less then, Equals, Not equals, Greater or equal, Less or equal) and a value.
If a Customer does not have a Parent, the current customer balance is used as a parent balance in this custom condition.
Also, the result depends on whether the Parent level collections setting is enabled (Statement page > ACTIVITY panel > SETTINGS). Also, refer to Consolidated Collection Workflow.

- if a Customer has a Parent and the Parent level collections setting is disabled, the parent customer balance (not Consolidated balance) is used as a parent balance. In the case of higher-level parents assigned, only the top parent is taken in into account;
- if a Customer has a Parent and the Parent level collections setting is enabled, the parent customer balance (Consolidated balance) is used as a parent balance. In the case of higher-level parents assigned, all the child companies of the top parent are taken into account.
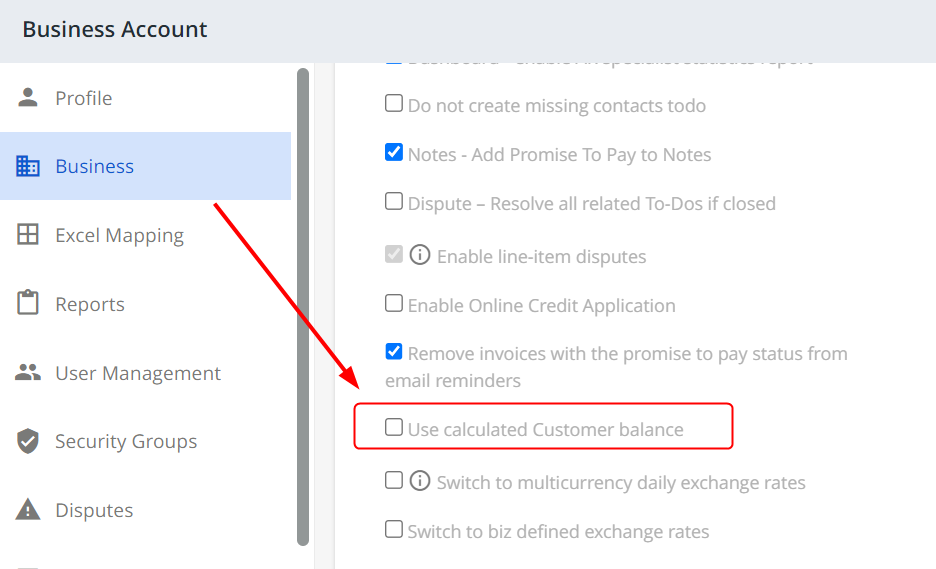
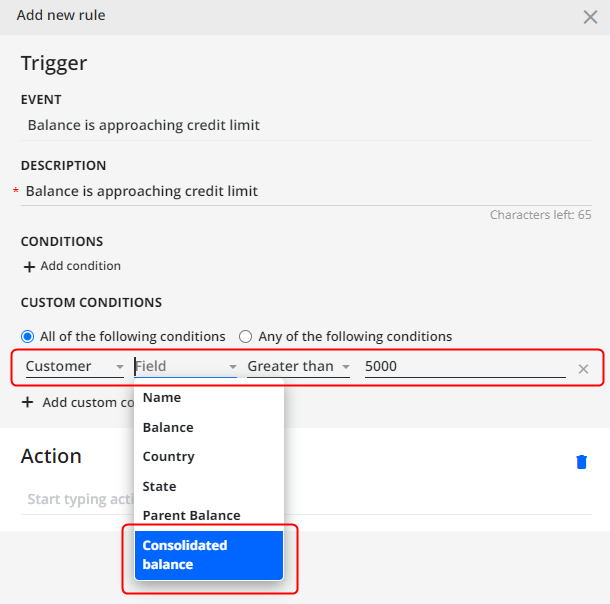
“Consolidated Balance” custom condition
The consolidated balance for this custom condition is calculated only for the customers with Parent level collections setting enabled (Statement page > ACTIVITY panel > SETTINGS).
The consolidated balance is made up of the customer's balance + the balance of its child company (if any).
Custom Condition – Overdue Balance and Consolidated Overdue Balance
You can use the following fields to configure rules that trigger actions only related to customers with overdue balances:
- Overdue Balance
-
Consolidated Overdue Balance– Consists of the overdue balance of a customer, including its child companies (if there are any).
YayPay only calculates consolidated overdue balance for the customers with the Parent level collections setting enabled (in Statement page | ACTIVITY panel | SETTINGS).
For example, you can use the Overdue Balance field to exclude customers with a 0.00 overdue balance from automatic email reminders.
Custom Condition – Days Past Due
You can use this condition to configure rules that trigger actions that occur every x days.
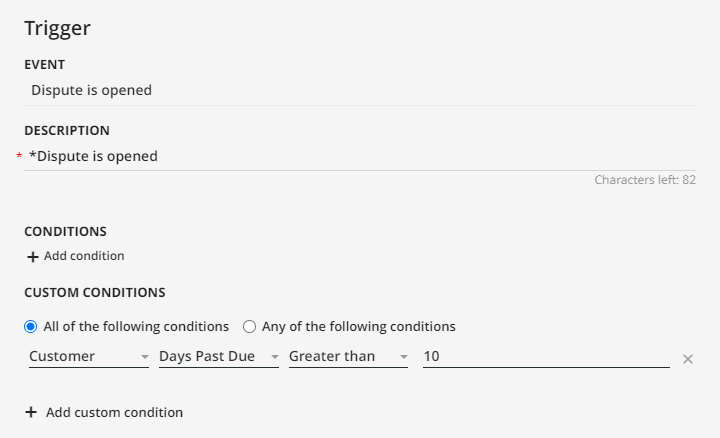
Example
You can set up a set of rules that trigger every 10 days for customer accounts that are 10, 30 or 60 days past due, using a different email template for each period. To achieve this, you will need the following rules:
- A rule that runs every 10 days with a custom condition that is set up for account that are 10 days past due. This rule employs an email template A.
- A rule that runs every 10 days with a custom condition that is set up for account that are 30 days past due. This rule employs an email template B.
- A rule that runs every 10 days with a custom condition that is set up for account that are 60 days past due. This rule employs an email template C.
A customer has the following invoices past due:
- Invoice 1: 38 days past due
- Invoice 2: 24 days past due
- Invoice 3: 14 days past due
- Invoice 4: 10 days past due
In this case, the customer would trigger the rule for accounts past due by more than 30 days and use the email template C, as their account falls within that category. They would not trigger the rule for accounts past due by more than 10 days, as one of the invoices exceeded the 30-day threshold.
Custom Condition – Excluding Multiple Customers
You can use this custom condition to configure a rule that triggers a selected action for all the customers except for those whose names are specified by the custom condition.
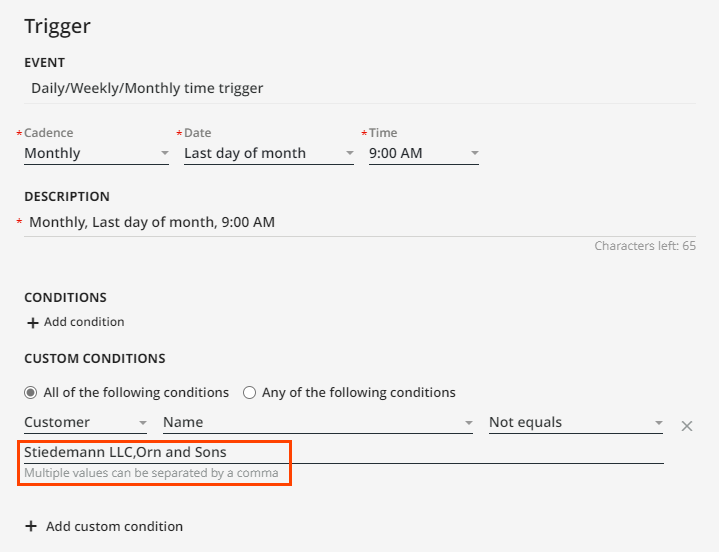
The Value field can contain multiple values separated by commas.
Example You can set up a rule that sends a monthly statement to all customers, except for those whose names are specified by the custom condition.
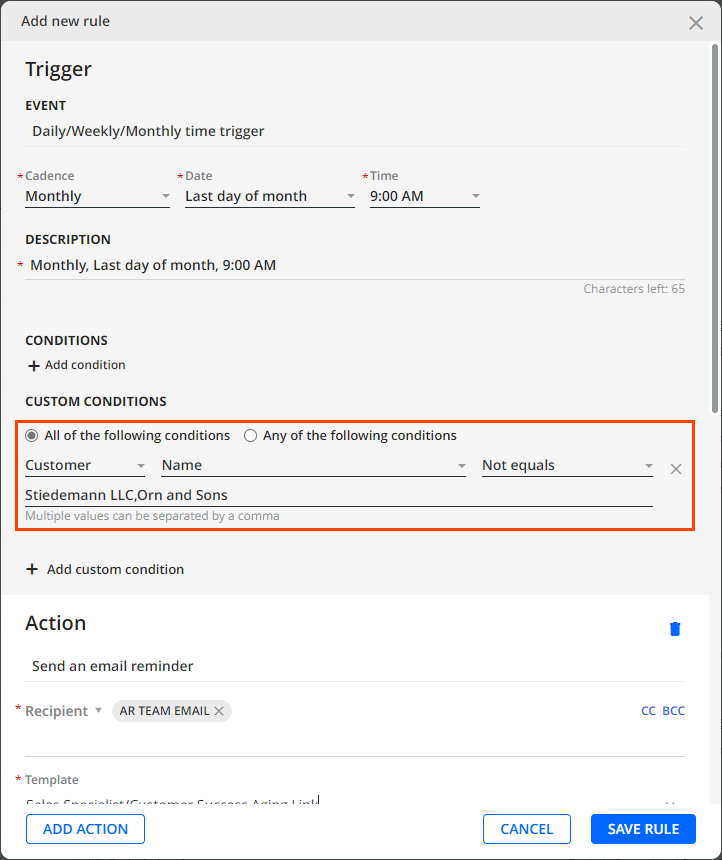
In this case, all customers except for Stiedemann LLC, Orn and Sons will receive their monthly statement on the last day of the month at 9AM.
