Using system or editable custom fields, YayPay users can easily create sets of data based on any attribute they define.
System Custom Fields allow users to tag any Customer or Invoice record and then utilize these tags across the system to generate and download custom reports, filter data on a granular level to perform required actions, etc.
Creating system custom fields (customer/invoice level)

To create new system custom fields or manage the already defined system custom fields:
Go to Settings| System Custom Fields.
-
Define system custom fields and select their visibility options.
You can define system custom fields for the customer or invoice level. For each level, there is a dedicated tab where you can define all the related settings:YayPay Display Name
Defines the name of the system custom field as it will be displayed in YayPay. The name can have a maximum of 20 characters.
Aging Filter
If checked, the selected system custom field becomes available for sorting and filtering on the Aging Report page.
This option is available at the customer level only.Display on Statement
If checked, the selected system custom field will be displayed on the Statement page.
Display on Customer Portal
If checked, the selected system custom field will be displayed on the Customer Portal web page.
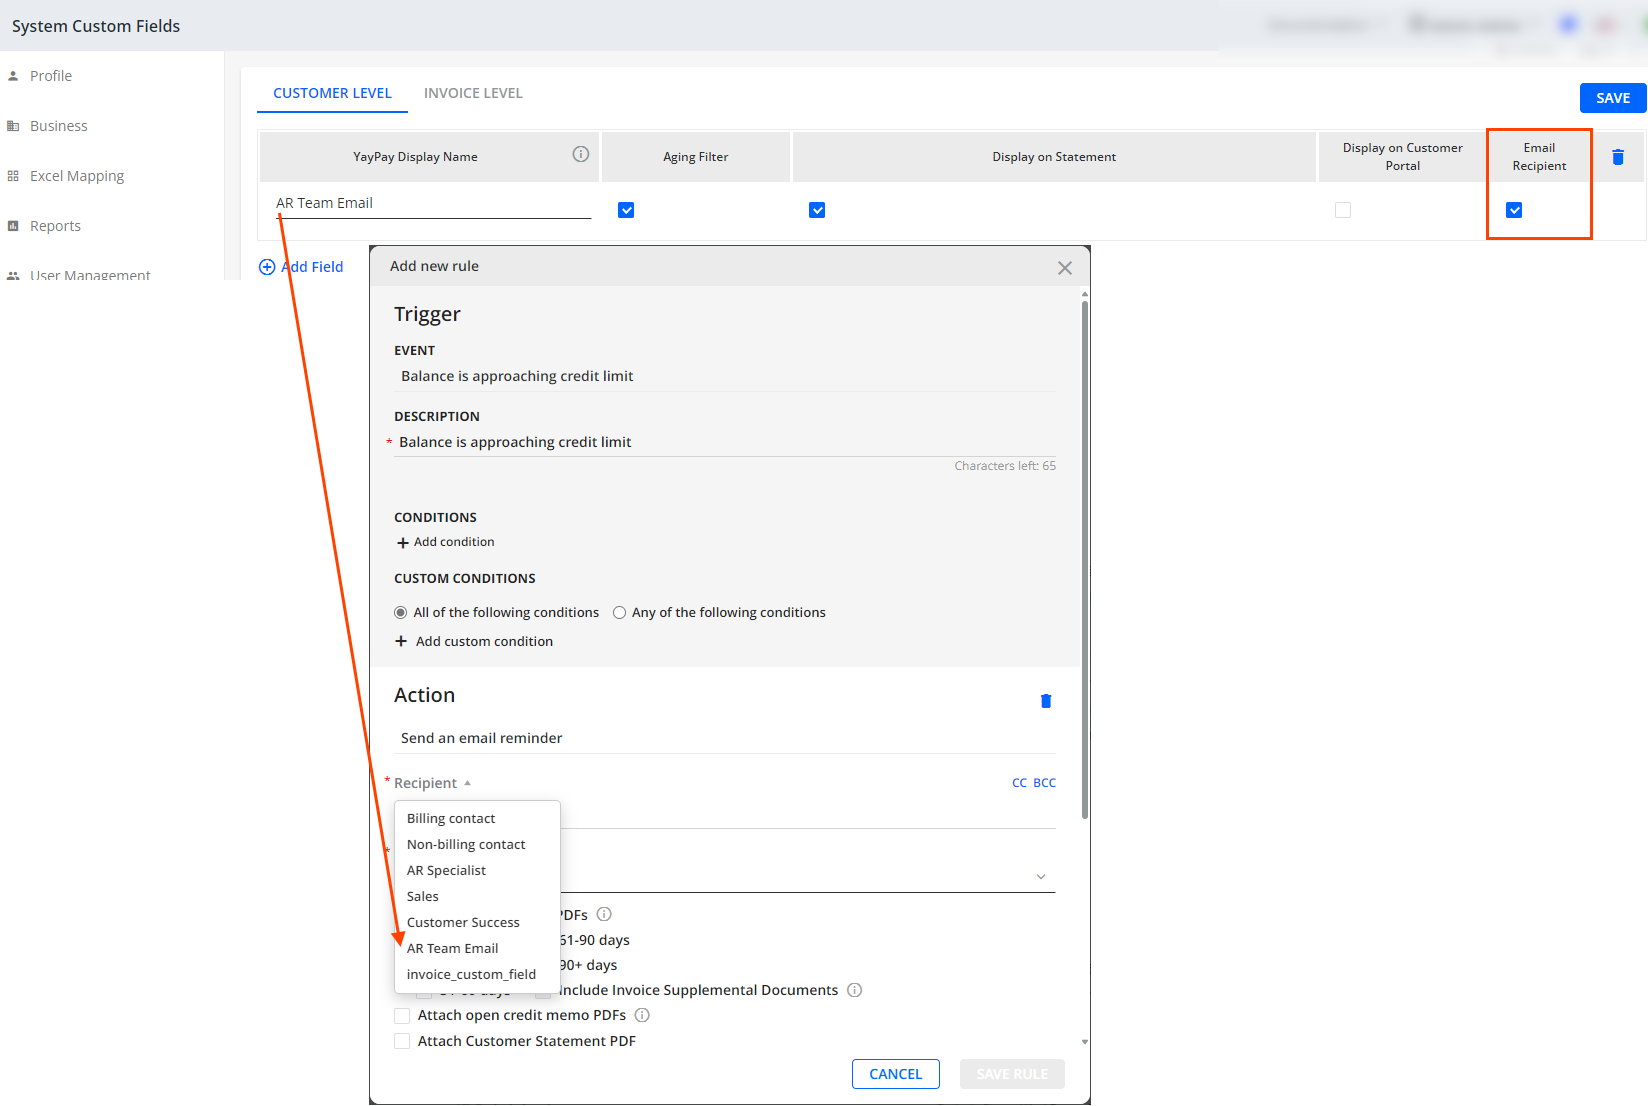
Email Recipient
If checked, the selected system custom field which contains an email address as its value, will be available in the Recipients combo-box when sending email reminders. Typically, you can send email reminders from pages such as Global Search, Aging Report, Statement, Invoices, Disputes or Communications pages,etc.
Additionally, you can select this email address from the Recipients combo-box when setting up the Send an email reminder action for events in workflows or global rules.
Click Save to confirm the settings.
To assign a value to a custom field via the Set Up System Custom Field Value dialog, follow the steps described below.
Once system custom fields are added, every customer or invoice can be tagged. You can use multiple or no system custom fields at all.
Customer Level System Custom Fields
To tag any Customer record and then utilize these tags across the system:
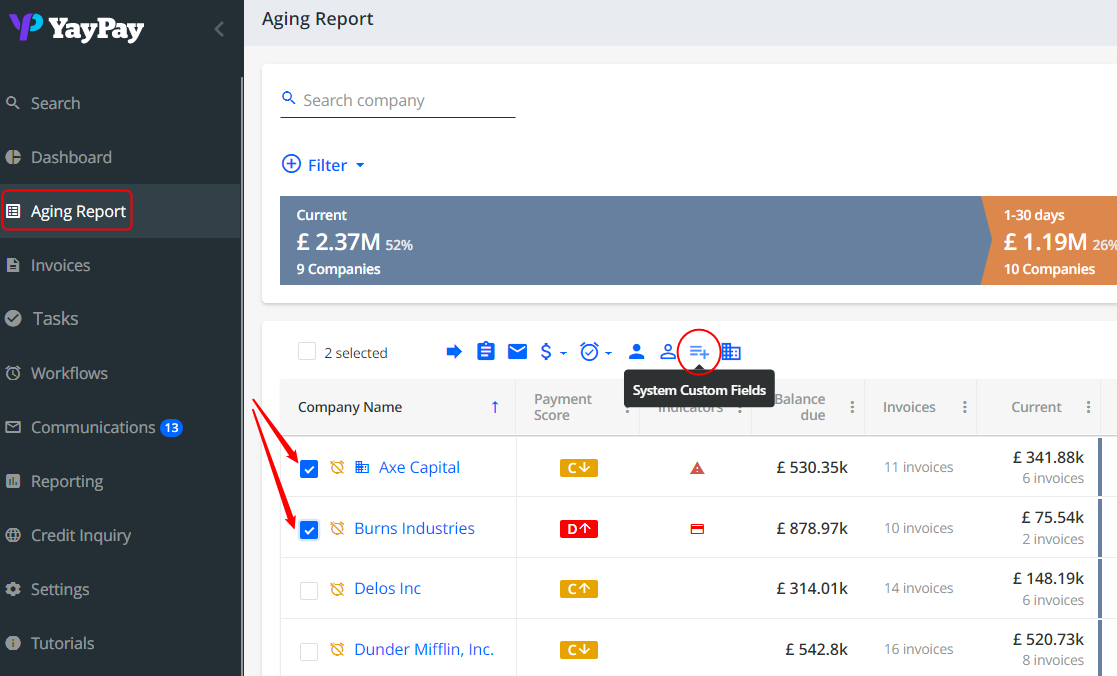
Go to the Aging Report page and select customers to assign desired values for System Custom Fields.
- To assign the values, click on the System Custom Fieldsicon located on the Actions panel:
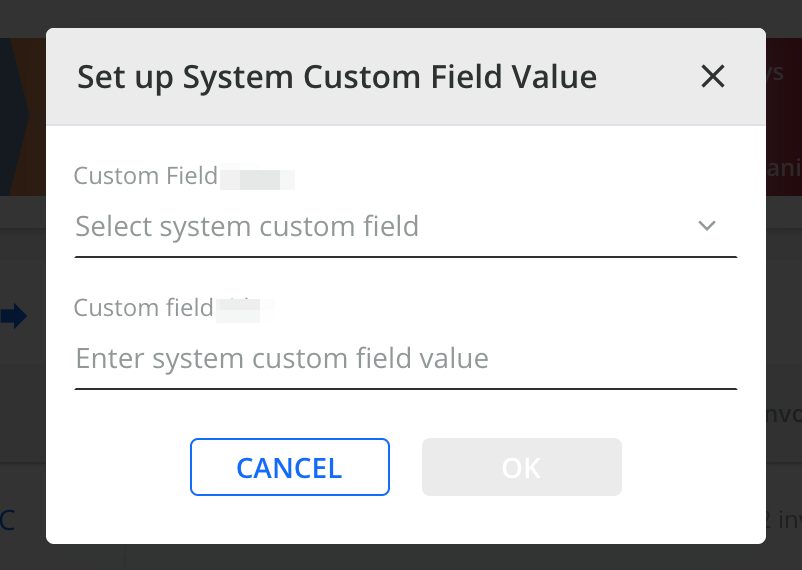
- In the Set up System Custom Field Value pop-up that opens, set the following:

- Select a system custom field from the Custom Field Title combo box.
The list contains system custom fields previously defined on the Settings | System Custom Fields page. - Enter any value that you want to assign to the system custom field.
- Click OK to save your changes.
4. As a result, a new “tag” you’ve created is associated with the customer and can be used in any kind of filter in the system.
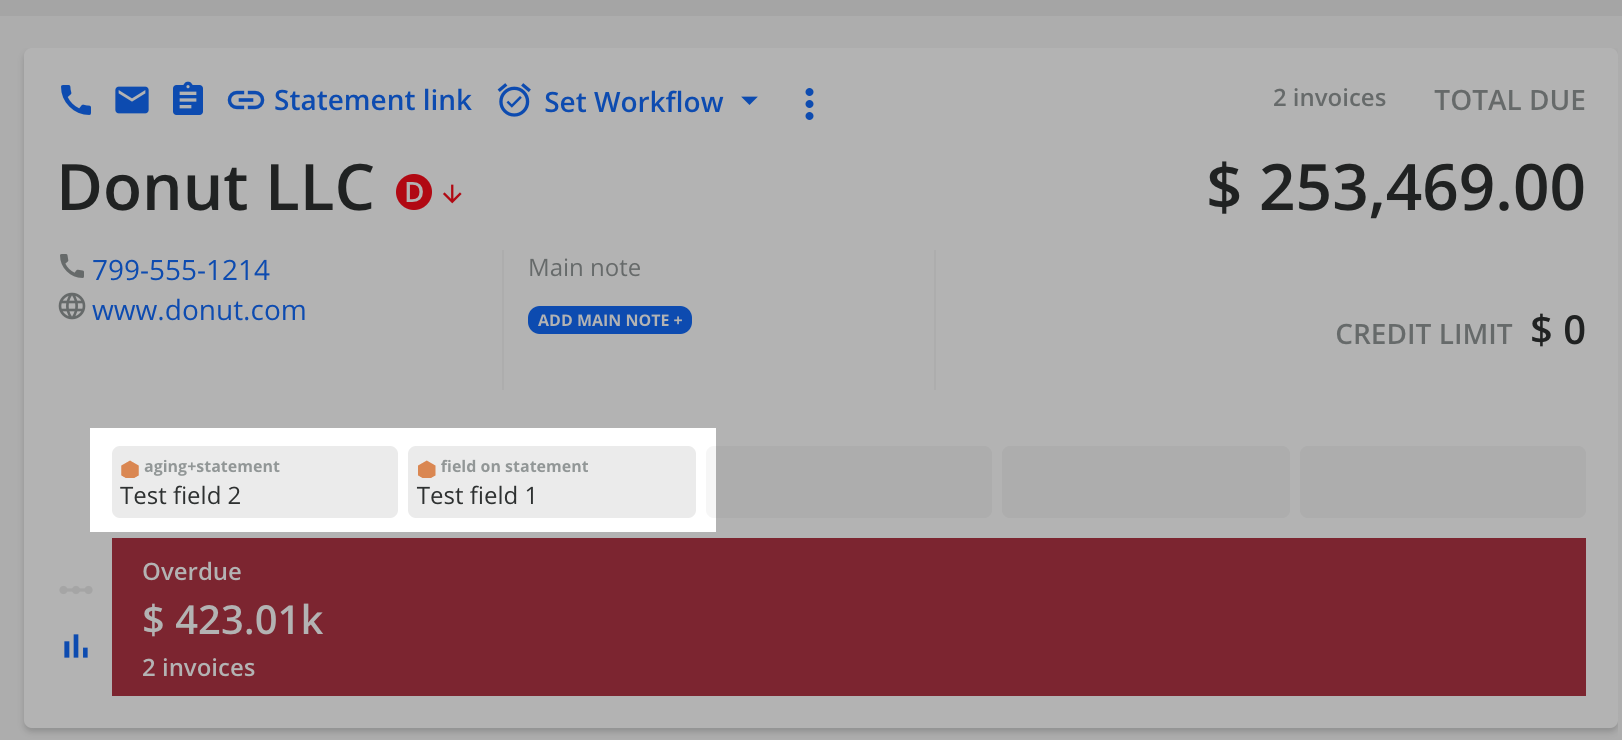
Once added, customer level System Custom Fields values will be displayed on the following places:
-
Statement page's header:
Aging Report page, if the corresponding columns are added using the column picker.
All configured System Custom Fields are displayed in aging filters, if the visibility option is configured.
Invoice Level System Custom Fields
To tag any Invoice record and then utilize these tags across the system, follow the same principles as for Customer Level System Custom Fields:
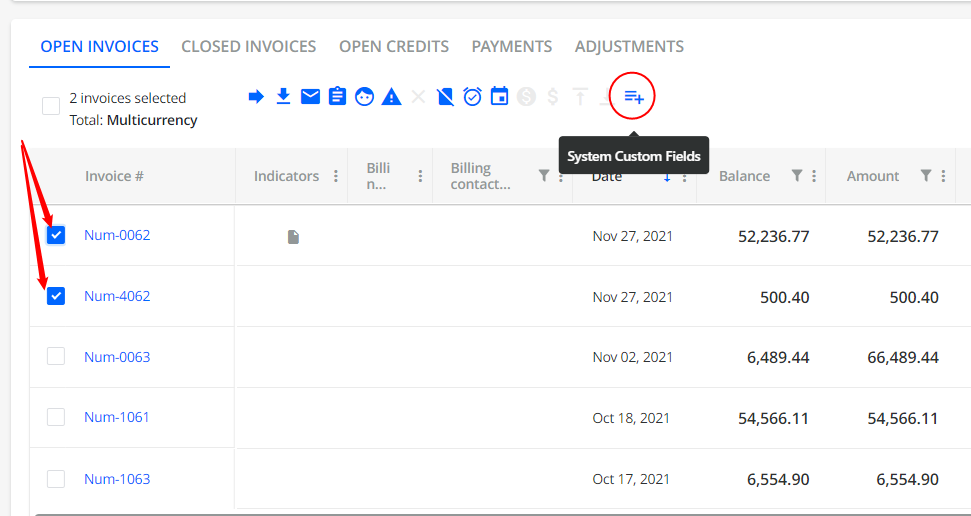
Go to the Statement page and select invoices to assign desired values for System Custom Fields.
- To assign the values, click on the System Custom Fields[icon] icon located on the Actions panel:
- In the Set up System Custom Field Value pop-up that opens, set the options in the same was as for Customer Level System Custom Fields:
As a result, a new “tag” you’ve created is associated with the selected invoices and can be used in any kind of filter in the system.
Once added, invoice level System Custom Fields values will be displayed on the following places:
Statement page - in the open invoices grid, if the corresponding columns are added from the column picker.
Invoices page, if the corresponding columns are added using the column picker.
All configured System Custom Fields are displayed in filters, if the visibility option is configured.
Using System Custom Fields
In addition to the most typical use cases mentioned in the previous sections, you can also use system custom fields in more complex scenarios, for example:
- When creating Custom Conditions in Rules Engine, you can select a previously created system custom field from the Fieldcombo-box:

- When creating a Hide Invoice Rule, you can select a previously created system custom field from the Select Field combo-box:

-
To filter a subset of your customers on the Aging Report page or (open) invoices on the Invoices page:
Additionally, you can export the filtered customer or invoices records to Excel. Before doing so, ensure the respective System Custom Field columns are visible before you click on the Export to Excel icon located above the grid: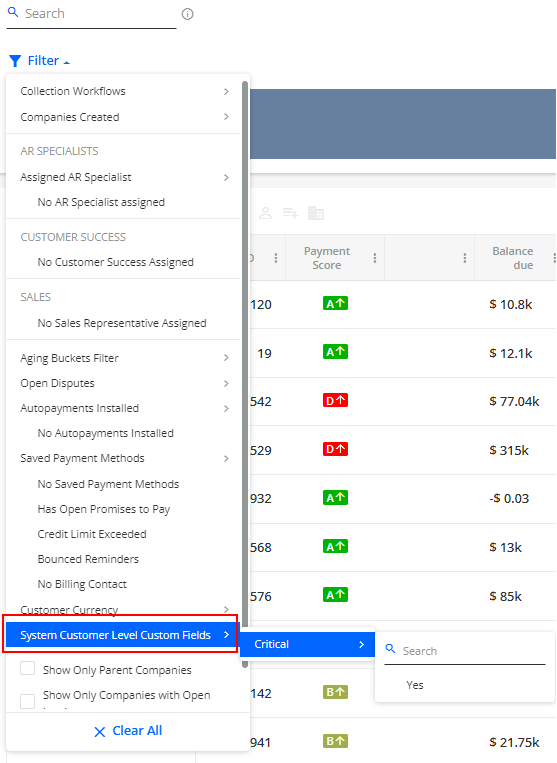

- To select the email address from the system custom field as a recipient when setting up the Send an email reminder action for events in workflows or global rules.
Managing System Custom Fields Using an Excel File
As an alternative to updating the System Custom Fields/values for a few customers or invoices at a time (as described above), you can use a mapping Excel file (called SystemCustomFieldsMapping.xlsx) to update or delete values for all customers/invoices in YayPay.
For more details, see the System Custom Fields Mapping Excel article.
