SMTP/IMAP Settings in Outlook
If your AR Mailbox is hosted on Office365.com instead, your IT Team can provide you with the following settings in Outlook, similar to the following illustration that shows the SMTP and IMAP protocol/parameters that you need to use and configure YayPay.

The information in the above picture can be found in Outlook, under Settings > View All Outlook Settings > Mail > Sync Email
API
YayPay supports a direct API integration with your Microsoft O365 Server to send and fetch emails also.
Note: For API, in the Email Settings panel, start the configuration with the Inbound emails settings first, and then return to the Outgoing emails to select “Same as Inbound API”
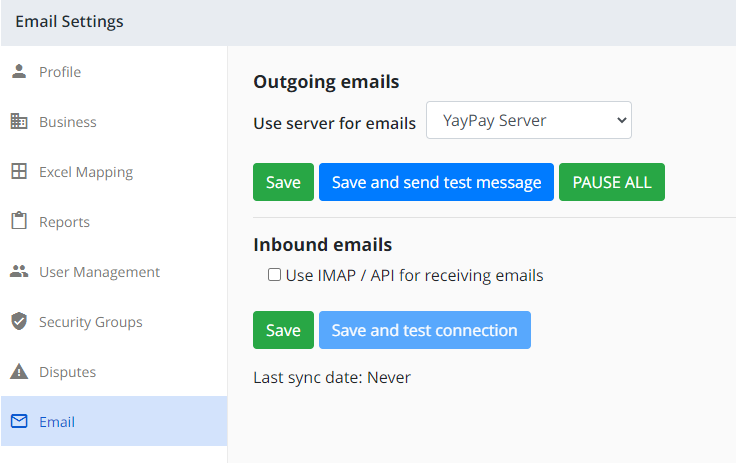
Outgoing emails
- Select the option "Same as Inbound API" from the drop-down
- Enter your AR email address in the "From" field
- Configure the Sender Name field that your recipients will see in their inbox, e.g. "AR Collections Team"
- Click Save
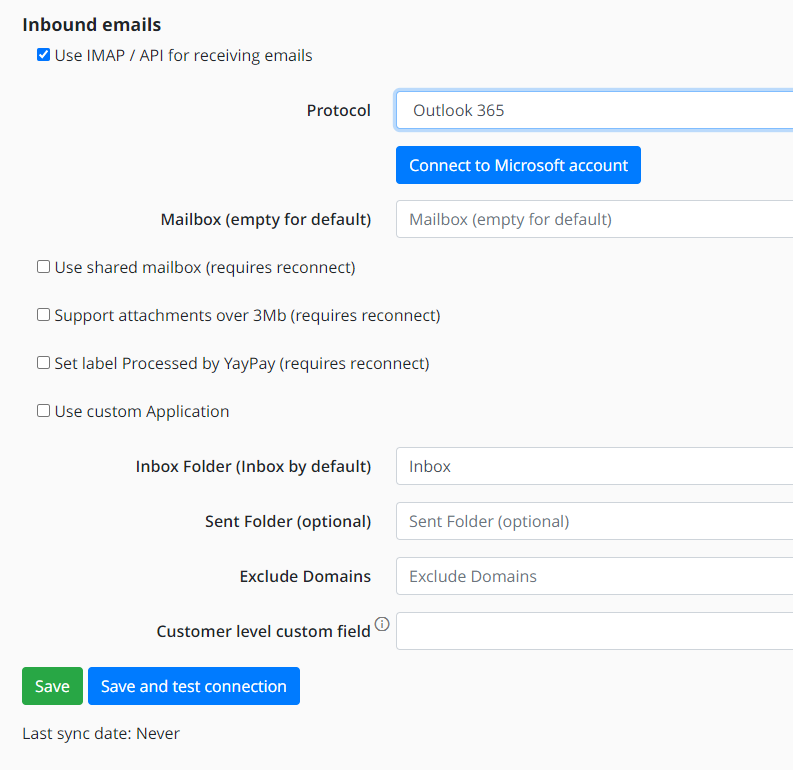
Inbound e-mails
1. Check the box "Use IMAP / API for receiving emails"
2. For Protocol, select "Outlook 365" from the drop-down list
3. The Microsoft Authentication Library (MSAL) defines two types of clients: public clients and confidential clients. Consult your IT team to find out which type is your account and for the following steps choose the correspondent scenario:
Scenario #1 - For Individual mailboxes (public clients)
- Press the Connect to Microsoft account button
- Depending on how your O365 service is configured by your internal IT, you may be redirected to a Microsoft login page or shown a Prompt requesting approval
Example #1
If you see Approval required, enter a short message and click on "Request approval" to initiate the approval process by your IT / O365 Administrator

Example #2
If you are prompted to allow YayPay access, enter the given credentials to log into Outlook and/or allow access to YayPay's connector application by pressing the "Yes" button

Look at Scenario #2 for an explanation of the settings/parameters that you can configure
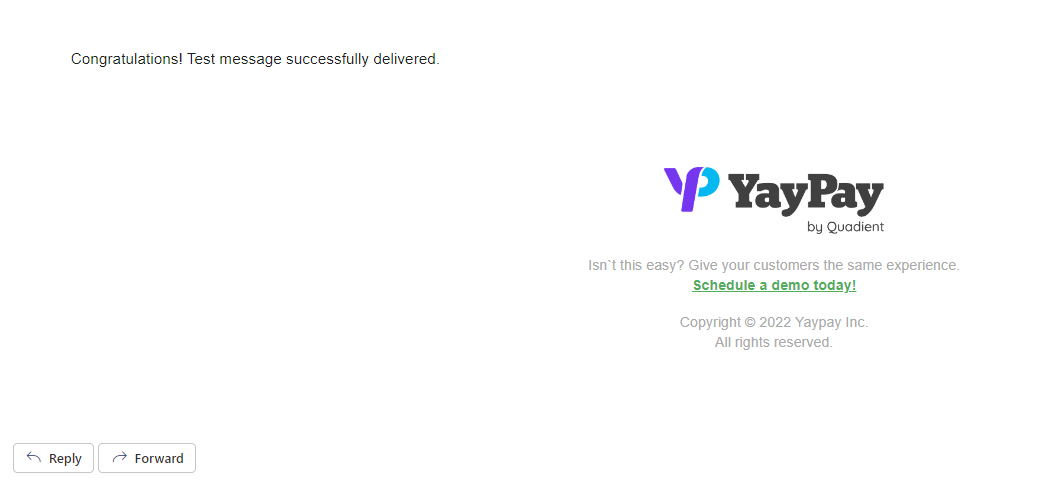
After going through to complete the series of Microsoft prompts, click Save and Test Connections. If the Inbound mailbox setup, credentials, and connection are successful, you will receive a system notification sent in your inbox with the body of the message shown as follows:
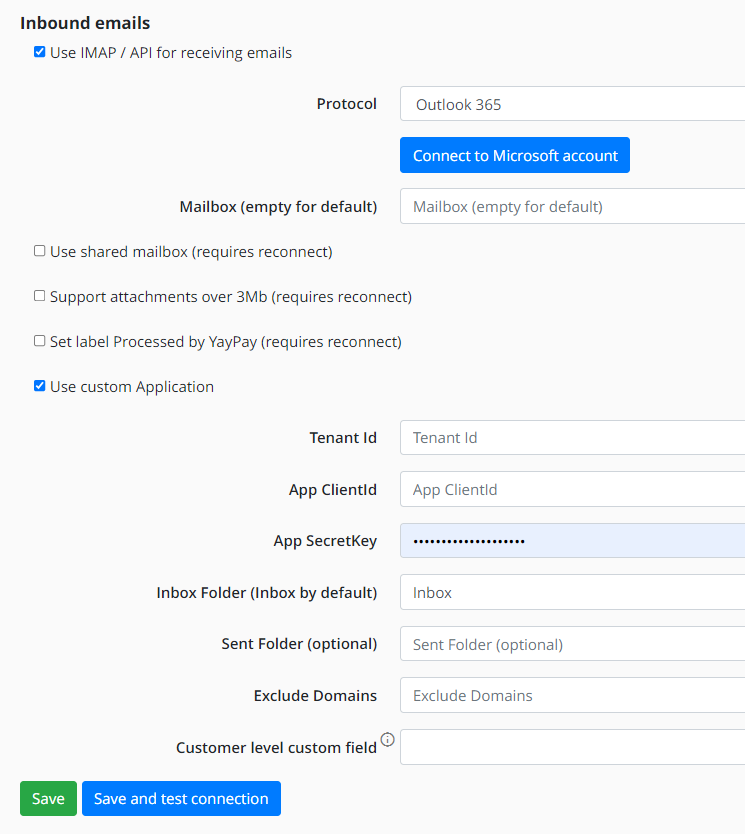
Scenario #2 - For mailbox application (Confidential client application)
- Check Use custom Application box
- Populate the following fields with your credentials: Tenant id, App ClientId, App SecretKey
- Click Save
4. When you see a "CONNECTED" status, this indicates a successful connection with your AR Mailbox to read the incoming emails into YayPay

-
Use shared mailbox - If you have several people added as members to a Shared Mailbox, and you want them to receive emails from this shared AR Mailbox, enable the checkbox and populate the Mailbox (empty for default) field in YayPay with the mailbox address also. You should work with your IT/Mail Administrator.
To learn what a shared mailbox is, see Microsoft's About shared mailboxes article. - Support attachments over 3Mb - when enabled, the attachments with a size exceeding 3Mb are supported. (Note: 3 Mb refers to the total size of all attached files)
- Set label Processed by YayPay - when enabled, the label "Processed by YayPay" will be assigned to emails in the Outlook mailbox to help categorize and review them.
- Inbox folder - This field defines a folder we are pulling emails from. By default, the Inbox folder is set up.
- Sent folder - We are able to pull emails from the Sent Folder. By default, this field is empty. If you input the Sent folder in this field, our system will be pulling over emails not only from the Inbox folder but also from Sent.
- Configure one or multiple domain names in "Exclude Domains", each separated by a comma. This will disregard these emails during the email assignment process (refer to: https://yaypay.helpjuice.com/communications/email-to-customer-assignment for more information)
- Customer level custom field - values from the selected custom field are used to link inbound emails to corresponding customers. Our system takes a value of a custom field, indicated in the subject, and assigns an email with a matching client. Each value must be unique for the customer to avoid flaws.
Click Save if you do any changes to the settings

Common / Known Issues with Microsoft Office 365 or Exchange Server Setup
If you see issues with IMAP or SMTP setup on Microsoft servers, please, test your connection using Microsoft Remote Connectivity Analyser.
With the Username/Password given to you by your Internal IT, try and log into the email account at www.outlook.com with the credentials before configuring YayPay with the same credentials. This helps to eliminate any credential issues.
