To correctly sync the salesRepEmail and customerSuccessEmail fields:
- Do the following before syncing the salesRepEmail and customerSuccessEmail fields:
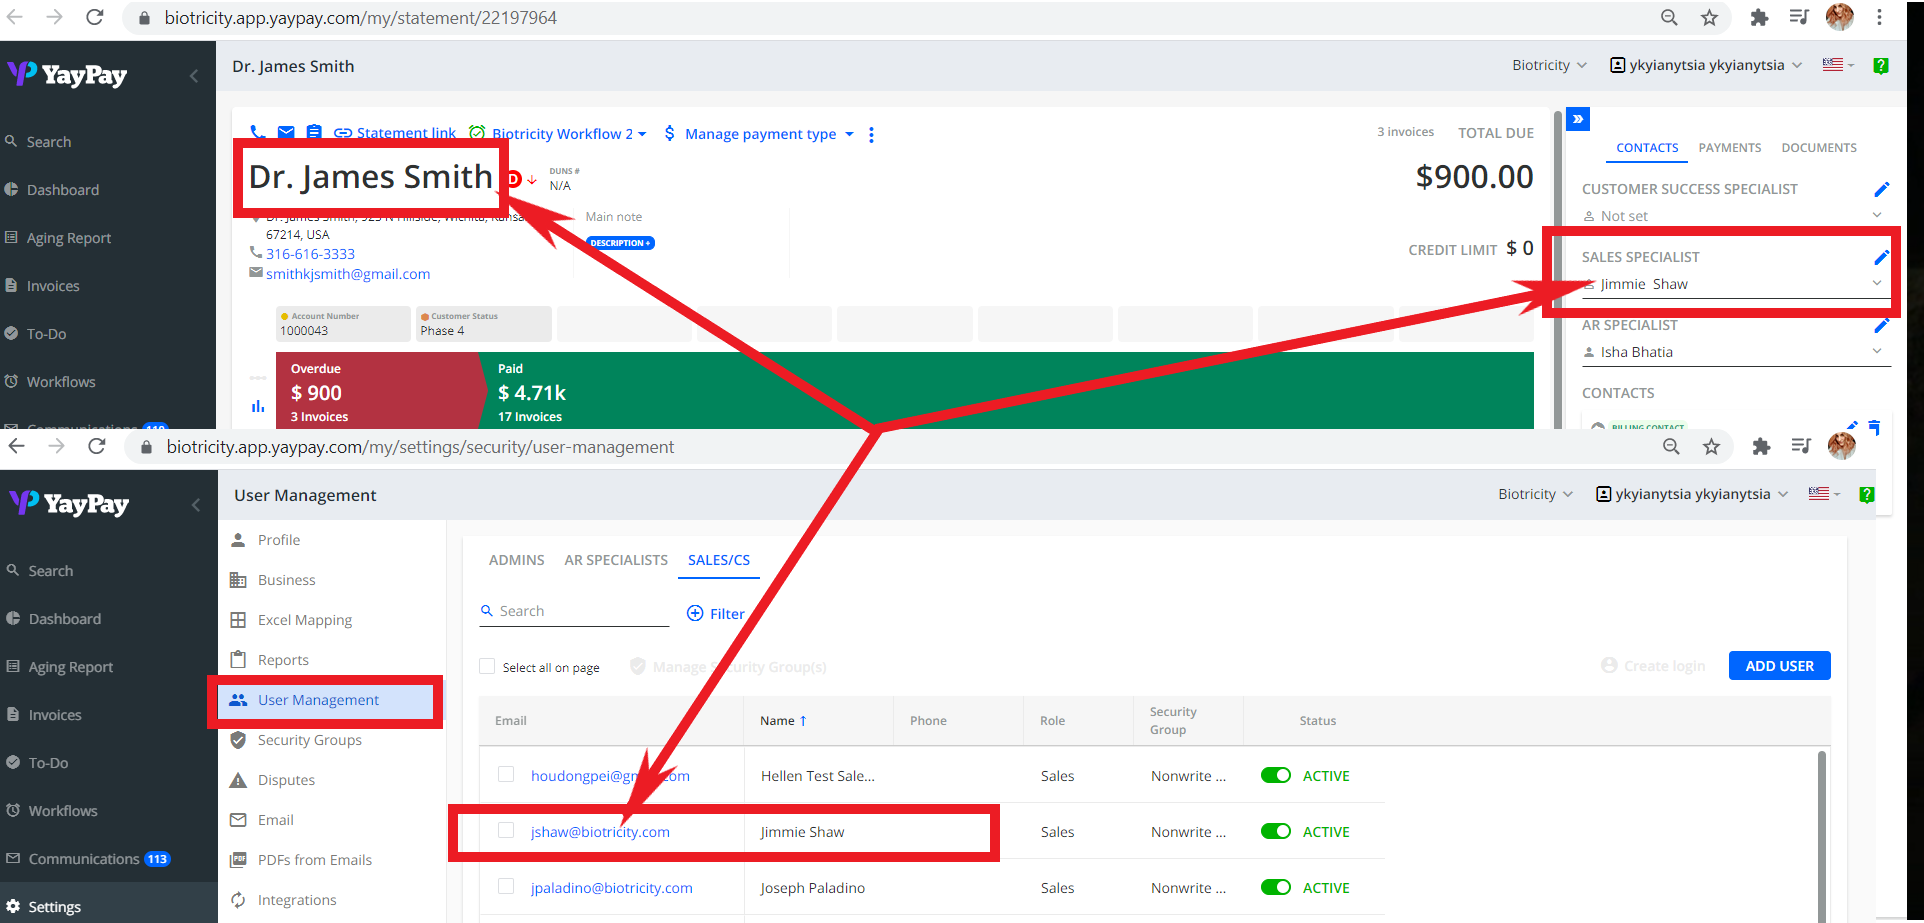
- Go to Settings | User Management | Sales/CS in YayPay.
- Create the following users:
- Sales Representative
- Customer Success Manager
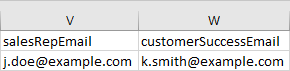
- Configure your customer.csv file:
- Add the salesRepEmail and customerSuccessEmail columns to the file.
- Set the values of those columns to the email addresses of the users that you created in step 1.
- Go to the Integration page, upload the ZIP file, and leverage the sync process.
Sync Outcome
Linking Subsidiaries
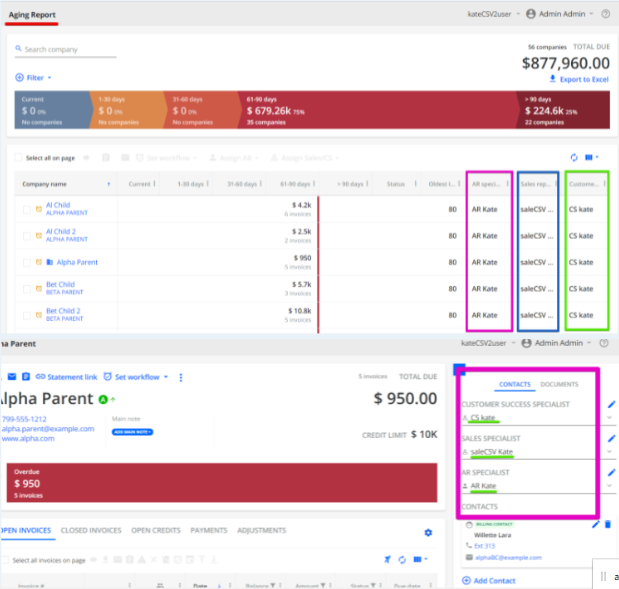
In the YayPay database, the relationship between the Customer and the Sales Representative can only be supported via the "email" field for non-duplicate emails. This means that the email of the Sales Representative must be unique to all BIZs. If the email is used for any other business, such a relationship cannot be created.
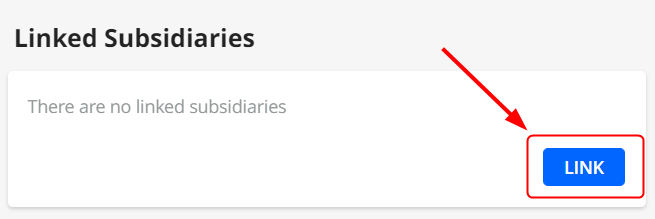
To resolve this issue, you must share AR/Sales/CS accounts between subsidiaries by creating a link between subsidiaries:
- Go to the Settings | Business section and use the Linked Subsidiaries block to create the link.
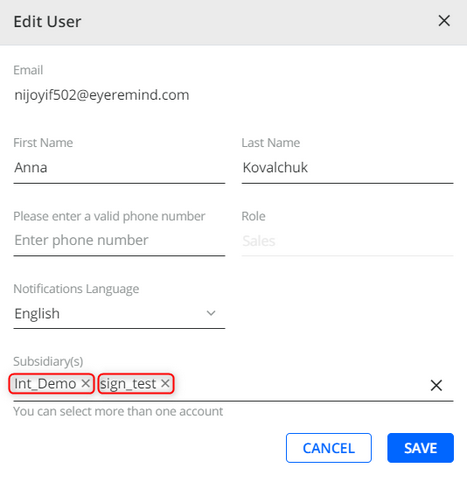
- Open the Edit User dialog of a user in the Settings | User Management | Sales/CS section to see all the linked subsidiaries.
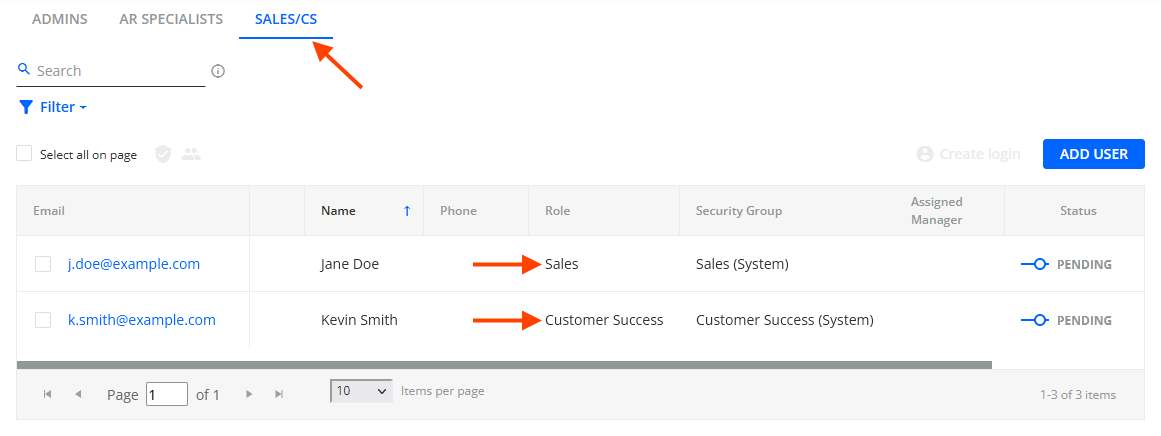
Creating Sales/CS Users
This section describes how to create a Sales Representative and a Customer Success Manager in YayPay:
- Go to the Business | User Management section.
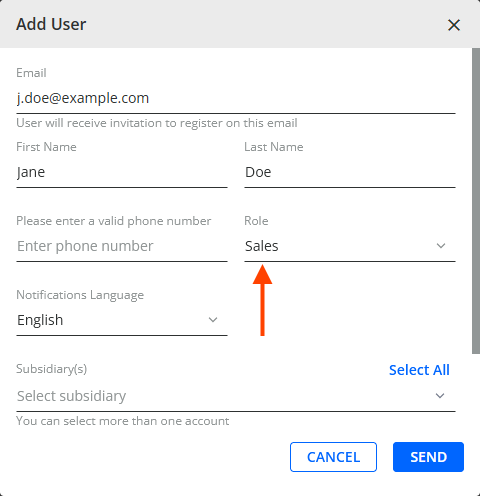
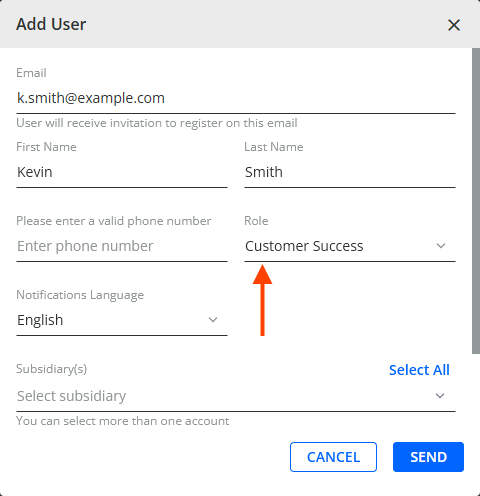
- Click on the ADD USER button to open the Add User dialog.
- Configure the dialog, making sure to select the correct role for each user:
| Sales Representative | Customer Success Manager |
|---|---|
 |
 |
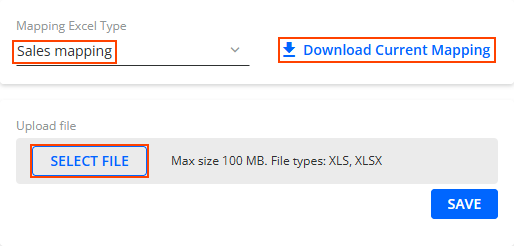
Alternatively, you can use Excel Mapping to create a Sales Representative and a Customer Success Manager in YayPay:
- Go to the Settings | Excel Mapping section.
- Select the Sales mapping option.
- Optionally, click on the Download Current Mapping button to download a mapping template.
- Configure the given users in the mapping file. For example:

- Upload the file into YayPay by clicking on the SELECT FILE button and click on SAVE.