This article describes how to integrate Yaypay with QuickBooks Online (QBO).
1. Log into YayPay to Set Up QuickBooks Online Access
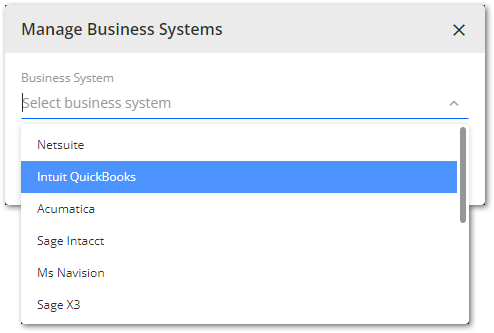
- Go to Settings | Integrations and click on Manage Business Systems.
- Select the Intuit QuickBooks business system.
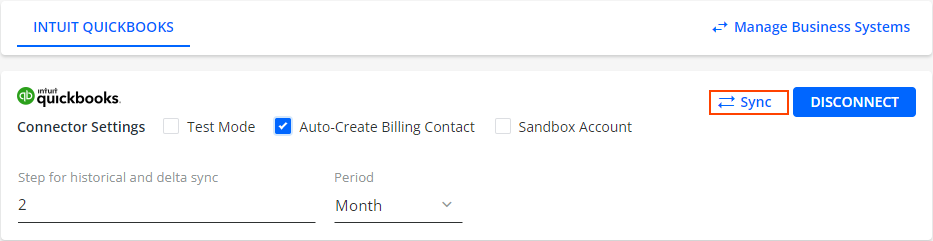
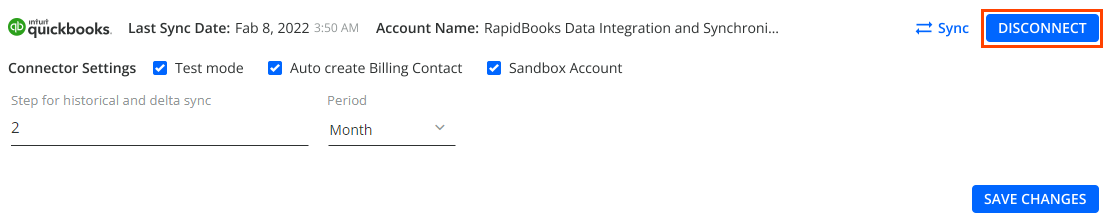
- Check the Auto-Create Billing Contact check box to sync customer contacts/emails from your QBO system.
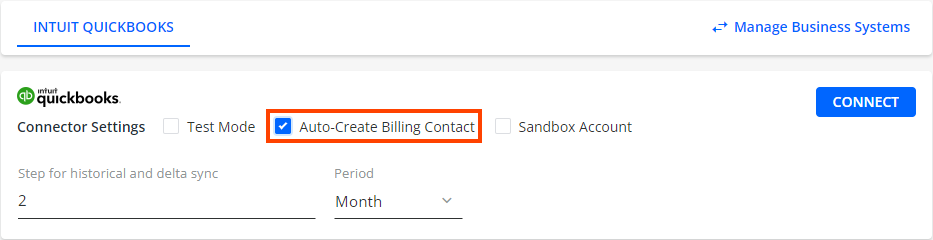
- Optionally, specify the Step for historical and delta sync and Period settings to split the retrieved data into batches based on a specific time period.

For example, if you enter 2 and select Month for Period, the sync will import data starting from 2015 and split it into batches of 2 months each.
Click on CONNECT to be redirected to QBO's Sign In page.
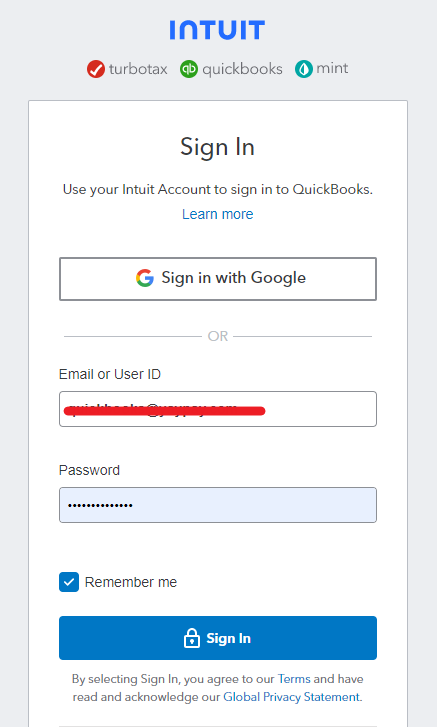
- Use the credentials of a Company Admin QuickBooks type of user to fill out User ID and Password, and click on Sign In.
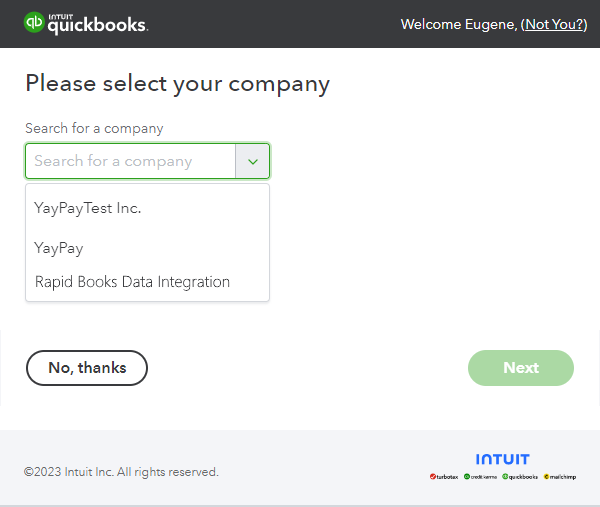
- Select the company (if your account has multiple companies) you want to sync from.
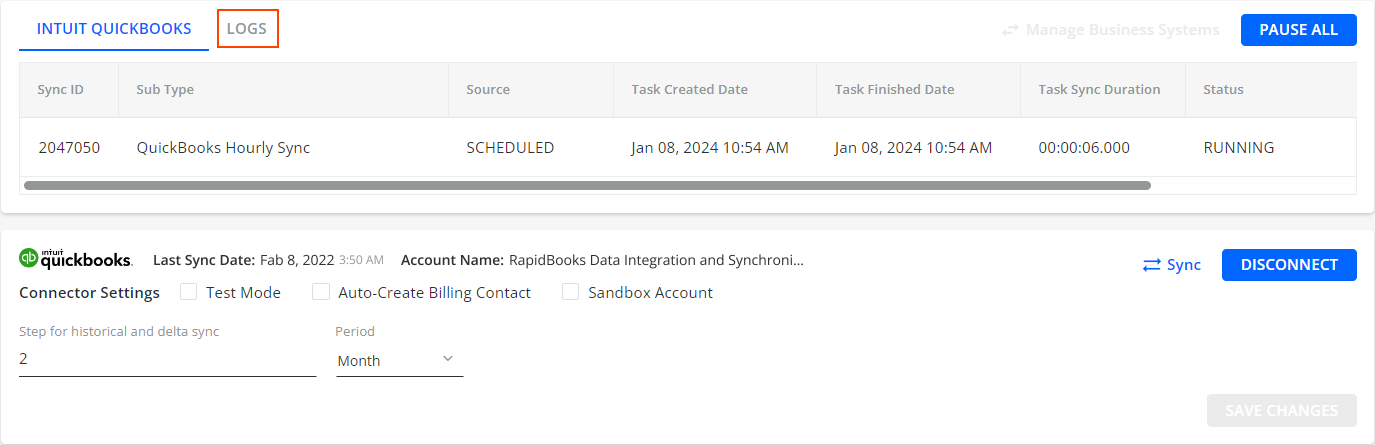
After a successful synchronization, the account name will be displayed on the Connector Settings page, and this account will be used for data synchronization.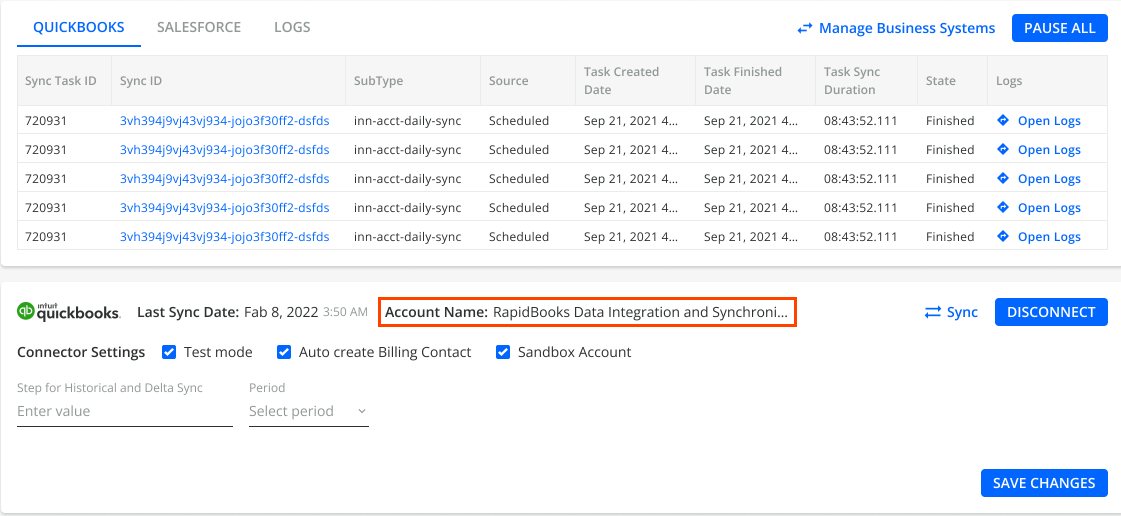
- Click on Next and wait for YayPay to confirm the connection has been established.

- Click on Sync in YayPay to start integrating YayPay with your QuickBooks account.
After syncing, you can review the details in the LOGS tab. Each sync has its own log,which includes any errors or issues that may have occurred. By clicking on a specific Sync ID entry, you can see the details for that specific sync process.
2. How to Tell a Sync between QuickBooks Online and YayPay Is Active
After the sync completes for the first time, a date/time stamp will be shown - this indicates that YayPay is still connected and will remain so.
The date/time stamp will change multiple times a day as YayPay connects to QuickBooks to retrieve new updates/changes from the last sync point.
After a successful synchronization, the account name will be displayed on the Connector Settings page, and this account will be used for data synchronization.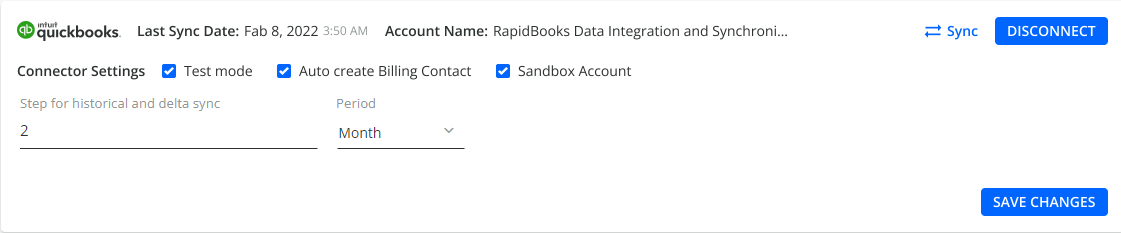
3. How to Check if a Sync with QuickBooks Online Was Successful
If the first sync is successful, you will begin to see your AR data in YayPay by the next day or two (see screenshot).
If your Aging Report is still empty after 2 days (e.g there are no companies shown or no overall AR value shown), contact YayPay Support or your YayPay representative.
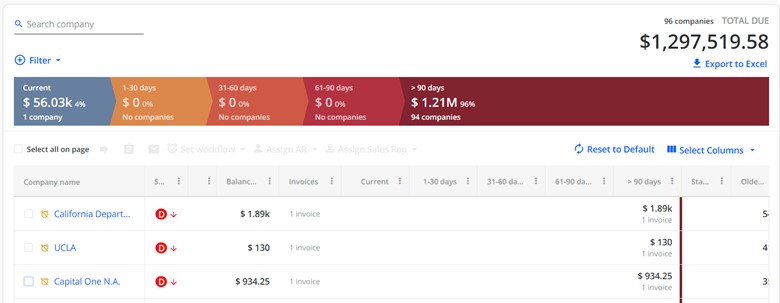
Note: By default, the Aging Report will show your total AR balance and the companies with balances greater than $0.
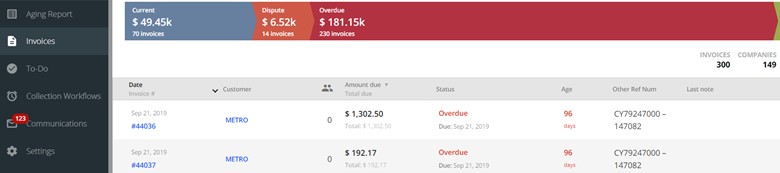
In addition, enable the Invoice page - Embed invoice PDF setting in Settings | Business to be able to display your invoice documents in YayPay.
When you click on an Invoice # (e.g. on Invoices page), YayPay displays a PDF invoice synced via FTP or API (if one is available). Otherwise, YayPay displays a PDF invoice synced from QuickBooks.
4. Payments captured in YayPay
If you use YayPay to capture/record Payments, validated by a Processor (refer to https://yaypay.helpjuice.com/en_US/payments for background), please note that these Payment transactions remain in YayPay and will not integrate back to QuickBooks Online ERP.
You might be able to use the payments report generated by YayPay to develop your own integration process for importing payments back to QuickBooks Online. For more information, see the Payment Reporting article.
5. Some Practical Points
How do I disconnect and restart the sync process?
There can be some occasions in which you may need to disconnect the sync, e.g.
- If there is a sync error due to an Access Token expiry from QuickBooks Online
- If you forgot to mark the checkbox to Auto create billing contact, or if you have finished trying the sync in Test mode which would not bring your contacts, etc
- Click on the DISCONNECT button in the QuickBooks panel
- Do a page refresh to be sure (e.g. the date/time stamp of the last sync will no longer be shown)
- Check the “Auto Create Billing Contact” checkbox
- Re-enter your QuickBooks credentials that were used before to follow through and start the sync as described above
