The JSON File Connector is used to integrate On-Premise ERPs with YayPay.
General Overview
JSON File Connector allows the processing of the data extracted from an ERP as JSON files. To extract that data from an ERP we have built a special application called SmartSync.
SmartSync is a small application that must be installed on the same server as your ERP, and it acts as a communication gateway between YayPay and ERP server. On scheduled basis data is extracted from your ERP and passed to the YayPay (SFTP server). In a similar way data from the YayPay (like payments) can be sent back to an ERP where it is applicable.
After data is available for processing it is consumed by JSON File Connector and becomes available in the YayPay.
Setup / Pre-requirements
1. Install the SmartSync Application
YayPay will provide you with the link to the SmartSync MSI installer file.
YayPay will provide you with all the information required to configure the SmartSync tool.
Once you receive the MSI installer file, install the MSI file in the place where Dynamics GP is installed.
Create SQL Server user account (see next step).
Launch SmartSyncManager and fill in the Dynamics GP Integration parameters information and check the integration status on the Diagnostic tab.
2. Create an SQL Server User Account
In order for the SmartSync tool to have access to your ERP data, you need to create a read-only SQL Server user account with the name SmartSync. In order to create this account, you must have ADMIN access to the SQL Server.
YayPay will provide you with the SQL statements that should be run to create such an account.
3. Outbound communication on port 22000 is open
SmartSync application transfers data to a secured place over the SFTP protocol. You need to make sure that port 22000 is not blocked by your firewall for outgoing communications. In most cases, it is open by default.
4. Customization
The JSON File Connector provides a high level of customization.
Different companies have different ways of using the same software and we understand that JSON File Connector has many ways to adjust itself to your style and needs.
In the beginning, you will be provided with the default data mapping. After reviewing the results, you can make adjustments to the default data mapping if needed. Discuss your preferences with Yaypay's onboarding team.
Configuring the JSON File Connector for YayPay Integration
This section summarizes how to set up the JSON File Connector.
Connector Configuration Page
Log in to YayPay and go to Settings > Integrations.
Click Manage Business Systems and, in the dropdown list, select JSON to edit the connector settings.
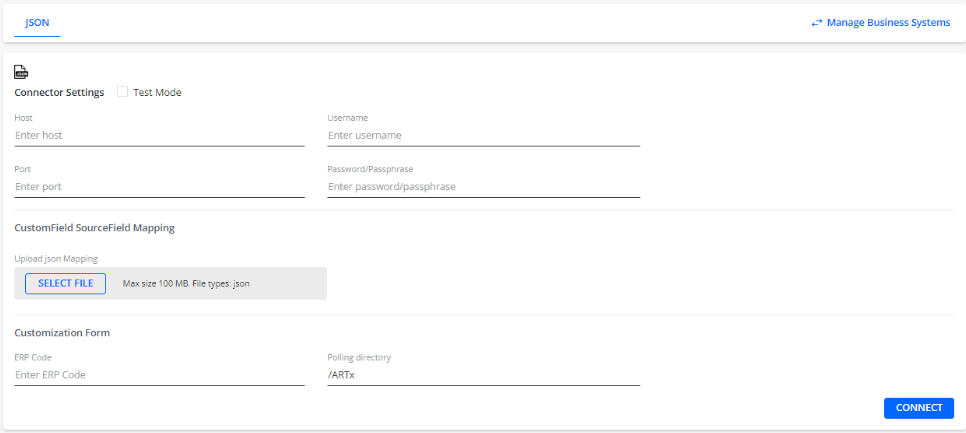
YayPay will pre-configure these settings for you. Information about this page is just for your reference.
Custom Fields
During the onboarding process, YayPay’s onboarding team will identify Custom Fields that you would like to have, and configure them for you.
When the configuration is completed, the configuration data is displayed as follows: 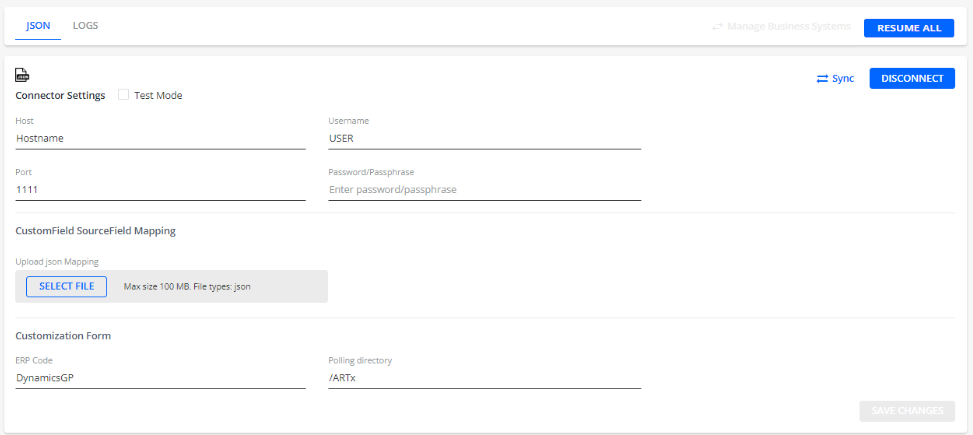
JSON File Connector Integration Schedule
Communicate with the YayPay onboarding team what is the preferred schedule to run the integration process. You can run data synchronization a few times a day if you want.
In the future, you will have the ability to run the sync process on demand. We are working on that feature.
