After upgrading your Sage 300 to include Sage 300 Web Forms, follow these steps to configure the YayPay integration with your ERP:
Follow your Sage 300 Upgrade Guide to ensure your earlier versions of System Manager and the Application are upgraded to Sage 300 Premium (Version 2022 PU1)
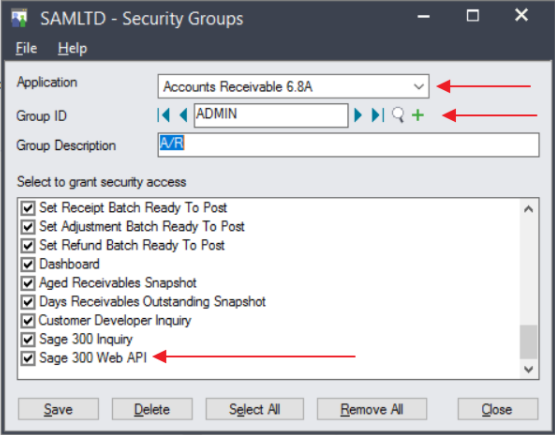
You will need to set up the security groups for the Sage 300 user (= the user logged in to Sage 300)
You will need to give the Sage 300 user access to the 'Sage 300 Web API' option under Security Groups (per each module required).
If you want the ADMIN to have access, you will need to edit both "web. config" files in the \Online\Web and \Online\WebApi folder. Change the key 'AllowWebApiAccessForAdmin' to true.
Restart the web API app-pool for the settings to take.
Once the user access is done, the next step would be to see if they can access the web API from HTTP(s)://server/sage300webapi/
2. Enter User name and Password

Example:

Before starting the synchronization process with YayPay, make sure, that if you use the ADMIN role, you should provide the special rights for this role, because by default the ADMIN user is disabled from the WEB API.
There are two web.config files that have a property to allow the admin user access in the web API. They are in the ...\Online\Web and ...\Online\WebApi folders. Set the flag to true and reset IIS.
2.1 Sage 300 Company
You should fill in the Company. The Company corresponds to the Company you use to enter in Sage 300.
Example:

3. Sage web service URL
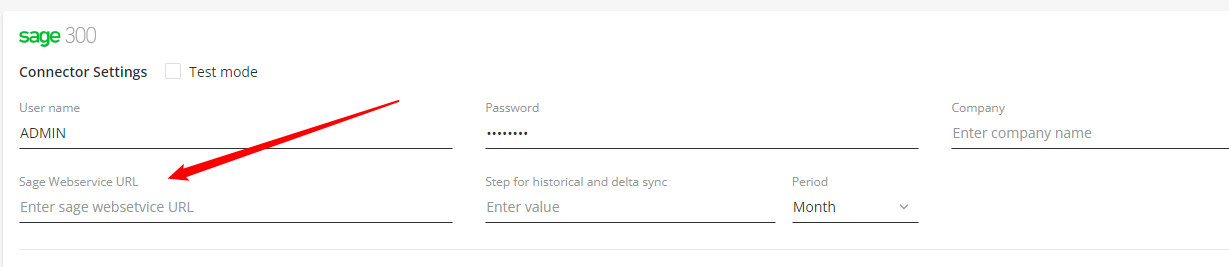
Sage web service URL it's the host of the Sage 300 account.
For example:
To enter your account you use the following address → http://18.235.68.114/Sage300/OnPremise/QURNSU4tU0FNTFRE/Core/Authentication/Login?logout=true
In the Connector settings you should fill in the following host:

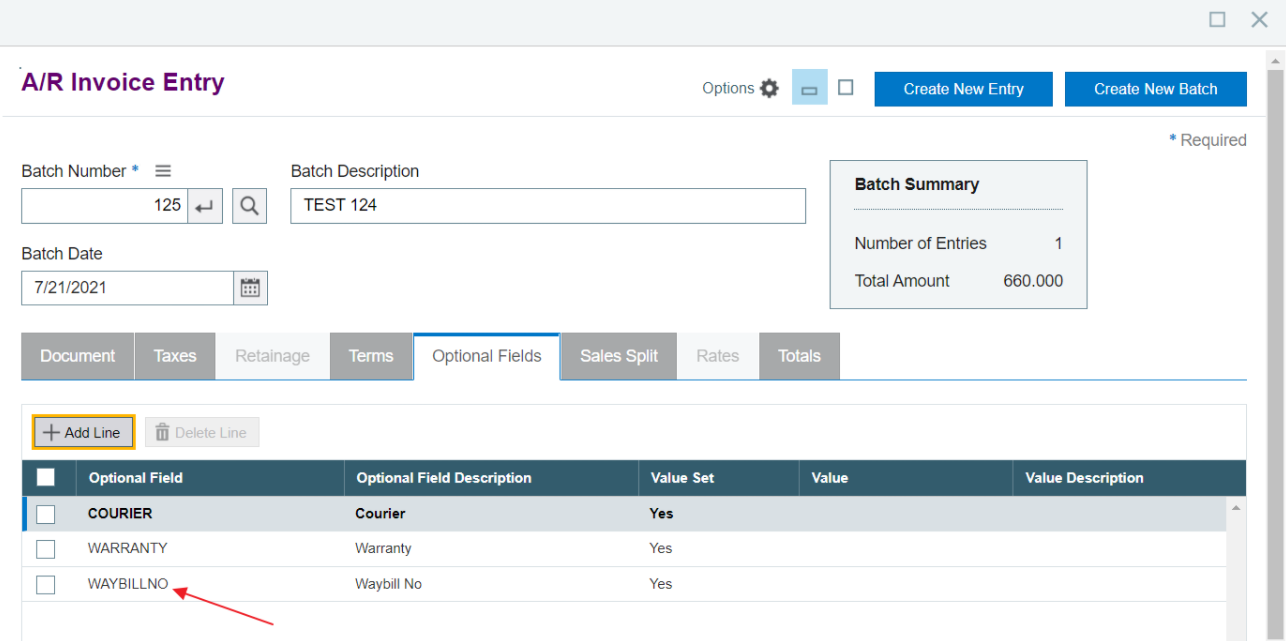
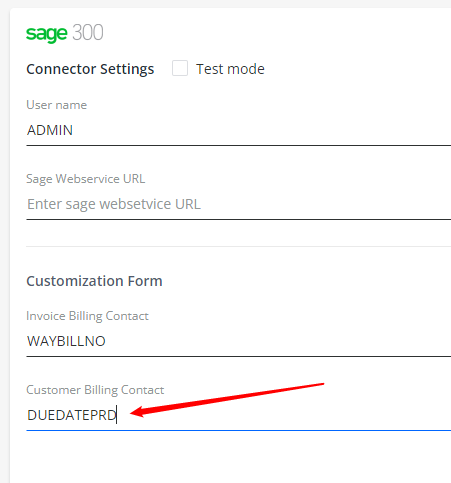
4. Invoice billing contact custom field name
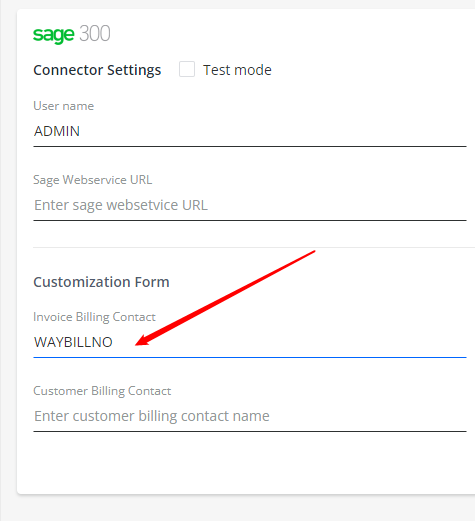
5. Customer billing contact custom field name

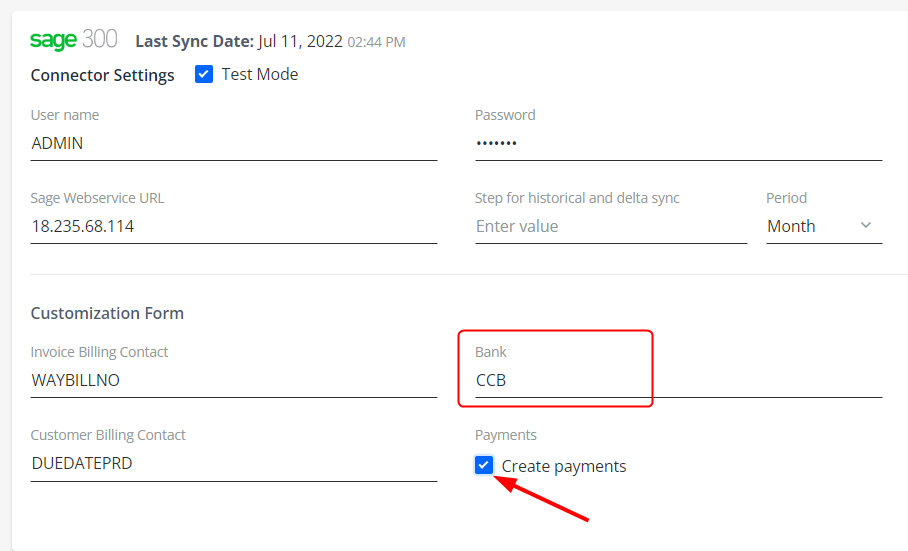
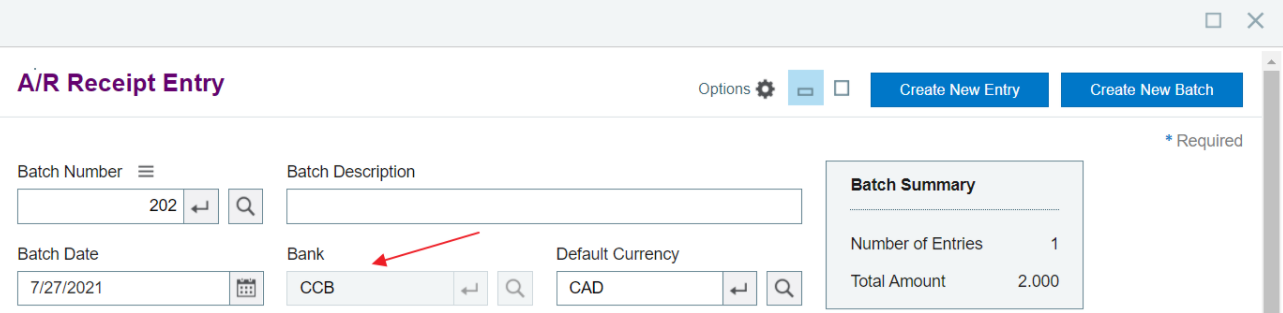
6. BANK
BANK is a required field for the payment in Sage 300.
In addition to the BANK being a required field to configure in YayPay (referencing what is in Sage 300), you should also enable the “Create Payments” checkbox in order to automatically push successful payment attempts made in YayPay to Sage 300
Example:

Removing Billing Contacts from YayPay
If removing invoice or customer level billing contacts imported from Sage 300, the following applies:
If you remove an invoice or customer level billing contact from the custom field in Sage 300® and initiate a resynchronization, this contact will be removed from YayPay as well.
- If you remove an invoice or customer level billing contact in YayPay, the data and relationships in the database will not be changed. The contact record will only be marked as removed in the database.
As a result, future sync iterations related to the modified invoice will not display the removed invoice or customer level billing contact in YayPay. However, all the data and mappings still exist.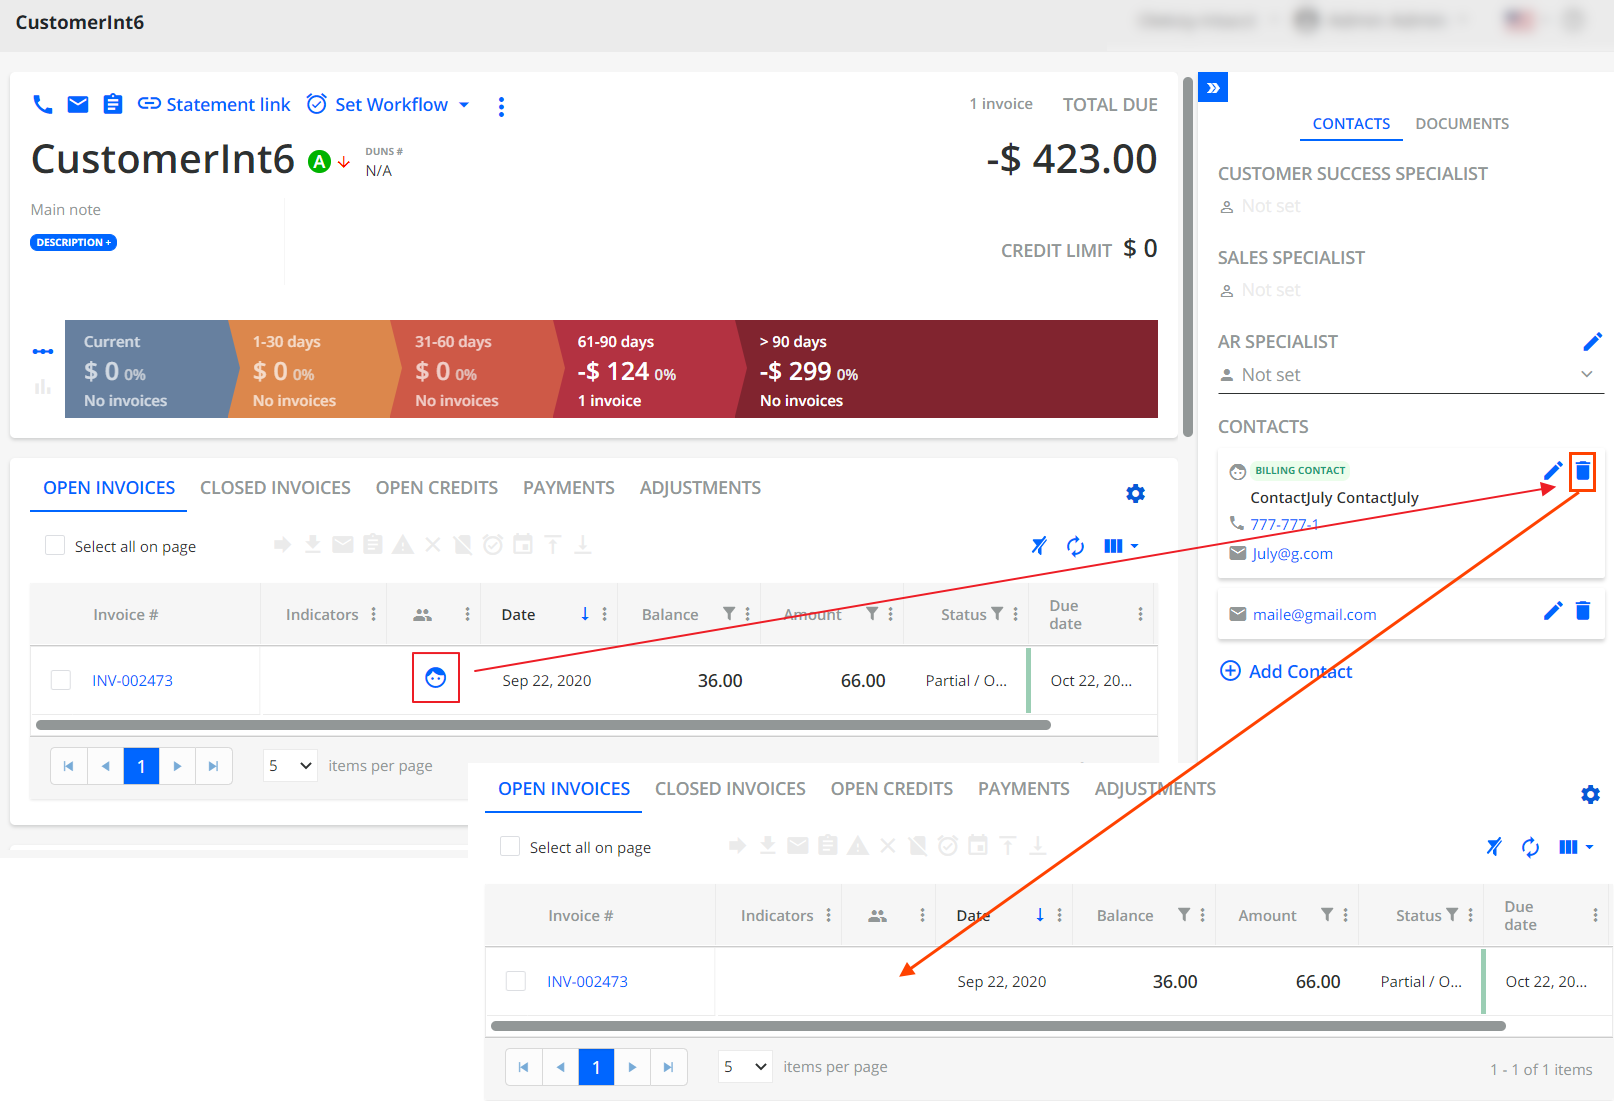
Thus, if you subsequently update the invoice or customer billing contact on the ERP side and perform a sync, the contact will become active again and YayPay will display the invoice billing contact once again.
