YayPay folder
Log into Sage, and select the appropriate folder.
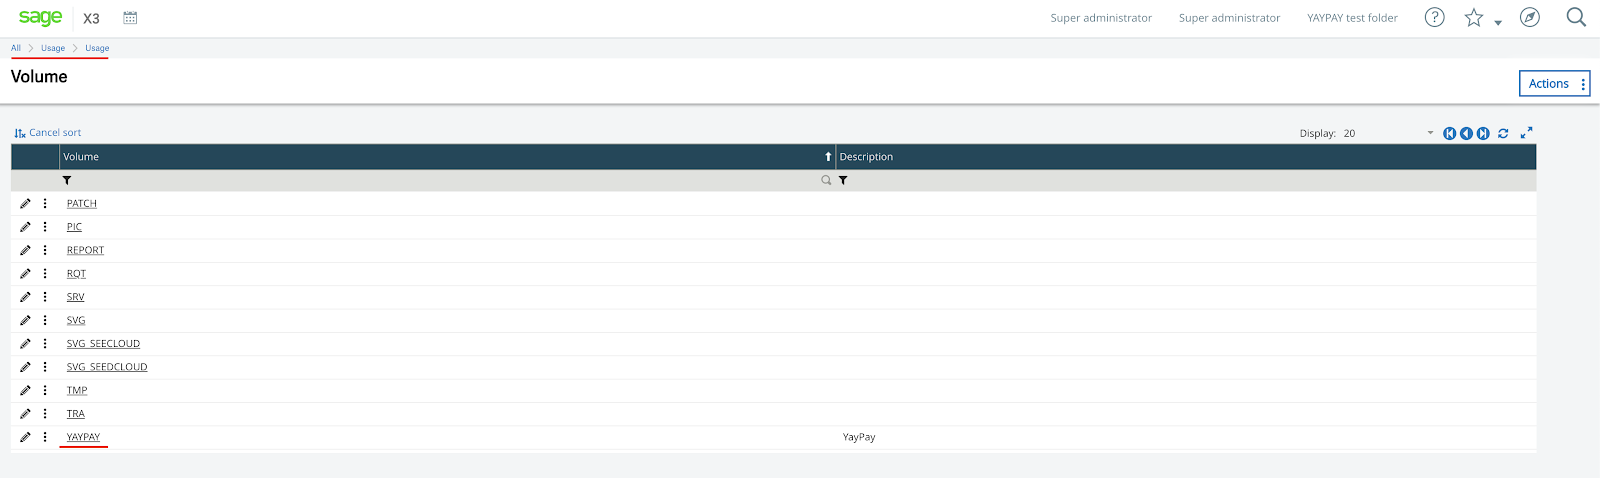
Navigate tor Usage > Usage > X3 storage areas. Create a new storage area called YAYPAY (all upper case). The value in the Volume text box should be YAYPAY (all upper-case) The Description can be whatever you'd like. The Root value should be YAYPAY (all upper-case).
SOAP web calls
Ensure there is an appropriate web service pool to handle the SOAP web calls. This can be done under Administration > Administration > Web Services > Classic SOAP pools configuration. The setup of the web pool will be determined by individual licensing and user/login setup for each client installation.

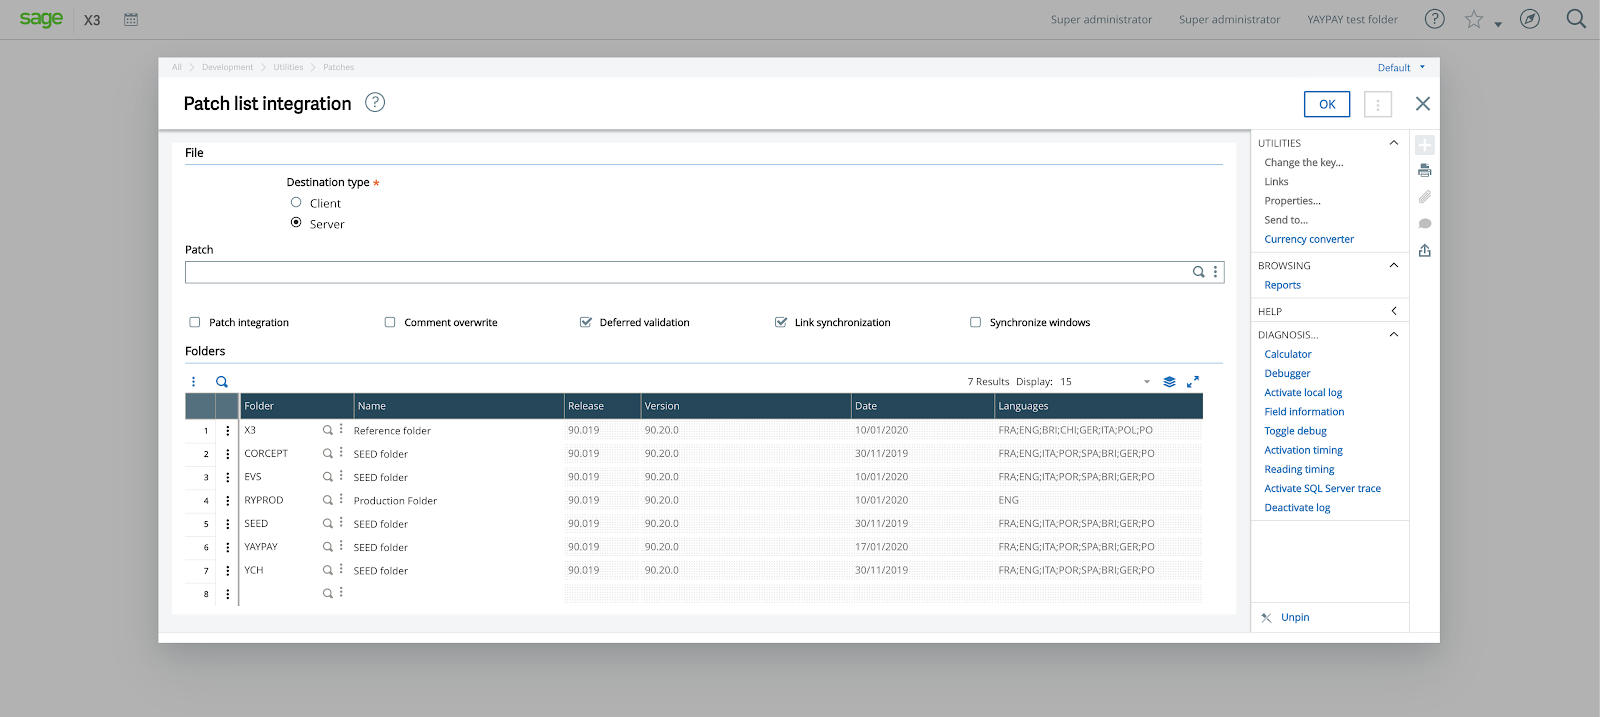
Install the YayPay integration patch
Install the YayPay integration patch by navigating to Development > Utilities > Patches > Patch Integration. Install the patch into the appropriate Sage folder.
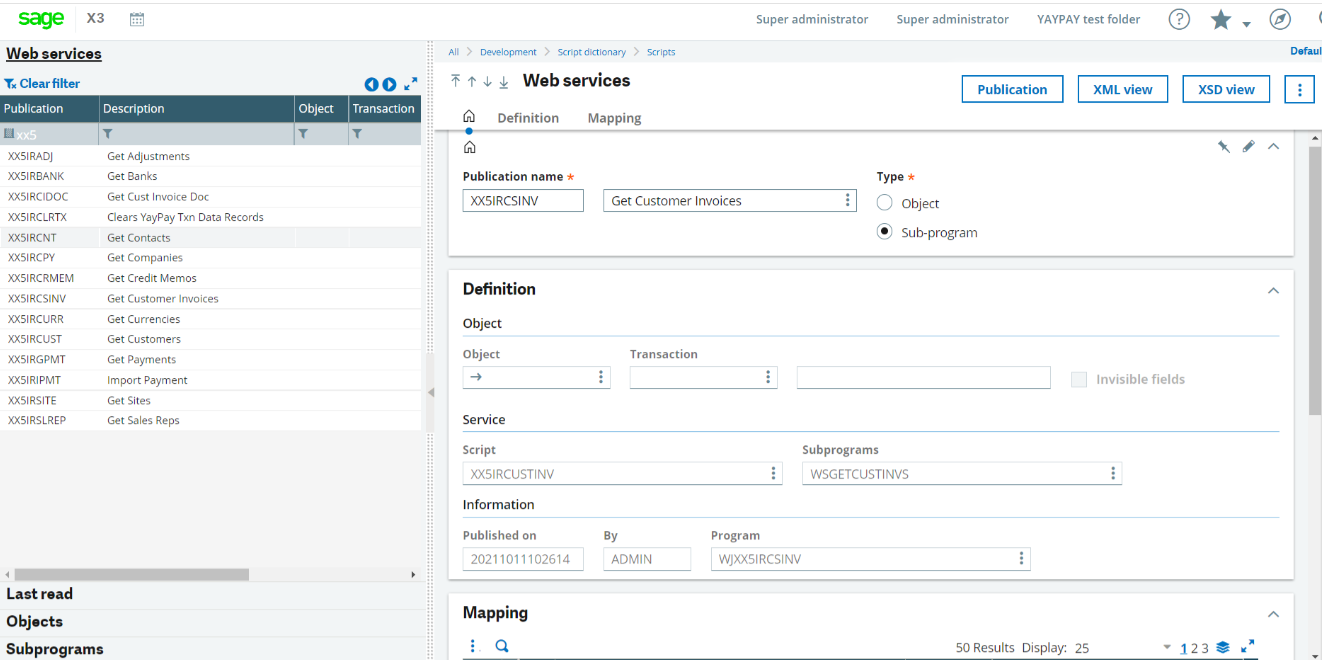
Web Service publishing
Navigate to the list of web services under
Development >
Script dictionary > Scripts > Web services.
Republish the following web services:
XX5IRADJ
XX5IRBANK
XX5IRCIDOC
XX5IRCLRTX
XX5IRCNT
XX5IRCPY
XX5IRCRMEM
XX5IRCSINV
XX5IRCURR
XX5IRCUST
XX5IRGPMT
XX5IRIPMT
XX5IRSITE
XX5IRSLREP