TThe following procedure outlines the setup of YayPay and your Sage X3® system to support pushing payments from YayPay to Sage X3®. This happens soon after a payment attempt has been made in YayPay and validated by the payment processor to be successful.
Supported Payment Allocations
The Sage X3 connector supports pushing the following types of payment allocations:
- An invoice settled partially or completely using a newly created payment and credit memo.
- An invoice settled partially or completely using a newly created payment and another payment acting as credit.
- An invoice settled partially or completely using only a credit memo.
- An invoice settled partially or completely using only a payment acting as credit.
Setup Prerequisites
The prerequisite for this setup outlined is that your Payment Processor Gateway / Merchant credentials have been approved and issued to you (as well as configured in YayPay under the Settings > Integrations page).
1. Customize Payment Methods in Sage X3
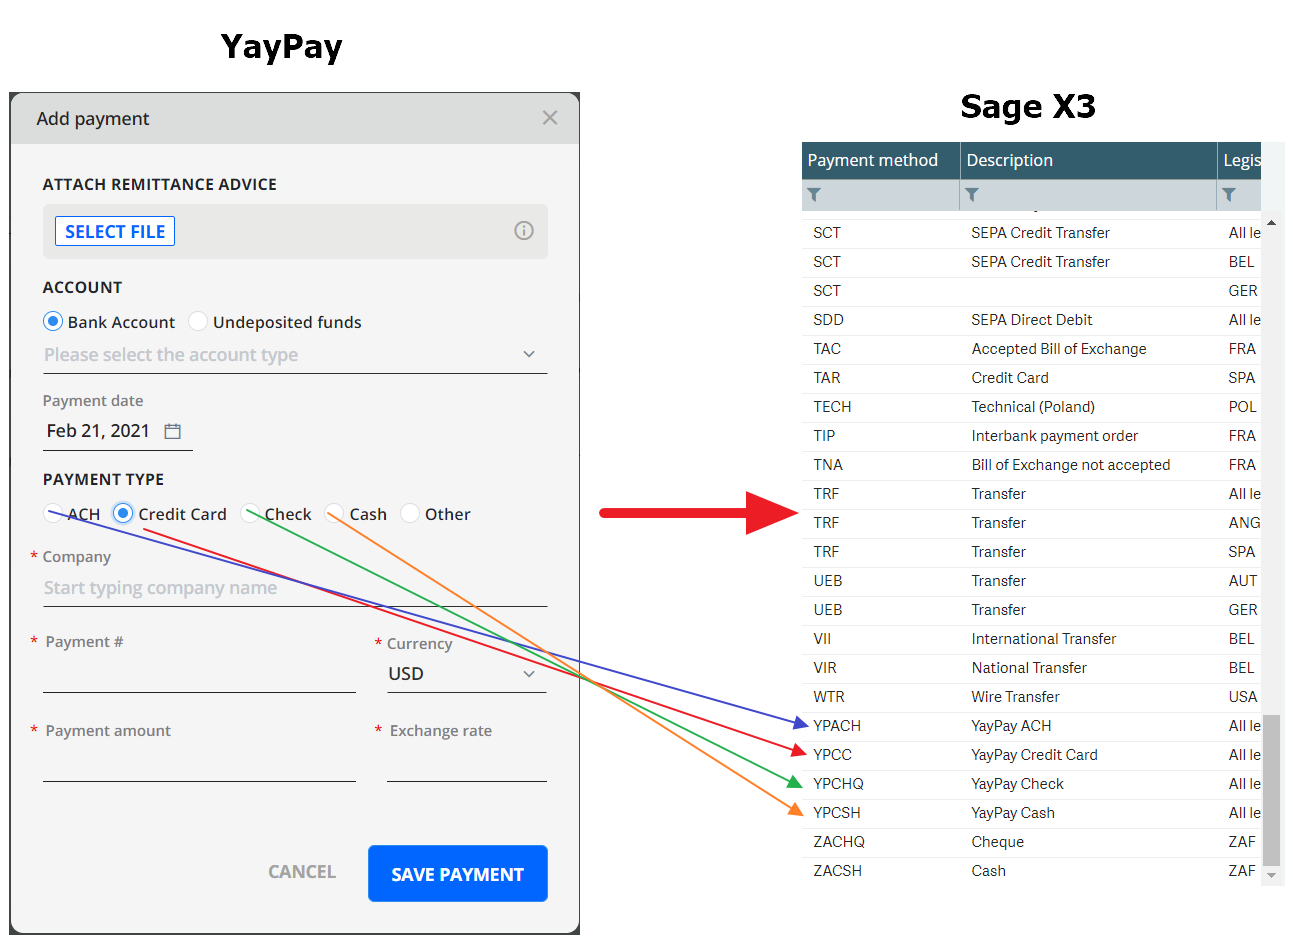
Before creating a payment in YayPay, you should make sure that your account in Sage X3 has customized payment methods.
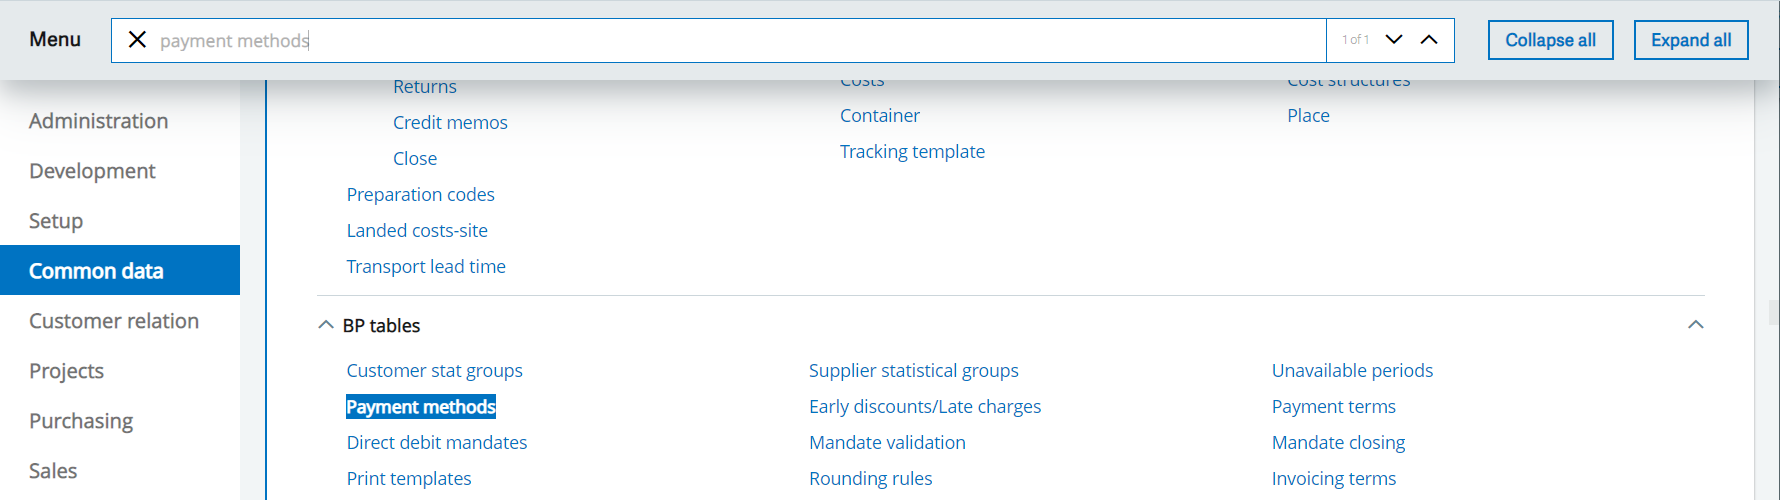
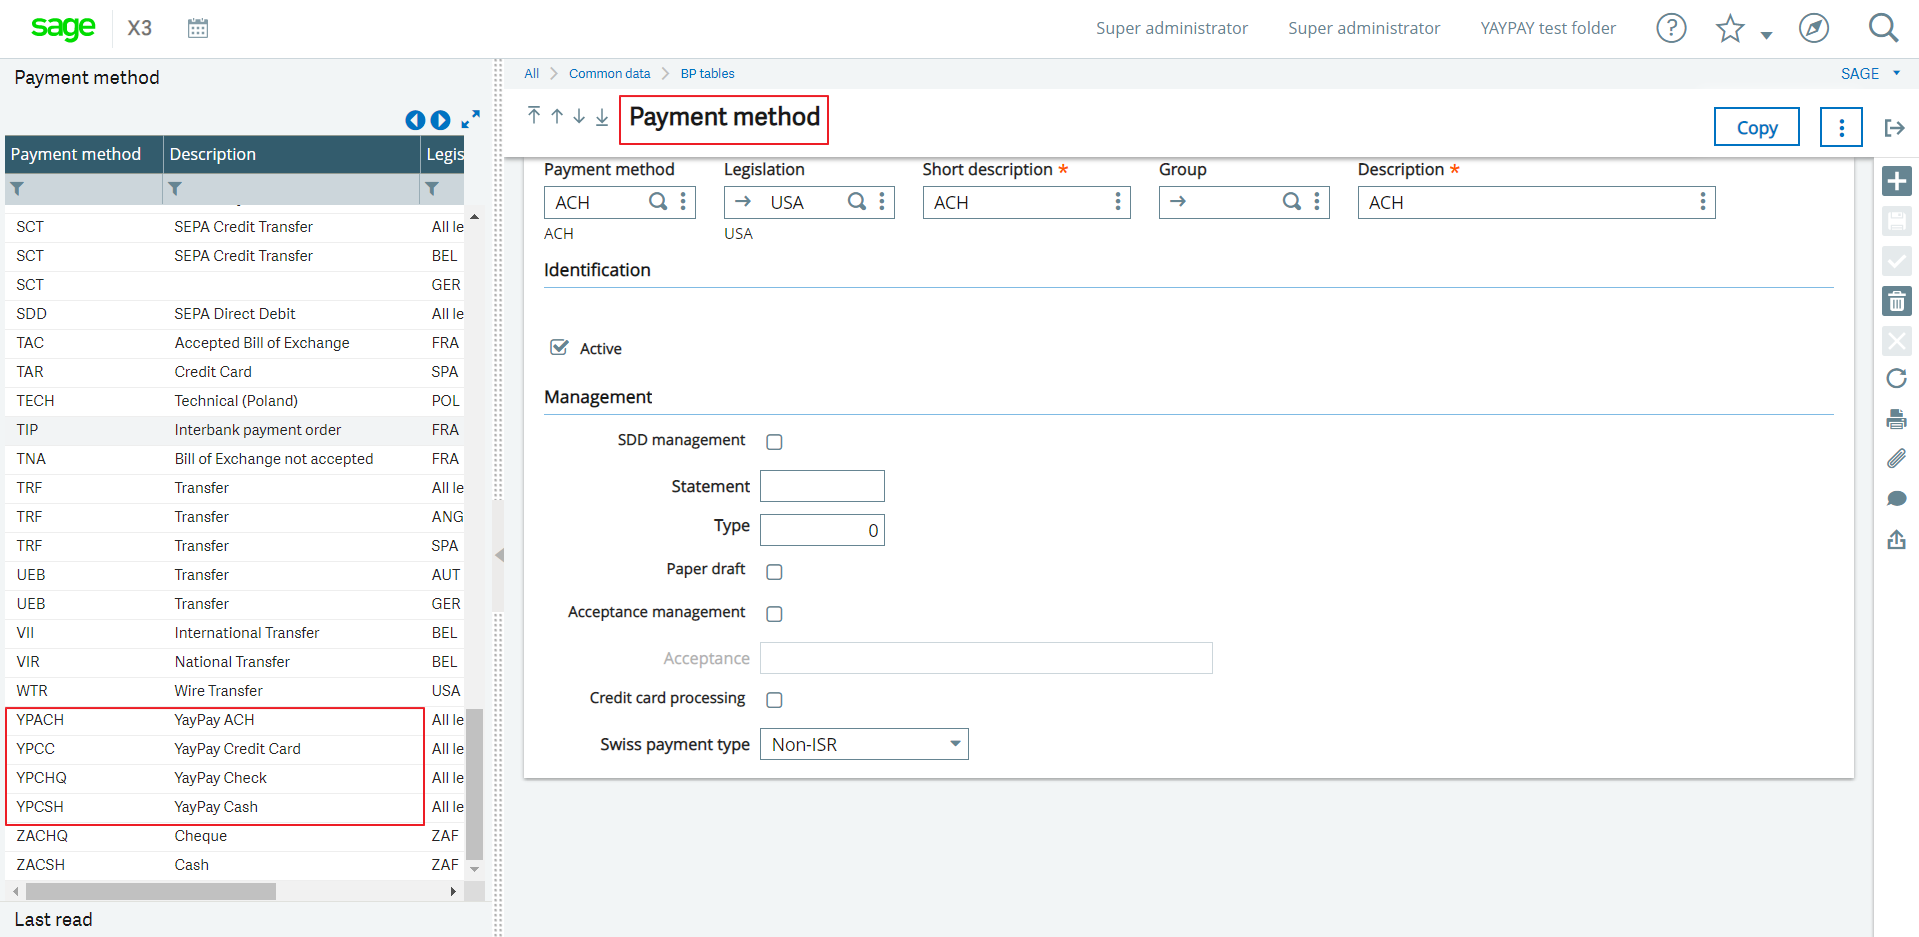
Each payment method should correspond to the payment method in YayPay.
For example, if you create a payment and select the payment card method in YayPay, it means that Sage X3 should have the same payment method.
2. Select Sage X3 Checking Account in YayPay
You can also configure YayPay to send the Card or ACH payment to a specific Checking Account. This list of drop-down values is sourced from your Sage X3 system.
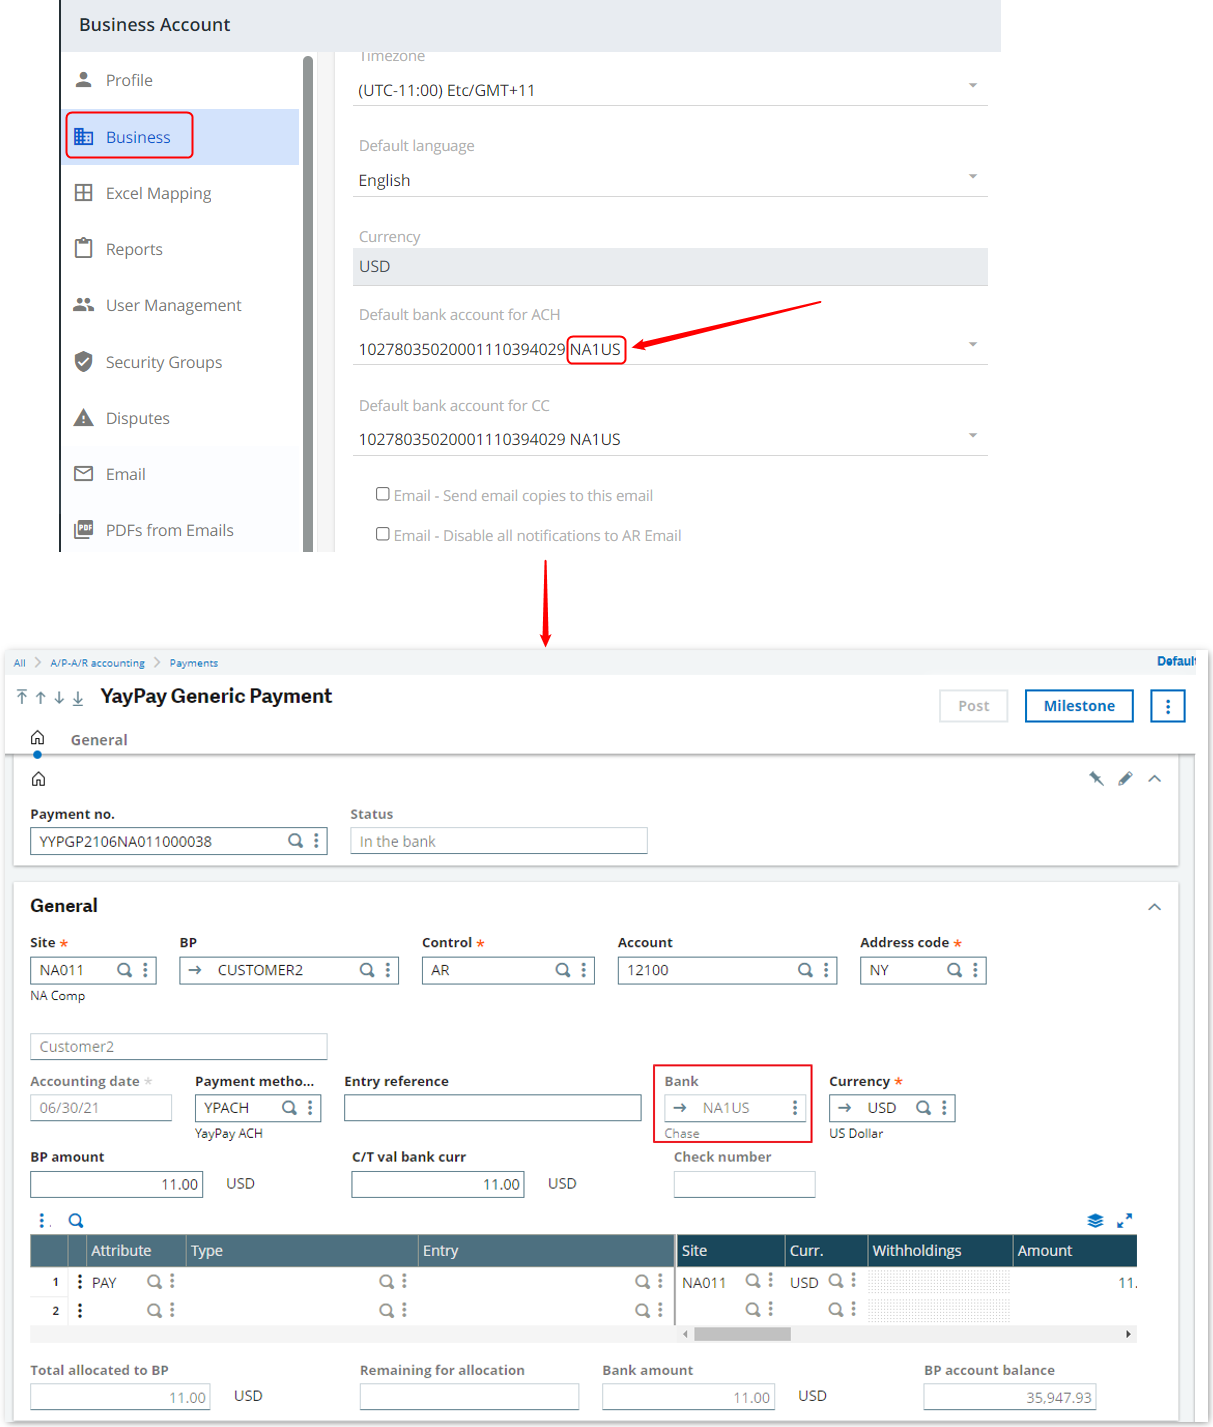
Go to your Business Settings page in YayPay (Settings -> Business) to select the appropriate Bank Account for both ACH and Card Payments from the 2 drop-down lists. These Checking Accounts should also be linked to a Bank Account in Sage X3.
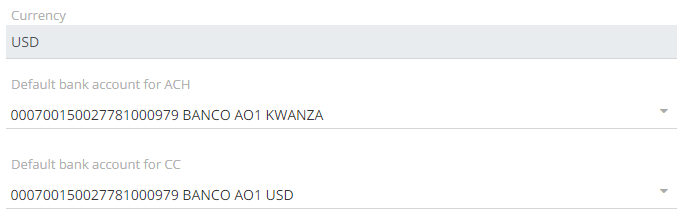
To see Bank Accounts in Sage X3, you should open the Navigation Menu, select Common Data > BP accounting table > Bank accounts.
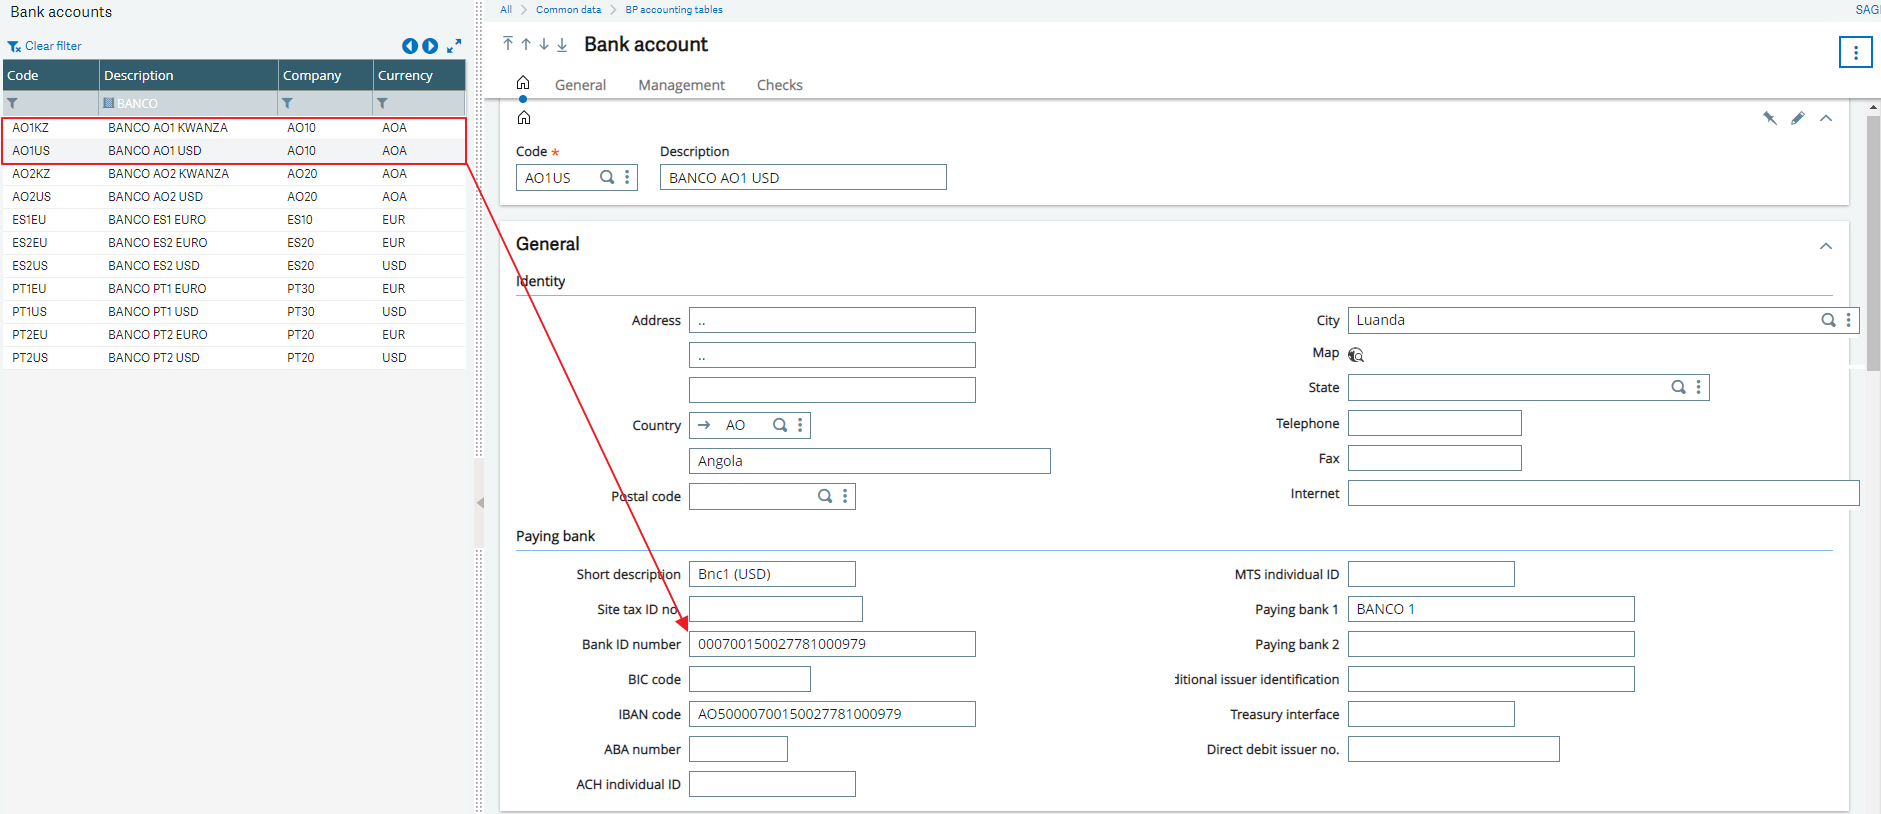
After the sync process, YayPay updates Bank Accounts in the Default bank account for ACH and Default bank account for CC lists.
3. Configure YayPay to create and send the payment information to Sage X3
Log into YayPay and go to the Settings > Integrations page. Select the Sage X3 Connector Settings.
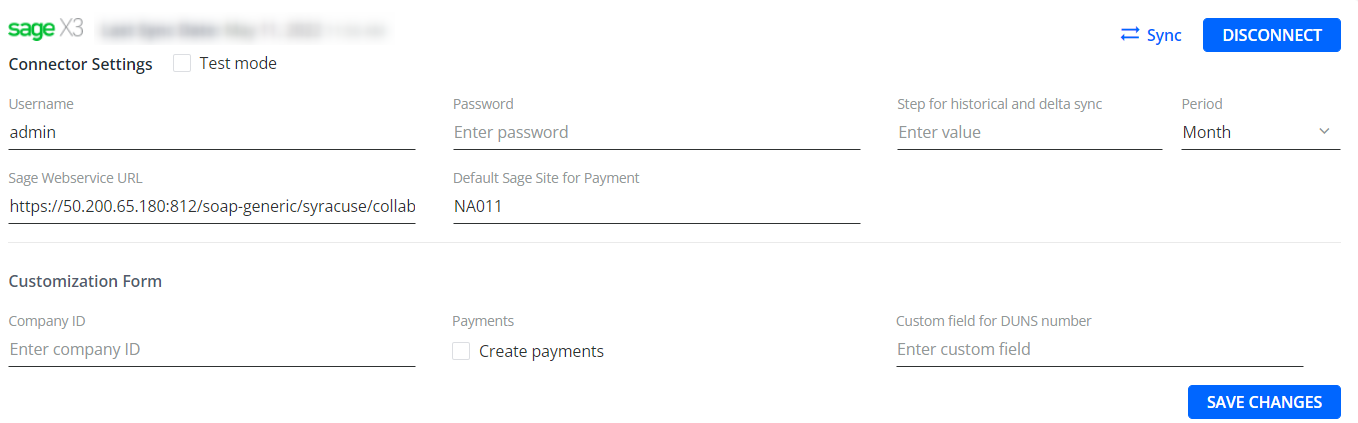
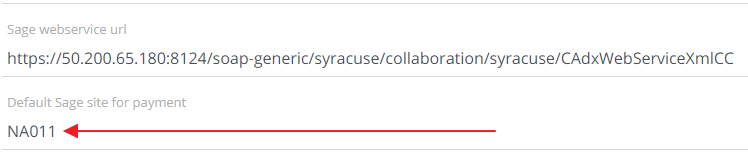
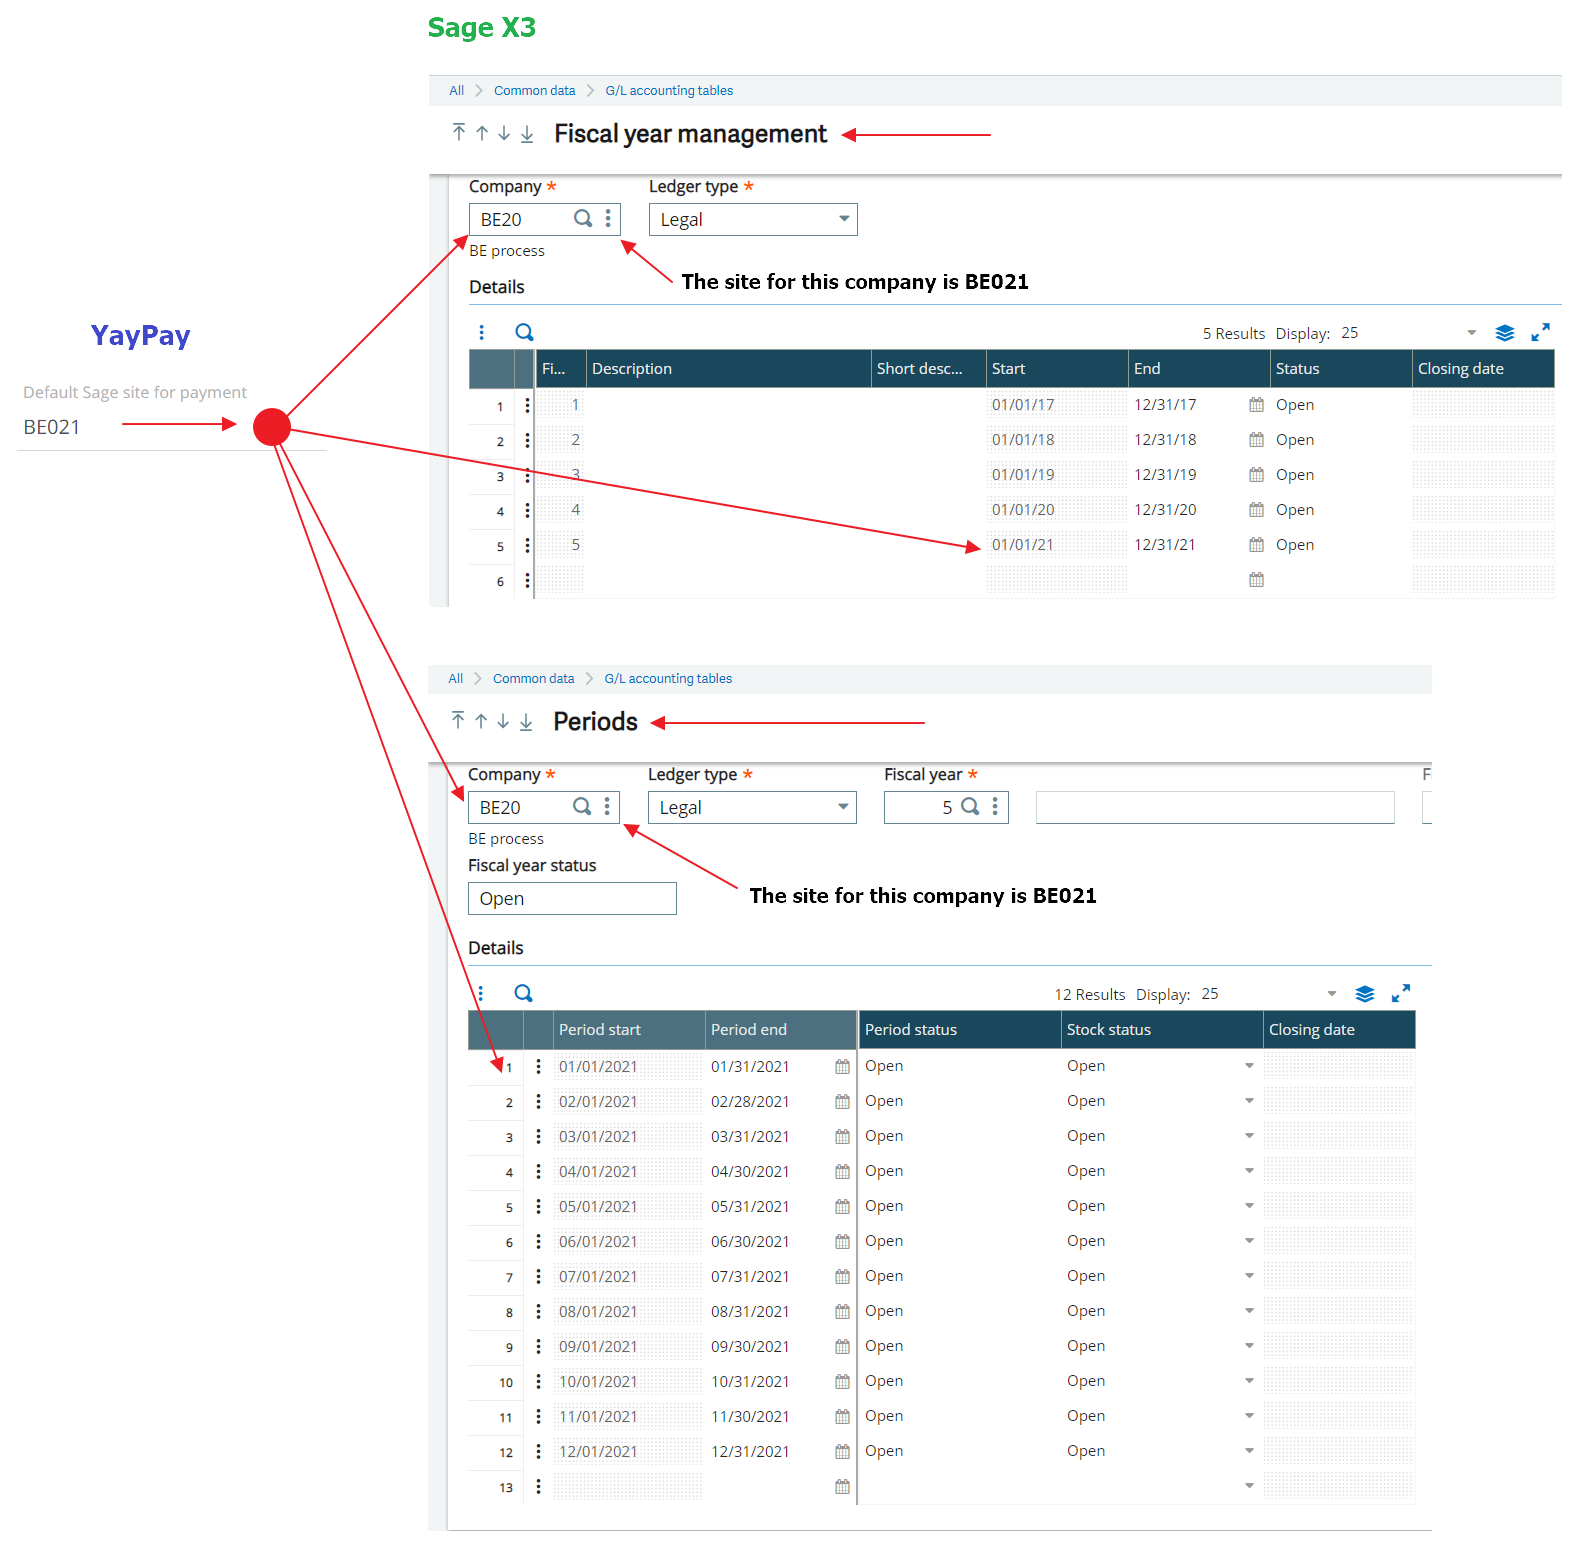
- Fill in the Default Sage Site for Payment field.
- Enable the Create payments setting.
Click SAVE CHANGES to save your updates.
NOTE: When you create a payment in YayPay and push it to Sage X3, the payment in Sage X3 will bear the Bank field, indicating the bank code from the selected account in YayPay:
4. Create a payment item manually (or review the payment attempt through YayPay’s Cash App page)
1. Go to Cash App and click on ADD PAYMENT
2. In a new popup window enter the necessary payment info and click Save Payment
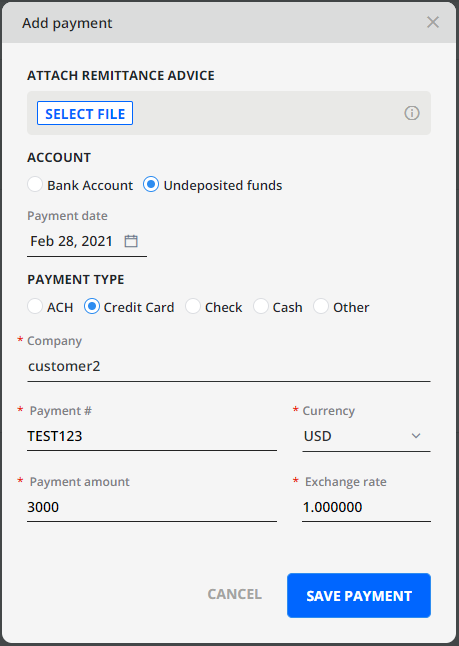
Figure 1. Creating a payment in YayPay
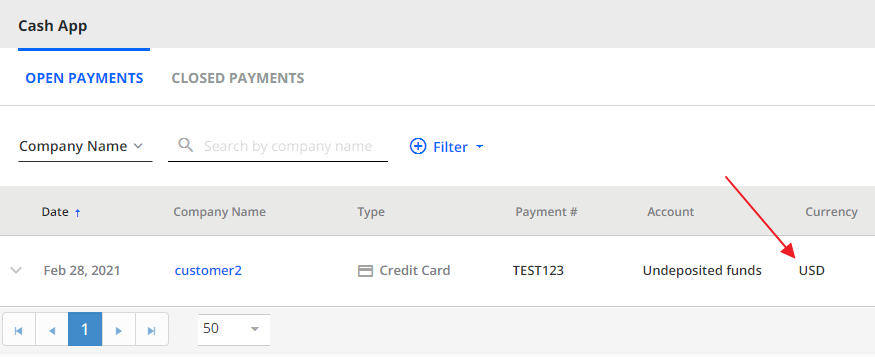
3. The created payment appears to be on the list

Figure 2. Displaying a payment in Cash APP in YayPay
4. In order to pull payment info correctly the Site value from the Sage field should be indicated in YayPay Settings >Integrations> Sage X3
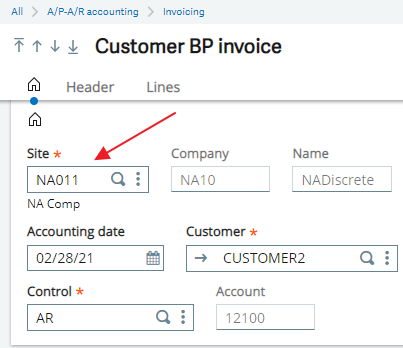
Warning
The Site field might be different for each payment, make sure you change the setting for each type of payment
5. Currency of the created payment should coincide with the currency in the record created in Sage
6. Displaying pushed payments from YayPay to Sage X3: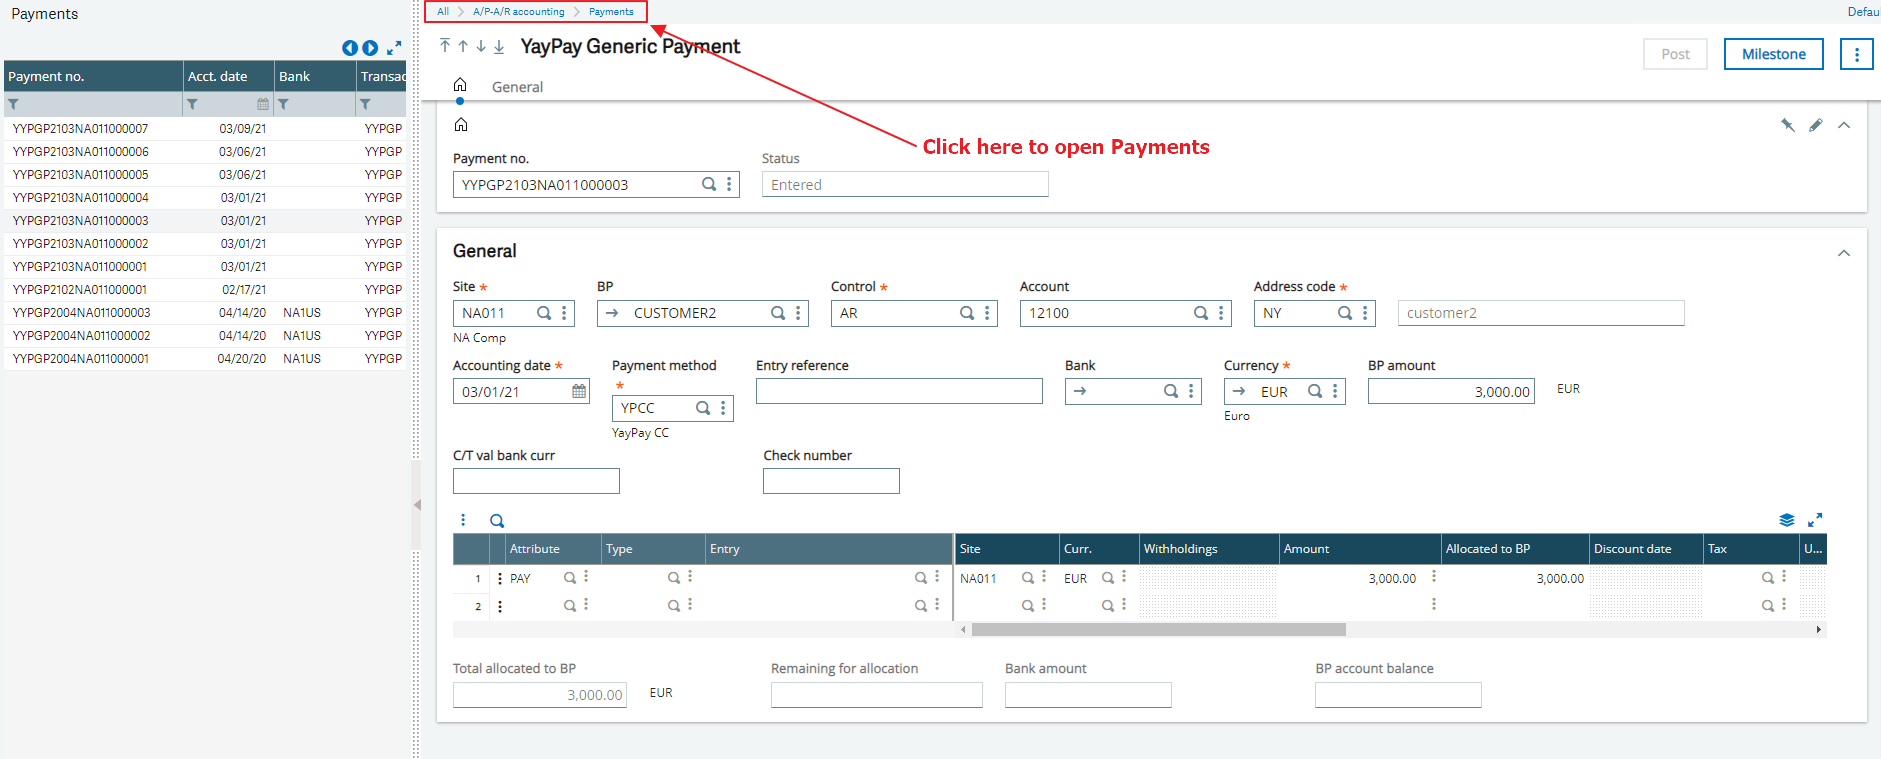


Figure 3. Selecting Payments in YayPay
To open pushed payments, click A/P-A/R Accounting > Payments > Payment/Receipt Entry > YYPGP YayPay Generic Payment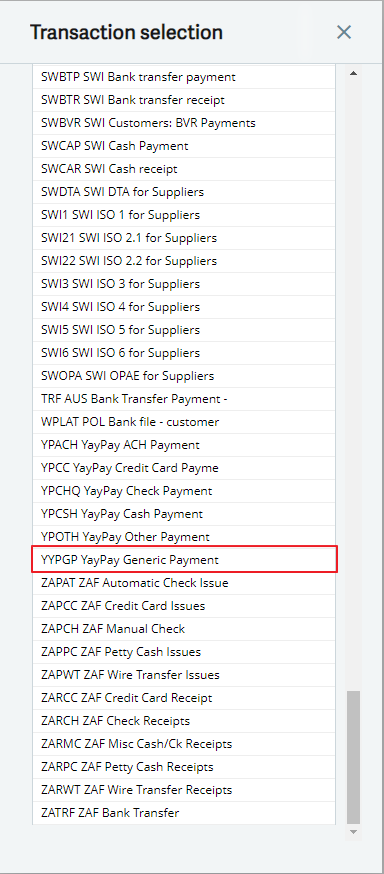

Figure 4. Displaying payment types
According to the payment request presented above, the created payment in Sage X3 has the following view: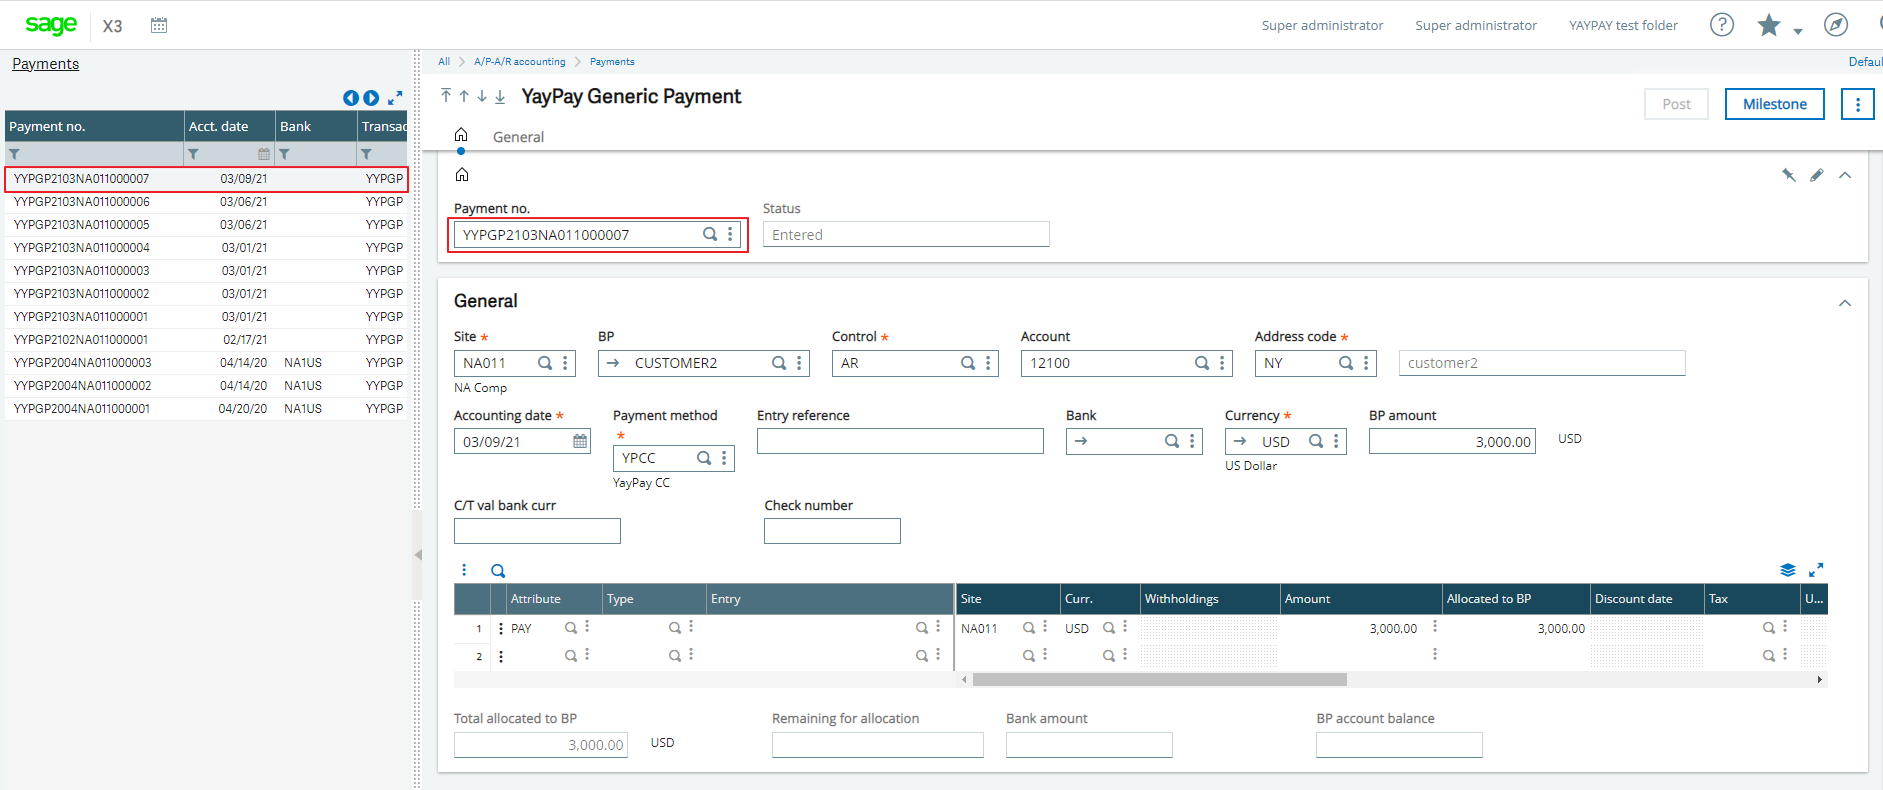

Figure 5. Displaying the pushed payment from YayPay
5. Post Payment
Once you push payment from YayPay to Sage X3, you should take the following steps:
1. Open a created payment
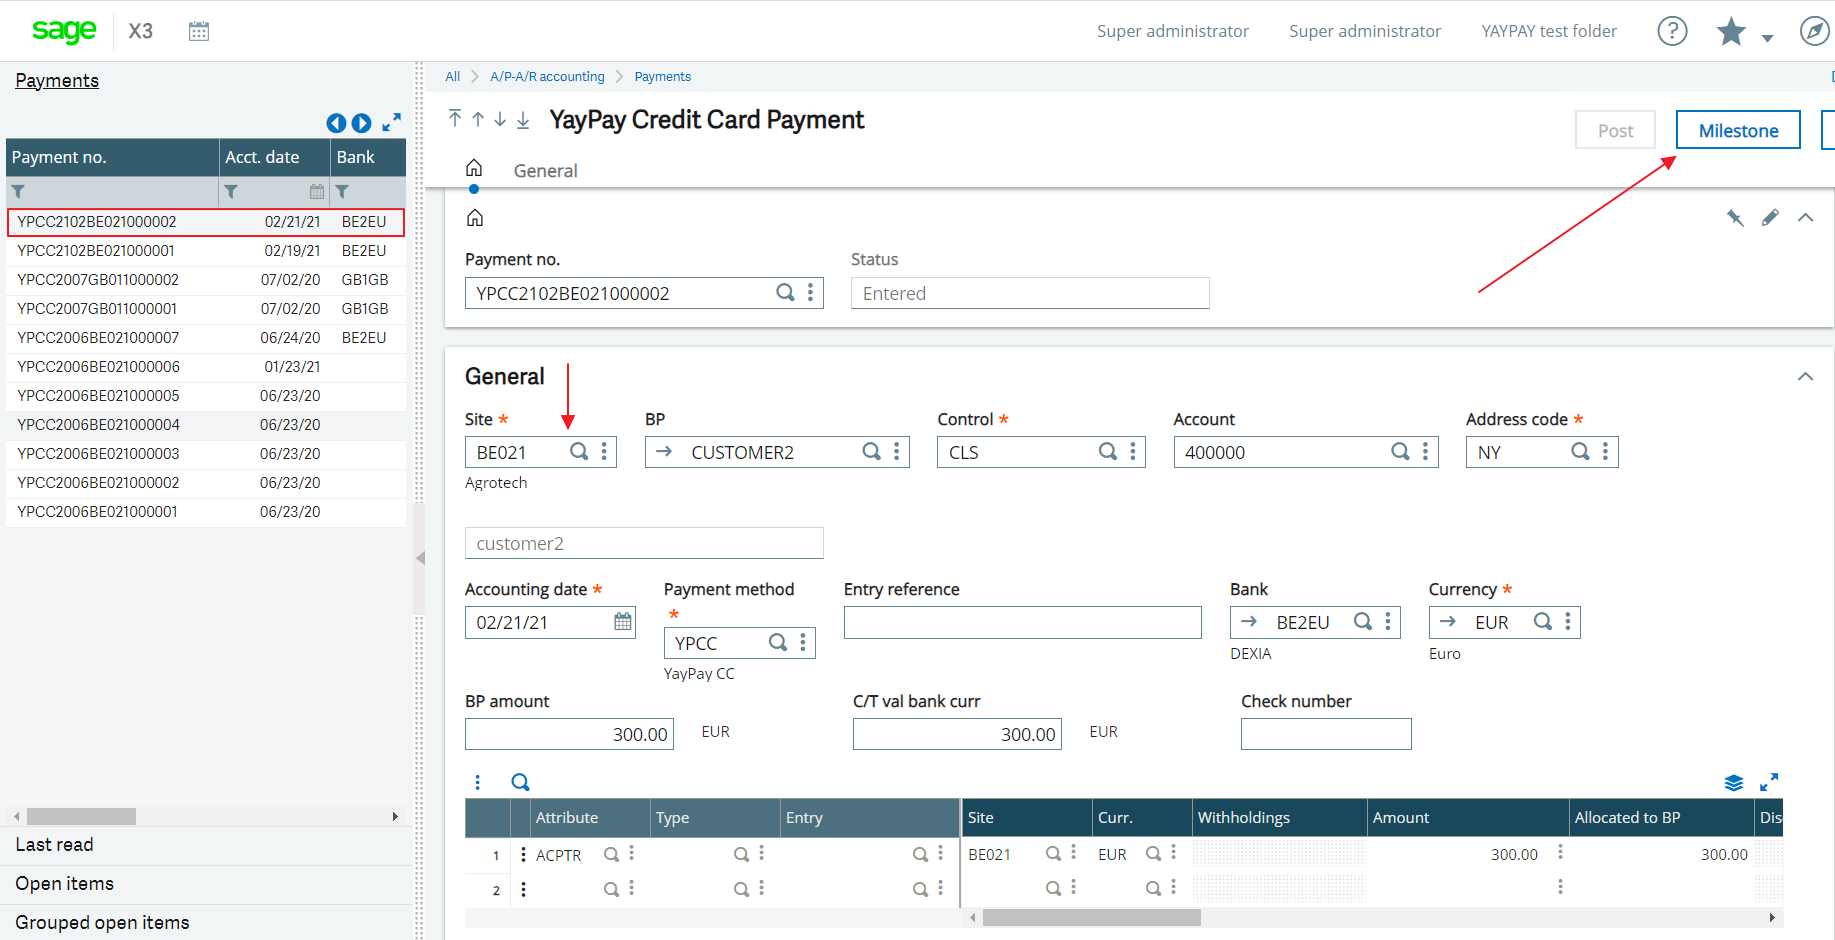
2. Click Milestone
to see the steps that you should perform in Sage X3 to finish the payment. Once you click Milestone, Sage X3 opens the following window:

Until you perform the steps that Sage X3 recommends, the payment status is Entered.

3. Bank deposits
If the bank wasn’t sent on the payment from your system, you’ll have to update each payment with the proper bank code.
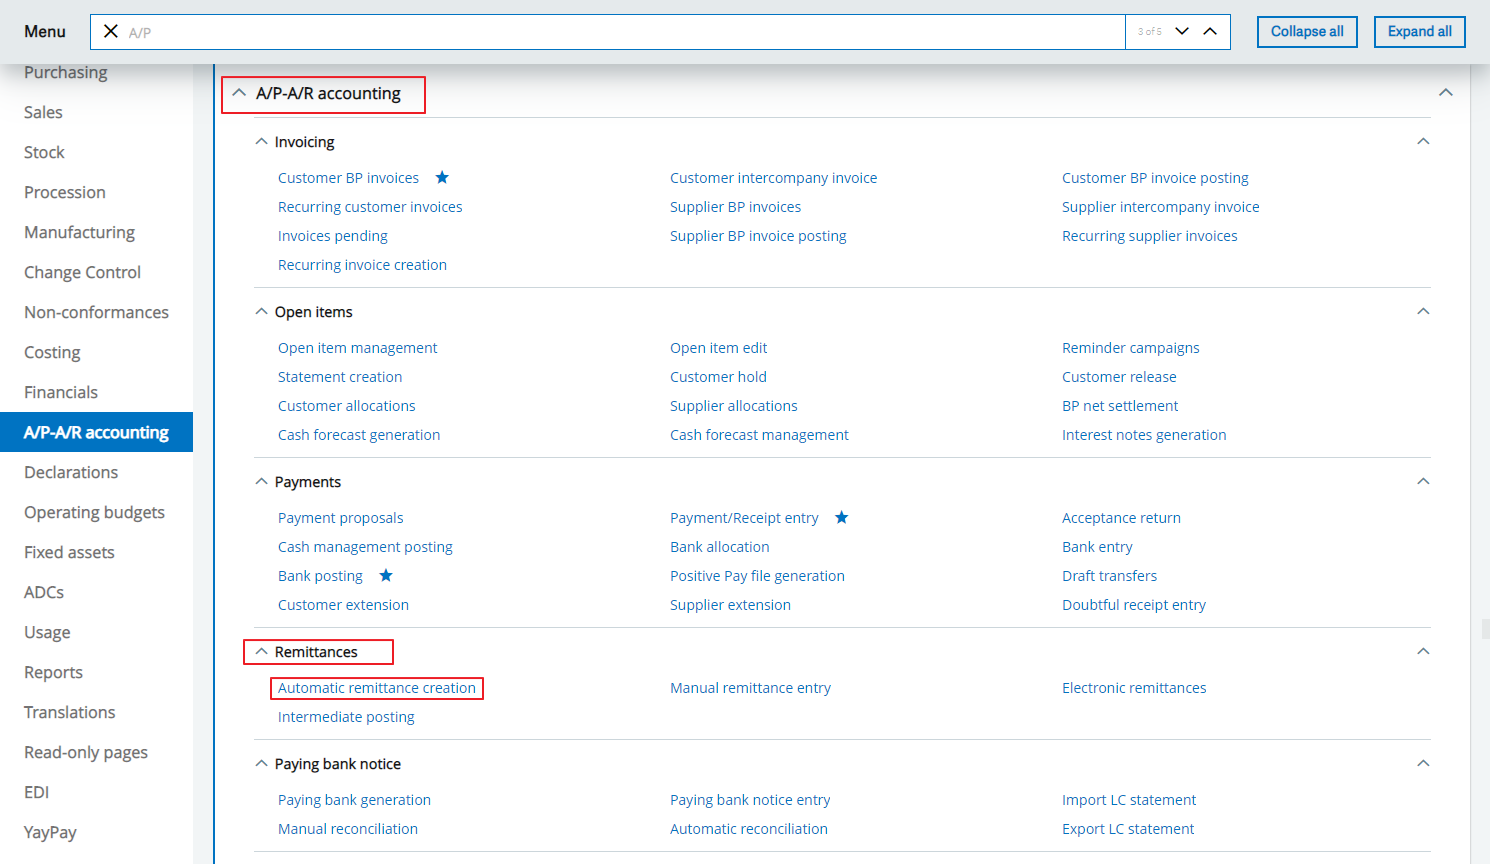
Generate the remittance slip – A/P-AR accounting\Remittances\Automatic Remittance creation:
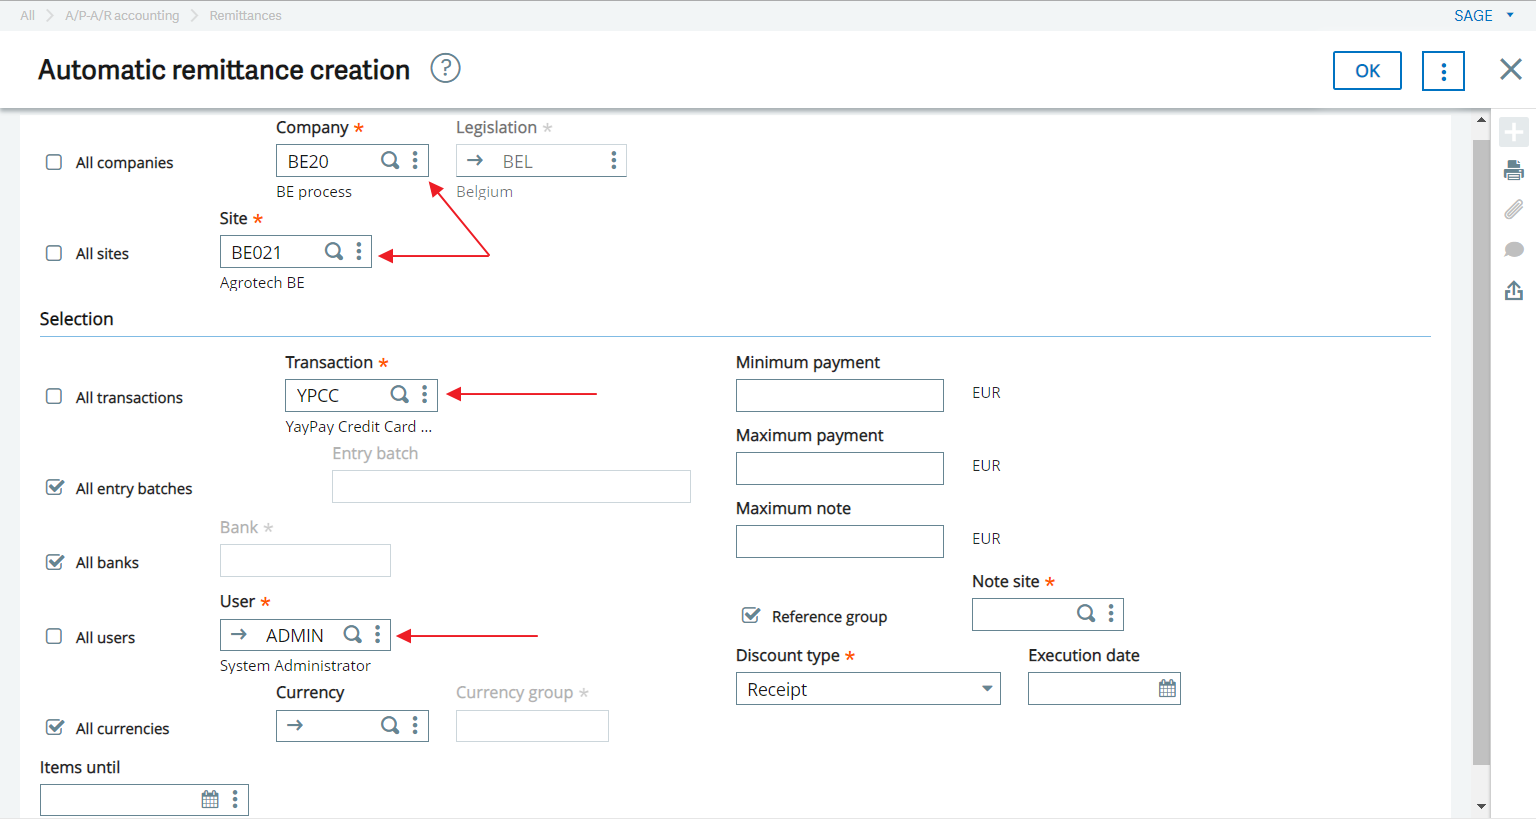
Pay attention that you should fill in data that corresponds to your payment.
- Uncheck All companies and enter the company you are working with.
- Uncheck All sites and enter the site name you are working with.
- Uncheck All
transactions and enter one of the transaction codes for YAYPAY you are working with.
For example, YayPay Credit Card Payment (because a payment was created with this payment method).
- Uncheck All Banks (unless you only have 1 bank in your system, then it's fine to select ALL) and enter your specified Bank code.
- Uncheck All users or check All users, just in case the integration uses a different user code than your login.
- Click OK
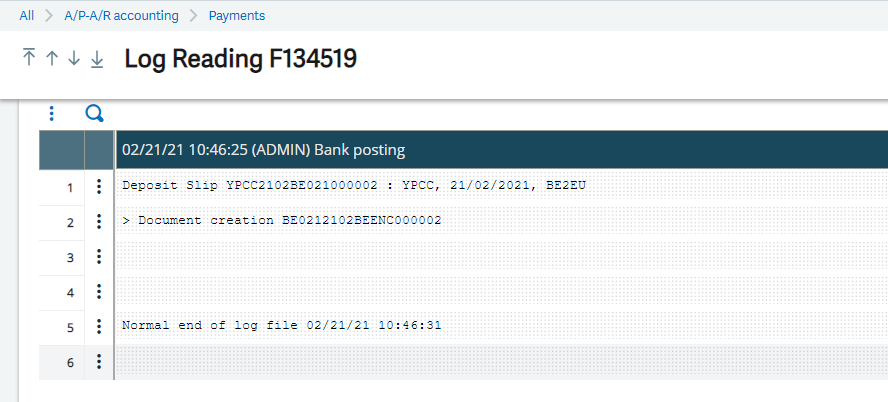
The resulting log file will look something like this. Line 1 is the Deposit Slip, the rest are all the payments on the Slip.
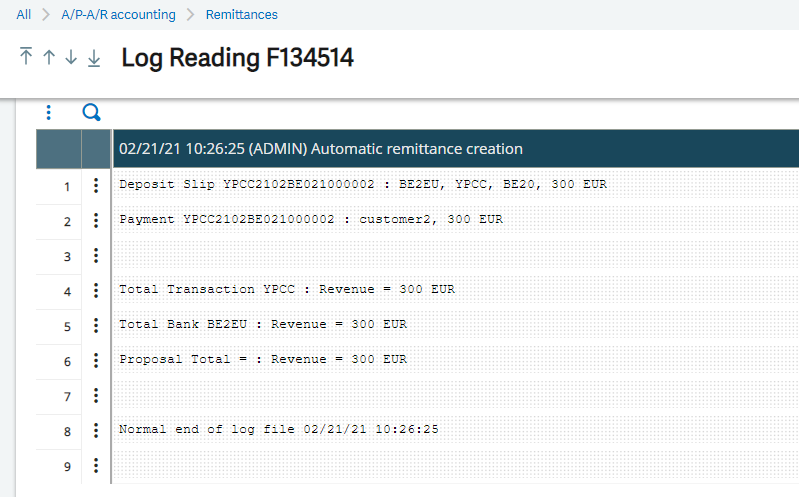
Also, the payment has the status Slip entered.

4. Bank posting
Once you finish the Bank deposits operation, you should start the Bank posting operation
Post the Remittance in the Bank Posting function – A/P-A/R Accounting\Payments\Bank Posting:
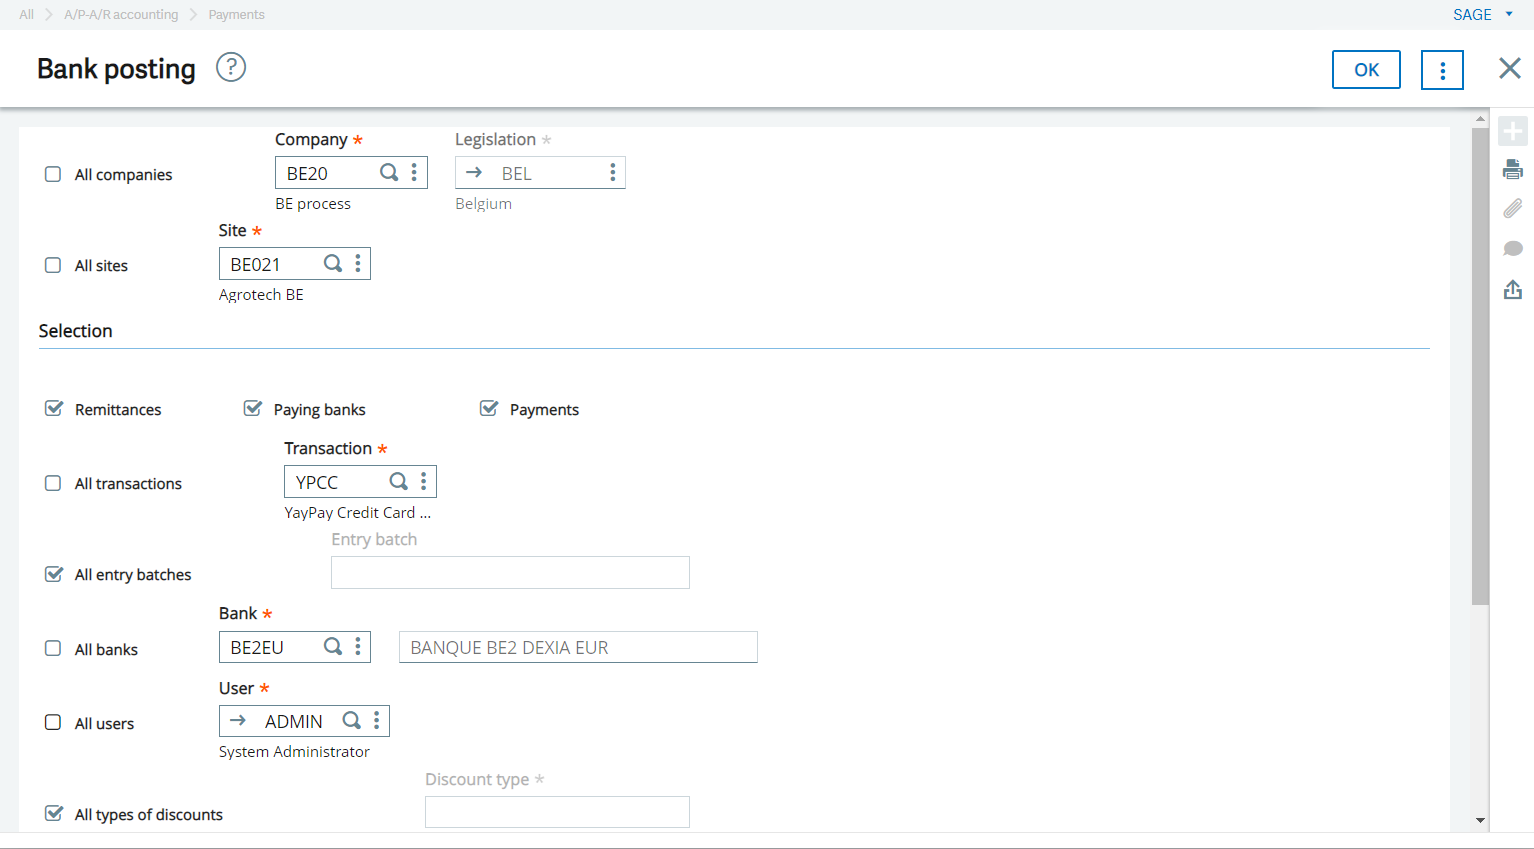
Pay attention that you should fill in data that corresponds to your payment.
- Uncheck All companies and enter the company you are working with.
- Uncheck All sites and enter the site name you are working with.
- Uncheck All transactions and enter one of the transaction codes for YAYPAY you are working with.
For example, YayPay Credit Card Payment (because a payment was created with this payment method).
- Uncheck All Banks (unless you only have 1 bank in your system, then it's fine to select ALL) and enter your specified Bank code.
- Uncheck All users or check All users, just in case the integration uses a different user code than your login.
- Click OK
The logfile will report completion or show you any errors.
Also, the payment has the status In the bank.

6. Frequently Asked Questions
Is the Payment Integration to Sage X3 affected if the "PAUSE ALL" button is pressed (the button is found in the Settings > Integrations page of YayPay)
Yes, the Pause All operation pauses both the AR Sync from Sage X3 to YayPay and the Payment creation from YayPay to Sage X3
