Similar to a Customer-Level Billing Contact, YayPay can sync and create a Billing Contact maintained at the Invoice transaction in your ERP. This is called an Invoice Billing Contact in YayPay.
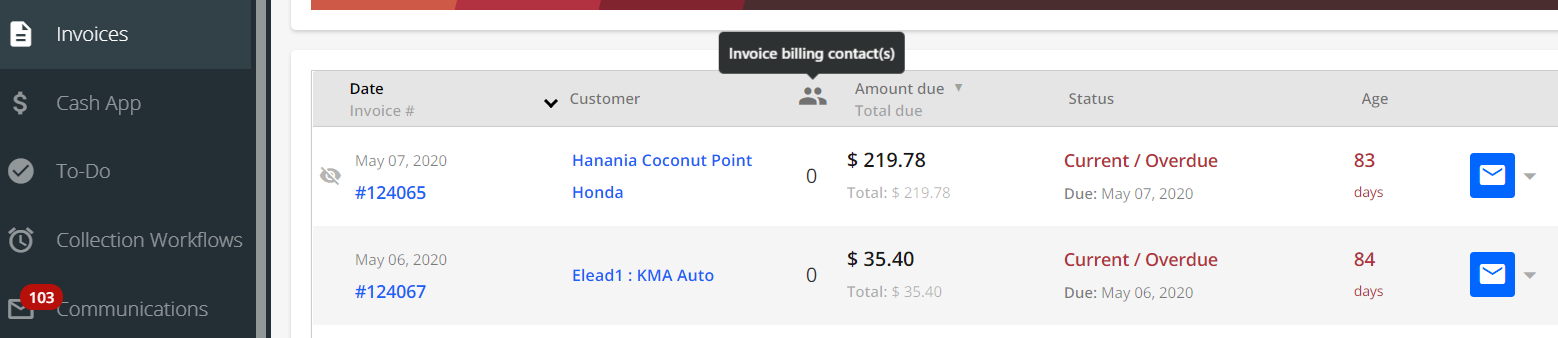
You can use your INVOICES menu to look at your Invoice Billing Contact - a "0" beside the Invoice means there is none, while a "1" indicates an Invoice Billing Contact is present:
For operational reasons, your customers may be organized such that the Invoice contacts you use to address and send the Invoice to, is different to the customer contacts maintained at the customer/account level in your ERP.
Invoice Level Billing Contact(s) can be pulled from NetSuite, Intacct and also imported via CSV files, and then used as recipients for Email Reminders when you configure the Workflows in YayPay to use the invoice level billing contact (this option is found within the "Workflow Settings" of each Workflow).
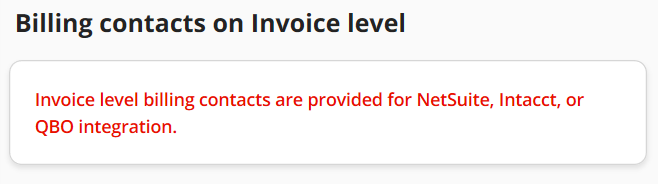
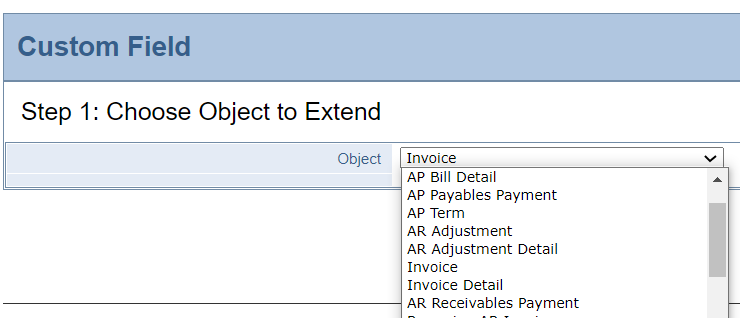
Use this panel in the Settings > Business page of YayPay, to configure how YayPay will pull across your Invoice Level Billing Contacts. By default, the panel displays the following message, which will change depending on the Connector configured in the Settings > Integrations page.
Bringing over the Invoice Level Billing Contact from NetSuite
The configuration steps involved to bring the billing contact info at the invoice transaction level in NetSuite and create it in YayPay is outlined as follows:
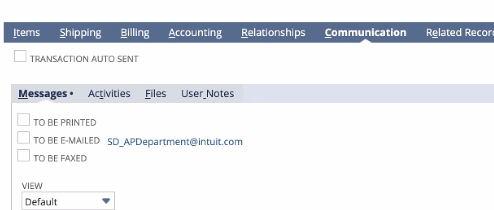
Scenario #1 - Invoice Contact stored in Native 'To Be E-mailed' field
In NetSuite:
If you maintain one or multiple email addresses in the 'To Be E-mailed' field for an Invoice record in NetSuite, you can bring the email address(es) over to YayPay as an Invoice level billing contact.
For example, to bring this email address over as an invoice level billing contact in YayPay:
In YayPay:
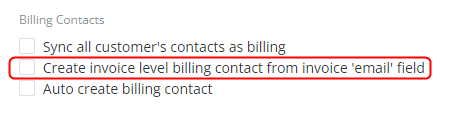
In YayPay, go to Settings > Integration page.
Check the box "Create invoice level billing contact from invoice 'email' field' and Save your changes (if you are doing this after the sync has taken place, you will need to reenter your NetSuite Token/Consumer credentials again)
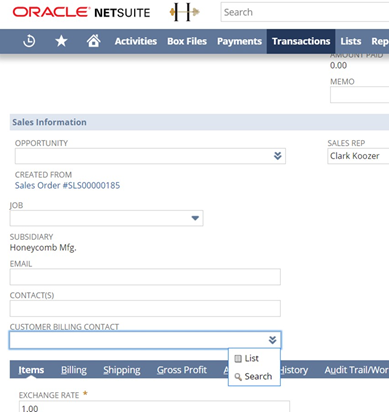
Scenario #2 - Invoice Contact from a Custom Field in NetSuite
In NetSuite:
If you maintain an Invoice-level billing contact's email addresses using a custom field in NetSuite (that is either Free Text or List/Record Type), you can bring the email address over to create it in YayPay as an Invoice level billing contact.
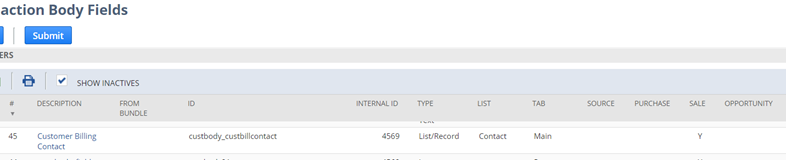
Locate this custom field on the Invoice page in NetSuite. Click on the field e.g. "Customer Billing Contact" to find out the Field ID name, or with the help of your NetSuite Administrator, you do the same via the NetSuite menu path: Customization > Lists, Records & Fields menu:
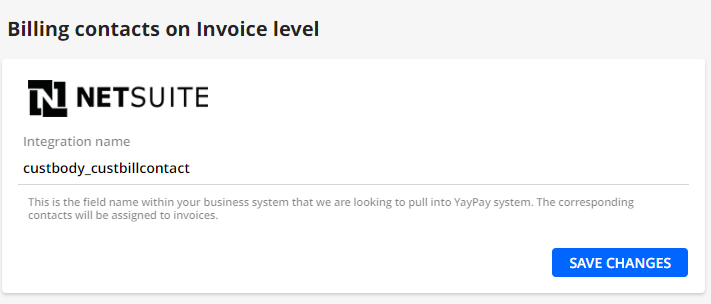
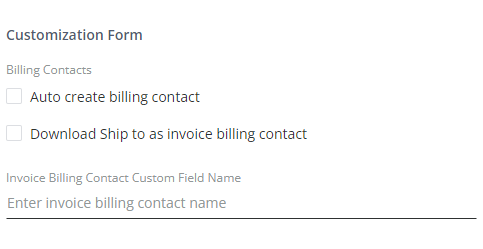
In YayPay:
Enter the NetSuite custom field name in this panel found in the Settings > Business page of YayPay and save your changes:
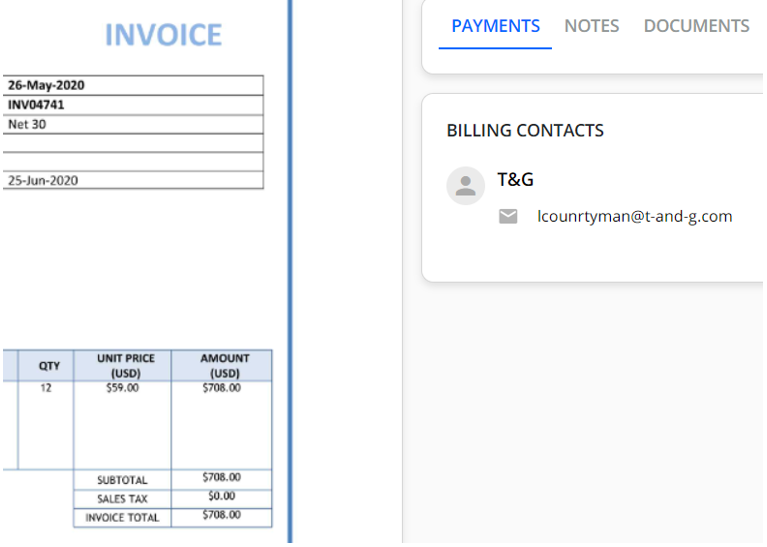
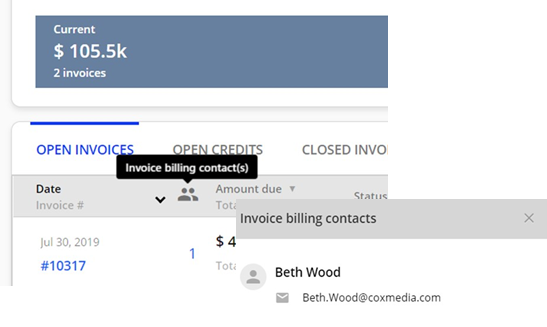
In both scenarios illustrated above, the sync will now be directed to bring over and create the Invoice level billing contact in YayPay, which can be found next to the Invoice Number, e.g.:

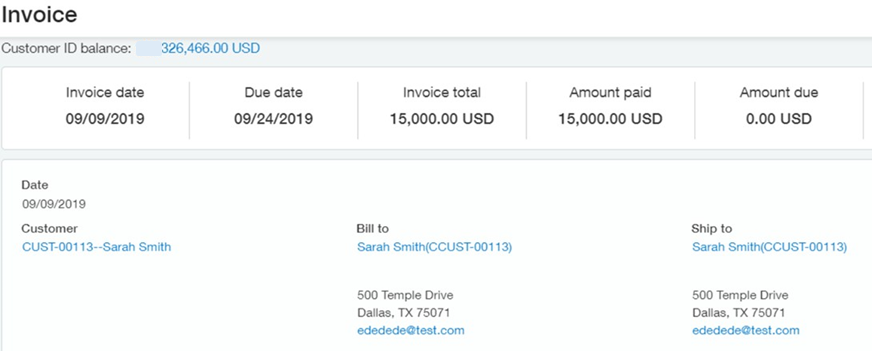
Alternatively, if you click into Invoice # to open the Invoice, you may see your ERP Invoice PDF embedded in the page. To the right, the Invoice Billing Contact(s0 would also be found:
Bringing Over the Invoice Level Contact from Intacct
The configuration involved to bring the email address of the Billing Contact at the invoice transaction in Intacct is outlined as follows:
Scenario #1 - Invoice Contact from the Bill To section
In Intacct:
By default, Invoice billing contacts from Intacct are always pulled over and created to YayPay. This Invoice-level billing contact in YayPay will be the contact / email address from the Bill-to section of the invoice transaction in Intacct:
In YayPay:
Invoice level billing contacts are displayed next to the Invoice Number. You can view this info either using the INVOICES menu in YayPay or within a particular customer using the Statement page (look under the Open/Closed Invoices tab), e.g.

Alternatively, if you click into Invoice # to open the Invoice, you may see your ERP Invoice PDF embedded on the page. To the right, the Invoice Billing Contact(s0 would also be found:
Scenario #2 - Invoice Contact from a Custom field in Intacct
In Intacct:
If you keep the billing contact's email address associated with the Invoice using a custom field in Intacct, it is also possible to bring that into YayPay (See: April 2020 Release Notes)
Review your Intacct setup, under Platform Services > Object Customization > Custom Fields, and check that the custom field is associated with the "Invoice" Object.
For example, this could be the custom field ("BILLING_CONTACT") that you created in Intacct to hold an email address (per Invoice):

In YayPay:
Enter the Intacct Field ID name (i.e. "BILLING_CONTACT") in the "Invoice billing contact custom field name" field:
The above field is found in the Settings > Integrations page of YayPay, where you configure YayPay with the Intacct Web Services User Credentials to initiate the AR Sync from Intacct and YayPay:
Click on "SAVE" to save your changes and press "Sync".
Note: You will need to re-enter the password of the Web Services User before Saving.
After the sync, the information brought into YayPay will look like this, e.g.:
Alternatively, if you click into Invoice # to open the Invoice, you may see your ERP Invoice PDF embedded in the page. To the right, the Invoice Billing Contact(s0 would also be found:
Defining the invoice level billing contact in CSV file imports
These steps outline the data preparation and how to add the invoice billing contact to the invoice.csv file:
- In preparing your AR data from your ERP to import into YayPay, the contact.csv is one of the 6 CSV files that will represent contact(s) you wish to establish in YayPay (either labeled as billing or non-billing) associated with the Customer/Account
- In the invoice.csv file used to represent Open and Closed Invoices from your ERP system, there is a provision for you to represent Invoice level billing contacts (i.e. contacts per Invoice). This is denoted by the 'billingEmail' column in the invoice.csv file
- During the import process into YayPay, the information contained in the billingEmail column of the invoice.csv file will be matched with the Email column in the contact.csv file
- If the emails are the same, the contact will be regarded as an Invoice Billing Contact in YayPay
Defining Customer Level Billing Contact(s) by calling YayPay APIs
Very similar in nature to the CSV file approach, you can also create Invoice Level Billing Contacts in YayPay through a combination of using the /contacts and /invoices APIs to push and integrate your Invoice records and Invoice Contacts into YayPay (when there are new, updated or deleted contacts in your ERP for the invoice).
This is a similar logic that uses the parameter 'contact_email" in the /invoices API to match against the "email" in /the contacts API. See API Article link.
