Customer-level Contacts
Customer-level contacts are those that are found under the CONTACTS section of the Statement page.
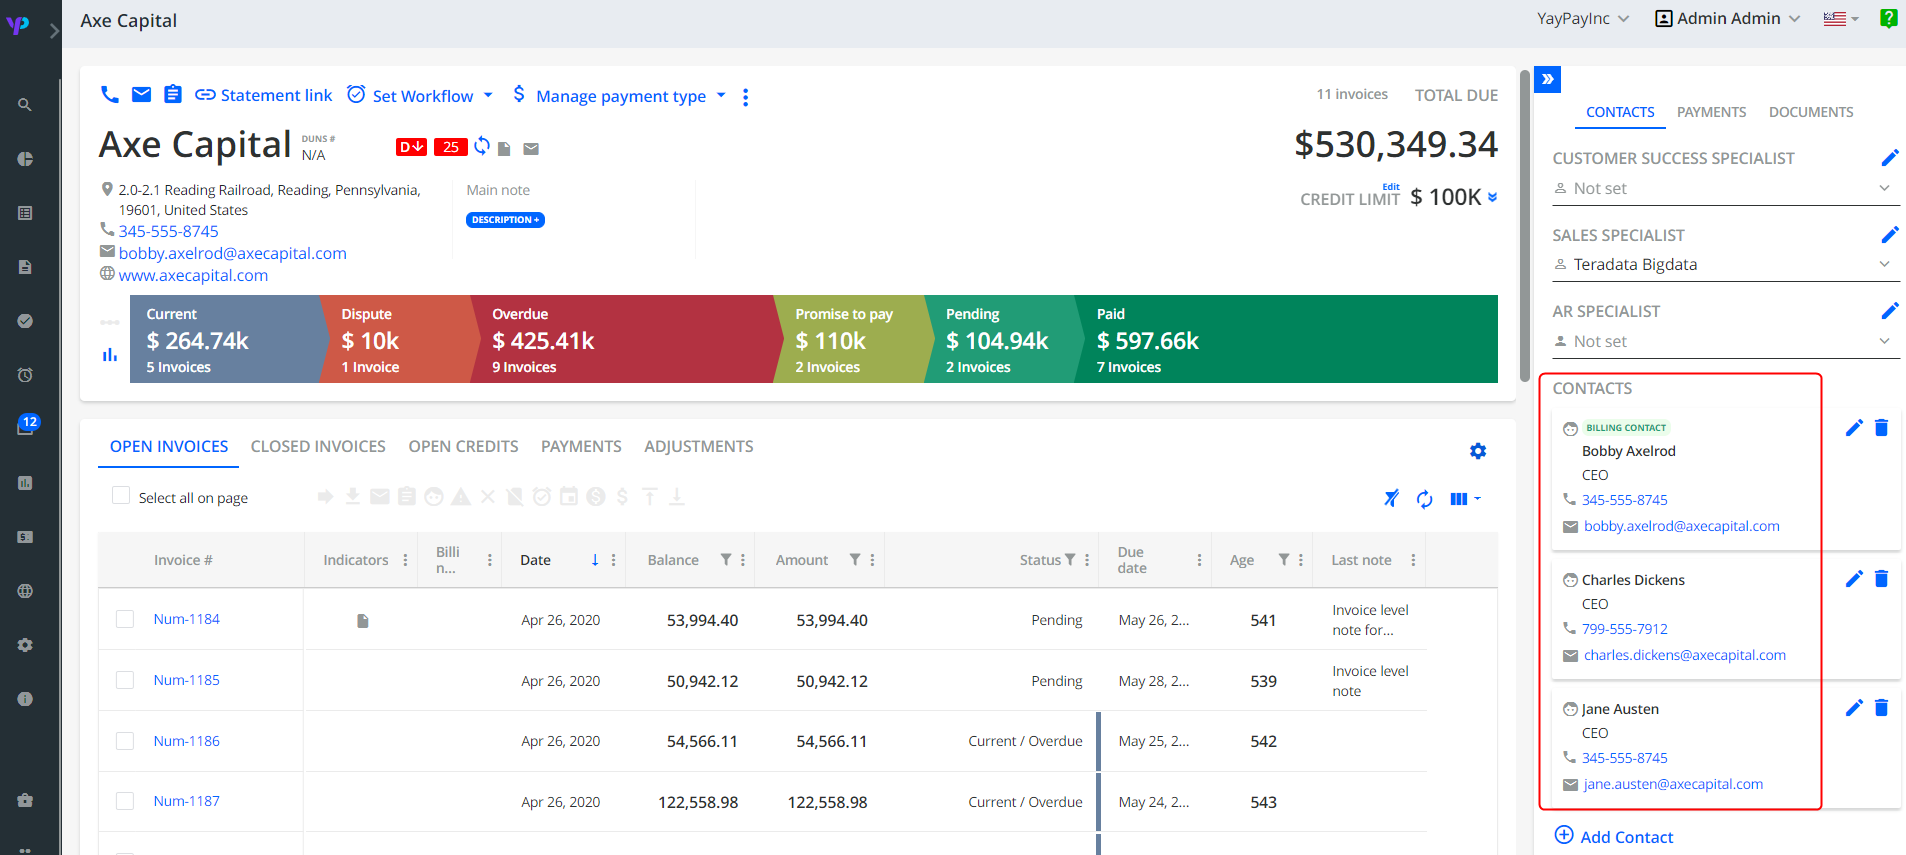
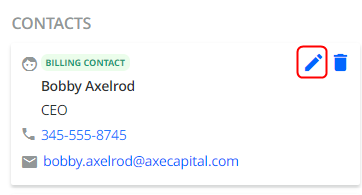
Customer-level contacts can be both labeled as the Billing contact (with a green label) or non-Billing contacts (those without the label in green).
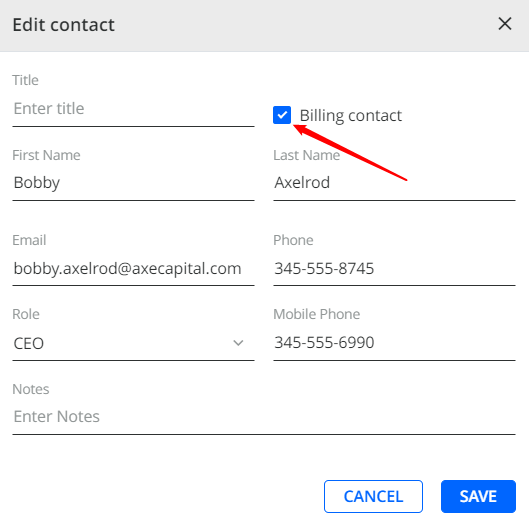
Any number of contacts can be Billing or non-Billing. You can change the status of contact by editing it.
These Customer-level contacts in YayPay are typically synced through the AR integration with your ERP or can be imported via CSV files and/or pushed into YayPay via API.
Additional contacts can be added in YayPay, but they remain in YayPay and do not integrate back into your ERP.
Also, there is an option to manage contacts in the YayPay system only. For this purpose in the Business setting, there is a setting "Use YayPay as a system of records for contacts". Please find detailed info here: https://yaypay.helpjuice.com/en_US/44476-account-settings/general-business-settings#use-yaypay-as-the-system-of-record-for-contacts
Invoice-level Contacts
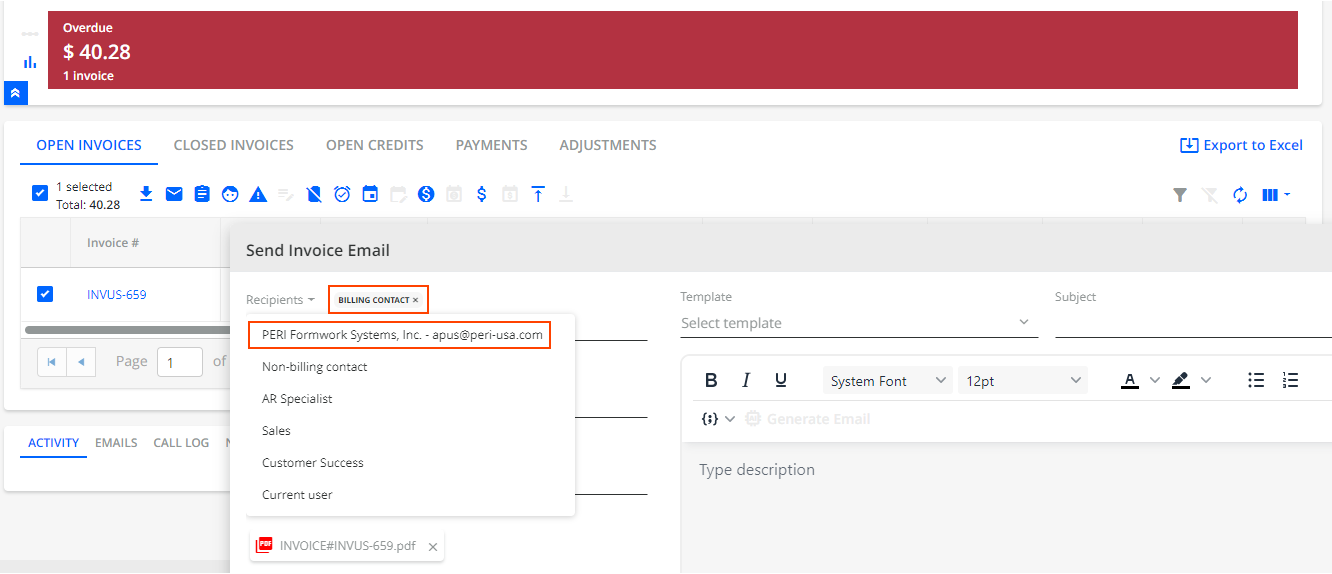
Invoice-level contacts are denoted by a Face icon shown next to each Invoice.

Click on the icon to see the email address of the Invoice-level contact.
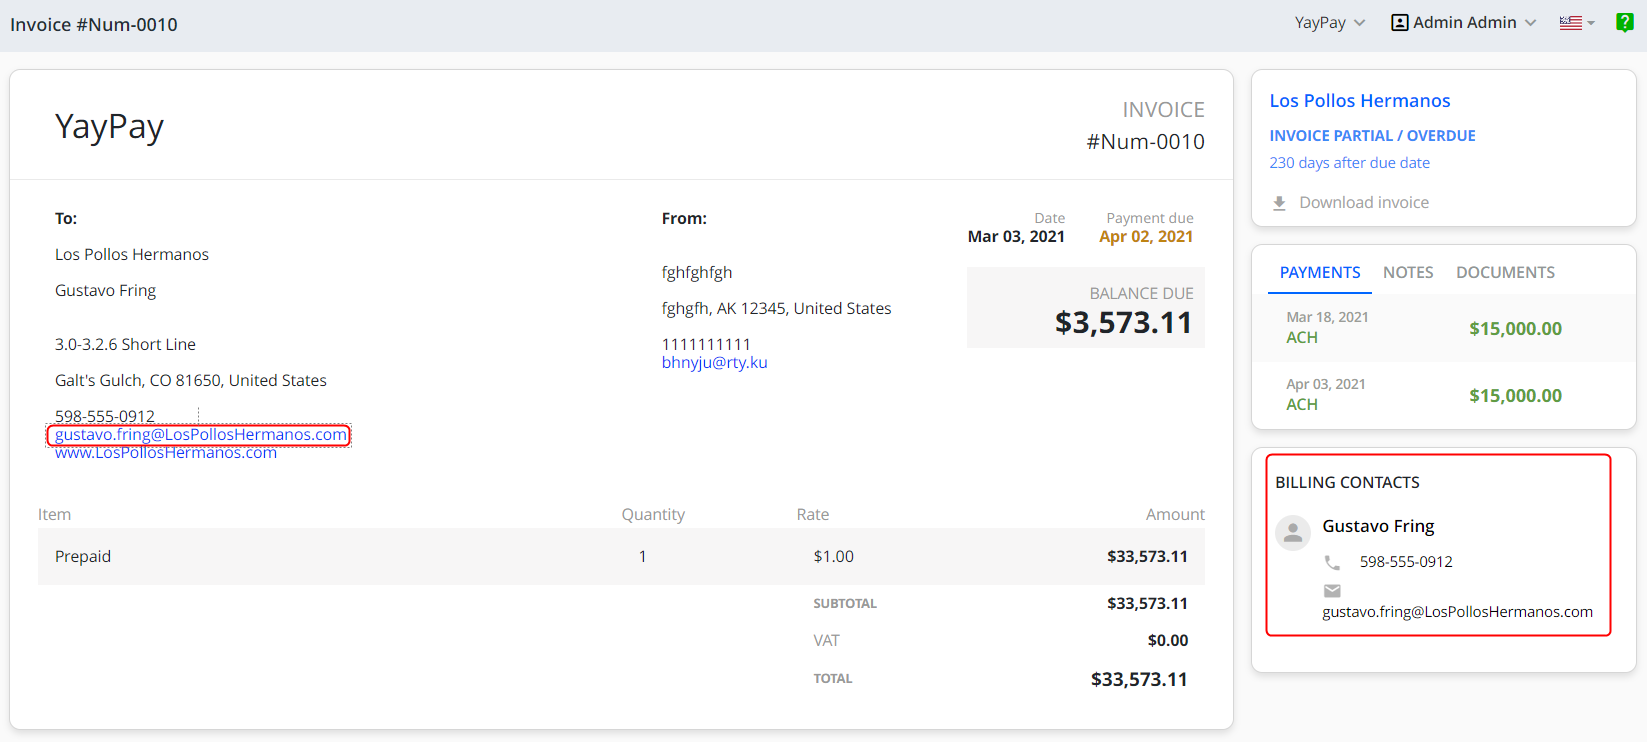
Invoice-level billing contacts can be the same for every invoice, or different, depending on how your ERP is set up. If you do not see a Face icon, it means YayPay did not receive an invoice level contact for that Invoice from your ERP.
These Invoice-level contacts in YayPay are typically synced through the AR integration with your ERP or can be imported via CSV files and/or pushed into YayPay via API.
Customer and Invoice level Billing Contacts in Workflows
By default, YayPay uses customer-level Billing contacts as recipients in the Email Reminder Action created in Collection Workflows.
To change the default behavior and use invoice-level Billing contacts instead, do the following:
- Go to Workflows and either click on an already created collection workflow or on the ADD WORKFLOWbutton. This opens a respective workflow page.

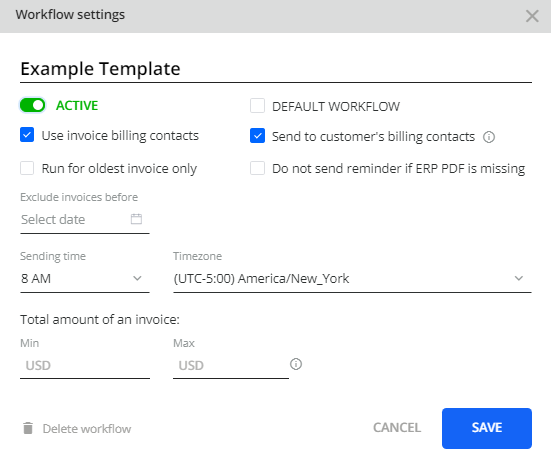
- Click on the Workflow settings icon located next to the workflow's name. This opens the Workflow settings dialog.
-
In this dialog, check the Use invoice billing contacts check box.
This overrides the default behavior so that YayPay will use invoice-level Billing contacts as recipients in the Email Reminder Action created in a Collection Workflow.
To learn more about the individual options in this dialog, see the Collection Workflow Settings article.
Optionally, to include customer-level billing contacts on the copy of the email reminder, check the Send to customer’s billing contacts check box.
This check box only becomes active when you also check Use invoice billing contacts.Click Save to confirm the workflow's settings.