This article describes how to synchronize custom fields, contacts and DUNS numbers from NetSuiteTM.
You can also add new fields to your NetSuiteTM configuration at either the Account/Customer-level or Invoice-level. These fields can then be synchronized with YayPay, making them available in the Aging Report, Statement page, email templates, etc.
For more details about synchronizing custom fields from ERP systems, see the Synchronizing Custom Fields from your ERP section.
To learn more about the synchronization between YayPay and NetSuiteTM, see the NetSuite: Configure Account for YayPay Integration section.
Synchronizing Customer Level Fields
The connector can synchronize the following NetSuiteTM customer level fields as YayPay customer level custom fields:
Custom Fields
Before synchronizing NetSuiteTM customer level custom fields with YayPay, identify them in NetSuiteTM and note their corresponding Field ID.
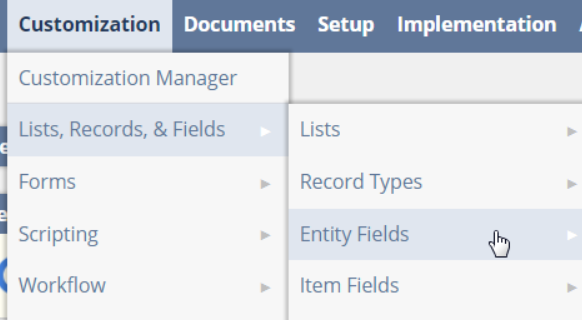
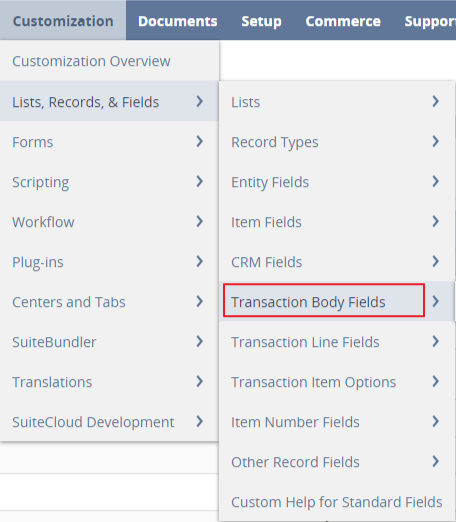
In NetSuiteTM, you can find custom fields in Customization | Lists, Records, & Fields:
If you need help identifying custom field names that you want to synchronize with YayPay, contact your NetSuiteTM administrator.
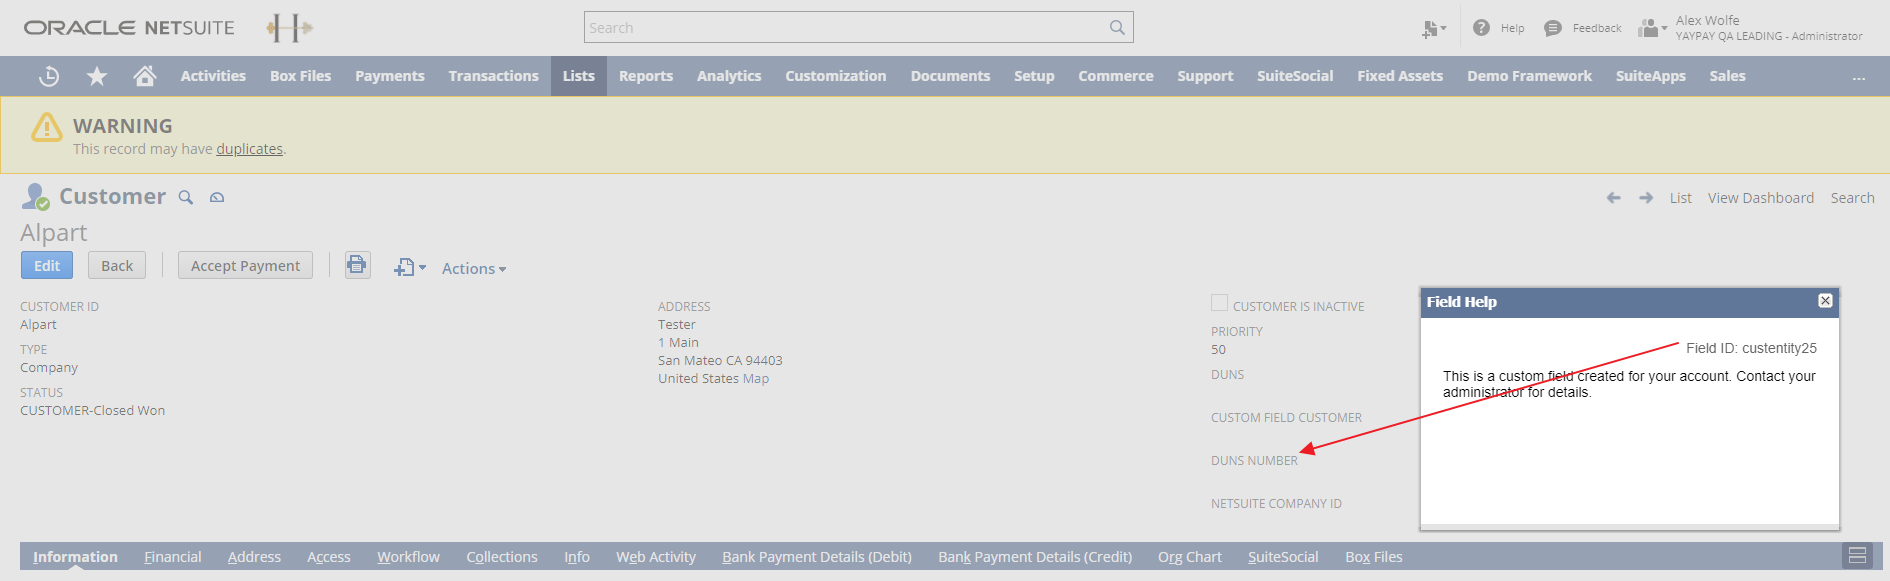
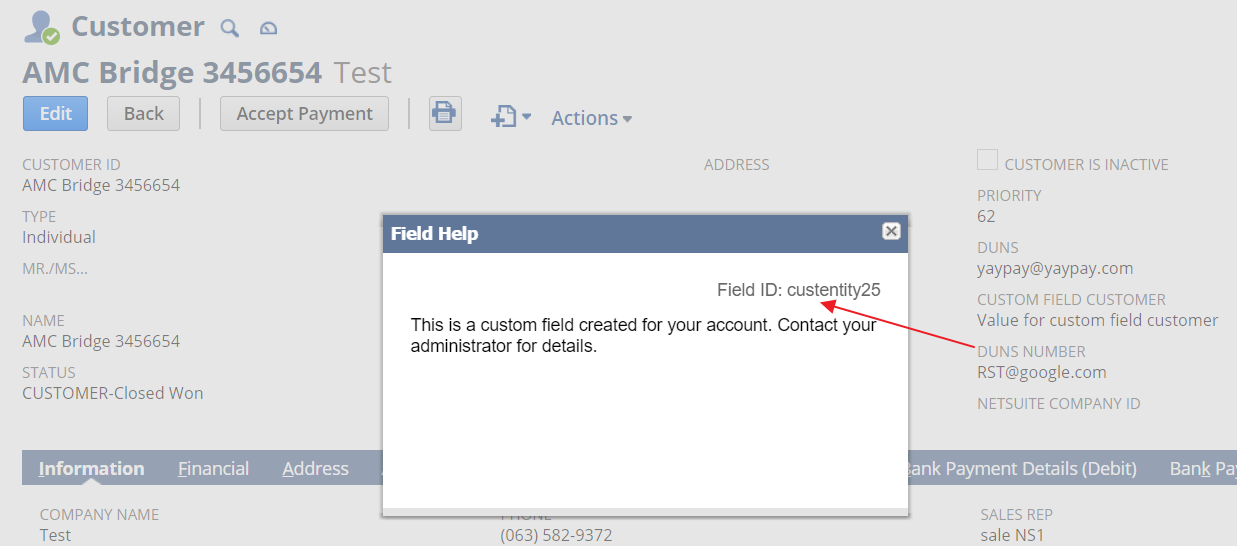
To find a custom field's Field ID, do one of the following:
- Click on the name of a custom field to display the Field Help pop-up. This will show the Field ID for that custom field:
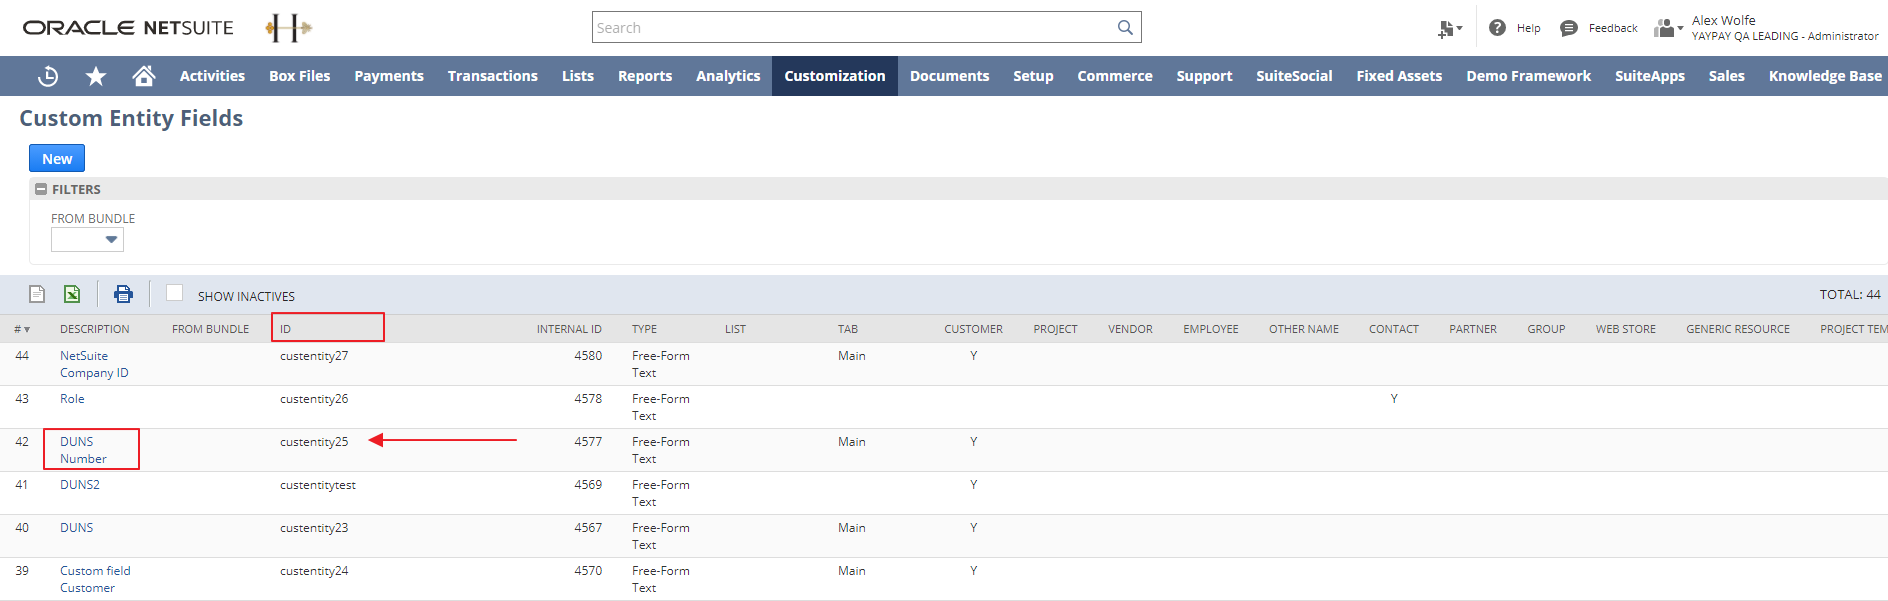
- Go to the Customization | Custom Entity Fields section in NetSuiteTM and note the custom field's ID in the ID column:
Once you have a NetSuiteTM custom field's Field ID, you can add that field to YayPay so it is synchronized during the next sync.
To add a custom field to YayPay:
Go to Settings | ERP/CRM Custom Fields.
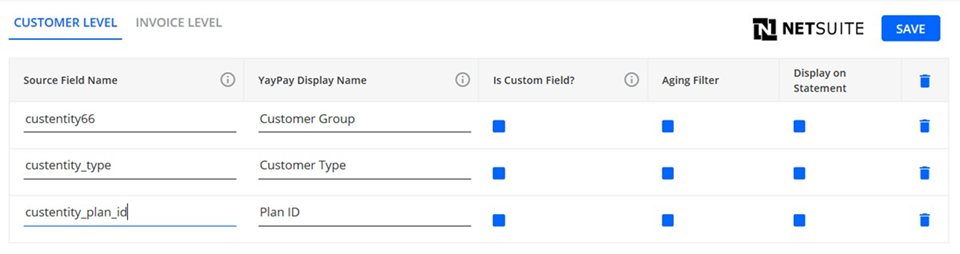
Go to the CUSTOMER LEVEL tab.
Enter the NetSuiteTM custom field's Field ID into Source Field Name, e.g.custentity_type.
The connector will also synchronize custom fields that are of List/Record or Multiple Select type in NetSuite. If a custom field has multiple values, the connector will synchronize and display these values separated by commas, ensuring that the data is accurately represented in YayPay.- Specify YayPay Display Name, i.e. how you would like the field from NetSuiteTM to be named in YayPay.
-
Check Is Custom Field? if this is a custom field created in NetSuiteTM.
However, if you want to synchronize a native NetSuiteTM field instead, leave the box unchecked.
Check Aging Filter to include a field and its respective value in the aging filter on the Aging Report page.
Check Display on Statement for the field to appear on the Statement page.
To add another custom field, click Add Field.
-
Click SAVE (in the top-right corner of the page) to confirm the settings.
As a result, during the next sync your custom field will be imported to YayPay.
Native Fields
To sync NetSuiteTM customer level native fields as customer level custom fields in YayPay:
Go to Settings | ERP/CRM Custom Fields.
Go to the CUSTOMER LEVEL tab.
- Enter the Source Field Name of a NetSuiteTM native field in Groovy script format:

The Groovy script format follows the customer.get{{APIFieldDName}}() pattern.See the Customer Level Native Fields and Their Corresponding Groovy Scripts section below for lists of all the supported native fields and their corresponding Groovy scripts.
- Specify the YayPay Display Name, i.e. how you would like the field from NetSuiteTM to be named in YayPay.

Leave Is Custom Field? unchecked.
Check Aging Filter to include a field and its respective value in the aging filter on the Aging Report page.
Check Display on Statement for the field to appear on the Statement page.
To add another custom field, click Add Field.
-
Click SAVE (in the top-right corner of the page) to confirm the settings.
As a result, during the next sync your custom field will be imported to YayPay.

Customer Level Native Fields and Their Corresponding Groovy Scripts
The following list contains all supported NetSuiteTM customer level native fields in Groovy script format. Use this format for the Source Field Name field when adding these native fields as customer-level custom fields in YayPay:
List of NetSuite native custom fields for Customers
customer.getAccountNumber()
customer.getBalance()
customer.getBillAddress()
customer.getBillAddress1()
customer.getBillAddress2()
customer.getBillCity()
customer.getBillCountry()
customer.getBillPhone()
customer.getBillState()
customer.getBillZipCode()
customer.getBooleanValue()
customer.getCategory()
customer.getCompanyName()
customer.getConsolBalance()
customer.getCreditLimit()
customer.getCurrency()
customer.getCurrencyRecordRef()
customer.getCustomFileds()
customer.getDoubleValue()
customer.getEmail()
customer.getEntityId()
customer.getEntityStatus()
customer.getEnumSelectValue()
customer.getExternalId()
customer.getFxBalance()
customer.getInternalId()
customer.getLanguage()
customer.getMobile()
customer.getOverdueBalance()
customer.getParent()
customer.getParentName()
customer.getParentRecordRef()
customer.getPhone()
customer.getReceivablesAccount()
customer.getSalesRepEmail()
customer.getSalesRepFirstName()
customer.getSalesRepId()
customer.getSalesRepIsInactive()
customer.getSalesRepLastName()
customer.getSalesRepMobile()
customer.getSalesRepPhone()
customer.getSelectValue()
customer.getStringValue()
customer.getStringValueFromArray()
customer.getSubsidiaryId()
customer.getTerms()
customer.getUrl()
customer.hashCode()
customer.getIsInactive()
customer.getIsPerson()
Synchronizing Invoice Level Fields
The connector can synchronize the following NetSuiteTM invoice level fields as YayPay invoice level custom fields:
Custom Fields
Before synchronizing NetSuiteTM invoice level custom fields with YayPay, identify them in NetSuiteTM and note their corresponding Field ID.
In NetSuiteTM, you can find custom fields in Customization | Lists, Records, & Fields:
If you need help identifying custom field names that you want to synchronize with YayPay, contact your NetSuiteTM administrator.
To find a custom field's Field ID, do one of the following:
- Click on the name of a custom field to display the Field Help pop-up. This will show the Field IDfor that custom field:

- Go to the Customization | Custom Entity Fields section in NetSuiteTM and note the custom field's ID in the IDcolumn:

Once you have a NetSuiteTM custom field's Field ID, you can add that field to YayPay so it is synchronized during the next sync.
To add a custom field to YayPay:
Go to Settings | ERP/CRM Custom Fields.
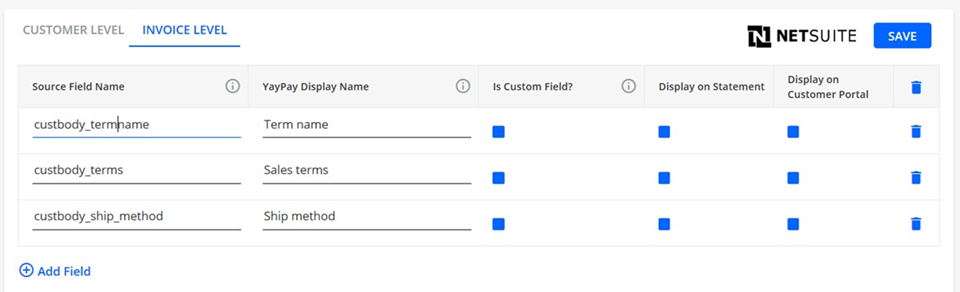
Go to the INVOICE LEVEL tab.
-
Enter the NetSuiteTM custom field's Field ID into Source Field Name, e.g.custentity_type.
Invoice-level ERP custom fields must be at the Invoice Header level (not Invoice Line Items).
The connector will also synchronize custom fields that are of List/Record or Multiple Select type in NetSuite. If a custom field has multiple values, the connector will synchronize and display these values separated by commas, ensuring that the data is accurately represented in YayPay. - Specify YayPay Display Name, i.e. how you would like the field from NetSuiteTM to be named in YayPay.
-
Check Is Custom Field? if this is a custom field created in NetSuiteTM.
However, if you want to synchronize a native NetSuiteTM field instead, leave the box unchecked.
Check Aging Filter to include a field and its respective value in the aging filter on the Aging Report page.
Check Display on Statement for the field to appear on the Statement page.
Check Display on Customer Portal for the field to appear on the Customer Portal web page.
To add another custom field, click Add Field.
-
Click SAVE (in the top-right corner of the page) to confirm the settings.
As a result, during the next sync your custom field will be imported to YayPay.
Native Fields
To sync NetSuiteTM invoice level native fields as customer level custom fields in YayPay:
Go to Settings | ERP/CRM Custom Fields.
Go to the INVOICE LEVEL tab.
- Enter the Source Field Nameof a NetSuiteTM native field in Groovy script format:

The Groovy script format follows the invoice.get{{APIFieldDName}}() pattern.
See the Invoice Level Native Fields and Their Corresponding Groovy Scripts section below for lists of all the supported native fields and their corresponding Groovy scripts.
- Specify the YayPay Display Name, i.e. how you would like the field from NetSuiteTM to be named in YayPay.

Leave Is Custom Field? unchecked.
Check Aging Filter to include a field and its respective value in the aging filter on the Aging Report page.
Check Display on Statement for the field to appear on the Statement page.
To add another custom field, click Add Field.
-
Click SAVE (in the top-right corner of the page) to confirm the settings.
As a result, during the next sync your custom field will be imported to YayPay.
Invoice Level Native Fields and Their Corresponding Groovy Scripts
The following list contains all supported NetSuiteTM invoice level native fields in Groovy script format. Use this format for the Source Field Name field when adding these native fields as invoice-level custom fields in YayPay:
Field ID
invoice.get_class()
invoice.getAccount()
invoice.getAccountingBookDetailList()
invoice.getAltHandlingCost()
invoice.getAltShippingCost()
invoice.getAmountPaid()
invoice.getAmountRemaining()
invoice.getApprovalStatus()
invoice.getBalance()
invoice.getBillAddressList()
invoice.getBillingAccount()
invoice.getBillingAddress()
invoice.getBillingSchedule()
invoice.getCanHaveStackable()
invoice.getContribPct()
invoice.getCreatedDate()
invoice.getCreatedFrom()
invoice.getCurrency()
invoice.getCurrencyName()
invoice.getCustomFieldList()
invoice.getDeferredRevenue()
invoice.getDepartment()
invoice.getDeserializer()
invoice.getDiscountAmount()
invoice.getDiscountDate()
invoice.getDiscountItem()
invoice.getDiscountRate()
invoice.getDiscountTotal()
invoice.getDueDate()
invoice.getEmail()
invoice.getEndDate()
invoice.getEntity()
invoice.getEntityTaxRegNum()
invoice.getEstGrossProfit()
invoice.getEstGrossProfitPercent()
invoice.getExchangeRate()
invoice.getExcludeCommission()
invoice.getExpCostDiscAmount()
invoice.getExpCostDiscount()
invoice.getExpCostDiscPrint()
invoice.getExpCostDiscRate()
invoice.getExpCostDiscTax1Amt()
invoice.getExpCostDiscTaxable()
invoice.getExpCostList()
invoice.getExpCostTaxCode()
invoice.getExpCostTaxRate1()
invoice.getExpCostTaxRate2()
invoice.getExternalId()
invoice.getFax()
invoice.getFob()
invoice.getGiftCertApplied()
invoice.getGiftCertRedemptionList()
invoice.getHandlingCost()
invoice.getHandlingTax1Rate()
invoice.getHandlingTax2Rate()
invoice.getHandlingTaxCode()
invoice.getInternalId()
invoice.getIsTaxable()
invoice.getItemCostDiscAmount()
invoice.getItemCostDiscount()
invoice.getItemCostDiscPrint()
invoice.getItemCostDiscRate()
invoice.getItemCostDiscTax1Amt()
invoice.getItemCostDiscTaxable()
invoice.getItemCostList()
invoice.getItemCostTaxCode()
invoice.getItemCostTaxRate1()
invoice.getItemCostTaxRate2()
invoice.getItemList()
invoice.getJob()
invoice.getLastModifiedDate()
invoice.getLeadSource()
invoice.getLinkedTrackingNumbers()
invoice.getLocation()
invoice.getMemo()
invoice.getMessage()
invoice.getMessageSel()
invoice.getNextApprover()
invoice.getNexus()
invoice.getOnCreditHold()
invoice.getOpportunity()
invoice.getOtherRefNum()
invoice.getPartner()
invoice.getPartnersList()
invoice.getPostingPeriod()
invoice.getPromoCode()
invoice.getPromotionsList()
invoice.getRecognizedRevenue()
invoice.getRecurringBill()
invoice.getRevenueStatus()
invoice.getRevRecEndDate()
invoice.getRevRecOnRevCommitment()
invoice.getRevRecSchedule()
invoice.getRevRecStartDate()
invoice.getSalesEffectiveDate()
invoice.getSalesGroup()
invoice.getSalesRep()
invoice.getSalesTeamList()
invoice.getSerializer()
invoice.getShipAddressList()
invoice.getShipDate()
invoice.getShipGroupList()
invoice.getShipIsResidential()
invoice.getShipMethod()
invoice.getShippingAddress()
invoice.getShippingCost()
invoice.getShippingTax1Rate()
invoice.getShippingTax2Rate()
invoice.getShippingTaxCode()
invoice.getSource()
invoice.getStartDate()
invoice.getStatus()
invoice.getSubsidiary()
invoice.getSubsidiaryTaxRegNum()
invoice.getSubTotal()
invoice.getSyncPartnerTeams()
invoice.getSyncSalesTeams()
invoice.getTax2Total()
invoice.getTaxDetailsList()
invoice.getTaxDetailsOverride()
invoice.getTaxItem()
invoice.getTaxPointDate()
invoice.getTaxRate()
invoice.getTaxRegOverride()
invoice.getTaxTotal()
invoice.getTerms()
invoice.getTimeDiscAmount()
invoice.getTimeDiscount()
invoice.getTimeDiscPrint()
invoice.getTimeDiscRate()
invoice.getTimeDiscTax1Amt()
invoice.getTimeDiscTaxable()
invoice.getTimeList()
invoice.getTimeTaxCode()
invoice.getTimeTaxRate1()
invoice.getTimeTaxRate2()
invoice.getToBeEmailed()
invoice.getToBeFaxed()
invoice.getToBePrinted()
invoice.getTotal()
invoice.getTotalCostEstimate()
invoice.getTrackingNumbers()
invoice.getTranDate()
invoice.getTranId()
invoice.getTranIsVsoeBundle()
invoice.getTypeDesc()
invoice.getVatRegNum()
invoice.getVsoeAutoCalc()
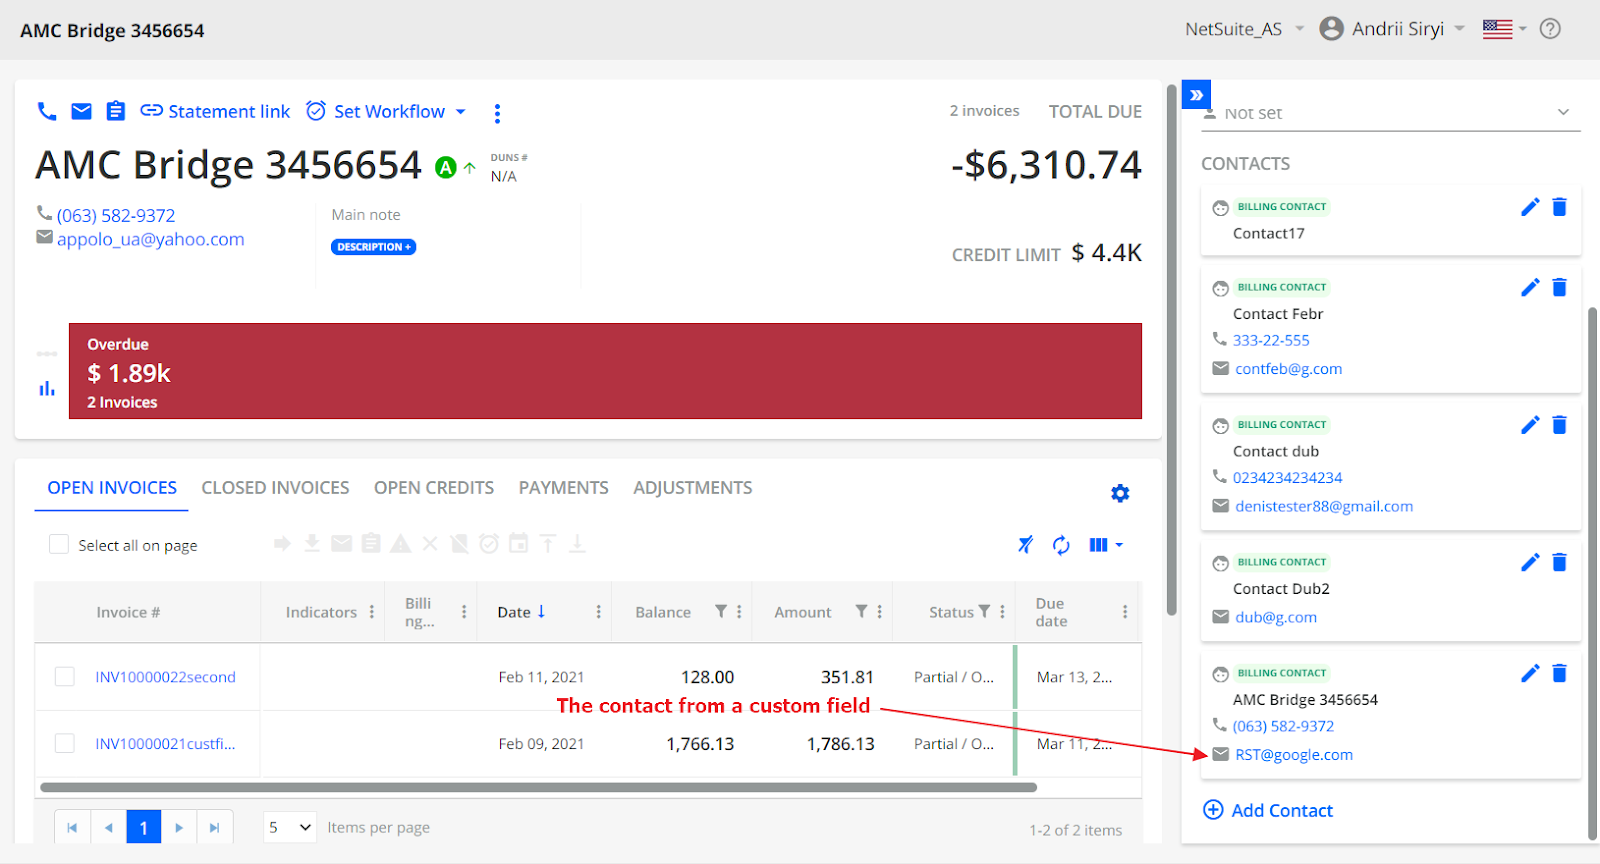
Pulling the Customer Level Billing Contact from NetSuite
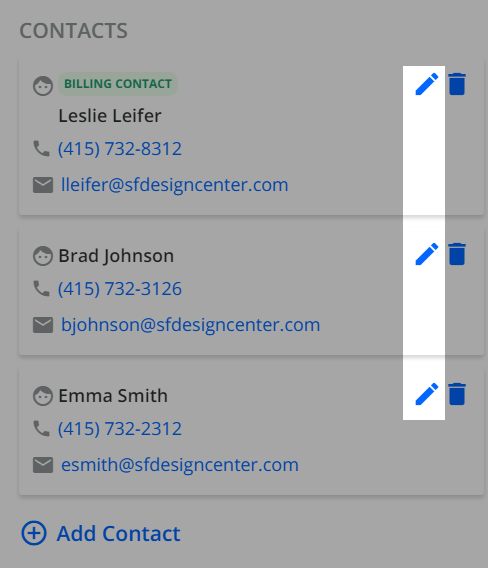
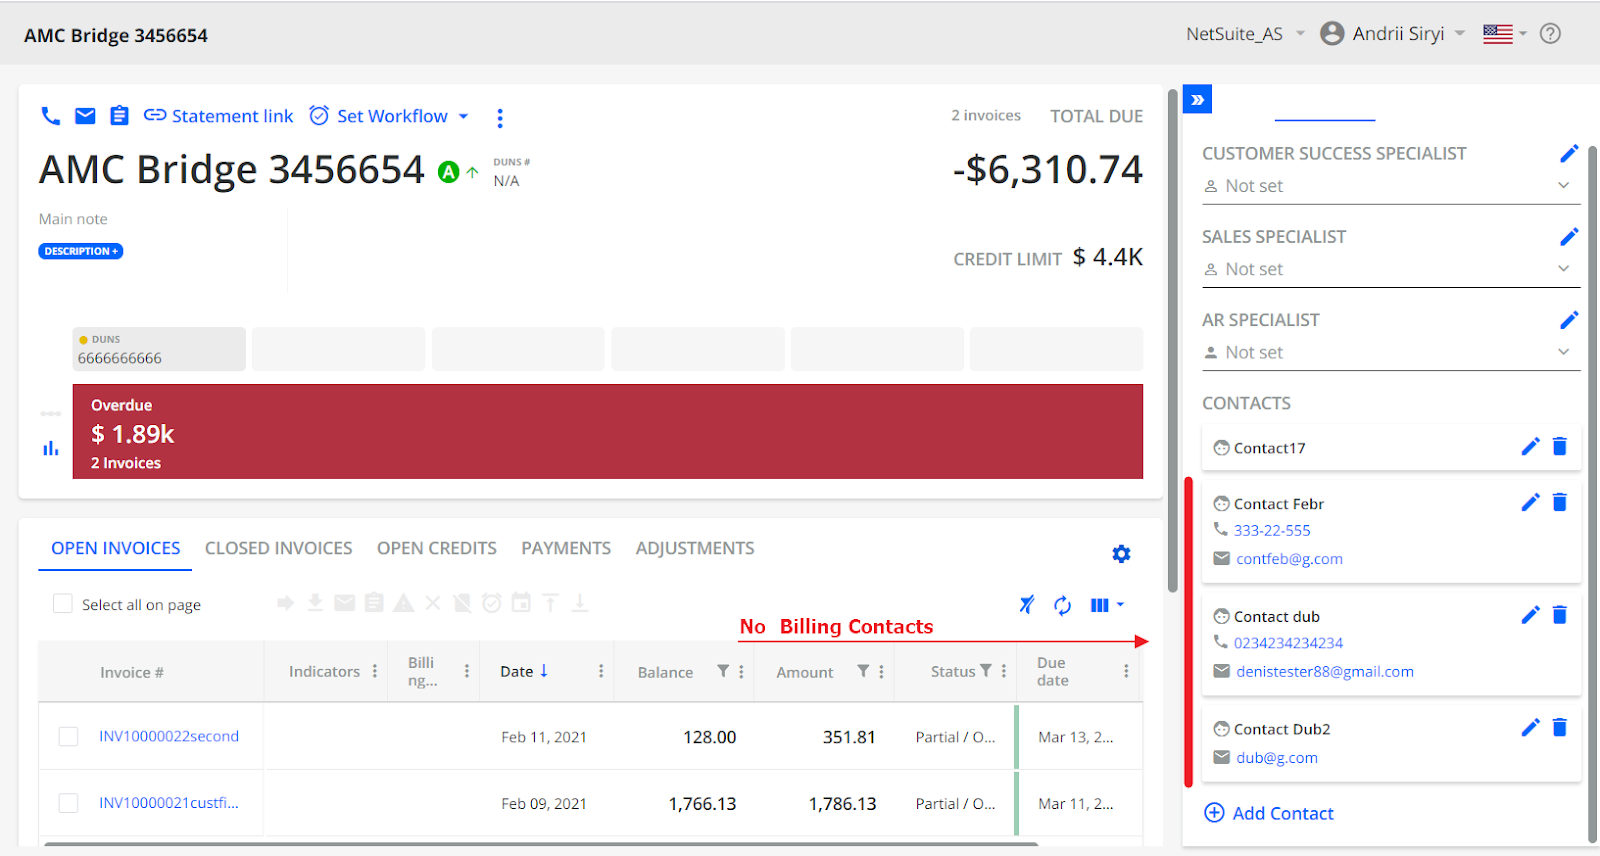
Customer-level contacts are those that are found under the CONTACTS section of the Statement page.

One or more Contact records for each customer should be designated as a Billing Contact. When a collection workflow is set up in YayPay, the recipients of the reminders are specified by type, and Billing Contacts are essential to this workflow.
Customer-level contacts can be both labeled as Billing contact (with a green label) or non-Billing contacts (those without the label in green). Any number of contacts can be Billing or non-Billing. The user can change the status of contact by editing it.
These Customer-level contacts in YayPay are typically synced through the AR integration with the Customer ERP or can be imported via CSV files and/or pushed into YayPay via API.
Scenario #1 - Standard Email maintained in NetSuite - “Auto-create billing contact" checkbox
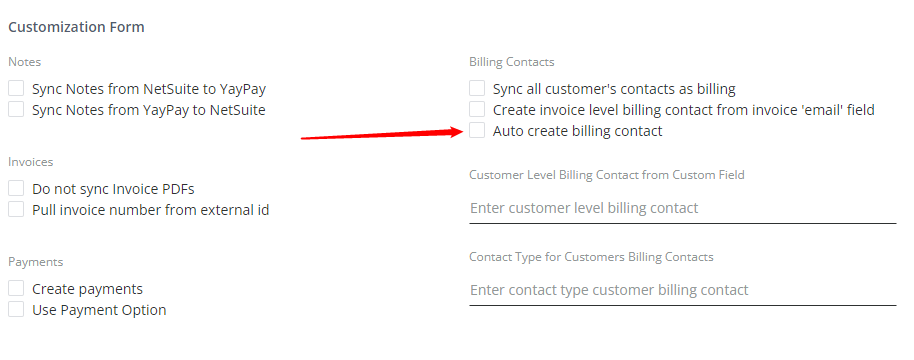
To bring over the standard email address maintained for the customer in NetSuite, check the "Auto-create billing contact" checkbox. This is found in the Settings > Integrations page of YayPay.
The customer's email address will be synced into YayPay, and the Company name is used as the 'First Name' of the contact (the Last Name will be left blank). This contact in YayPay will also be marked as the Billing Contact.
If the "Auto-create billing contact" checkbox is not checked.
The sync result:

If the "Auto-create billing contact" checkbox is checked.
The sync result:
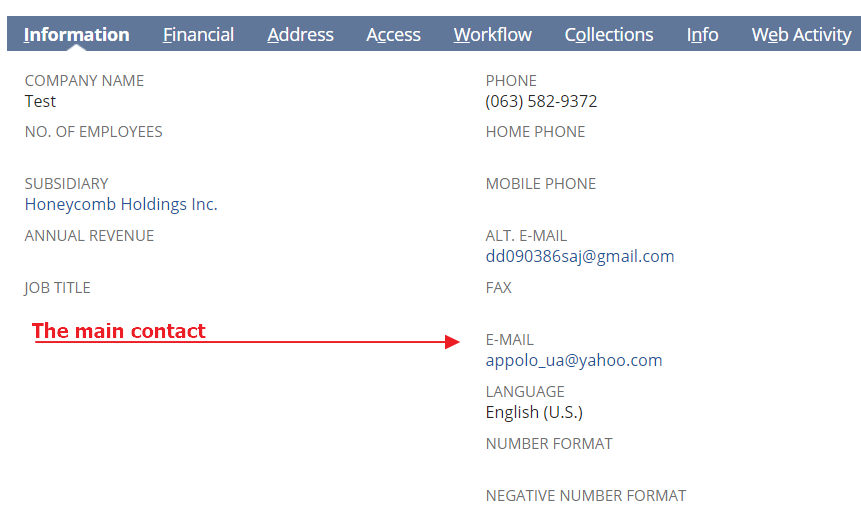
Scenario #2 - Contacts maintained under Relationships in NetSuite - “Sync all contacts as billing” checkbox

The user can also bring over one or more contacts that he/she maintains under the Customer record in NetSuite. These contact(s) are listed in the Relationships tab in NetSuite: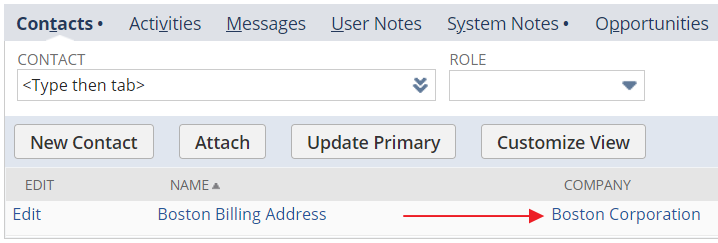
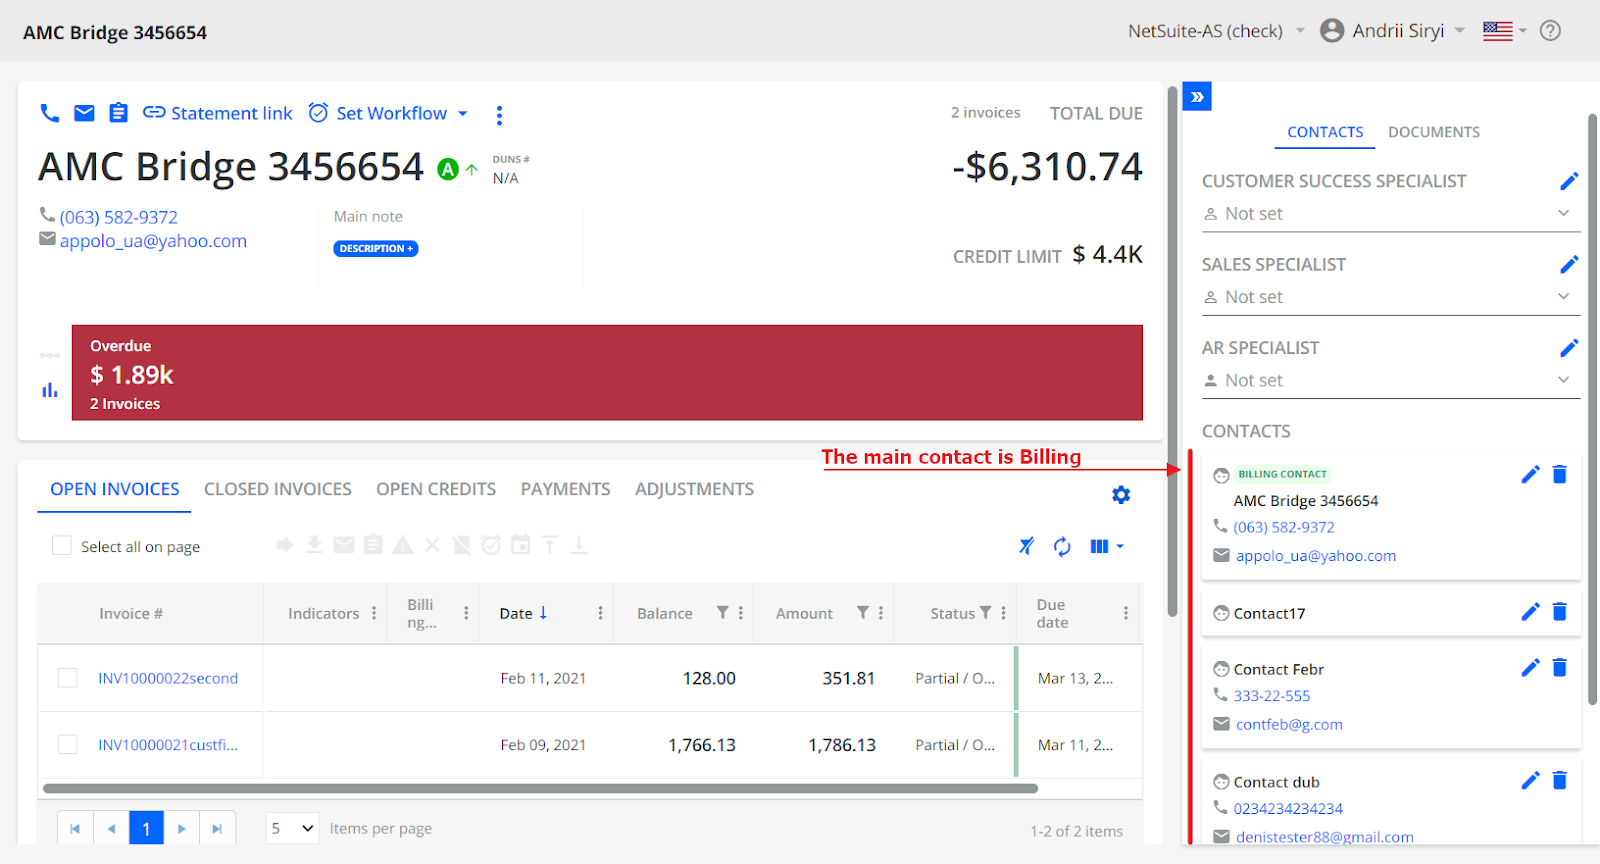
By default, all these contacts maintained under the Customer in NetSuite will be synced and brought over to YayPay, but they will not be marked as ‘Billing Contacts'.
The exception will be the contact record in NetSuite labeled with Primary Contact Role. This record will be created and labeled as a "Billing Contact" in YayPay.
If the "Sync all contacts as billing" checkbox is not checked.
The sync result:
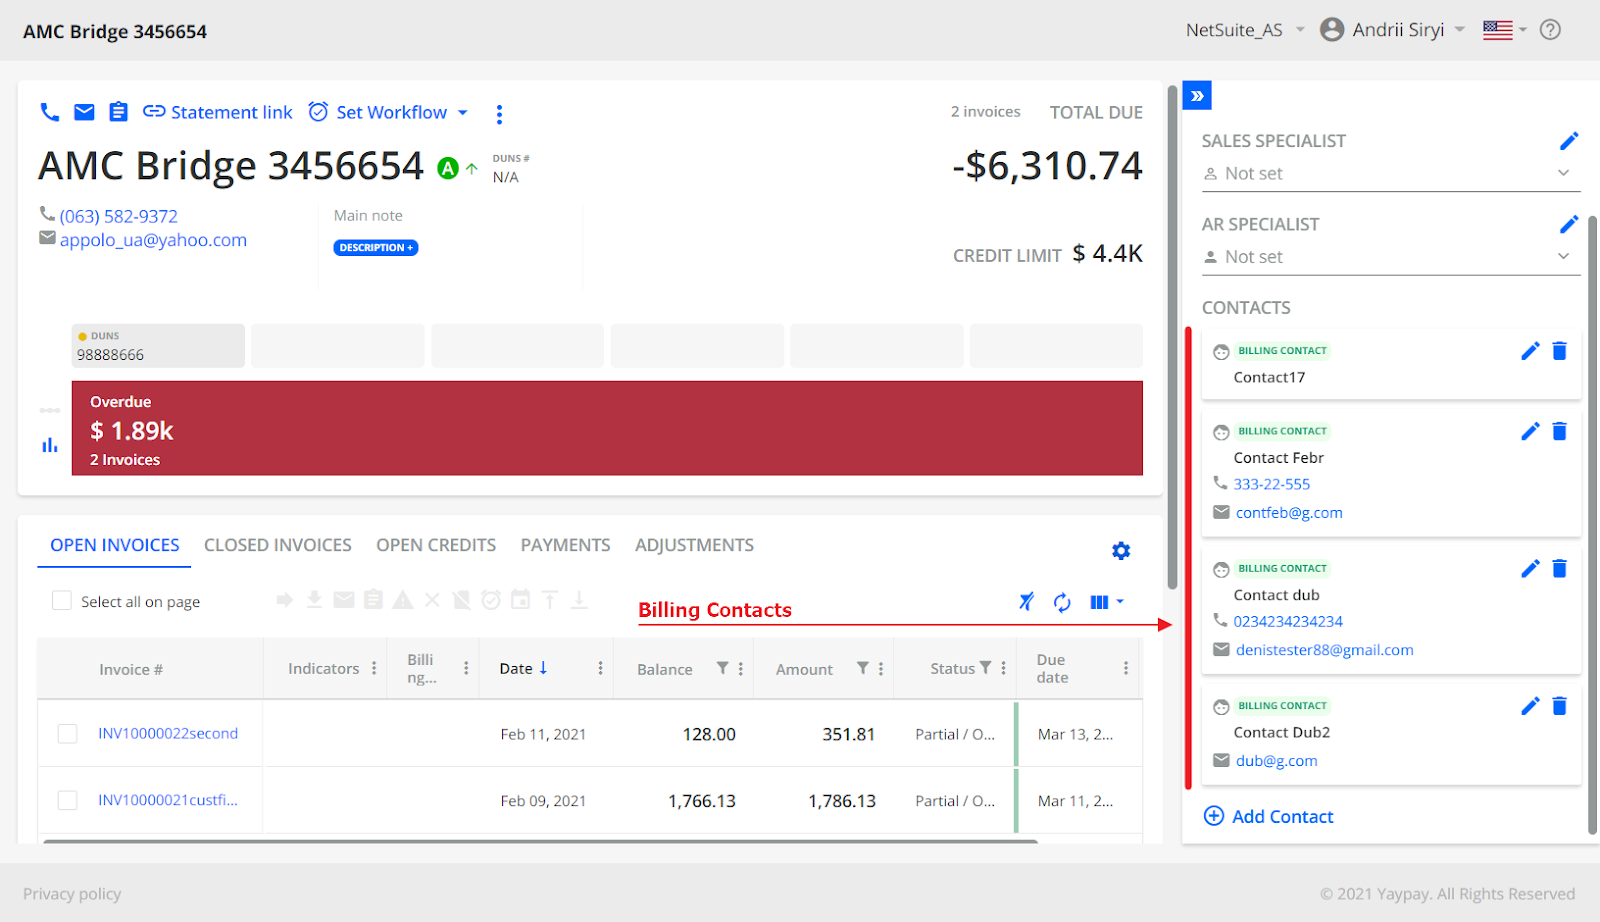
If the "Sync all contacts as billing" checkbox is checked.
The sync result:
Note: if after the sync process the contact (-s) is not billing, you should update contact (-s) in NetSuite, and start the sync process once again.
Scenario #3 - Clarifying the contact type - ‘Contact type for customer billing contact’ text field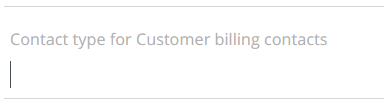
The primary contact Role is not the only one that can be used for the record. In the NetSuite Role dropdown you can choose any role you want to use:
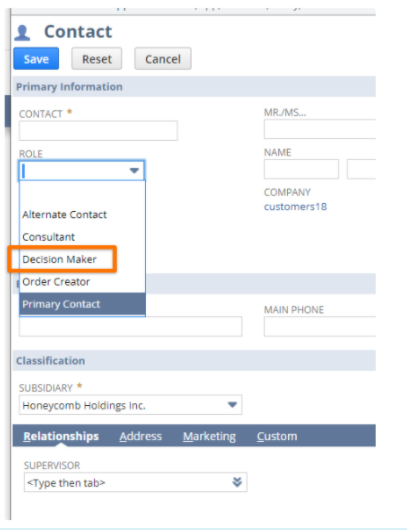
In YayPay Settings > Integrations > NetSuite, edit please type in the role type chosen in NetSuite.
! Pay attention, if you want to specify the role, you should not check the Customer contacts as billing checkbox.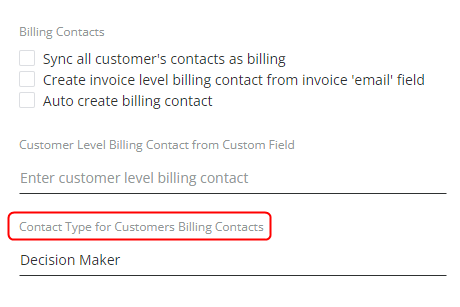
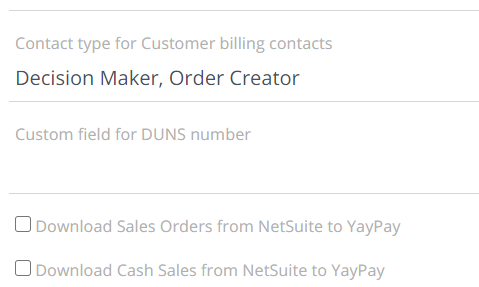
Also, you can specify a few roles and separate them by a comma.
In NetSuite you have the following contacts:

In the connector, you specified that you want to make the following role as billing contacts:
 After the sync process, you see the following:

BS_2020 is not billing, because the contact has a role ‘Consultant'. This role is not specified via the connector.
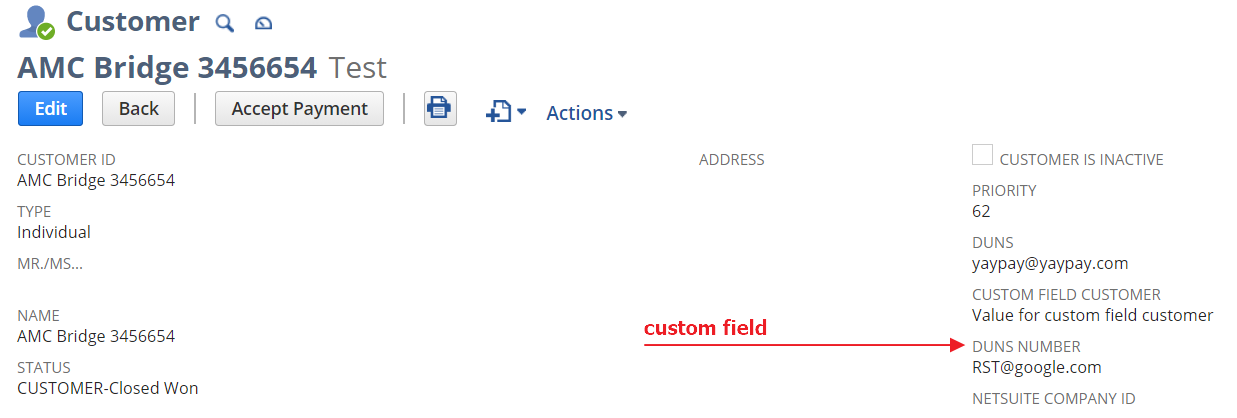
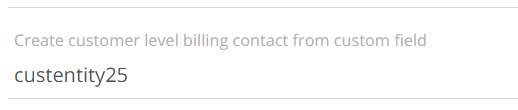
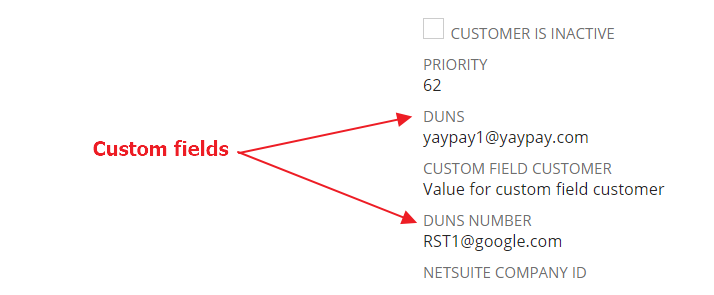
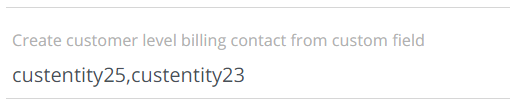
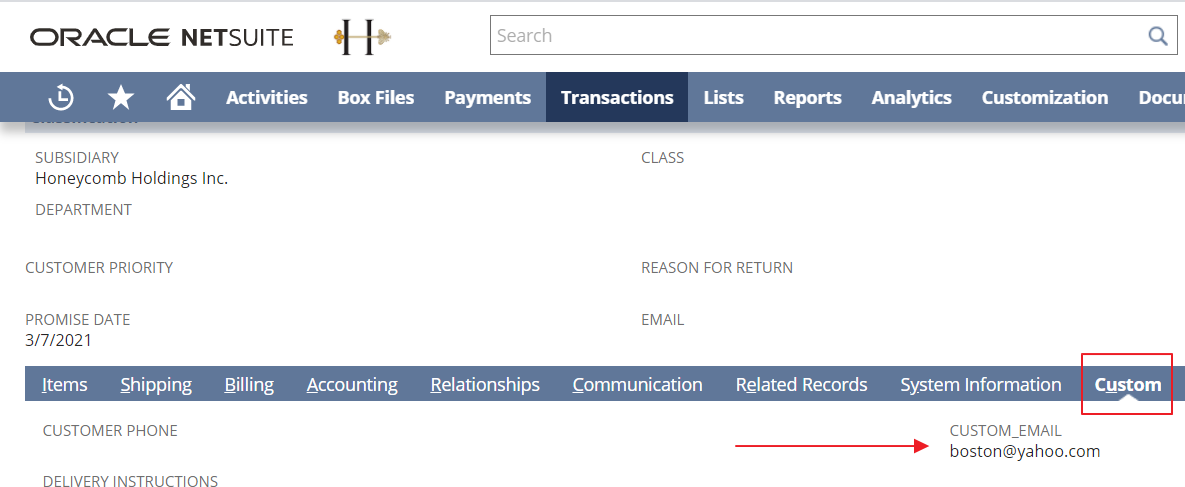
Scenario #4 - Receiving the customer contact as billing from the custom field - “Create customer level billing contact from custom field” text field
This custom field could be how the Netsuite Administrator has created the custom field for the customer, in order to record one or multiple email addresses.
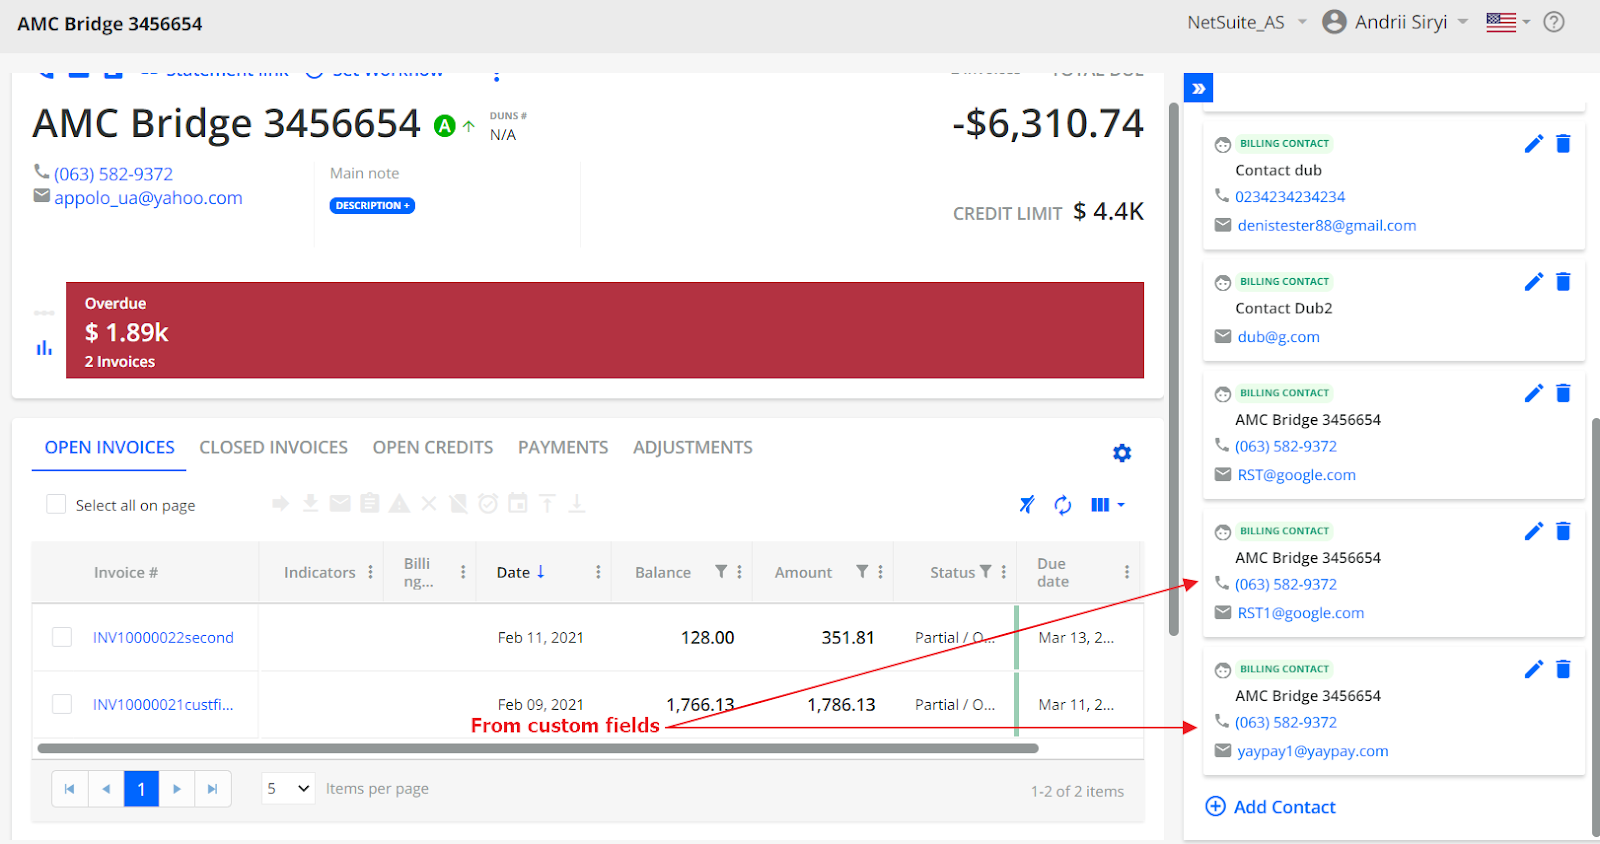
In addition to the standard customer email field, if you use 1 or multiple custom fields in NetSuite to capture multiple email addresses, you can also configure YayPay to create multiple Billing Contacts from the custom field(s).
The sync with NetSuite will:
Create a Billing Contact in YayPay from each NetSuite custom field (if there are 3 custom fields, there would be 3 Billing Contacts in YayPay)
Each Billing Contact's email address in YayPay will contain the email address maintained in NetSuite
If you have one NetSuite custom field that has multiple, comma-separated email addresses, then 1 billing contact will be created in YayPay where the email field of the contact will contain multiple email addresses also
Removing the Invoice Level Billing Contacts in YayPay
1. The user opens an Invoice and removes the Invoice Billing Contact.

2. Once the user removes the Invoice Billing Contact, the Invoice has the following view:

3. When the user removes the Invoice Billing Contact from some specific invoice using UI - all the data and relations will be not changed in the database. The only change that will be applied - a particular contact record will be marked as removed in the customer_person table.
4. All next sync iterations related to the changed invoice will not show removed Invoice Billing Contact in the UI after sync because all the data and mappings still exist.
5. Once the user updates the Invoice Billing Contact on the ERP side - after the next sync, the contact becomes active (not as removed), and YayPay depicts the Invoice Billing Contact once again.


Pulling the Invoice Level Billing Contact from NetSuite
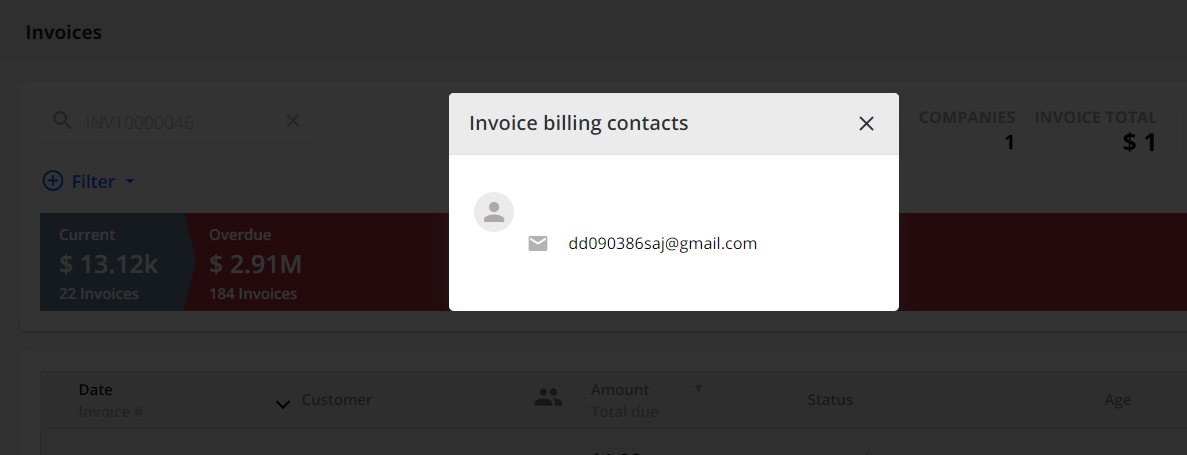
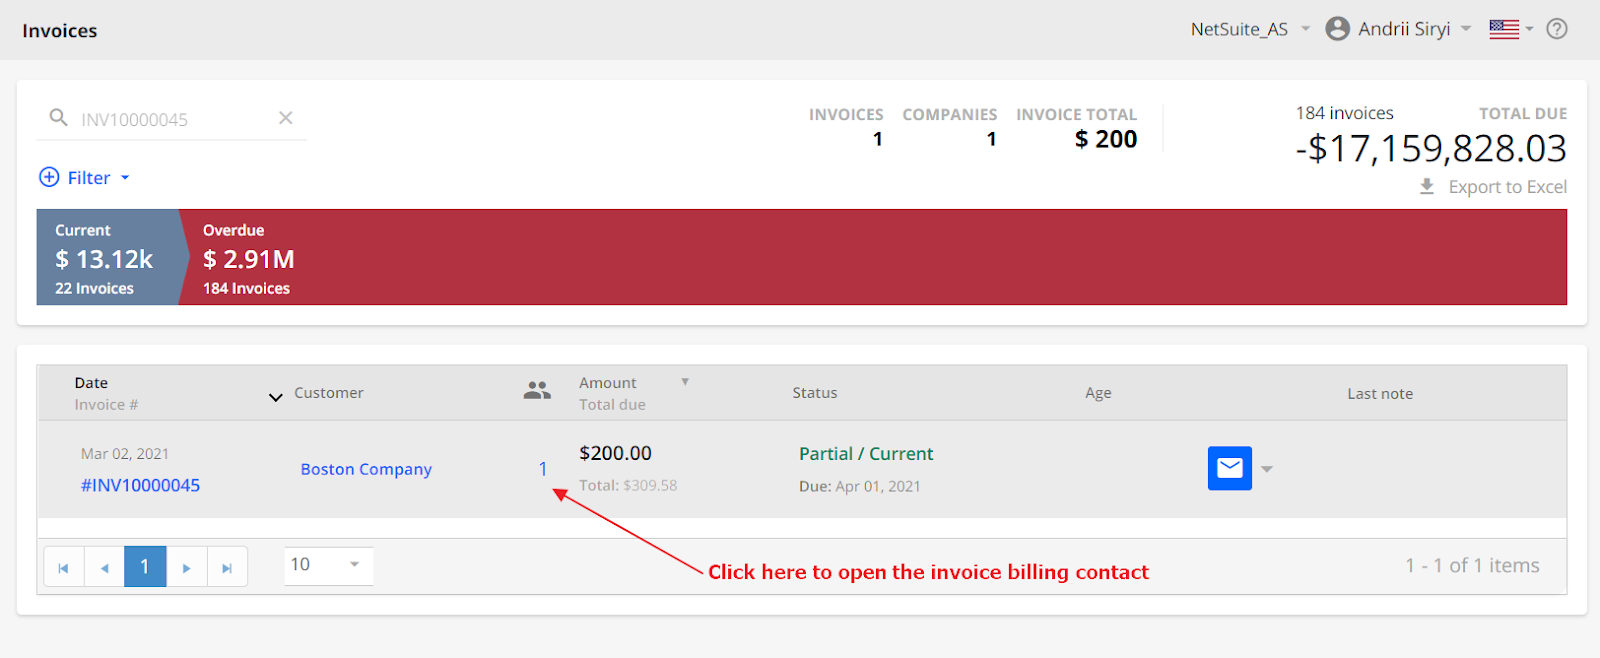
Invoice-level contacts are denoted by a Face icon shown next to each Invoice.

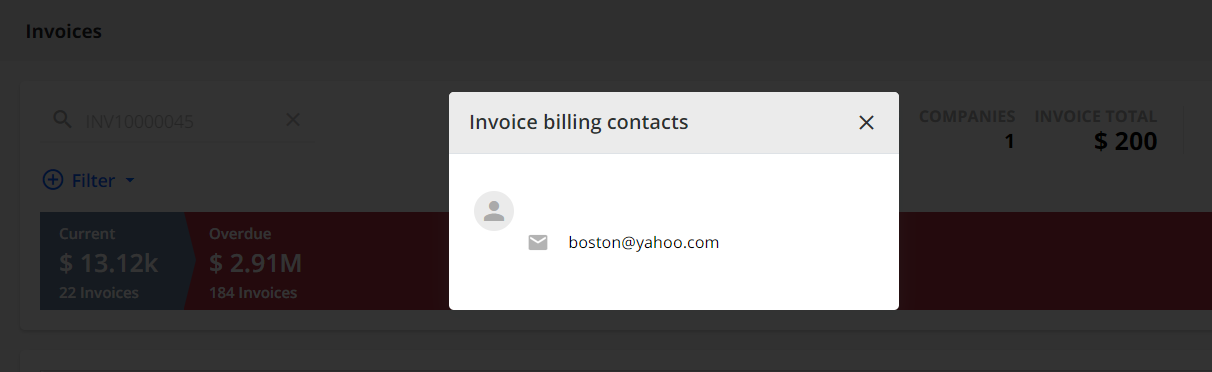
Click on the icon to see the email address of the Invoice-level contact.

Invoice-level billing contacts can be the same for every invoice, or different, depending on how the ERP is set up. If the user does not see a Face icon, it means YayPay did not receive an invoice level contact for that Invoice from the ERP. These Invoice-level contacts in YayPay are typically synced through the AR integration with the Customer ERP or can be imported via CSV files and/or pushed into YayPay via API.
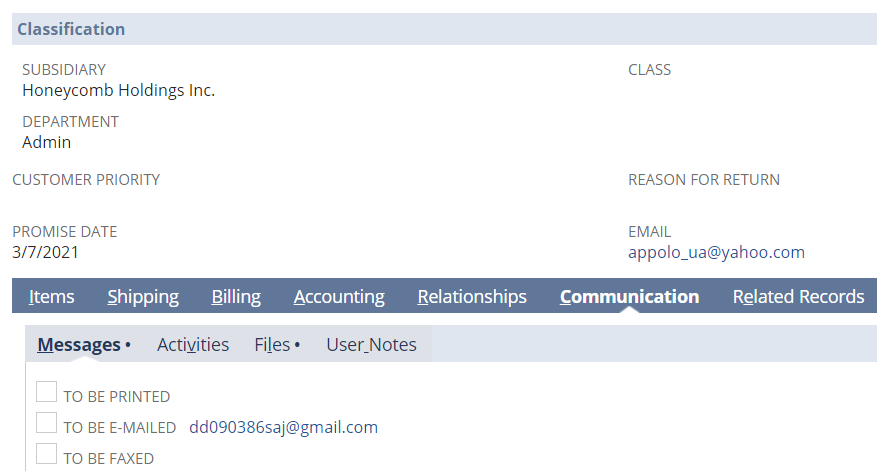
Scenario №1 - Invoice Contact stored in Native 'To Be E-mailed' field - Create invoice level billing contact from invoice 'email' field checkbox
The user can maintain one or multiple email addresses in the To Be E-mailed field for an Invoice record in NetSuite. The user can bring the email address(es) over to YayPay as an Invoice level billing contact.
In YayPay:
In YayPay, go to Settings > Integration page and locate the NetSuite panel. Click on "EDIT" to expand the panel.
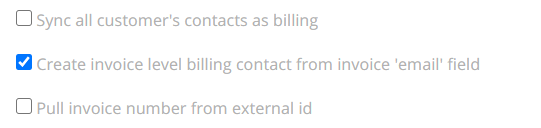
Check the box "Create invoice level billing contact from invoice 'email' field" and Save your changes.
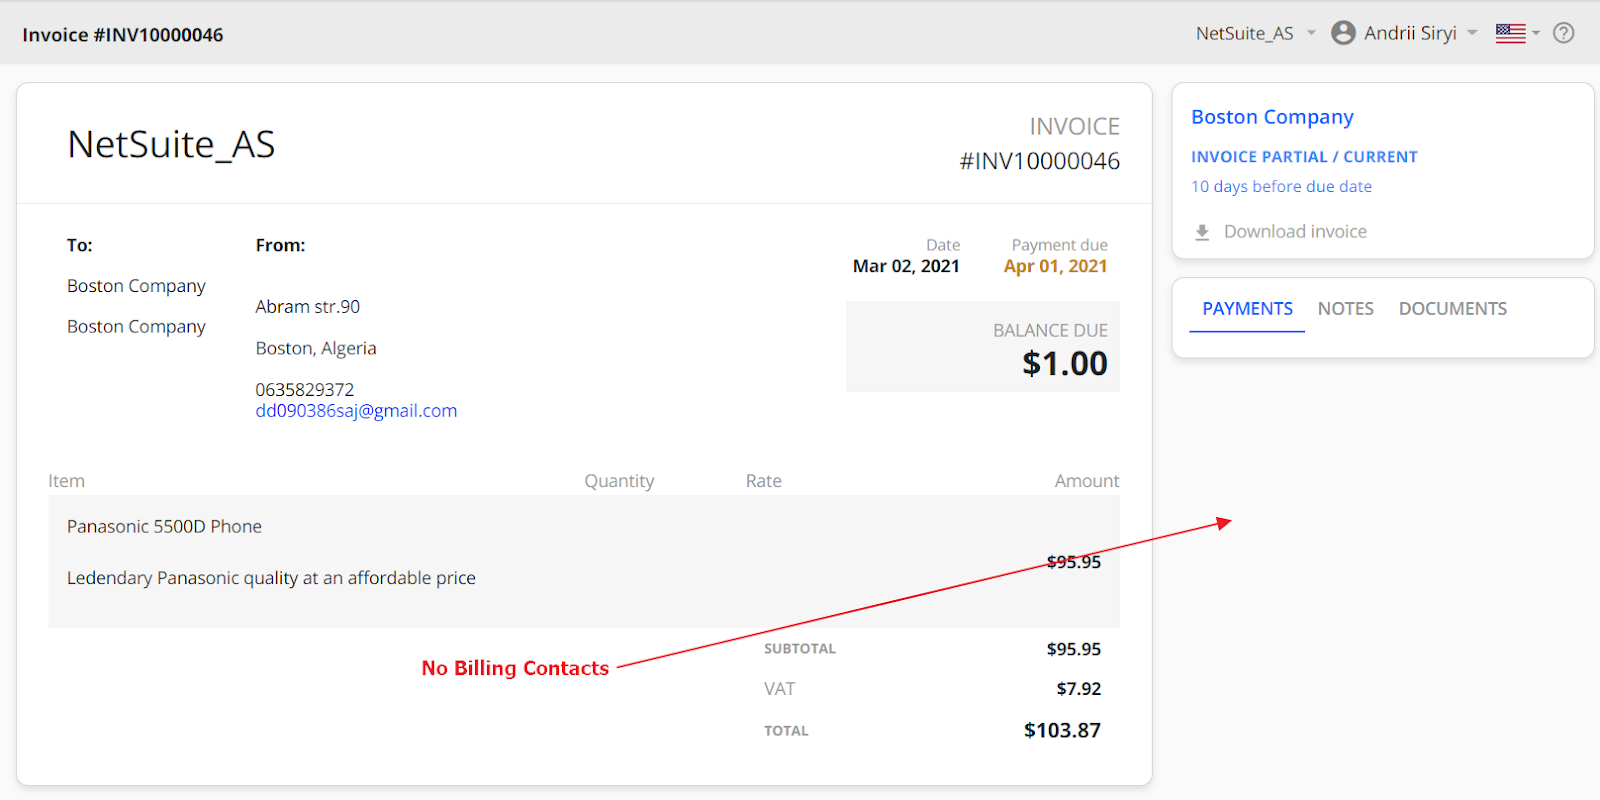
If the "Create invoice level billing contact from invoice 'email' field" checkbox is not checked.
The sync result:
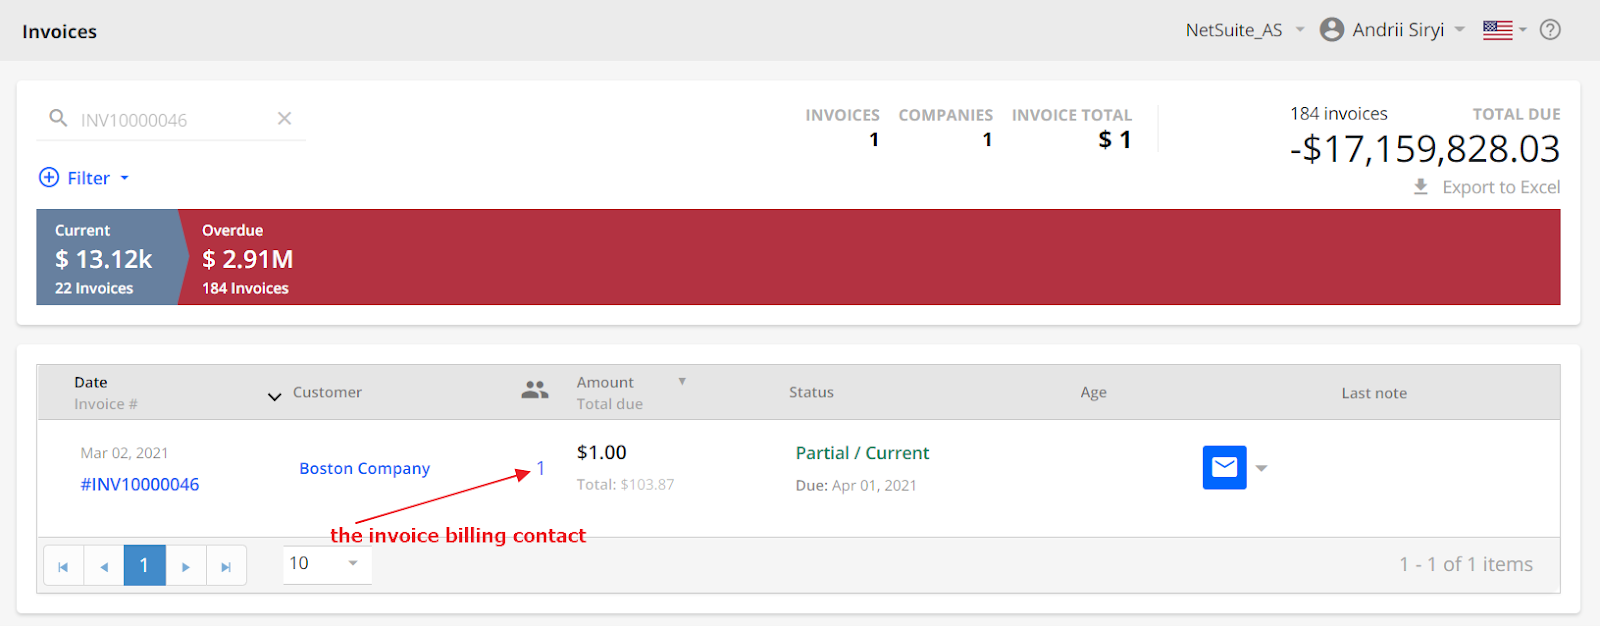
If the "Create invoice level billing contact from invoice 'email' field" checkbox is checked.
The sync result:
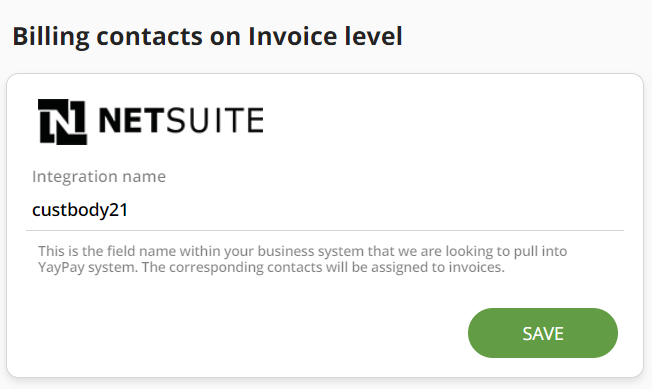
Scenario #2 - Invoice Contact from a Custom Field in NetSuite - Billing contacts on Invoice Level from custom field
If the user maintains an Invoice-level billing contact's email addresses using a custom field in NetSuite (that is either Free Text or List/Record Type), the user can bring the email address over to create it in YayPay as an Invoice level billing contact.
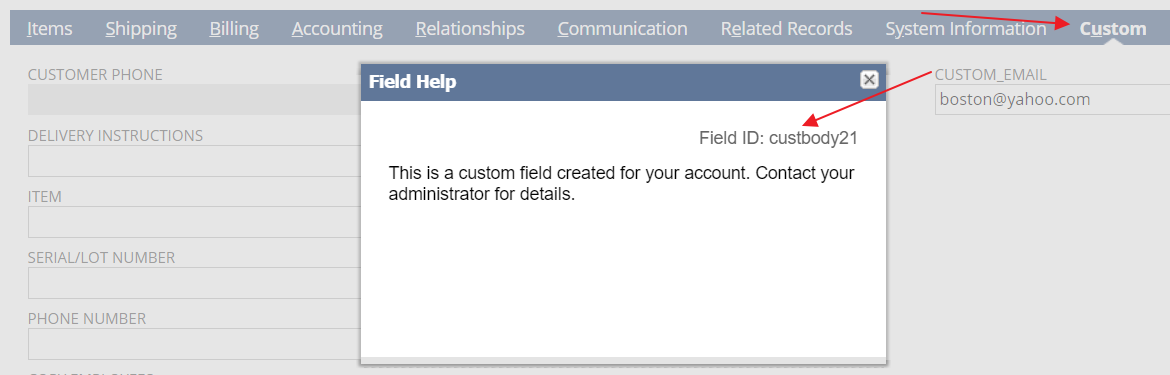
Locate this custom field on the Invoice page in NetSuite. Click on the field name to find out the Field ID name, or with the help of your NetSuite Administrator, you do the same via the NetSuite menu path: Customization > Lists, Records & Fields menu > Transaction Body Fields
In YayPay:
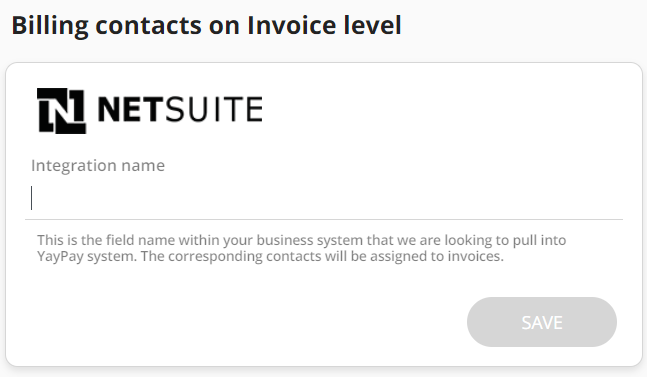
Enter the NetSuite custom field name in this panel found in the Settings > Business page of YayPay and save your changes:
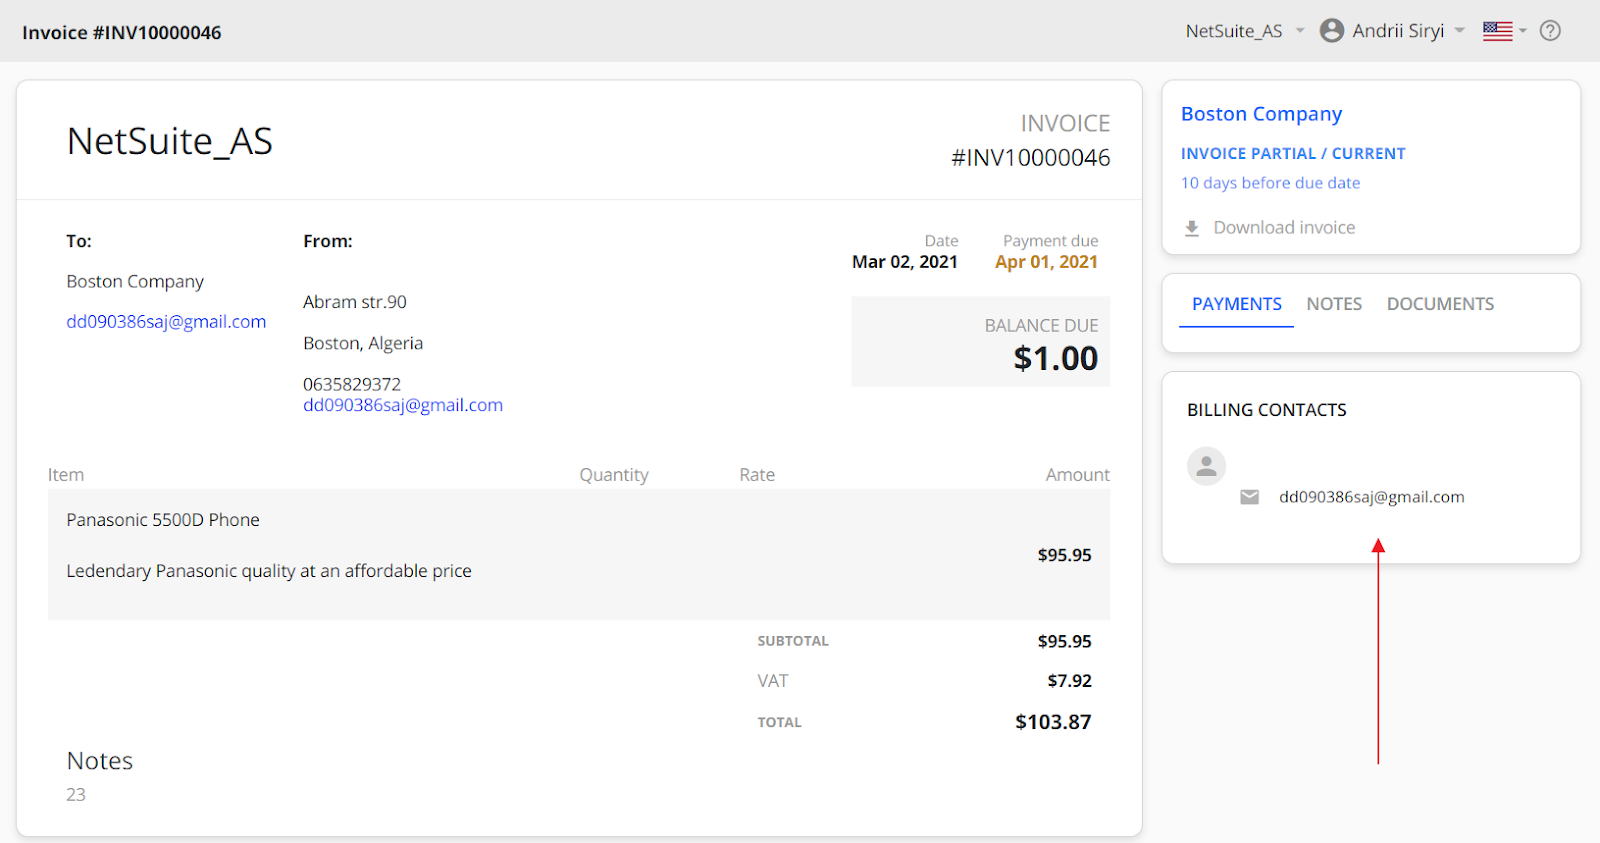
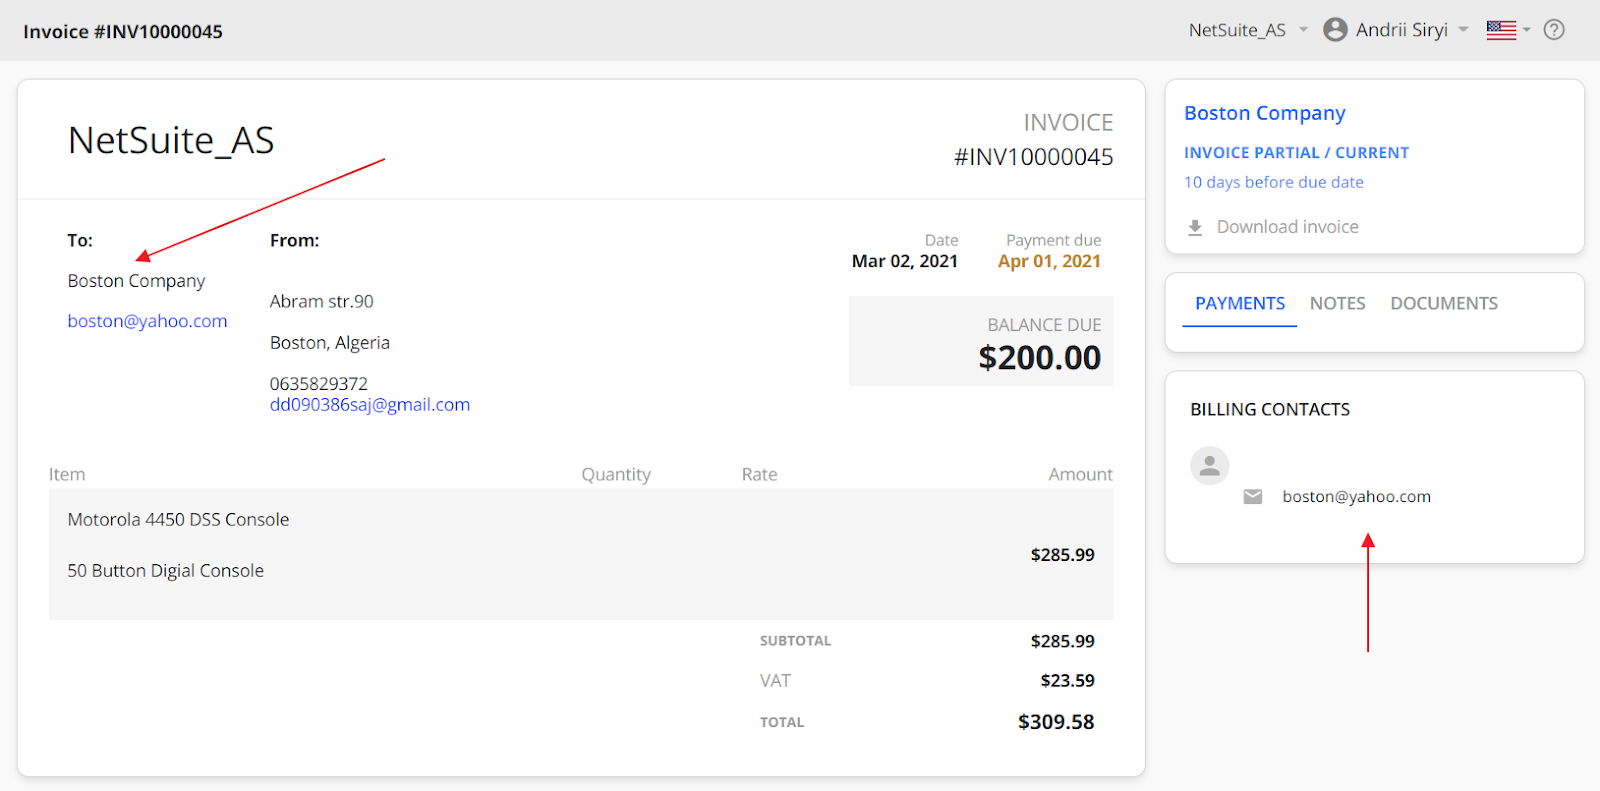
In both scenarios illustrated above, the sync will now be directed to bring over and create the Invoice level billing contact in YayPay, which can be found next to the Invoice Number, e.g.:


Depending on how the user wants to organize and maintain his/her Customer and Contact data in the ERP, the user may need to use the concept of an Invoice-level contact, e.g. a good test would be to review the internal operations to see if a new bill/Invoice is issued to a contact that is different to the main Customer billing contact. In such situations, the contact for the Invoice can also differ from Invoice to Invoice, within the same Customer for example.
This is termed as an Invoice-level billing contact in YayPay which should be mapped to the Customer ERP Invoices/contacts. The implication of not receiving such information in YayPay is that the Collection Workflows will not be able to successfully send Email Reminders to these "Invoice-level billing contact" (enabled under Workflow Settings or Global Rules respectively).
Syncing a NetSuite Invoice Contact from a Custom Record
This section describes how to sync an invoice billing contact from a Custom Record created within an Invoice-Level Custom Field in NetSuite.
To sync such a contact from a NetSuite Custom Record, use the following pattern for referencing it throughout YayPay:
{invoice_customfield_id}.{customrecord_with_email_id}.RecordRef
- {invoice_customfield_id} - References the ID of the Invoice-Level Custom Field created in NetSuite.
- {customrecord_with_email_id} - References the ID of the Custom Record field from the Custom Record that contains the invoice contacts that you want to sync.
- RecordRef - References the API method that YayPay's NetSuite connector will use to receive the field designated by the {customrecord_with_email_id} the property.
Utilize that pattern in the following YayPay features to sync the invoice contact from the Custom Record field:
-
Settings | ERP/CRM Custom Fields - Sync invoice contacts as custom values to be available as ERP/CRM custom fields in YayPay.
For example:
-
Settings | Business | Billing contacts on Invoice level - Sync invoice contacts as billing contacts that will automatically be assigned to invoices.
For example: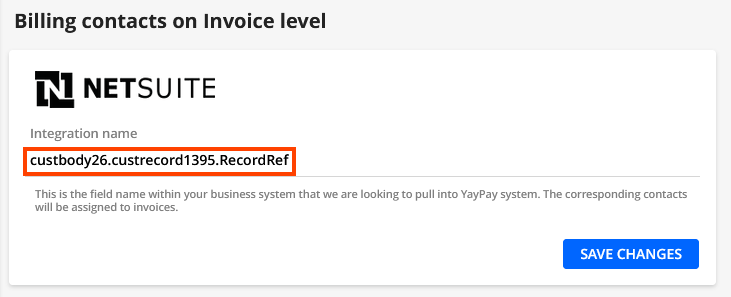
Outcomes of Syncing a NetSuite Invoice Contact from a Custom Record
- Here is an outcome example of syncing a NetSuite Custom Record as an ERP Custom Field in YayPay:
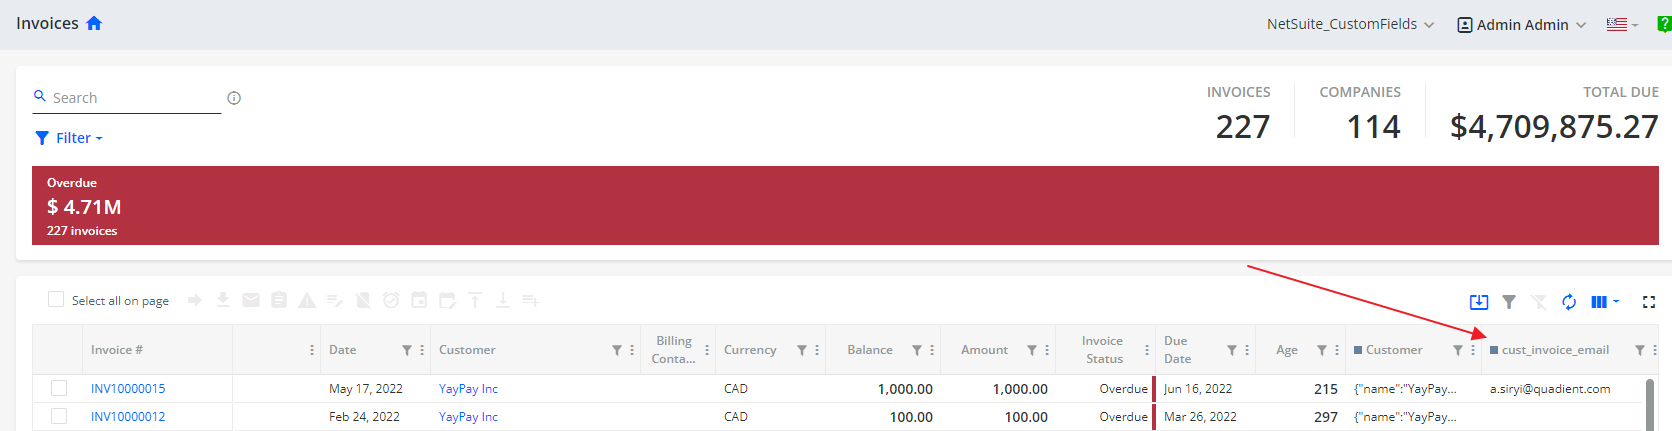
- Here is an outcome example of syncing a NetSuite Custom Record to create an Invoice-Level billing contact in YayPay:
Permissions
If you use the correct pattern for referencing a Custom Record but the Connector does not have the permission to sync Invoice Contacts from that Custom Record, NetSuite returns the following error message:
Permission Violation: You need higher permission for custom record type <name> to access this page. Please contact your account administrator.
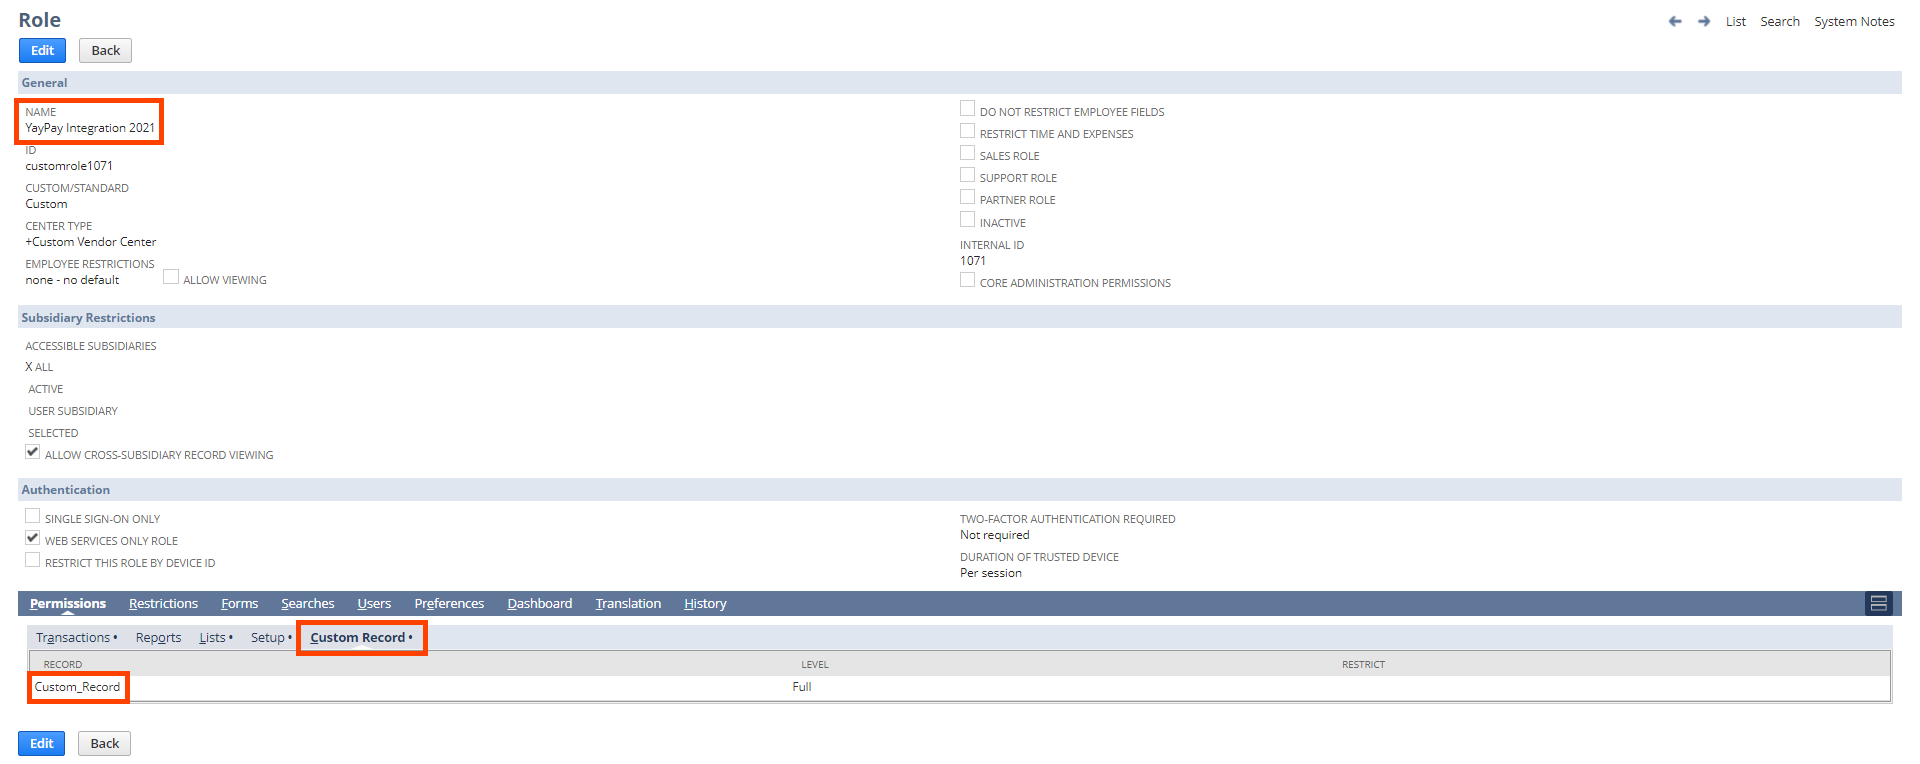
To sync an Invoice Contact from a Custom Record, you must grant specific access to the API role that the Connector uses:
- Go to Setup | User/Roles | Manage Roles in NetSuite.
- Open the API role that the Connector uses for the integration.
- Add the name of the given Custom Record to the Custom Record tab.
 Creating a Custom Record in NetSuite
This section describes how to create a Custom Record in NetSuite for the purpose of syncing it to YayPay:
- Create a Custom Record:
- Go to Customization | Lists, Records & Fields | Record Types and click on New.
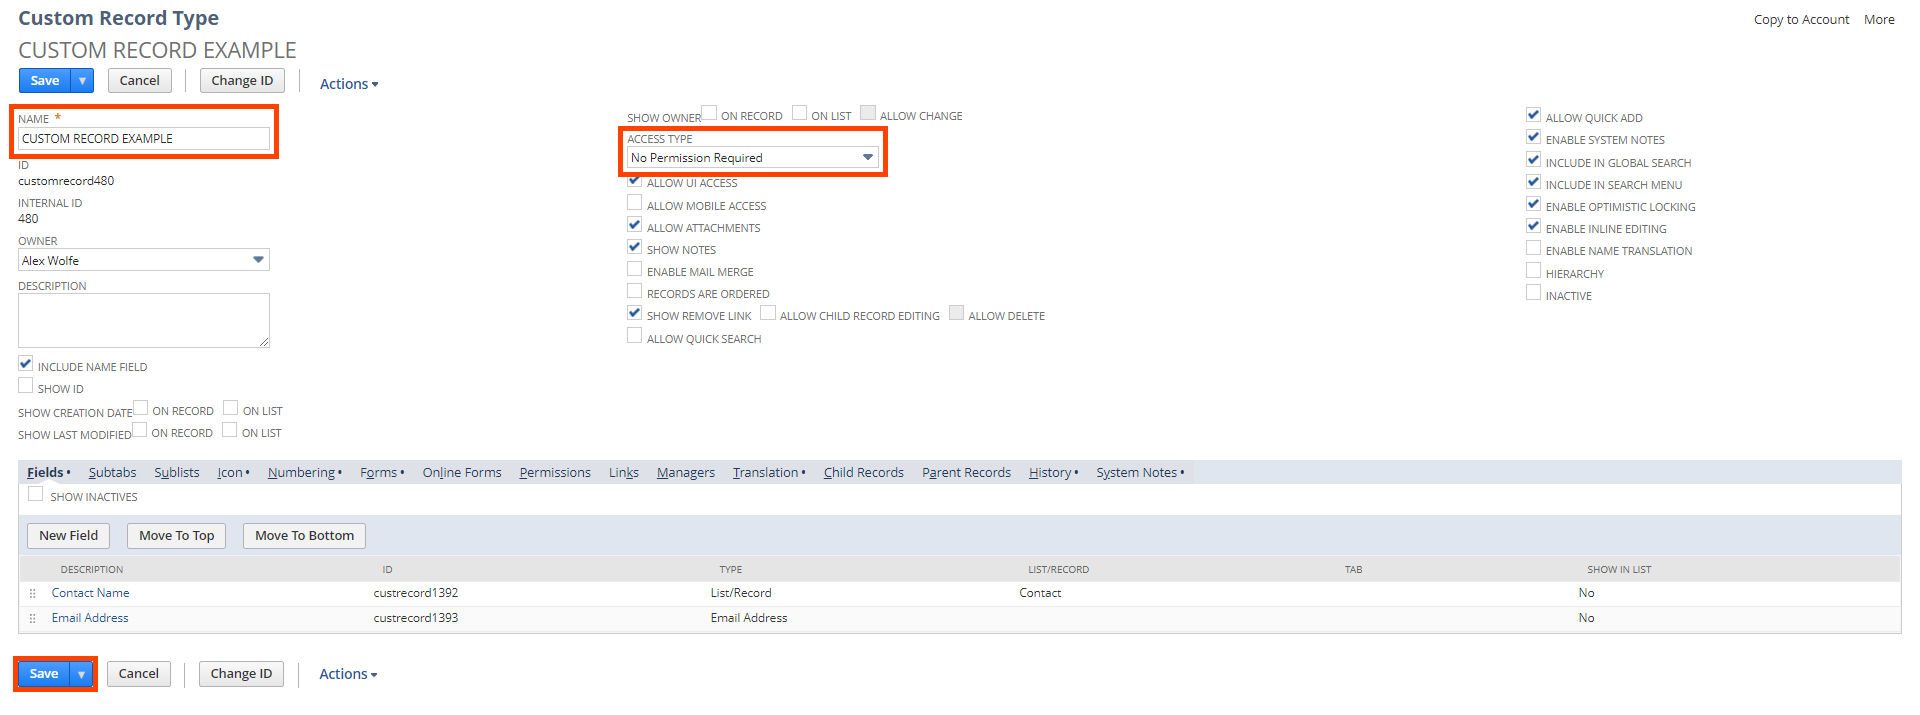
- Fill in the following fields:
- NAME - Define a custom name for the given Custom Record.
- ACCESS TYPE - Select the No Permission Required option.
- Click on Save.
- Add 2 custom fields to the created Custom Record:
- Go to Customization | Lists, Records & Fields | Record Types.
- Open the Custom Record created in step 1.
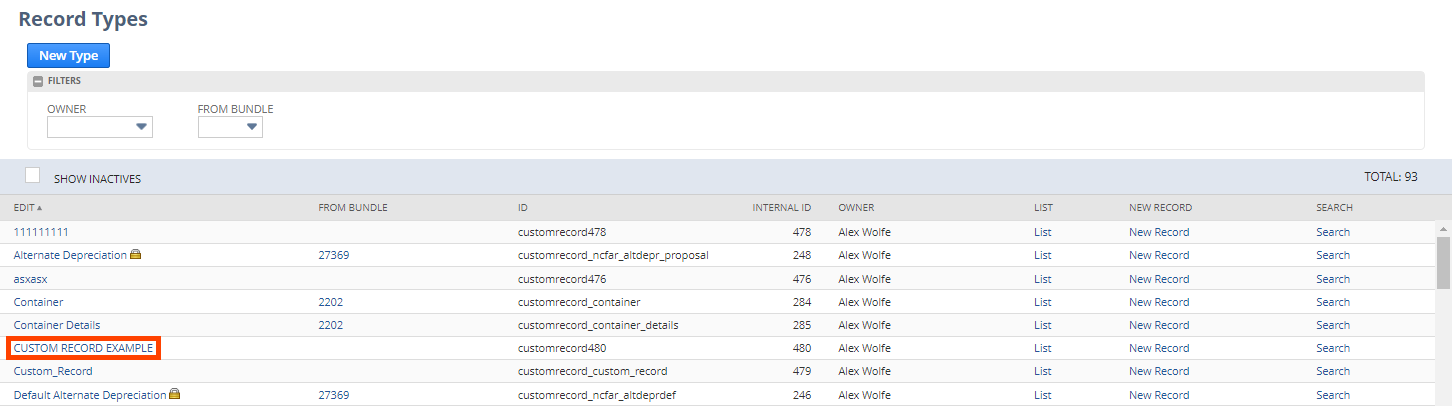
- Click on New Field on the Fields subtab to add the first custom field.

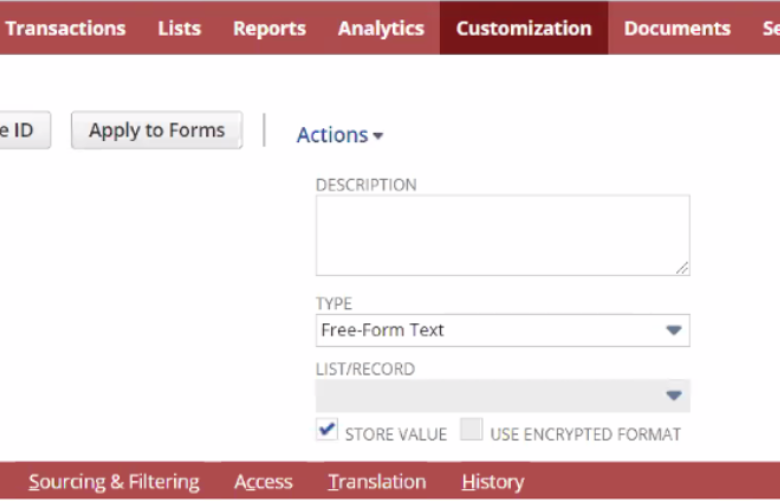
- Fill in the following fields for the first custom field and click on Save:

- LABEL - Define a custom label for the given custom field.
- TYPE - Select the List/Record option.
- LIST/RECORD - Select the Contact option.
- STORE VALUE - Ensure it is checked.
- Click on New Field on the Fields subtab again to add the second custom field.
- Fill in the following fields for the second custom field and click on Save.
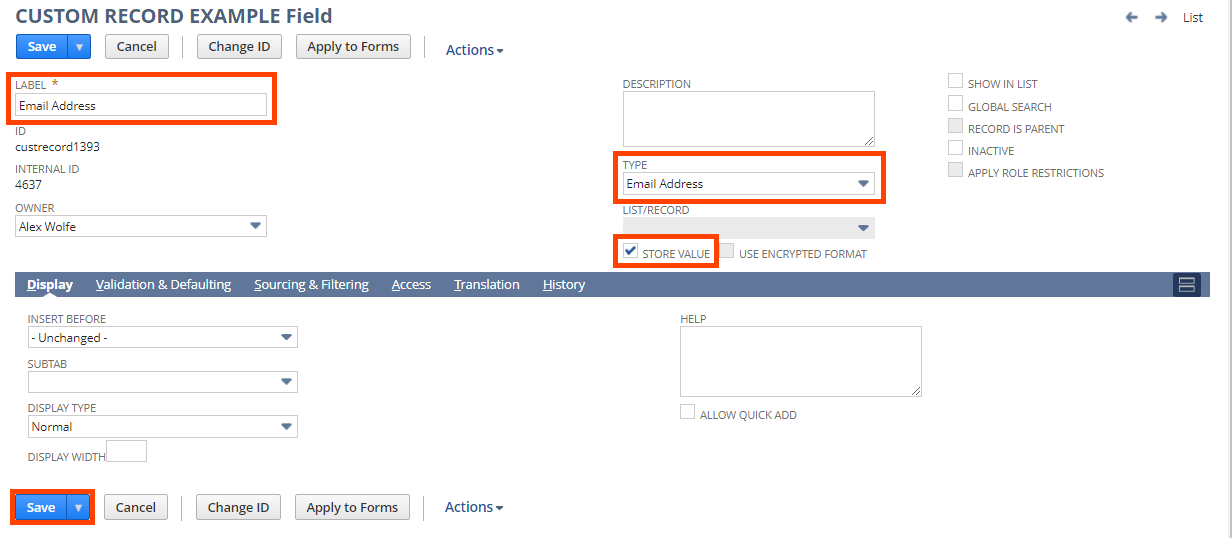
- LABEL - Define a custom label for the given custom field.
- TYPE - Select the Email Address option.
- STORE VALUE - Ensure it is checked.
- Add records to the created Custom Record:
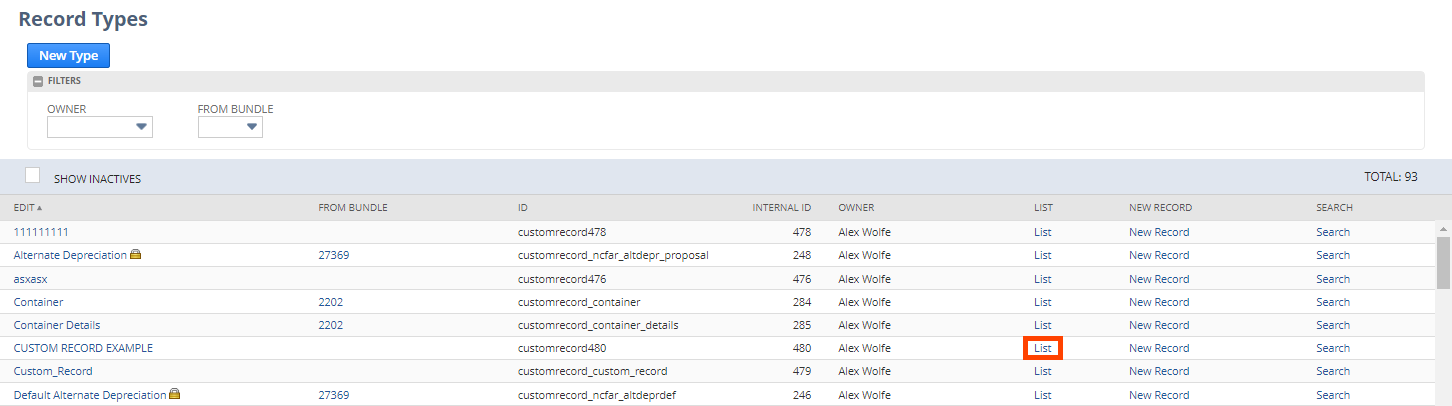
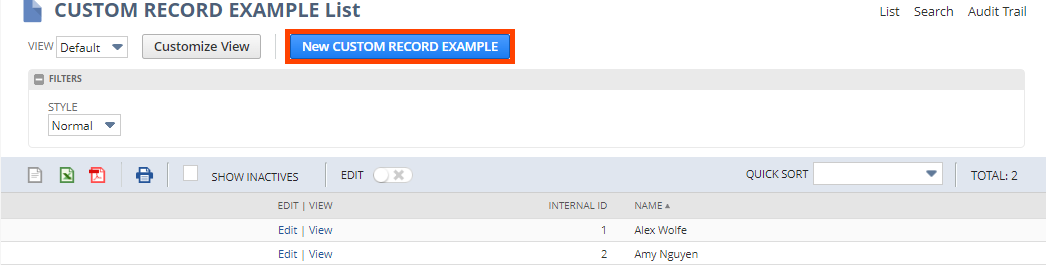
- Go to Customization | Lists, Records & Fields | Record Types.
- Click on the List button that belongs to the created Custom Record.
- Click on the New <Custom_Record_Name> button.
- Fill in the following fields:
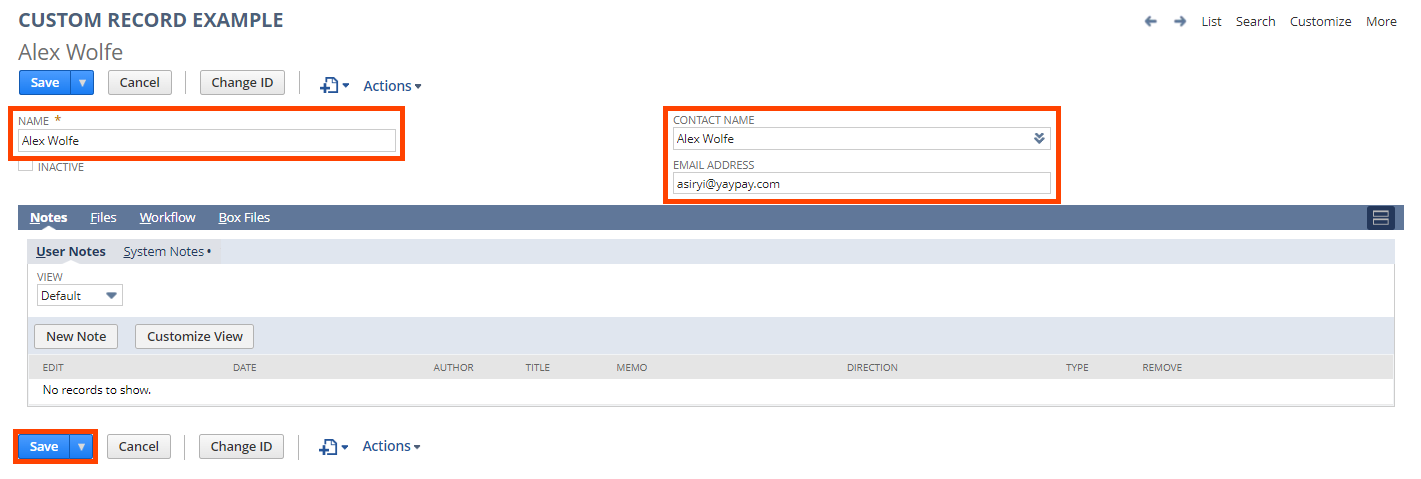
- NAME - Define a custom name for the given record.
- CONTACT NAME - Select one of the existing contacts.
- EMAIL ADDRESS - Enter the email address of the selected contact.
- Repeat steps a-d to define multiple records.
- See the defined records in the list for the created Custom Record.
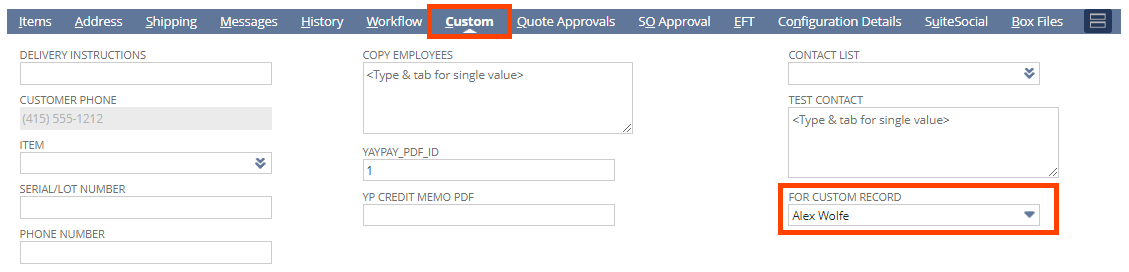
- Create an invoice-level custom field related to the created Custom Record:
- Go to Customization | List, Records & Fields | Transaction Body Fields and click on New.
- Fill in the following fields:

- LABEL - Define a custom label for the given transaction body field.
- TYPE - Select the List/Record option.
- LIST/RECORD - Select the name of the created Custom Record.
- STORE VALUE - Ensure it is checked.
- SALE (on the Applies To tab) - Ensure it is checked.
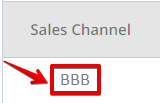
- While creating an invoice, you are now able to fill in the created custom field using a dropdown menu. See the example field called FOR CUSTOM RECORD:
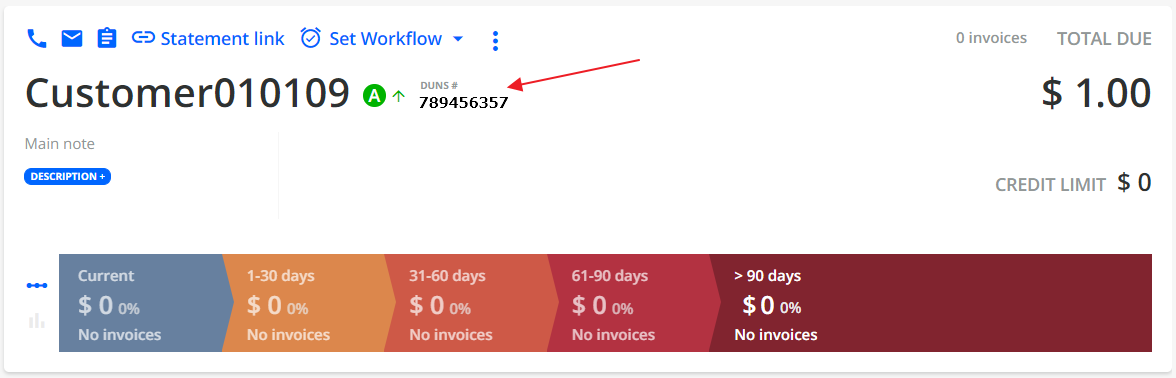
Bringing DUNS Number from NetSuite
To transmit the DUNS (Data Universal Numbering System) Number within the Customer from NetSuite to YayPay the user should perform the following steps:
1. In YayPay, go to Settings > Integrations and fill in the Custom field for DUNS number with a NetSuite Field ID value.
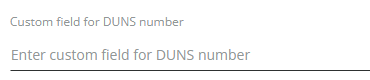
2. The Custom field for DUNS number should include the Field ID that corresponds to the Custom Field name in NetSuite.
3. Once you fill in the Custom field for DUNS number field in YayPay, click Save.
4. After the sync process, YayPay depicts the DUNS Number within the Customer.