The following outlines the setup of YayPay and Acumatica to support the payment integration from YayPay to Acumatica.
Prerequisites
- Ensure that you have imported and published the YayPay customization package in Acumatica (refer to this link for more information: https://yaypay.helpjuice.com/acumatica/how-to-publish-customization-package-in-acumatica)
- Ensure YayPay is connected to Acumatica (refer to this link on how to configure the AR Sync/integration between Acumatica and Yaypay: https://yaypay.helpjuice.com/acumatica/acumatica-configure-account-for-yaypay-integration)
1. Configure Payment Methods in Acumatica
Log into Acumatica using a User with an Administrator role:

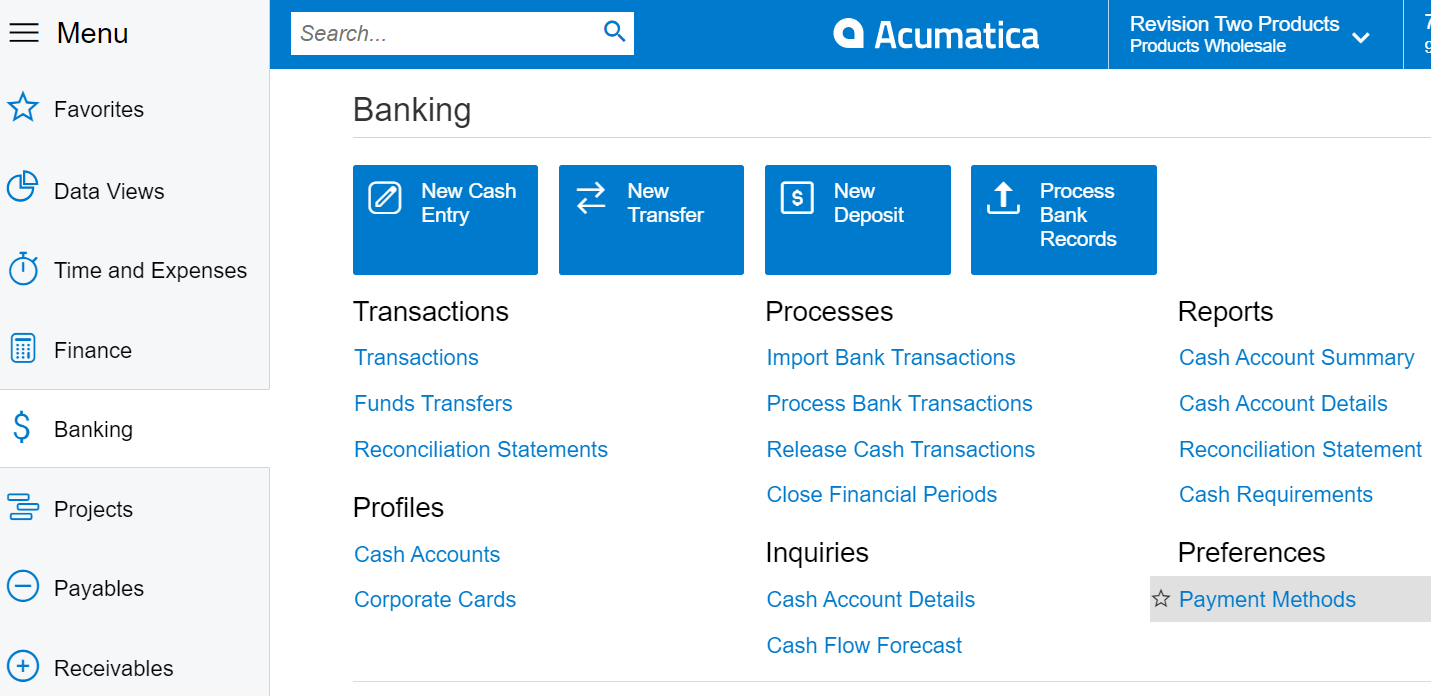
Once you are logged into Acumatica, navigate to the Banking > Payment methods page:

You can also search for this menu item using the ‘Global search’.
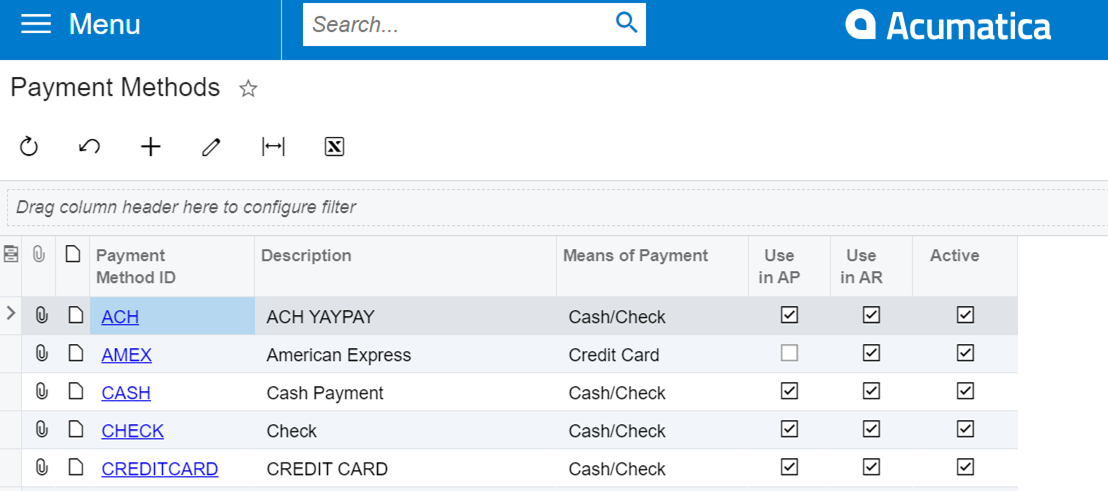
Check and create these Payment methods in your Acumatica system if you do not have them, using these Payment Method IDs. Ensure the status is "Active" and select the "Use in AR" checkbox for each Payment Method:
- ACH
- CASH
- CREDITCARD
- CHECK
- OTHER
The Description for each Payment Method can be of your choice, but ensure each Payment Method ID is in upper case:

Behind each Payment Method, configure and link the appropriate Bank Account, according to your business / operational needs.
2. Configure YayPay for Payments
Prerequisites
Log into YayPay and go to Settings > Integrations page:
- Configure the Payment Gateway and other Merchant settings in YayPay when you have received the information from the Payment Processor
- Check that YayPay is also connected to your Acumatica - YayPay uses the same AR sync settings to send payment information to your Acumatica system
YayPay's payment functionality
Refer to this link for more information on using YayPay for Payments: https://yaypay.helpjuice.com/payments
Successful Payments captured through YayPay will be sent to Acumatica, which could be:
- A payment made against one or several invoice(s). Refer to: https://yaypay.helpjuice.com/payments/payment-flow-from-internal-statement-page
- A Payment made at the Account / Customer level.
Refer to: https://yaypay.helpjuice.com/payments/on-account-payments - A payment manually created, allocated, and pushed from the basic Cash Application module.
Refer to: Cash Application Basic
Test the Payment integration to Acumatica
To make a simple test, press the "Sync" button to send the payment information to your Acumatica system shortly after you have made a test invoice payment in YayPay.

3. Frequently Asked Questions
Is the Payment Integration to Acumatica affected if the "PAUSE ALL" button is pressed (the button is found in the Settings > Integrations page of YayPay)
Yes, the Pause All operation pauses both the AR Sync from Acumatica to YayPay and the Payment creation from YayPay to Acumatica
