Importing Payment Data into Cash Application
You can import payment data into the Cash Application module in one of the following ways:
Uploading Payment Files
Before uploading payment files in the Cash Application module, do the following:
- Ensure that the payment files meet the requirements listed in the Payment File Requirements section.
- Prepare and upload the JSON mapping files required by YayPay to be able to process the data fields generated (in the uploaded payment file) by your bank.
To learn how to do that, see the JSON Mapping section of the Cash Application Settings article.
To upload payment files in the Cash Application module:
- Click on the UPLOAD PAYMENTS button.

- Configure the Upload Payments dialog:

- Select the bank account to which the payments were made.
The currency of the payments will correspond to the currency of the selected bank account. - Select the JSON mapping file applicable to the payment file you are going to upload.
- Click on SELECT FILE to browse for the payment file you want to upload.
- Click on UPLOAD to upload the payment file.
- Select the bank account to which the payments were made.
- Wait for the payment grid to automatically refresh, displaying the uploaded payments.
Payment File Requirements
This section lists the requirements that a payment file must meet to be successfully uploaded to YayPay:
- File Format - The file must be in one of the following formats: CSV, TXT, XLS, or XLSX.
- Maximum File Size - The file cannot exceed 100 MB in size.
- File Structure - The file must contain table-structured data. Each row should represent a distinct payment, with each column indicating a specific payment property. Every column must have a header.
- Payment Representation - Each row in the file should correspond to a payment made by a single customer.
- Extra Data - The file may contain additional data such as file headers or total amounts. However, you should manually remove them before uploading the file.
- File Tabs - The file should only contain one tab.
- Customer Information - The file must include a column that lists either the names of the customers who made the payments, the invoice numbers covered by the payments, or any other unique customer identifier.
- Debit or Credit Payments - The file can include both debit and credit payments. Their amounts should be recorded in separate columns or in a single column but with different signs.
- Payment Dates - Columns with payment dates may also contain timestamps, but this is optional.
- Payment Identifiers - The file can include unique payment identifiers such as payment numbers, check numbers, or bank references. This is not mandatory. If the file does not contain identifiers, the system will generate them for each payment.
Payment File Example
Here is an example of a payment file generated by the bank JPMorgan Chase®:
It contains information about two credit payments. The most important columns are:
- Credit Amount – Shows the payment amount.
- Bank Reference – Shows the payment number as recorded in YayPay.
- Remarks 1 – Shows the name of the paying customer, allowing YayPay to auto-match the payment with the corresponding customer.
Error Handling
To handle errors in payment files, YayPay follows these rules:
- If every record in a payment file has an error, the file cannot be uploaded.

- If there are errors in some records, you have these options:
- If you want to proceed, you can upload the correct records.
- If you want to correct the errors, you can cancel the upload and try again.

- If you need to review the errors, click on Download Error List within the given error dialog to download an Excel sheet with all the error details.
Handling Zero and Negative Payment Amounts
Within uploaded payment files, YayPay ignores payment records with the following amounts:
- Zero Amounts - A zero amount indicates that a record is not a payment but a document that accompanies a payment.
- Negative Amounts - A negative amount indicates a debit record, which is not applicable to the Cash Application module.
Example:

YayPay handles the example payment file as follows:
- The highlighted records are ignored.
- The other records are added into the Cash Application module as payment records.
- No errors are detected.
Handling Various Amount Formats and Currencies
This section describes how YayPay handles various amount or currency formats in uploaded payment files:
-
Payment Amount Formats YayPay can process payment amounts in different formats. For example:
- 1,000,000.00
- 1000000,00
- $1,000,000.00
- $1000000.00
- 1 000 000,00
-
Currencies YayPay can create payment records for amounts containing the following currency signs (or no currency signs) by converting the payments to the currency of your bank account:
- € (Euro)
- $ (US Dollar)
- £ (British Pound)
- ¥ (Japanese Yen)
- ₹ (Indian Rupee)
- C$ or CA$ (Canadian Dollar)
- Displayed Amount Formats YayPay displays uploaded payments in the following formats, depending on the localization you have selected for your GUI:
| GUI Localization | Displayed Amount Format |
|---|---|
| US | 1,234.56 |
| UKR | 1 234,56 |
| GB | 1,234.56 |
| FR | 1 234,56 |
| DE | 1.234,56 |
Adding Payments Manually
To manually add a payment:
- Click on the ADD PAYMENT button to open the Add Payment dialog.

- Configure the Add Payment dialog.
 Note the following:
- The mandatory fields are: Customer, Bank Account, Exchange Rate, and Payment Amount.
- YayPay automatically generates a unique payment number if you omit it.
- Click on SAVE to add the payment.
- Find the payment in the Payment grid.

Auto-Generating Payments Made via YayPay
You can configure YayPay to automatically create records in the Cash Application module about payments made on the Statement Page or Customer Portal:
- Go to the Cash Application module.
- Click on the gear icon highlighted below to open the Cash Application / Settings page.

- Go to the PAYMENTS tab.
- Activate the Auto generate YayPay portal payments option.

- Check created payment records in the Open Payments grid.
Overview of Payments in Cash Application
The Payments section consists of the following features:
- Payment Pipeline View
- Open Payments Grid on the OPEN tab
- Closed Payments Grid on the CLOSED tab
Payment Pipeline View

The pipeline view provides you with statistics on open payments divided by their invoice allocation status:
- Unmatched – Indicates payments that have not been matched with a customer yet.
- Not Allocated – Indicates payments that have been matched with a customer but have not been allocated to any invoice yet.
- Partially Allocated – Indicates payments that have only partially been allocated. For each such an open payment, there is still some unallocated amount yet to be allocated to an invoice.
- Allocated – Indicates payments that have fully been allocated to invoices. Their unallocated amount is zero.
The pipeline view provides the following statistics for each allocation status:
- Number of open payments with the given status.
- Total amount of open payments with the given status.
- Percentage that the payments with the given status represent of the total amount of all payments in the Cash Application module.

Open Payments Grid

Default Columns in the Open Payments Grid
This section lists the columns that the open payments grid shows by default:
- Payment # – Payment reference number. Payment # is a unique payment identifier within one bank account. Click on the number view more details about the payment.
- Indicators – Shows an icon that indicates something about the payment. For example, if it has attachments.
- Bank Account – Bank account number to which the payment was made.
- Payment Date – Date on which the payment was made.
- Payment Amount – Amount of the payment made.
- Unallocated Amount – Amount of the payment that has not been allocated.
- Currency – Currency of the payment.
-
Customer – Name of the customer who made the payment. You can click on the name to open the customer's Statement page.
- Allocation Status – Status that the payment can take with respect to its allocation: Unmatched, Allocated, Not Allocated, or Partially Allocated.
-
Details – Shows any other details associated with the payment.
- Allocation Source – Method that was used to allocate the payment.
Optional Columns in the Open Payments Grid
This section lists the additional columns that you can choose to display in the open payments grid:
- Lockbox #
- Payment Type – Type of payment used.
- Assigned AR – Name of the AR Specialist assigned to the payment.
- File Name – Name of the payment file (if one is available) that was used to upload the given payment into YayPay.
- Customer ERP ID – ID of the customer in your ERP.
- Customer Account # – Reference number of the customer's account.
- Sync Status – Status of the payment's sync with your ERP.
- Remittance – Reference number of the remittance linked with the payment. You can click on the number to open the remittance's details.
- Creation Date – Date the payment was created in Cash Application.
Customizing the Open Payments Grid
- Select which columns to display:
- Click on the Select Columns icon.

- Select all the columns you wish to display.
- Click on Apply Changes to confirm.
- Click on the Reset Columns to Default icon if you want to go back to displaying the default columns.

- Click on the Select Columns icon.
- Expand the grid for a closer view by clicking on the Expand Grid icon.

- Sort the grid’s data using a specific column:
- Click on the name of the column you wish to sort by in descending order.
Sorting is available for the following columns: Payment #, Payment Date, Payment Amount, Unallocated Amount, Currency, Customer, Assigned AR, Creation Date. - Click on the column name again to sort in ascending order.
- Click on the column name again to cancel all sorting.
- Click on the name of the column you wish to sort by in descending order.
- Rearrange the order of the columns in the grid:
- Click and hold inside the header of the column you wish to move.
- Drag the column to the desired spot.
Searching for Specific Payments
You can use the provided Search field to search for specific open payments.
An entered phrase is searched in the Details column, as indicated by the information icon next to the Search field.
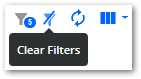
Filtering the Data in the Open Payments Grid
You can filter the data displayed in the Payment grid using the Filter icon.

The Filter icon is available for the following columns:
- Bank Account – Selects the bank account to which the payments were made you want to display in the grid.
-
Payment Date – Defines the time period in which the payments were made you want to display in the grid.

- Creation Date – Defines the time period in which the payments (that you want to display in the table) were created in the Cash Application module.
-
Payment Amount – Defines the amount range applicable to the payments you want to display in the grid.

- Unallocated Amount – Defines the range of unallocated amounts applicable to the payments you want to display in the grid.
- Currency – Selects the currency of the payments you want to display in the grid.
-
Customer – Selects the customer who made the payments you want to display in the grid.

- Allocation Status – Selects the allocation status of the payments you want to display in the grid.
- Allocation Source – Selects the method that was used to allocate the payments you want to display in the grid.
- Payment Type – Selects the type of payments you want to display in the grid.
- Assigned AR – Selects the AR assigned to the payments you want to display in the grid.
- Sync Status – Selects the sync status of the payments you want to display in the grid.

Adding Notes to Payments
AR specialists can leave notes for each other on payments that they are working on to share information necessary for further payment processing:
- Select the payments (in the open payments grid) you want to leave a note for.
- Make sure the selected payments do not contain any notes yet.
- Click on the Add Note icon to open the Add Note dialog.

- Type your note into the Description field and click on ADD.

- Check the Indicators column (in the open payments grid) which should now contain an icon, indicating that a node has been added to the given payments.

- View added notes on the NOTE tab of the Payment Details page of individual payments.

Assigning AR Specialists to Open Payments
AR specialists and admins can assign AR specialists to open payments, distributing the available workload:
- Ensure your business has at least one activated AR specialist in Settings | User Management.
- Select the payments (in the open payments grid) to which you want to assign an AR specialist.
- Click on the Manage AR icon to open the Manage AR dialog.

- Select the AR specialist you want to assign to the selected payments and click on CONFIRM.

Pushing Payments to ERP
This section describes how to manually push payments (and their allocations) to your ERP system (only Sage Intacct and Oracle Netsuite are supported for now):
- Select the payments (in the Payments grid) you want to push to your ERP.
- Make sure the selected payments meet the following criteria to be able to push them:
- Their Allocation Status value must be one of the following: Not Allocated, Partially Allocated, or Allocated.
- Their Sync Status value must be one of the following: Not Synced, or Error.
- They can only be allocated (or partially allocated) to positive invoices, including invoices with applied discounts.
- Only credit memos (and not any other document types for now) can be incorporated in their invoice allocation to modify the amount owed by the customer on the allocated invoices. You will be able to push more complex allocations (with adjustments etc.) in the future.
- By default, each selected payment requires a defined Payment Date to successfully push payments to your ERP system. This is due to YayPay's default behavior of utilizing the transaction date as the payment date when pushing payments from the Cash Application module to your ERP system.
You can choose to use the sync date — the date the payment is sent from Cash Application — as the payment date for your ERP system. This ensures your records indicate the date of payment confirmation instead of the original transaction date.
To enable this feature, enable the Cash Application - Use sync date when sending payments to ERP setting in Settings | Business. When enabled, you can push payments to your ERP system even if their Payment Date value is empty.
- Click on the Push to ERP icon.

- Check the Sync Status column to see the result of the push:

- SENDING – Payment is being pushed to the ERP system.
- PENDING – Payment was successfully pushed to the ERP system but is awaiting completion of the sync process. To view this status, navigate to the CLOSED tab where YayPay automatically transfers it after a successful push. The payment no longer contributes to open payment statistics. While in this status, the Balance column of the allocated documents still shows the original amount and the Available Balance column shows the amount reduced by the allocated amount.
- SYNCED – Payment has fully been synced with the ERP system. That means that the allocation has successfully been created in the ERP system and that the payment and the related documents have returned back to YayPay with the new balances and statuses. The payment remains on the CLOSED tab. The Balance column of the allocated documents now shows the adjusted amount.
-
ERROR – There was an error pushing the given payment to the ERP system.
Hover over the error status or the error indicator icon to display a tooltip explaining in detail what is wrong with the given payment. Correct it and try pushing it again. - NOT SYNCED – No user has attempted to push a given payment to the ERP system yet.
Fixing Payments with the Error Sync Status
When you encounter an error with a payment pushed to your ERP system, you can fix the error and push the payment to your ERP again.
If you make changes to at least one of the following payment parameters, YayPay interprets that as taking a corrective action to resolve the error:
- Customer
- Bank account
- Payment amount
- Payment type
- Associated remittance
- Payment allocation (in any way)
When you correct a payment with Remittance as its Allocation Source, YayPay indicates this by updating the Sync Status of the payment from ERROR to NOT SYNCED. However, if the Allocation Source of the payment you are correcting is either Manual or Rules, YayPay does not change the Sync Status.
Handling NetSuite Payment Types
This section describes how YayPay handles payments pushed to NetSuite with or without payments types mapped in Settings | Business | Payment Types Configuration:
- If a payment without a payment type is pushed to NetSuite, it is created with a blank payment method in NetSuite.
If the Payment Method field is configured to be mandatory in NetSuite, you must ensure that a payment type is selected in Cash Application for each payment that you intend to push. Otherwise, you will receive errors. - If a payment has a payment type, but there is no mapping for it in YayPay, it is created with a blank payment method in NetSuite.
- If a payment has a payment type mapped in YayPay, it is created with the mapped value in NetSuite.
Handling Intacct Payment Methods
This section provides a table that shows how payment types sent from Cash Application are mapped to payment types in Intacct:
| Cash Application Payment Types | Corresponding Payment Types in Intacct |
|---|---|
| Check | Printed Check |
| Cash | Cash |
| Credit Card | Credit Card |
| Other | Printed Check |
| ACH | Printed Check |
| EFT | Printed Check |
| Bank | Printed Check |
| Wire | Printed Check |
| Any other payment type | Printed Check |
| NULL | Printed Check |
Errors Encountered When Pushing Payments to ERP Systems
YayPay may not be able to give you a reason for some of the errors encountered when pushing payments to ERP systems.
For Oracle NetSuite, follow these steps to find the possible cause of an unspecified error:
- Ensure that invoice discounts are filled in correctly.
- Ensure that each invoice that belongs to an invoice group in NetSuite is submitted to be in the group.
- Ensure that your NetSuite account uses the Payment Option entity if the Use Payment Option checkbox is enabled in the NetSuite Connector settings.
- Ensure that all mandatory fields on the Payment page are filled in correctly.
- Ensure that your General Ledger account uses the same currency and subsidiary as the payments you are pushing.
- Ensure that no invoice is reversed.
- Ensure that no invoice has a negative amount.
- Ensure that the NetSuite user has the necessary permissions to create a payment in NetSuite.
- Ensure that the Default AR Account field is configured in Settings | Business.
- Ensure that payments and invoices use the correct currency and subsidiary for each customer.
For Sage Intacct, follow these steps to find the possible cause of an unspecified error:
- Ensure that each invoice and its corresponding payment have the same customer.
- Ensure that the Undeposited Funds account is correct.
- Ensure that the General Ledger account is linked to a Financial Account.
- Ensure that each payment and the documents allocated to it all use the same location and currency.
- Ensure that each payment and the documents allocated to it are all linked to the same bank account.
Exporting Payments to CSV
Pushing payments to your ERP system using the Push to ERP icon is only supported for Sage Intacct and Oracle Netsuite for now.
If you are using a different ERP system, you can export payments into a CSV file and use it to import payments into your ERP system:
- Select the payments (in the Payments grid) you want to export to a CSV file.
- Click on the Export to CSV icon.

- Define how to handle the exported payments using these check boxes:

-
Update sync status and close payments - Check if you want to change the sync status of the exported payments to EXPORTED.
This option is not available to businesses that integrate with Sage Intacct or Oracle Netsuite as the native sync is available to them. -
Push payments to FTP server – Check if you want to push the exported payments and their allocation data to your FTP server specified in the CSV Connector Settings. Your ERP system will be able to retrieve the data from there.
To enable this check box, you must do the following:- Check Enable pushing payments to FTP/FTPS/SFTP servers in the CSV Connector Settings.
- Check Update sync status and close payments in the 'Export To CSV' dialog.
-
Update sync status and close payments - Check if you want to change the sync status of the exported payments to EXPORTED.
- Check the data in the exported Export_payments_<date>.csvfile, containing the following columns:
- External ID – Shows the unique identifier assigned to the payment by YayPay.
- Customer ID – Shows the unique identifier for the customer (as used in your ERP system) who has made the payment.
- Customer – Shows the name of the customer who made the payment.
- Payment # – Shows the specific number assigned to the payment.
- Bank Account – Shows the bank account that received the payment.
- Payment Date – Shows the date when the payment was received.
- Payment Amount – Shows the total monetary amount of the received payment.
-
Document ID – Shows the unique identifier (as used in your ERP system) for the document to which the payment was allocated.
- Document # – Shows the number of the document to which the payment was allocated.
- Document Allocated Amount – Shows the portion of the payment that was allocated to a specific document.
- Document Discount Taken – Shows the amount of discount that was applied to the document that was allocated to the payment.
Manage Payment
To edit the properties of a payment, except for Payment # if the payment record was created based on a payment made via YayPay:
- Click on the Manage Payment icon belonging to the payment whose properties you want to edit.

- Edit the data in the opened Manage Payment dialog.
The mandatory fields are: Customer, Bank Account, Exchange Rate, Payment #, and Payment Amount. - Click on SAVE and confirm by clicking on PROCEED.


Manage Payment Dialog Features
You can utilize the following features when working with the Manage Payment dialog:
- Dragging the dialog across the screen.
- Minimizing the dialog to the application tray.

- Working with the Manage Payment and Manage Remitance dialogs simultaneously.

Deleting Payments
To delete payments that are no longer needed, or payments created in the Cash Applicationmodule by mistake, do the following:
- Go to the open payments grid.
- Select the payments you want to delete.

- Click on the Delete icon.

- Confirm you want to delete the selected payments by clicking on the DELETE button.
- Check the consequences of each deleted payment:
- If a deleted payment was associated with a remittance, that association is removed. The allocation of the related remittance is unaffected.
- If any documents were allocated to a deleted payment, that allocation is removed, recalculating the balances of all the affected documents.
- A deleted payment can no longer participate in the automatic remittance association.
Closed Payments Grid
This grid (available on the CLOSED tab) provides similar features to the Open Payments grid.
It lists the payments whose Sync Status value is one of the following:
- PENDING – Payment has been successfully pushed to the ERP system but is awaiting completion of the sync process. YayPay automatically transfers such a payment from the OPEN tab to the CLOSED tab after a successful push. The payment no longer contributes to open payment statistics. While in this status, the Balance column of the allocated documents still shows the original amount, and the Available Balance column shows the amount reduced by the allocated amount.
-
EXPORTED – Payment has been exported to a CSV file using the Export to CSV button.
The payment no longer contributes to open payment statistics. While in this status, the Balance column of the allocated documents still shows the original amount, and the Available Balance column shows the amount reduced by the allocated amount.
You can reopen EXPORTED payments by selecting them and clicking on the Reopen Payments icon. This allows you to make allocation adjustments. It moves the selected payments back to the OPEN tab, changing their sync status to NOT SYNCED.
-
SYNCED: Payment has been fully synced in one of the following ways:
- An integrated ERP system (Sage Intacct and Oracle NetSuite) syncs a PENDING payment with YayPay.
- A CSV connector sync returns an external ID of an EXPORTED payment to YayPay.
When a payment becomes SYNCED:
- The following columns may be filled if the sync returns the corresponding data:
- Payment ERP # – Shows the number assigned to the given payment in the ERP.
- Document ERP ID – Shows the ID of the document that represents the given payment in the ERP.
- The Balance column of the allocated documents now shows the adjusted amount.
Handling Pending Payments
If YayPay is unable to complete the sync process of a payment (i.e. the payment remains in the PENDING sync status) for 7 days, YayPay does the following:
- Changes the payment's Sync Status value to NOT SYNCED.
- Moves the payment back to the OPEN tab.
- Changes the payment's Allocation Status value to Not Allocated.
- Makes the payment's Allocation Source value empty.
- Allows you to recreate the allocation manually.
- Allows you to use the documents, that participated in the removed allocation, in other allocations.
- Preserves the payment's link to a remittance if there was one before the allocation was removed:
- If the given remittance was allocated and YayPay transferred that allocation to the payment, that payment allocation is not restored automatically.
- To transfer the remittance allocation to the payment again, you can unlink the remittance from the payment and link it back again.
Downloading Payment Files of Closed Payments
For each closed payment that was uploaded into YayPay via a payment file, you can download its original payment file (e.g. to verify that the payment data was correctly uploaded and synchronized).
Do that by clicking on the Download Payment File icon (belonging to the payment whose payment file you want to download) in the closed payments grid.
