Payment Allocation Statuses
Payments in the Cash Application module can have one of the following statuses:
- Unmatched – No customer was found to match in YayPay.
- Not Allocated – Payment has been linked with the customer but has not been allocated to any invoice.
- Partially Allocated – Payment has partially been allocated, but there remains a certain unallocated amount.
- Allocated – Payment is fully allocated, and its unallocated amount is zero.l

Payment Allocation Overview
This section outlines how to allocate payments to invoices:
- Associate payments with customers.
- Associate payments with remittances.
- Allocate payments to invoices.
1. Associating Payments with Customers
Use the following features to configure YayPay to attempt to perform the association automatically:
- JSON Mapping - Configures YayPay to automatically attempt to associate customers with payments uploaded via payment files.
- Auto Generate YayPay Portal Payments – Configures YayPay to automatically associate payments made via the Statement page or the Customer Portal with the customers who made them.
For payments uploaded via payment files, YayPay attempts to identify a customer for each payment:
- If one customer is identified – YayPay automatically associates that customer with the given payment.
-
If multiple customers are identified as potential candidates for payment association – YayPay suggests the identified customers (up to 10) to you, allowing you to select which one to associate with the given payment manually:
- Open the Manage Payment dialog of each uploaded payment.
- Check if there is a RECOMMENDED label next to the Customer drop-down menu, indicating the number of customers identified as potential candidates.
- Open the Customer drop-down menu.
- Check that the identified customers are available at the top of the list indicated by the Recommended icon
- Select the customer to associate them with each given payment.

- If no customer is identified – You must associate a customer with the given payment manually.
2. Associating Payments with Remittances
Optionally, associate a payment with the remittance that accompanied the payment.
For details, see the Payment-Remittance Association article.
3. Allocating Payments to Invoices
Allocate a payment to invoices in one of the following ways:
-
Manually – Use the Payment Details page to manually perform allocations:
- Learn about the features of the Payment Details page in the Payment Details Page section.
- Learn how to use those features to perform manual payment allocations in the Manual Payment Allocation Flow section.
- Automatically – See the following sections to learn about the auto-allocation types supported by YayPay:
Auto-Allocation Using Allocation Rules
You can allocate payments to invoices based on predefined allocation rules:
- Go to Cash Application | Settings | Allocation Rules.
- Activate the allocation rules you want to use for the auto-allocation process.
- Adjust the priority of the activated allocation rules per your preference by dragging and dropping them.
- Initiate the auto-allocation process based on the predefined rules in one of the following ways:
-
Automatically - Ensure the Auto-apply rules check box is checked and upload a payment file to the Cash Application module.
YayPay will automatically initiate the auto-allocation process for all the payments uploaded within the file. This only occurs if the following auto-allocation types are unsuccessful: -
Manually- To initiate the auto-allocation process manually for a single payment:
- Go to the Payment Details page of the payment that you wish to auto-allocate.
- Click on the Auto-Allocate button to initiate the auto-allocation process.

- Review the result of the auto-allocation process:
- Check that YayPay has allocated the payment (based on the first rule that found matching invoices).
- Check that the allocated invoices are now displayed in the Selected Documents list with recalculated balances.
- Check if a discount has been applied. That occurs automatically if a valid discount is available for each matched invoice while none of the available discount has been used for different allocations.
- Click on SAVE to save the allocation.
-
Automatically - Ensure the Auto-apply rules check box is checked and upload a payment file to the Cash Application module.
- Check that YayPay has done the following:
- Recalculated the data (allocated amount, available balance, etc.) of the invoices involved in the allocation.
- Changed the given payments' Allocation Source value to Rules, indicating that the given payments have been allocated using allocation rules.

Auto-Allocation Using Payment-Remittance Association
When a payment is created in YayPay, manually or uploaded within a payment file (or an existing payment is edited), the system automatically attempts to associate that payment with an existing remittance. See the Payment-Remittance Association article to learn how YayPay locates the correct remittance.
When the system links a payment with a remittance, it also attempts to automatically allocate the payment to the correct documents by doing the following:
- Checks if any documents were allocated to the given remittance.
- Checks if those documents:
- Still have enough available balance so the given payment can be allocated to them with initial allocated amounts.
- Have already been allocated to a different payment.
- Does one of the following, depending on the result of the check in step 2:
- If the check succeeds fully – The system transfers the document allocation from the remittance to the payment. YayPay indicates this to the users by setting the given payment's Allocation Source to Remittance.
-
If the check succeeds partially – If the checked documents were already partially allocated to a different payment, YayPay transfers the document allocation to the newly linked payment partially. The list of selected documents provides alerts for partially allocated documents and already taken discounts, allowing you to decide whether or not to save the partial allocation.
 If you save the partial allocation in the transferred state, the payment's Allocation Source is set to Remittance. If you adjust the allocation before saving it, the Allocation Source is set to Manual.
NOTE: When YayPay transfers an allocation from a remittance to a payment partially and there was a non-zero Remit Discount Taken, the Discount Taken after the transfer is always zero, regardless of whether it was taken previously or not.
-
If the check fails – The system keeps the given payment and remittance linked. However, it does not transfer the document allocation from the remittance to the payment. You must perform such an allocation manually.
YayPay indicates this to the users by displaying the following alerts within the list of selected documents:- The document is not available for allocation because it is already fully allocated by another payment.

- The document has been deleted from your ERP system.

YayPay also displays the following indicator on the OPEN payments tab if an allocation (from a linked remittance) could not be transferred to the given payment:
- The document is not available for allocation because it is already fully allocated by another payment.
Auto-Allocation Using Remittance-Payment Association
When a remittance is created in YayPay from an email, the system attempts to parse the following data from the email:
- Payment number
- Invoice numbers
- Amounts to be allocated to specific invoices
If the parsing is successful, the system automatically allocates the payment to the corresponding invoice(s).
Auto-Allocation Prerequisites
The auto-allocation process can only be initiated:
- For payments that meet the following conditions:
- Their allocation status must be Not Allocated.
- They must be successfully associated with an email remittance via the process described in the Associating Email Remittances with Payments section.
- Based on email remittances that meet the following parsing conditions:
- At least one payment number was successfully parsed from the email and validated by AI.
- At least one invoice number was successfully parsed from the email and validated by AI.
YayPay ignores the 'INV' prefix in invoice numbers, regardless of whether it is capitalized or not, like 'inv' or 'Inv'. This rule applies both to the invoice numbers parsed from emails and those already recorded in YayPay which are used for validation purposes.
For example, suppose YayPay parses '1234' and 'INV5678' from an email as invoice numbers. If there are invoices labeled 'Inv1234' and '5678' already recorded in YayPay, both these invoice numbers are successfully validated.
Auto-Allocation Process
For each remittance created from an email, YayPay attempts to auto-allocate a given payment by following these steps:
- Verifies if each payment and its associated invoices satisfy the following criteria:
- They must belong to the same customer (or its child companies) in YayPay.
- At least one invoice associated with the payment should be in the same currency. Any invoice in a different currency from the payment is not included in auto-allocation.
- Auto-allocates each payment (that meets the criteria from step 1) in one of the following ways:
- For invoices with specific amounts that are intended for allocation to particular invoices (as extracted from remittance emails), YayPay allocates each payment to the associated invoices based on those extracted amounts.
- For invoices without specific amounts that are intended for allocation to particular invoices:
- If a payment is sufficient to cover the total outstanding amount of the associated invoices (considering any discounts), the payment is allocated to these invoices.
- If a payment is insufficient to cover the total outstanding amount, the payment is allocated to the oldest invoice first. Any applicable discounts are applied, and the payment is used to pay off the remaining balance either fully (if the payment is sufficient) or partially (if the payment is insufficient).
If any unallocated amount remains, the process is repeated with the next oldest invoice until the unallocated amount is zero.
- Recalculates the data (allocated amount, available balance, etc.) of the allocated invoices.
- Sets each allocated payment's Allocation Source value to Remittance, indicating that the given payment has been allocated using remittance-payment allocation.

Auto-Allocation Using Invoice Identification
When a payment is created in YayPay from an uploaded payment file, the system automatically searches for invoice numbers in the payment file that are associated with the payment. This allows YayPay to associate the payment with the correct customer. For more details on this process, see the Importance of Customer Association Properties section of the Cash Application Settings article.
YayPay follows these steps to auto-allocate each payment (created from a payment file) using the identified invoice numbers:
- Verifies if each uploaded payment meets the following criteria:
- The payment file contained invoice numbers related to the payment.
- The payment has been associated with a customer.
- Auto-allocates each payment (that meets the criteria from step 1) in one of the following ways:
- If the payment is sufficient to cover the total outstanding amount of the found invoices (considering any discounts), the payment is allocated to these invoices.
- If the payment is insufficient to cover the total outstanding amount, the payment is allocated to the oldest invoice first. Any applicable discounts are applied, and the payment is used to pay off the remaining balance either fully (if the payment is sufficient) or partially (if the payment is insufficient).
- Recalculates the following data, displaying it in the appropriate Cash Application interfaces:
- Data of the allocated invoices – Allocated amount, discount taken, available balance, etc.
- Data of the allocated payment – Unallocated amount, allocation status, etc.
- Sets each allocated payment's Allocation Source value to Payment File, indicating that the given payment has been allocated using invoice identification.

Auto-Allocation Using YayPay Payment Data
You can utilize the Auto Generate YayPay Portal Payments feature for auto-allocation.
When activated, YayPay automatically allocates payments made for specific invoices via YayPay (on the Statement Page or via the Customer Portal) by doing the following:
- Creates records about such payments in the Cash Application module.
- Creates remittance records in the Cash Application module that correspond to the created payment records.
- Does the following with each created payment record:
- Associates it with the corresponding remittance record.
- Associates it with the customer who made it.
- Allocates it to the paid invoices.
- Recalculates the balance of the paid invoices.
- Allows you to view automatically created payment records in read-only mode, which means the following:
- You cannot make any manual changes to the allocation of automatically allocated payments.
- The Manage Payment action (usually available on the Open Payment grid or on the Payment Details page) is not available for automatically allocated payments.
- Indicates which payments have automatically been allocated by displaying the YP Payment value in their Allocation Source column.

Payment Details Page
To get to the Payments Details page, click on the payment reference number in the grid:
The page opens in a new browser tab with the following sections:

-
Payment Details – Displays the same information as the Open Payments grid.
You can also manage payments (similar to Open Payments Grid) by clicking on the Manage Payment icon.
-
Open Documents Grid – Lists all the open documents (e.g. invoices, credit memos, adjustments, etc.) that you can use in payment allocation.
For more information, see the Open Documents Grid section. - Selected Documents List – Displays documents that have been selected for payment allocation from the Open Documents grid.
Open Documents Grid
The Open Documents grid lists all the open documents (e.g. invoices, credit memos, adjustments, etc.) that you can use in payment allocation.

Columns in the Open Documents Grid
This section lists the columns shown on the open documents grid:
- Document # – Document reference number (from the ERP system).
- Document Type – Document type, e.g. invoice, credit memo, adjustment, payment, deposit application, journal entry, etc.
-
Indicator– Icon indicating documents have already been allocated to a remittance:
- Hover over that icon to see which remittance.
- Click on the remittance number to open that remittance in a new tab.
- Use the information in the remittance to allocate the payment correctly.

-
Customer – Name of the customer related to the given document.
Clicking on the customer opens the Statement page. - Document Date – Date on which the given document was created.
-
Due Date – Due date of the given document.
It is mandatory for invoices, and optional for credit memos and adjustments. - Status – Status of the given document. The possible values include: Current, Overdue, Partial, Pending, Promise to Pay, Dispute, and Open.
- Amount – Total amount of the given document.
- Balance – Document's balance that is currently available for remittance allocation based on the last sync with ERP (comes from the sync with ERP).
- Available Balance – Document's balance that is currently available for the next allocation. It can be less than the Balance amount because some amount can be already covered by other payments but has not synced with ERP yet.
- Currency – Currency of the document, e.g. USD, EUR, GBP.
- Discount Date – Final date when the given invoice can be paid in order to have a discount. It is only applicable to invoices.
- Discount Available – Discount that will automatically be applied for the Remit Discount Taken field if the payment date is earlier than or equal to the discount date. It is only applicable to invoices.
-
Discount Taken – Actual discount that was given to the given invoice during payment allocation. This can be more than Discount Available if a user gives a higher discount. It is only applicable to invoices.
For more information, see the Discount Taken section. -
Allocated Amount – Amount that has already been allocated to the given document during payment allocation.
For more information, see the Allocated Amount section.
-
Remit Discount Taken - Shows the actual discount that was given to the given invoice during remittance allocation. This can be more than Discount Available if a user gives a higher discount. It is only applicable to invoices.
- Remit Allocated Amount – Amount that has already been allocated to the given document during remittance allocation.
-
Invoice Level Custom Fields – Additional information (beyond the standard invoice data) associated with each individual invoice. You can configure the invoice level custom fields in Settings | ERP/CRM Custom Fields.
To learn how to configure invoice level ERP/CRM custom fields, see the appropriate article depending on the ERP system that you are using:- Synchronizing Invoice Level Fields (NetSuite®)
- Invoice Level Custom Fields (Sage Intacct®)
- Bringing over Custom Fields through CSV Files

Customizing the Open Documents Grid
- Select which columns to display:
- Click on the Select Columns icon.

- Select all the columns you wish to display.
- Click on Apply Changes to confirm.
- Click on the Reset Columns to Default icon if you want to go back to displaying the default columns.

- Click on the Select Columns icon.
- Expand the grid for a closer view by clicking on the Expand Grid icon.

- Sort the grid’s data using a specific column:
- Click on the name of the column you wish to sort by in descending order.
Sorting is available for the following columns: Document #, Customer, Document Date, Due Date, Amount, Balance, Available Balance, Discount Date, and Invoice Level Custom Fields. - Click on the name again to sort in ascending order.
- Click on the name again to stop sorting by the given column.
- Click on the name of the column you wish to sort by in descending order.
- Rearrange the order of the columns in the grid:
- Click and hold inside the header of the column you wish to move.
- Drag the column to the desired spot.
Searching for Specific Open Documents
You can use the provided Search field to search for specific open documents by their document number.

Filtering the Data in the Open Documents Grid
You can filter the data displayed in the Open Documents grid using the Filter icon.
The Filter icon is available for the following columns:
-
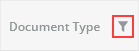
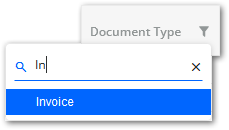
Document Type – Selects the type of documents you want to display in the grid.
-
Customer – Selects the customer whose documents you want to display in the grid.
-
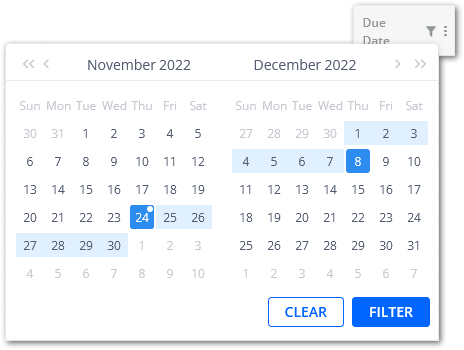
Document Date – Defines the time period in which the documents you want to display in the grid were created.
-
Due Date – Defines the time period in which the documents you want to display in the grid have their due date.
-
Available Balance – Defines the range of available balances applicable to the documents you want to display in the grid.

- Invoice Level Custom Fields – Selects the custom field value belonging to the documents you want to display in the grid.

Manual Payment Allocation Flow
To manually allocate a payment to invoices, perform the following steps on the Payment Details page:
- Check the following information:

-
Payment Amount – Amount that has been paid by the given payment.
-
Unallocated Amount – Amount available for allocation to invoices.
Initially, this amount is equal to the payment amount. It decreases as you allocate invoices to the payment until it reaches 0.
- Documents that can be used in the payment allocation.
-
Payment Amount – Amount that has been paid by the given payment.
- Select the invoices you want to allocate the payment to from the Open Documents grid.
To allocate a payment to an invoice, the Available Balance value of the invoice can not be zero. - Check that the selected invoices have appeared in the upper section of the page along with balance details and two additional fields:
- Optionally, select documents other than invoices (adjustments, credit memos, etc.) to impact the allocation process as follows:
- Documents with a positive balance increase the amount to be paid, and decrease the unallocated amount of the payment.
- Documents with a negative balance decrease the amount to be paid, and increase the unallocated amount of the payment.
- Discounts do not apply to documents other than positive invoices.
- The initially suggested Allocated Amount value for other documents equals their Available Balance value.
Edit the Allocated Amount field if required. It cannot exceed the Available Balance value.
- Check that the Unallocated Amount value of the payment is automatically recalculated as you select documents from the Open Documents grid.

- Ensure the Unallocated Amount value meets the following conditions to be able to save the allocation:
- It must not be negative.
- It must be less than the Payment Amount value.

- Click on SAVE to save the allocation.
- Learn about what happens when you save the allocation in the Allocation Outcome section.


Discount Taken
This section explains the behavior of the Discount Taken field that appears in the upper section of the Payment Details page when invoices are selected for payment allocation:
- It is only shown for invoices with a positive balance.
- It is automatically populated by the system. You can edit it if needed.
- It behaves in the following way:
- For invoices with Discount Available = 0.00, Discount Taken is 0.00.
- For expired discounts (see the Discount Date column), the Discount Taken is 0.00.
- For valid discounts: Discount Taken = Available Balance − Discount Available.
- If this difference does not exceed the Unallocated Amount value of the payment, the suggested Discount Taken value equals the Discount Available value.
- Otherwise, the Discount Taken field is pre-filled with 0.00.
- It can be edited at your discretion.
Note that Discount Taken + Allocated Amount for an invoice must not exceed its Available Balance value.

Allocated Amount
This section explains the behavior of the Allocated Amount field that appears in the upper section of the Payment Details page when invoices are selected for payment allocation:
- It is automatically populated as you select documents.
- The system suggests the Allocated Amount value of the invoice to be equal to its Available Balance minus the Discount Taken (if any). This applies to all selected invoices unless the Allocated Amount value for them exceeds the Payment Amount value. If the Available Balance value of the selected invoices is more than the Payment Amount value, the system suggests the maximum Allocated Amount value not to go beyond this value.
- If the Payment Amount value is exceeded, you cannot save such an allocation.
To resolve this, you can, e.g. manually reduce the allocated amounts for the selected documents or select a negative document for allocation (see below).
You can edit the Allocated Amount value if required but:
- It must not be zero.
- Allocated Amount + Discount Taken for an invoice must not exceed its Available Balance value.

Allocation Outcome
This section describes what happens when you save a payment allocation or when an automatic allocation occurs:
Within Cash Application:
- The Unallocated Amount value of the payment is recalculated.
If it remains non-zero, you can use the remaining amount in another allocation. - The Available Balance value for all the documents involved in the allocation is recalculated with regards to the Allocated Amount value.
New values for Available Balance and Allocated Amount are displayed in the Open Documents grid, along with the Discount Taken value if the discount was applied during the allocation.
The Status value of the document is changed accordingly, e.g. an open credit memo becomes closed, etc. - The allocation status of the payment becomes Allocated or Partially Allocated depending on whether the whole payment amount was allocated or not.
- For Allocated or Partially Allocated payments, on the Payment Details page, all documents involved in the allocation are displayed.
Within Statement Page and Customer Portal:
- Each invoice involved in a saved payment allocation changes its status to one of the following:
-
Pending - Indicates that the given invoice has been fully covered by the saved payment allocation.
Paying for such invoices on the Statement page or Customer Portal is no longer possible. -
Pending* - Indicates that the given invoice has been partially covered by the saved payment allocation.
Paying the remaining amount of such invoices on the Statement page or Customer Portal is possible.
-
Pending - Indicates that the given invoice has been fully covered by the saved payment allocation.
- The displayed Amount and Balance values remain unchanged until the given payment allocations have been fully synced with your ERP system.
- After the given payment allocations have been fully synced with your ERP system, the following happens:
- The invoices involved in the given payment allocations change their status to one of the following:
- Paid - Indicates that the given invoice is fully covered. Such an invoice is no longer displayed on the OPEN INVOICES tab, and is instead displayed on the CLOSED INVOICES tab.
- Partial - Indicates that the given invoices is only partially covered. Such an invoice remains on the OPEN INVOICES tab where the remaining balance can be paid.
- The new Amount and Balance values that have returned back to YayPay from your ERP system are now displayed.
- The invoices involved in the given payment allocations change their status to one of the following:
Modifying Payment Allocations
You can modify the payment allocation after it is saved but before an ERP sync has been executed. You can do it in one of the following ways:
Automatically Click on the Auto-Allocate button to overwrite the previously saved allocation with a new allocation done automatically based on predefined allocation rules.
To learn how the Auto-Allocate button works, see the Auto-Allocation Using Allocation Rules section.
Manually You can modify a payment allocation manually. For example:
- Modify the allocated amount of any selected invoice.
- Add invoices to the allocation.
- Remove any invoice from the allocation completely using one of the following methods:
- Click on the cross icon next to an allocated invoice.
- Unselect an allocated invoice in the Open Documents grid.
- Click on the Unselect All button above the Open Documents grid.

When you modify a saved allocation, the following happens:
- Within Cash Application – YayPay automatically recalculates the balances of the invoices that you have modified, added, or removed so that they can be used in other allocations.
- On the Statement page and Customer Portal – YayPay immediately adjusts the statuses of the invoices involved in the modified allocation. However, the Amount and Balance values are only recalculated after the given payment allocations have been fully synced with your ERP system.
