The Communications page in YayPay consolidates all your incoming and outgoing customer communications, providing a centralized location for all relevant information.
The Communications page has the following tabs:
- EMAIL REMINDERS – Displays your email communications with customers.
- MAIL – Displays physical mails sent to your customers.
This tab is only visible when the Outsourced Mail Service is activated for your account.
Email Reminders
The EMAIL REMINDERS tab lists sent and received customer emails.
This tab has the following sub-tabs:
- INBOX – Displays emails from your designated AR mailbox (Inbox) which are synced into YayPay.
- SENT – Displays emails sent to your customers from YayPay.
These emails are sent to either the customer or invoice contacts. For more details, see Customer's Billing Contacts in Email Reminders. - ALL – Displays all emails from both the INBOX or SENT tabs.
You can perform a Search to refine the messages shown on the Communications page by:
- Customer name
- Subject
- Email body
- Sender email
- Recipient email
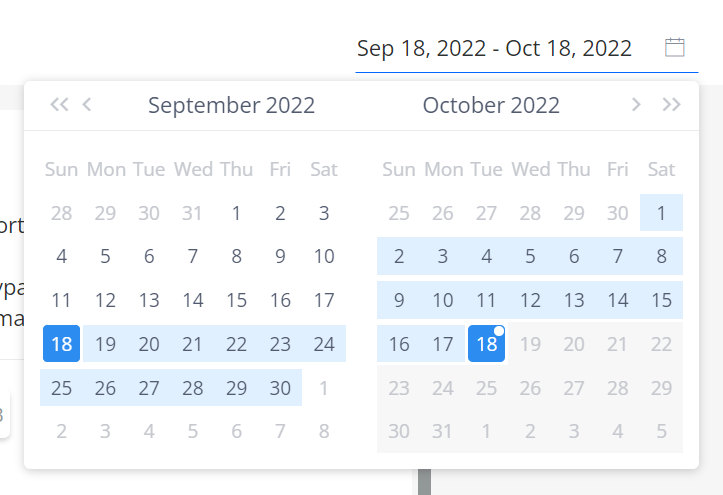
Also, you can use the filter dropdown, or search for messages within a date range.
 |
 |
Each email has a status associated with it in YayPay:
- Sent - A message was sent to your recipient (this message could have been sent via a scheduled workflow action or manually)
- Viewed - The recipient opened the message
- Replied - The recipient replied to the email message (the email message would be found in the inbox of your AR mailbox, and also in YayPay)
- Bounced - An attempt was made to send the email to the recipient's email address, however, no such recipient was found
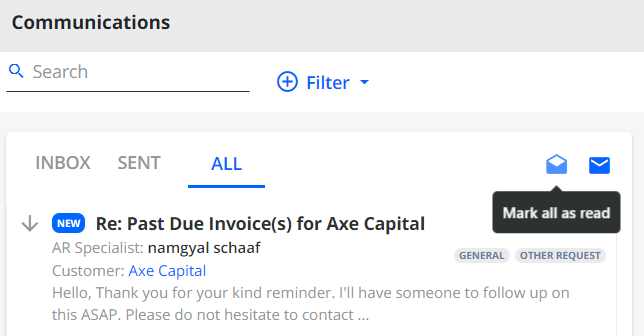
- New - New emails read from your AR mailbox into the YayPay platform, You can then mark the emails as read or unread (this update/change applies only in YayPay, and not the same email in your AR mailbox)
-
Error - Email was not sent.
The most typical errors are caused by:- Password authentication issues, preventing YayPay from connecting to your email host server:

- Missing customer contact information:
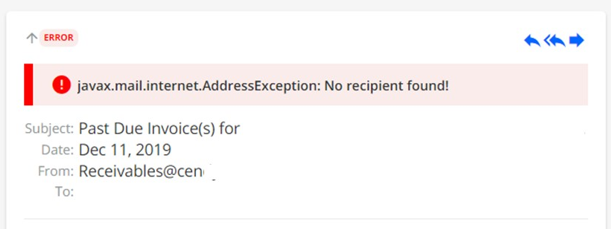
- Password authentication issues, preventing YayPay from connecting to your email host server:
To resend an email after fixing all issues, click Send Again located at the bottom of the email window.See Send Again.

-
Customer Replied (status for inbound emails) - Assigned to an email when the "From" field of an inbound message has been matched to the contact associated or assigned to the customer in YayPay. The "Customer Replied" status can be also used as a filter.
Use your Aging Report to identify customers that may have missing billing contacts to make sure the communications can be sent properly.
Email labels
Email labels are used for categorizing and managing emails by priority and actions required. With the help of labels, you can perform quick actions when working on emails while staying on the Communications page.
Email labels are received from the ML module or assigned by the user himself (only inbound emails).
Inbound emails labels
The labels are displayed both in the list of available emails and in the expanded view of the selected email. One email can have 0 to 3 labels. On hover over the label there is a standard tooltip with probability percentage, calculated by ML module:
There also is a "Are labels relevant?" option displayed in the email with at least one label assigned: you confirm that all labels are relevant by clicking it.
Assign/Remove a label
Adding a label to an inbound email or deleting an assigned label is available from the expanded view.
- to remove a label, click on its "cross" icon
- to assign a label, click "Add New Label +"
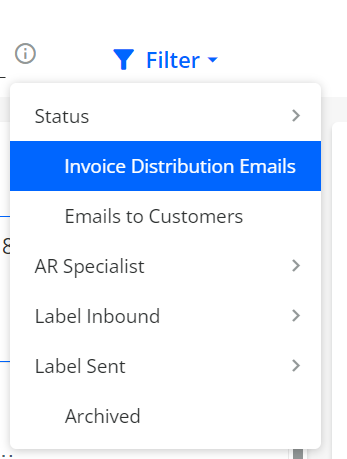
Filter inbound emails by labels
To filter your inbound emails list by labels, click Filter > Label Inbound and select the required labels (one at a time).
Sent email labels
For sent emails on the Communications page, only one label is used, which cannot be removed or changed.
In YayPay the sent email types (labels) are as follows:
- Daily Task
- Email Confirmation
- Notification to AR specialist
- Restore Password
- Test Email
- Email from Business
- Email to Sales Rep
- Invoice Reminder
- Staff Invitation
- User Invitation
- User Welcome
- Failed Impress Mail
- Failed Invoice Digital Signature
- Rule Email Reminder
- Inbound Mail Error
- Verification Code
- Analytics Report
Filter sent emails by labels
To filter your sent emails list by labels, click Filter > Label Sent and select the required labels (one at a time).
Actions with emails
The following actions are available for all emails:
-
Reply/Reply All – Opens the Reply/Reply All dialog where you can specify an email response.
To compose it, you can utilize Artificial Intelligence (AI) by clicking Generate Reply. This will generate a sample reply that you can review and edit as needed. The AI will take into account any prompt or context that you enter in the email body. For more information, see the Generating Email Templates Using AI article.
-
Forward – Opens the Forward dialog where you can specify recipients who will receive the forwarded email.
To formulate the email's message, you can utilize AI by clicking on the Generate Email button. For more information, see the Generating Email Templates Using AI article.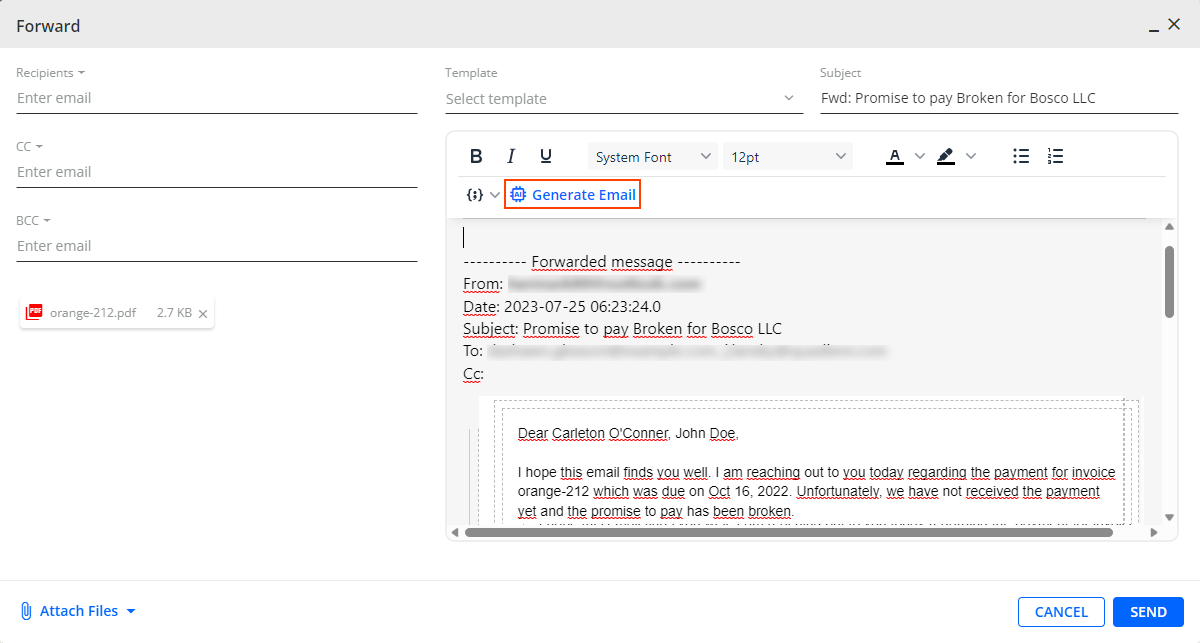
Delete – Deletes the selected email.
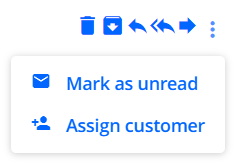
If an email has no Customer assigned, the actions available for such an email include:
- Mark As Unread – Marks the email as unread.
- Assign Customer – See Assign Emails to Customers.
-
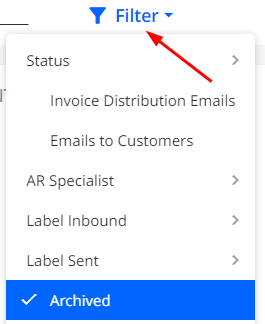
Archive from Inbox: archive the incoming emails shown under the INBOX tab, which are synced into YayPay from your AR Mailbox, and avoid clutter in the inbox to be able to work only with active messages. The email you selected to archive affects the email synced into YayPay only, the original email in your AR Mail Inbox is not affected/left untouched. The archived email is removed from the inbox and appears again in case a new reply in the thread is received.

Filtering the archived emails is available from the Filter menu.
If an email has a Customer assigned, the following actions are available:
- Archive from Inbox – Archives the incoming emails shown on the INBOX tab. For more details, see Archive from Inbox.
- Manage Customer – See Assign Emails to Customers.
-
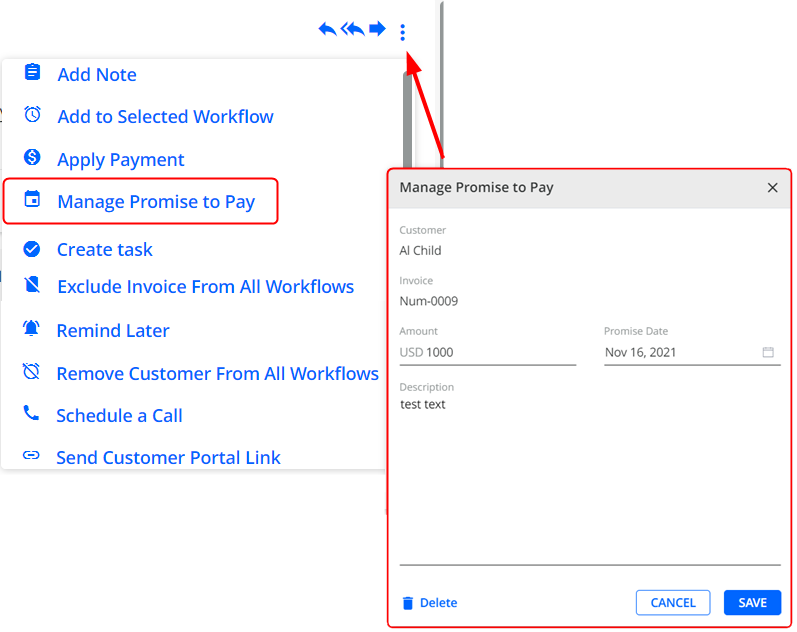
Manage Promise to Pay - Provides the ability to
-
Create a promise to pay.
After creating a promise to pay and clicking SAVE, the respective invoice is updated across the system:- The Activity bock on the Statement page is updated.
- A Task item is created.
- A notification to an AR (if enabled) is sent.
- Edit existing promises to pay by modifying their promise date, description text, and amount (only for a single invoice selected).
- Delete existing promises to pay.
-
Create a promise to pay.
Tasks type actions
Tasks type actions include:
-
Create Task

-
Schedule a Call

- Remind Later

- Add Note

The saved task (email reminder, call, note) is displayed on the Tasks page. The Activity block on the Statement page is updated accordingly.
"Email" type actions
"Email" type actions include:
- Send Customer Portal Link

- Send Invoice / Statement PDF
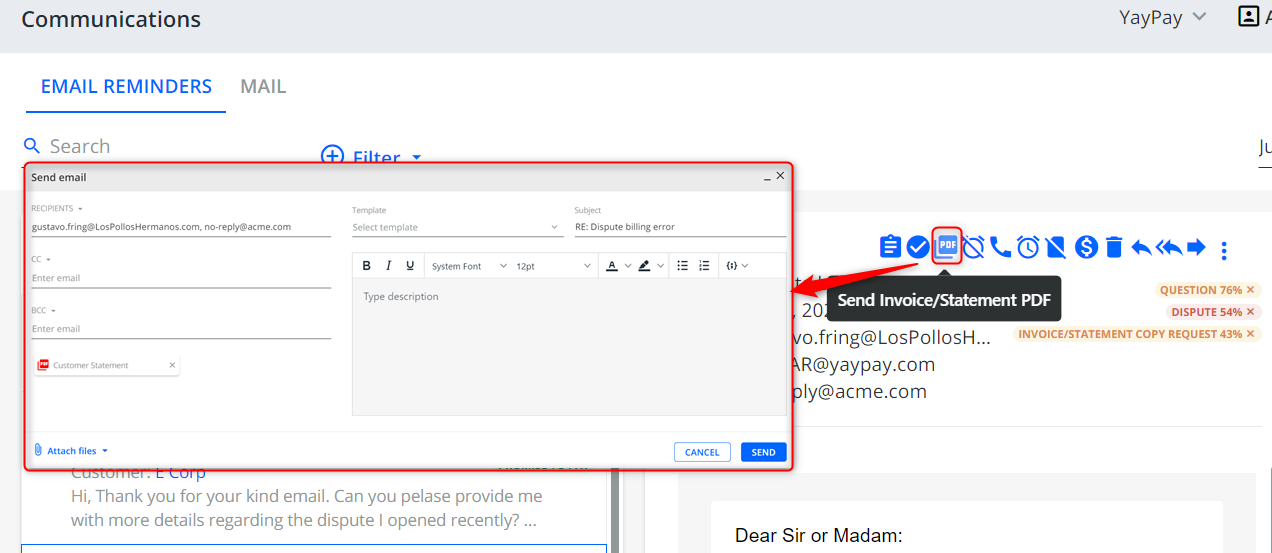
The sent email is displayed in the list of sent emails, and the Activity block on the Statement page is updated accordingly.
- Remove Customer from All Workflows

With this action, the Customer can be removed from all workflows, except for Global Rules. The Customer's status will be updated accordingly across the system.
- Add to Selected Workflow

- Update contact details

By clicking the "Update contact details icon" you are redirected to the current Customer's Statement page in a new browser tab.
-
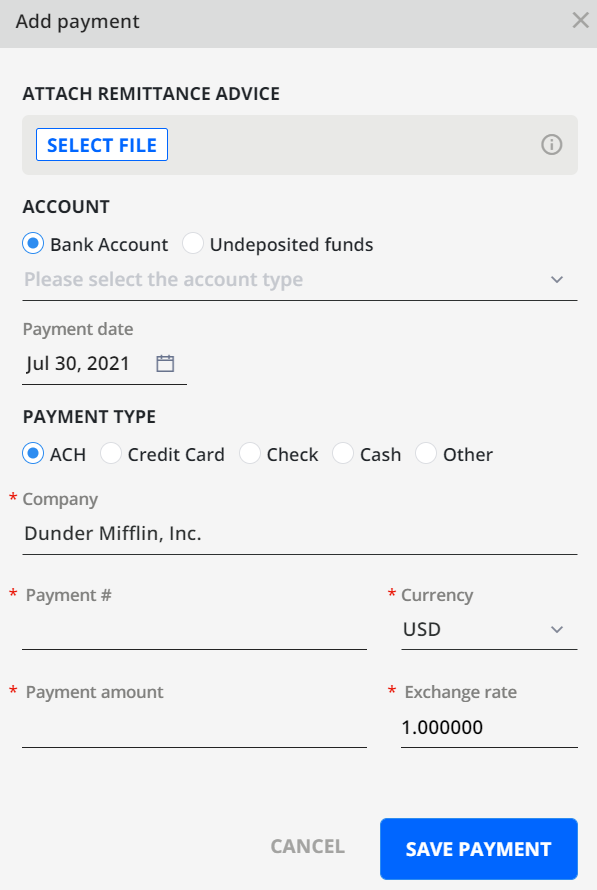
Apply Payment - only for accounts with available Cash App:

By clicking the Apply Payment action you are redirected to the Cash App in the new browser tab, with an "Add payment" pop-up opened:
-
Exclude invoice from Workflow and Global Rules - Excludes the selected invoice from the current customer's workflow and global rules (manually).
Opens the Exclude from Workflows and Global Rules dialog where you can choose whether to exclude the invoice from both workflows and global rules, or only workflows.
To keep the invoice included in global rules only, check the Keep invoices included in global rules check box and click PROCEED.
-
Open Dispute – Opens a dispute for the selected customer's invoice.
To do so, select an invoice or dispute related email that you received and click on the Open Dispute icon in the action bar (if available) or select the Open Dispute option from the menu that appears after clicking on the three dots in the top-right corner of the page.
This opens the Open Dispute dialog where you can select an opened invoice that you want to dispute from the Invoice combo box. Once an invoice is selected, its details like total due, created date, due date, and currency are displayed.
Additionally, you can also edit fields such as Disputed Amount, select Dispute Code or edit the Comment which is automatically pre-filled with the received email.
Send Again
You can resend emails that were not successfully sent by clicking on the Send Again button located at the bottom of the email window (on the Communications page and/or customer Statement page (EMAILS tab).
When you resend an email, the following applies:
The message will be sent again to the same recipients, having the same subject and body.
The attachments of the original email will be also included.
The "Invoice Delivery" functionality (tracking the first delivery of the invoice) applies to the Send Again mechanism as well, i.e. the first successful delivery of the invoice is considered initial, not the first actual one.
After successful resending, emails with Error status become Sent.
