You can open an invoice dispute in situations where you have concerns about the legitimacy or accuracy of the invoice, ensuring that any discrepancies or issues are addressed and resolved.
Disputes can be opened, edited and closed from the following locations:
- The Statement page, e.g. if the AR team receives a call or an email from the customer questioning the invoice legitimacy or accuracy.
- Your customer's Customer Portal web page.
- The Communications page where you can open a dispute, e.g. when you receive a dispute related email.
Activating the Disputes Page
To activate the Disputes page, contact YayPay Support (support@yaypay.com) or your YayPay Account Rep.
Once active, you will gain access to the following features, allowing you to:
View all the disputes on a single Disputes page.
-
Use the functionality on the Disputes page, for example:
manage disputes, including editing the Disputed Amount
- Use the Detailed View panel.
Open line-item disputes, i.e. dispute only specific line items on an invoice instead of opening a dispute for the whole invoice.
Use the X days after dispute created and X days after dispute updated workflow events.
Configure security settings to manage access to the Disputes page.
If you do not have the advanced disputes functionality activated, you will still have access to a basic set of dispute-related features. For more details, see the Disputes section.
Disputes Page Overview
The Disputes page comprises a workspace for managing disputes all over the system in one place.
It includes the header, the grid with two tabs (OPEN and RESOLVED), and the detailed view panel:

Disputes Page - Header
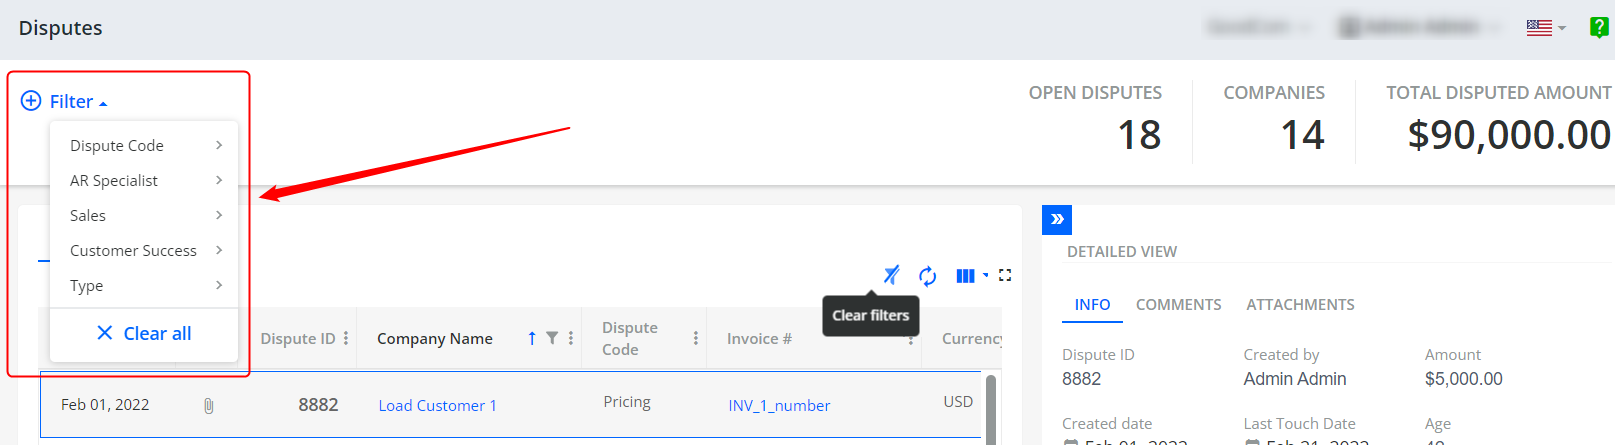
The header displays the counters for the total number of open disputes, companies with open disputes, and the total disputed amount (in your business-level currency).
The numbers in the header are filter-sensitive (including grid column filters);
The filter button in the header allows filtering the disputes by their codes (shortage, damage, wrong product, pricing, credit memo, tax, other), AR Specialist/Sales/Customer Success assigned, and by the dispute type (invoice, line-item). Multiple filtering can be applied.
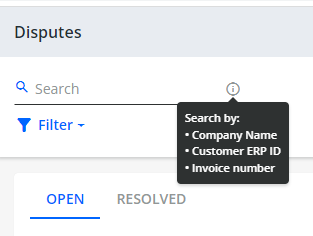
Search functionality on the Disputes page incorporates disputes search by
- Company Name
- Customer ERP ID
- Invoice number
Disputes Page - Grid
The grid on the Disputes page displays both open and resolved disputes, each listed on their respective tabs.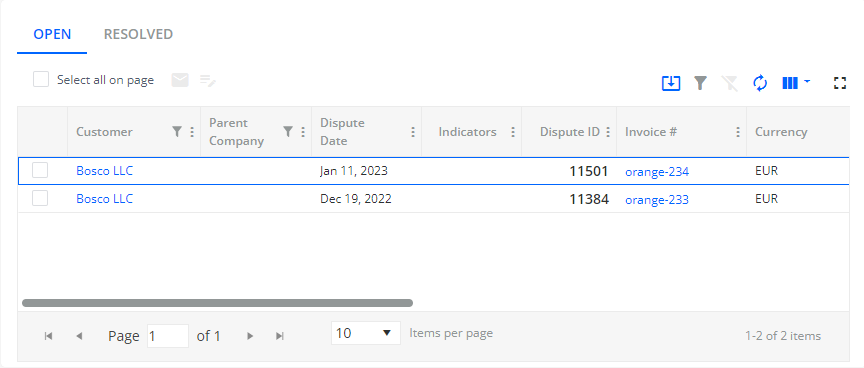
You can either select the individual disputes manually by checking the check boxes on each line or check the Select all on page check box to select all of them. Depending on the selection, relevant actions on the action bar become available, e.g. Send Email Reminder. These actions are described in separate sections below.
Additionally, you can use the following grid-related actions located on the right above the grid:
-
Export to Excel – Downloads an Excel file that contains the data from the grid on the OPEN tab.
If any columns have filtering applied, only the filtered values will be included in the Excel file.
-
Filter – Displays the number of filters used to filter the content of the grid's columns.
Examples of the filters within the columns: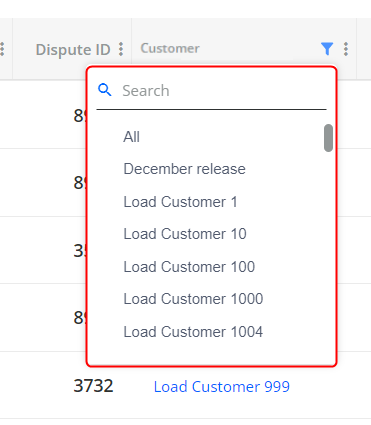

Clear Filters – Clears all the applied filters.
Reset Columns to Default – Resets the columns displayed to the default setting, i.e. only the default columns are visible in the grid.

-
Select Columns – Determines which columns are visible.
To add columns, click on the Select Columns icon above the grid and select the column names from the list. After selecting the columns, click on Apply Changes to confirm and display them in the grid.
Expand Grid – Extends the view of the grid, which makes it easier to customize it.
The following table provides an overview of the different tabs available on the Disputes page, along with the columns that can be displayed on each tab's grid:
| Disputes Page Tabs | Columns Displayed by Default | Columns that Can Be Added to Grid |
|---|---|---|
| OPEN | Date, Indicators, Dispute ID, Customer (clickable, including parent company if any), Invoice # (clickable), Currency, Dispute Code, Dispute Age, Disputed Amount, Invoice Amount Due, Invoice Total Amount, Last Touch Date |
Dispute Subcode, Dispute Type, Line Item Details (= item name, quantity, price), Customer ERP ID, Assigned Sales, Invoice Age, Invoice Date, Invoice Due Date, Invoice Status, Last Dispute Comment, Last Touch By, Created By, Assigned AR, Assigned CS + System and ERP Custom fields (both customer- and invoice-level), Assignee, Assignment Date |
| RESOLVED | Date, Indicators, Dispute ID, Customer (clickable, including parent company if any), Invoice # (clickable), Currency, Dispute Code, Dispute Age, Disputed Amount, Invoice Amount Due, Invoice Total Amount, Last Touch Date, | Dispute Subcode, Dispute Type, Line Item Details (= item name, quantity, price), Customer ERP ID, Assigned Sales, Invoice Age, Invoice Date, Invoice Due Date, Invoice Status, Last Dispute Comment, Last Touch By, Created By, Assigned AR, Assigned CS, Resolved Date, Resolved By, Resolution Code + System and ERP Custom fields (both customer- and invoice-level), Assignee |
Selecting and Managing Disputes
You can either select the individual disputes manually by checking the check boxes on each line or check the Select all on page check box to select all of them. Depending on the selection, relevant actions on the action bar become available, e.g. Send Email Reminder or Manage Dispute. The individual actions are described in separate sections below.
Managing a single dispute
When managing single disputes, you can change the disputed amount, disputed code and its subcode, add relevant documents, provide comments, or resolve the dispute.
To do so:
Check the check box next to an open dispute.
- Click on the Manage Dispute icon located above the grid.
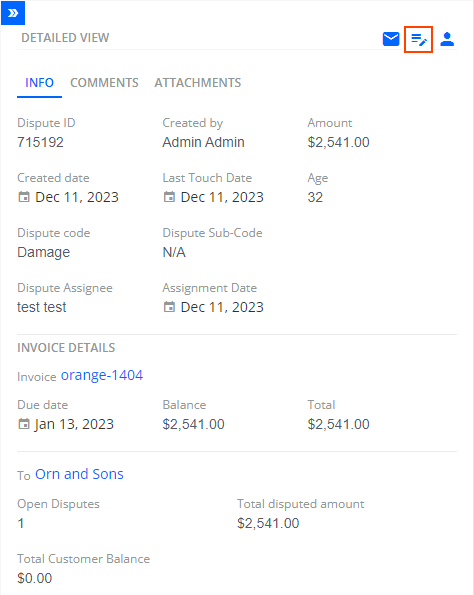
Alternatively, click on the Manage Dispute icon on the DETAILED VIEW panel on the right.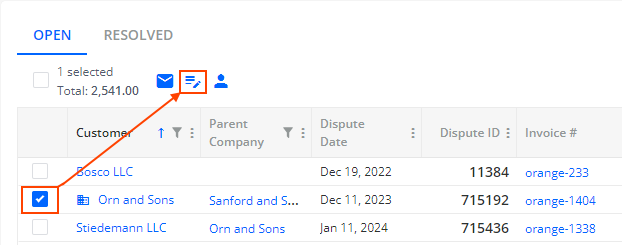
-
In the Manage Dispute dialogue that opens, you can take the following actions regarding the dispute: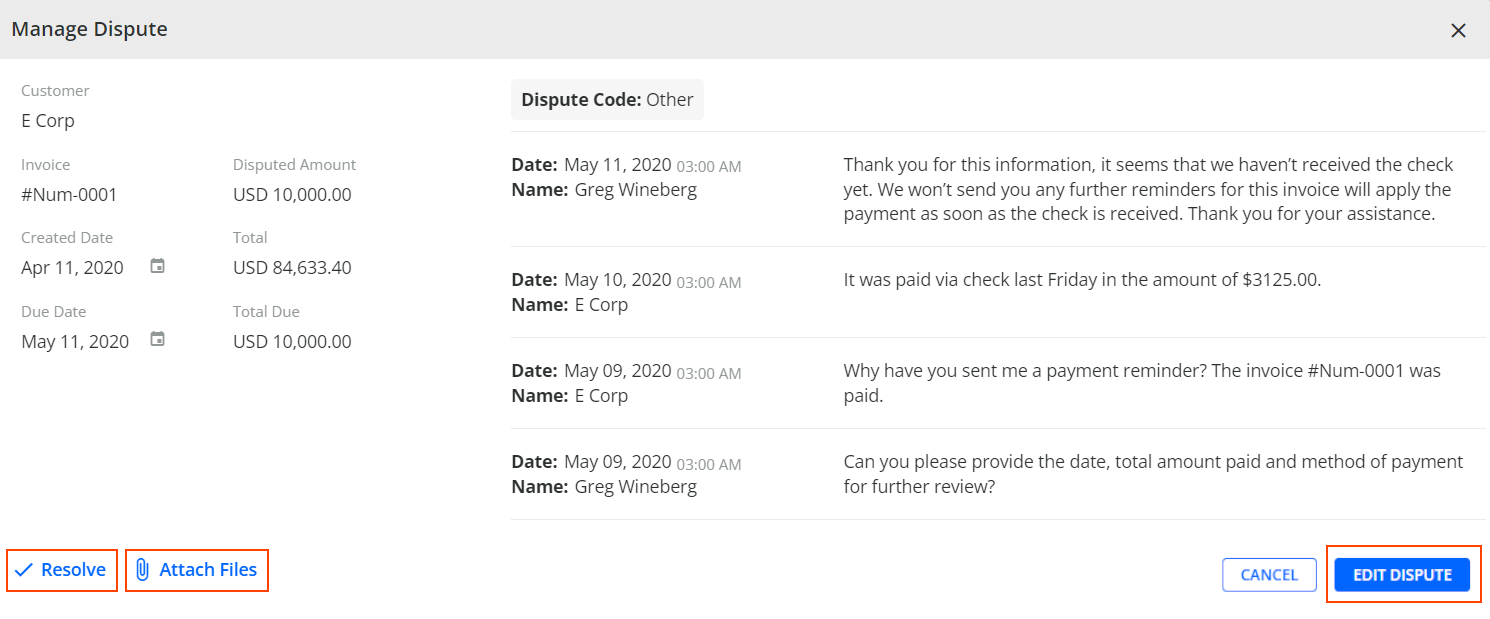
-
Resolve – Click on this button to open the Resolve Dispute dialog where you can define the Resolution Code field, add a comment, and click on the RESOLVE button to resolve the dispute.
Once resolved, the dispute is moved to the RESOLVED tab on the Disputes page.
-
Attach Files – Click on this button to upload dispute related documents or drag and drop them directly into this dialog.
Once uploaded, a paperclip icon will be displayed in the Indicators column in the grid.
To save your changes, close the Manage Dispute dialog.
-
EDIT DISPUTE – Click on this button to open the Edit Dispute dialog where you can:
Change the disputed amount.
Change the disputed code and its subcode (if configured). Fore more information about subcodes, see the Managing Dispute Codes article.
Add a comment that will be added to the dispute.

Click SAVE to save your changes. This closes both the Edit Dispute and Manage Dispute dialogs.
-
-
To review your changes, see the ACTIVITY tab at the bottom of the Statement page.
Managing multiple disputes
When managing multiple disputes, you can change the disputed code and its subcode; add relevant documents, provide comments; or resolve the selected disputes.
To manage multiple disputes:
-
Select the disputes.
You can do this manually or use one of the Select all on page or select all disputes of the given currency options: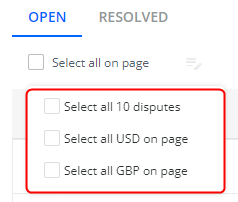
- Click on the Manage Dispute icon located above the grid.
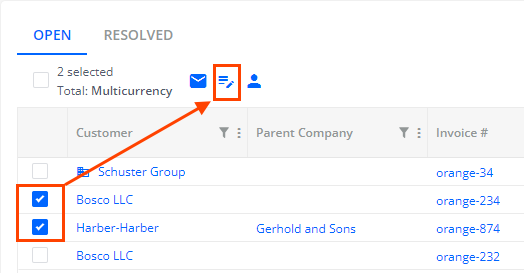
- In the Manage Dispute dialog that opens, you can take the following actions:
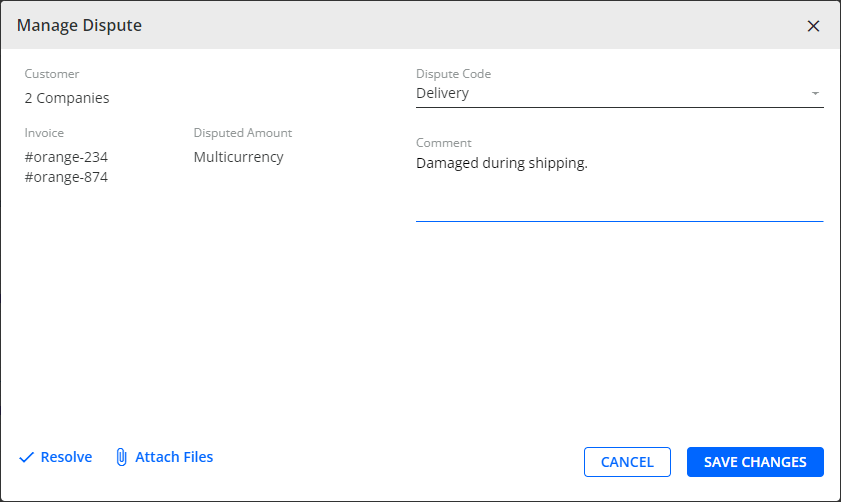
Change the dispute code.
Add a comment.
Resolve the dispute.
Attach dispute related documents.
For more details about these actions, see the Managing single disputes section.
Click SAVE CHANGES to save your changes. This closes the Manage Dispute dialog.
To review your changes, see the ACTIVITY tab at the bottom of the Statement page.
Manage Dispute Assignee
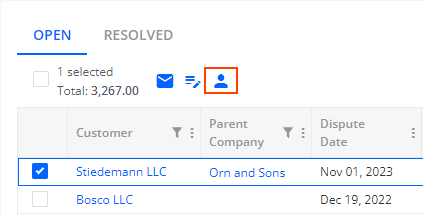
For open disputes, you can select and assign a dispute assignee.
Select one or multiple disputes and click on the Manage Dispute Assignee icon located above the grid.
In the dialog that opens, you can choose an assignee from the list of active users grouped by their roles.
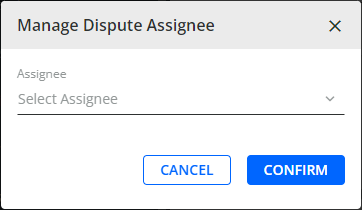
After confirming your selection, the chosen assignee and the date of assignment will be displayed in the Assignee and Assignment Date columns that you can add to the grid.
In addition, you can sort and filter the content in both columns.
The same information is also displayed on the DETAILED VIEW panel located on the right side of the page.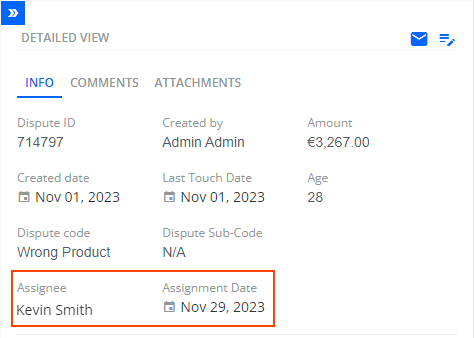
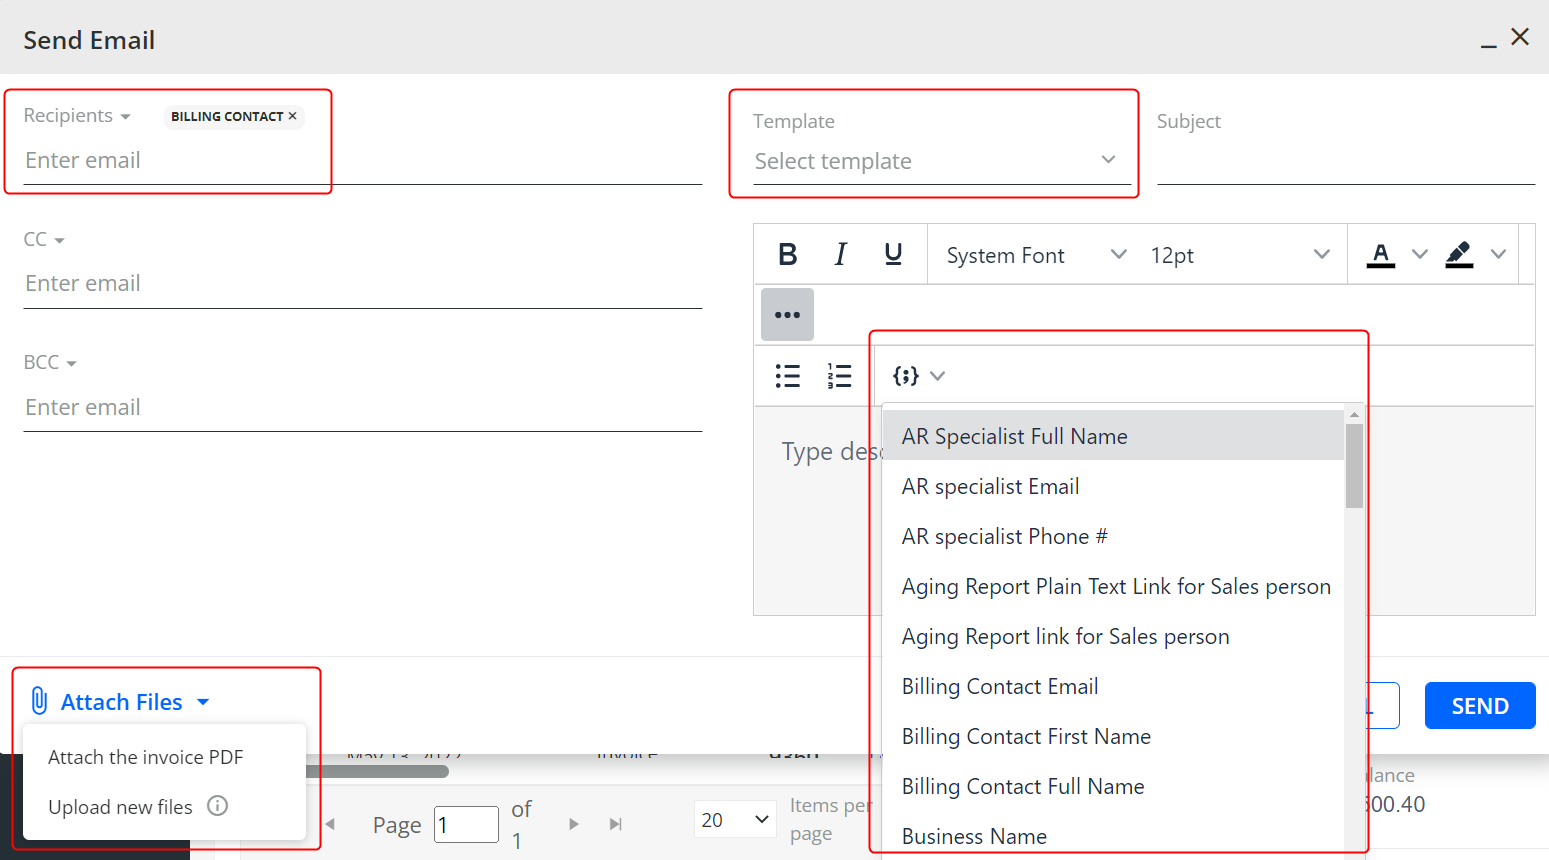
Sending an Email Reminder
The Send Email action is available both from the grid and from the detailed view panel:

Clicking on Send Email opens the standard YayPay dialog allowing you to select an email template, use dynamic tags functionality, attach documents to your message (either selected via Attach Files or drag and dropped), select recipients (the suggested being the Billing Contact), etc.
Upload Attachment to Resolved Dispute
To upload documents related to the dispute that has been resolved:
- Select one or multiple disputes and click the paperclip icon at the top of the RESOLVED tab.

- In the Upload Attachment dialog, select a file or drag and drop it directly into the dialog and specify its name.

The supported file formats include PDF, JPEG, JPG, PNG, CSV, TXT, DOC, DOCX, XLS, XLSX, and GIF. The maximum size is 100 MB.
If documents are attached to a dispute, it is indicated by the respective icon in the grid.
-
Click UPLOAD to upload the file.
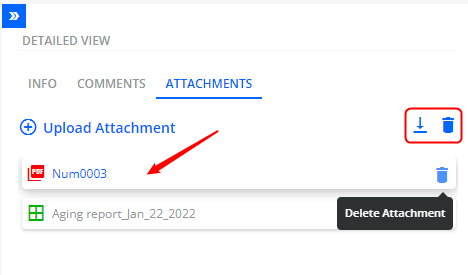
Once uploaded, you can view attachments on the ATTACHMENTS tab of the DETAILED VIEWpanel on the right side of the page:
On this tab, you can also manage all the attachments, i.e. you can upload more attachments, download or delete them.
Reopen Dispute
To reopen a dispute that was resolved, go to the RESOLVED tab in the grid, select the dispute, and click the Reopen dispute button either from the top of the grid or from the Detailed View panel.
In the Reopen Dispute dialog that opens, you can see the entire dispute history, its amount, disputed code and its subcode. You can also attach relevant documents (either selected via Attach Files or drag and dropped) or reopen the dispute.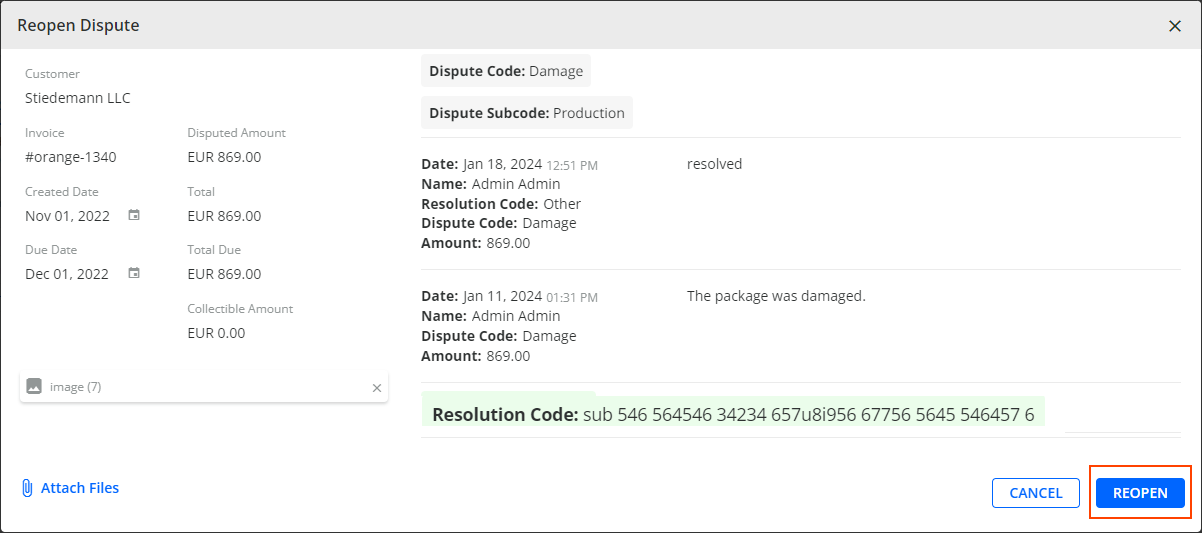
To reopen the dispute, click on the REOPEN button. In the dialog that opens, you can edit the Disputed Amount, Dispute Code, and Comment fields.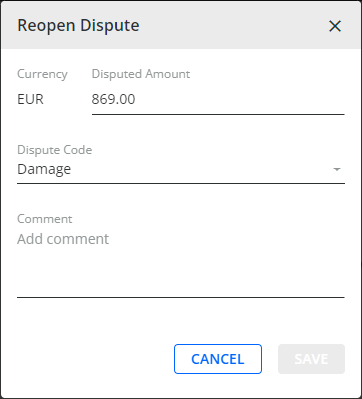
Once a dispute is reopened, it will be moved back to the OPEN tab.
Disputes Page - Detailed View Panel
Click on a dispute in the grid to see its details. There are three tabs:
INFO
- Dispute ID (unique ID of the dispute in the system)
- Amount (the disputed amount)
- Created by (the user who created the dispute)
- Created Date (the date the dispute was created)
- Last Touch Date (the date of the last touch with the customer)
- Age (age of the dispute in days from its creation date)
- Dispute Code (code of the dispute, also see https://yaypay.helpjuice.com/en_US/44476-account-settings/810499-disputes)
- Dispute Assignee (Assignee and assignment date)
- INVOICE DETAILS: clickable Invoice number, Due date, Balance, Total
- CUSTOMER DETAILS: clickable Customer, number of Open Disputes, Total disputed amount, Total Customer Balance
Note: the currency of the Total Customer Balance displayed can be adjusted with the "Use calculated customer balance" setting in Settings > Business. (Also, see https://yaypay.helpjuice.com/en_US/44476-account-settings/general-business-settings#use-calculated-customer-balance)
COMMENTS
- + Add comment button (ability to edit dispute code, and add a text comment)
- disputes opening and resolving history (comments, codes)
- Resolution code (for resolved disputes)
Note: for line-item disputes, the comments history contains only line-item details, for invoice-level disputes, there is the whole dispute history included.
ATTACHMENTS
- By clicking on the Upload Attachment button, you can select or drag and drop a dispute-related document. After a document has been uploaded, the indication icon is shown in the grid.

On the ATTACHMENTS tab, you can also download or delete the attached documents.
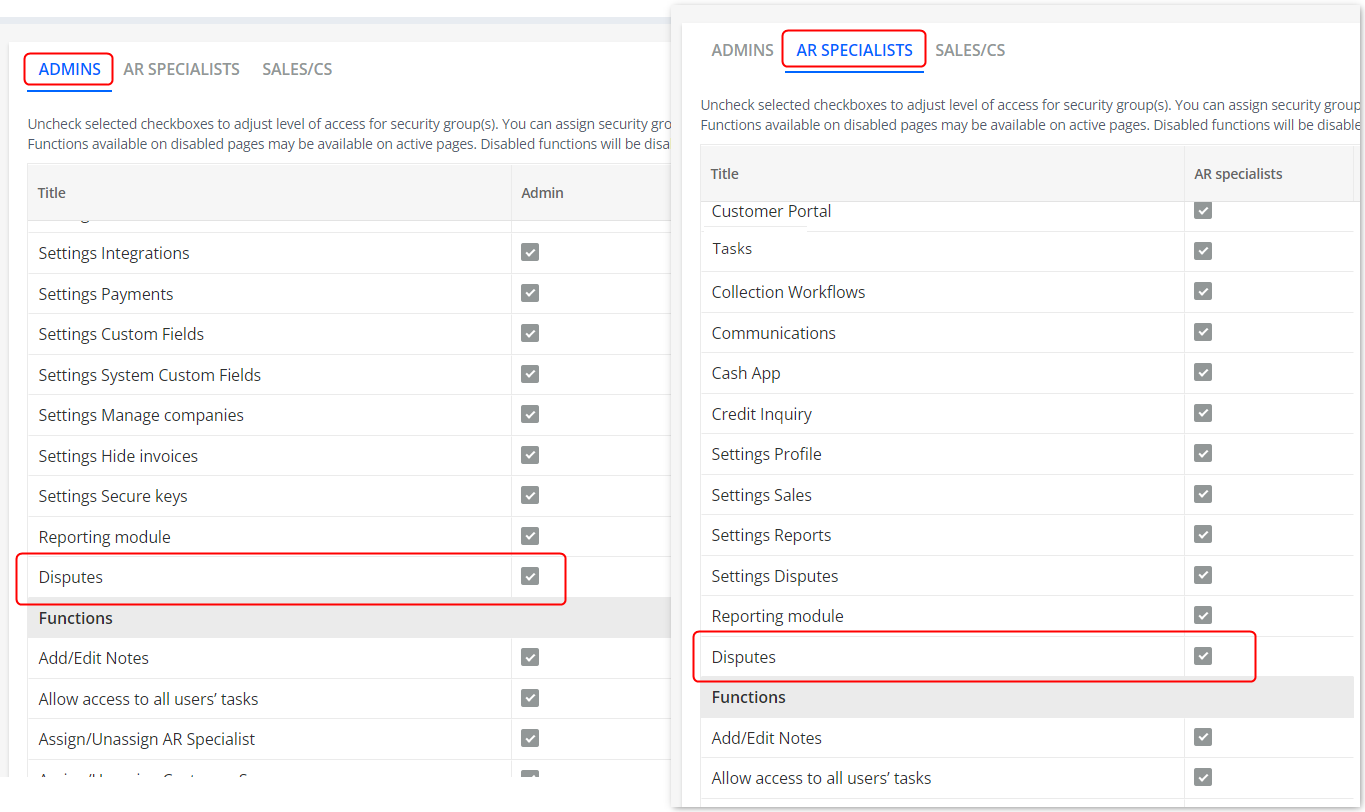
Security Settings for Advanced Disputes
The access to the Disputes page is enabled for Admins and AR Specialists (see Settings > Security Groups):
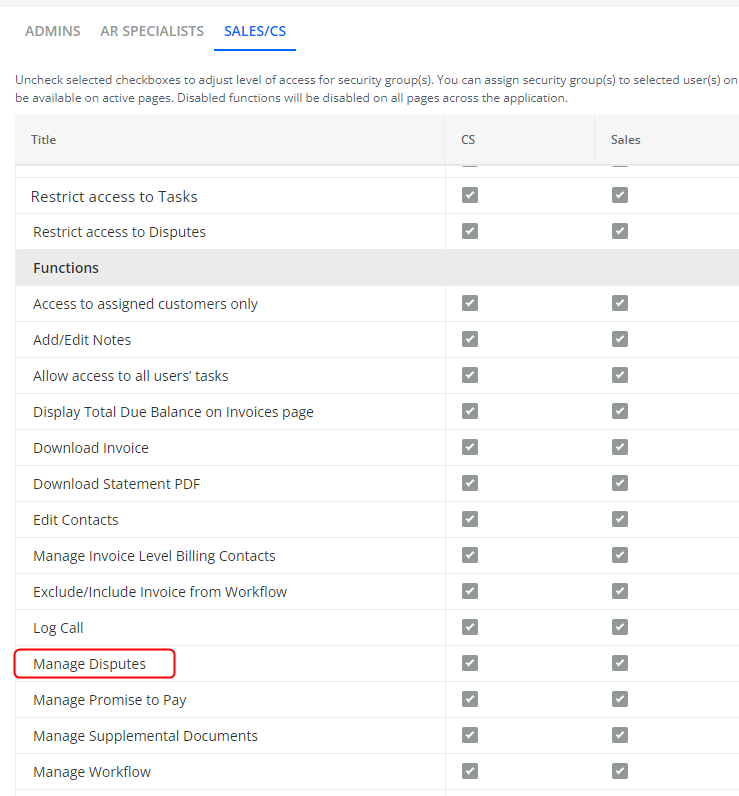
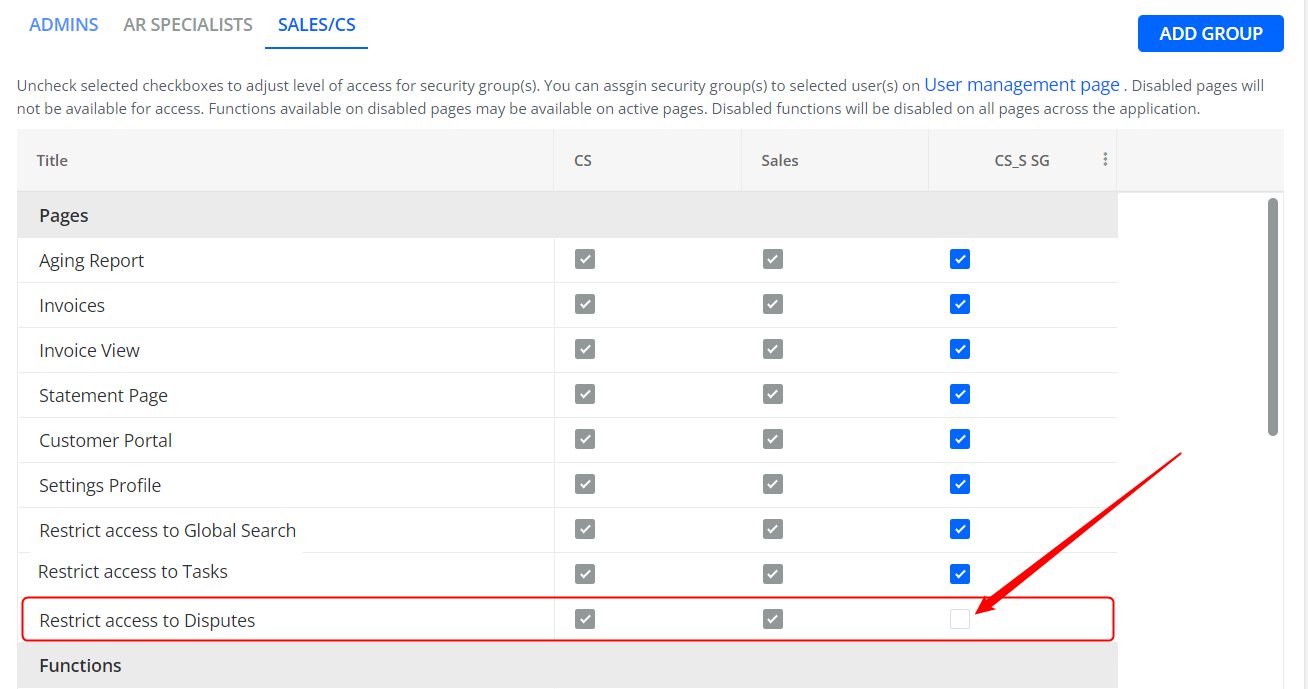
CS users by default have no access to the Disputes page, however, you can allow certain groups to manage disputes by disabling the "Restrict access to Disputes" option:
The "Manage Disputes" function regulates the ability to manage and reopen disputes: