This section provides an overview of the redesign of the Customer Portal page, highlighting the key differences between the previous and current versions.
The current version has been completely overhauled to offer you an enhanced user experience, with improved functionality and a variety of exciting new features.
What it Brings to Our Customers
- Improved user experience that makes finding information faster and easier.
- Enhanced efficiency, saving customers time and effort while improving overall productivity.
- Improved payment flow that aligns all cases in one modal view.
- Better experience when managing saved payment methods.
- Improved grid view with extended options for sorting and filtering data.
With our new portal, you can:
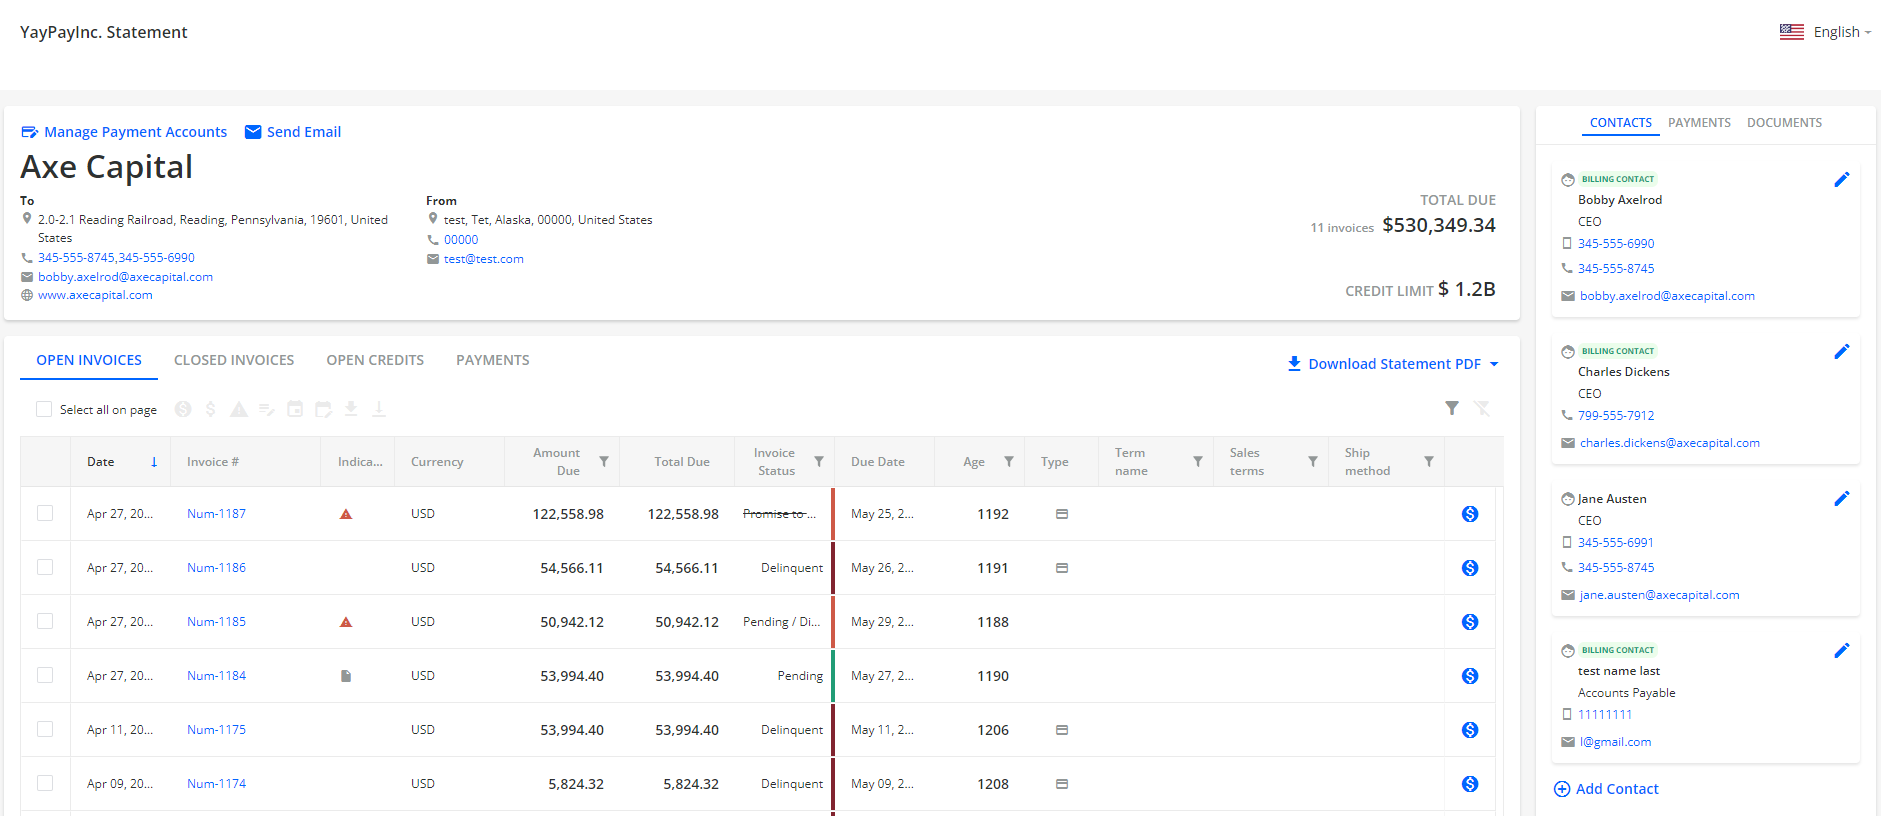
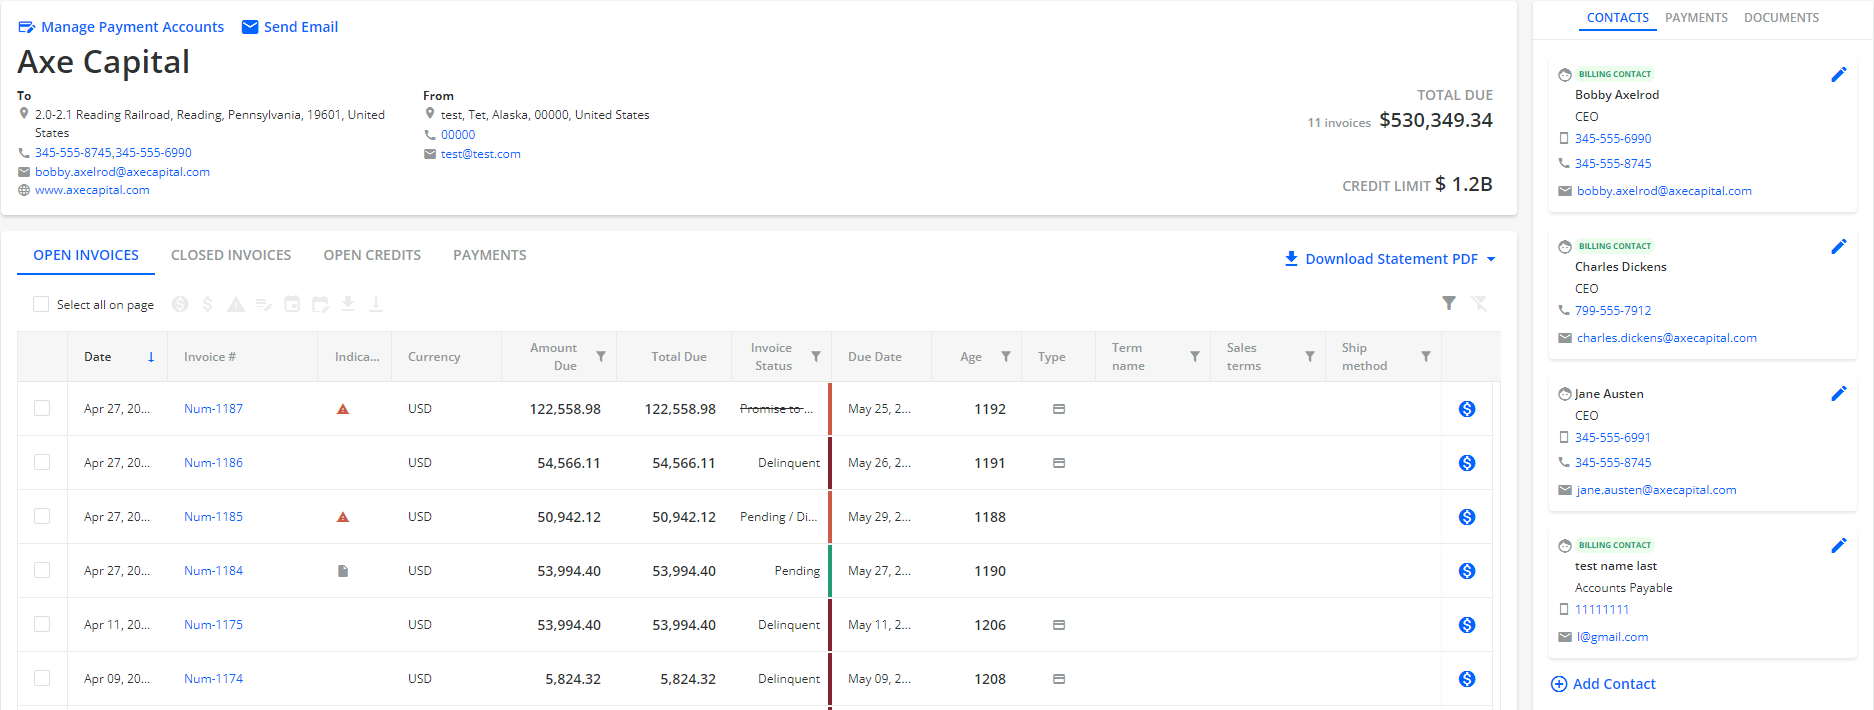
- Manage your payment accounts.
- Send emails directly from the header.
- Use the action bar above the grid to perform tasks such as paying for invoices, opening disputes, downloading invoices and more.
- Sort and filter available columns, which now provide more information.
The appearance and behavior of the Customer Portal web page can be further configured and adjusted in Settings | Business page in YayPay.
The following sections summarize the key differences between the previous and current versions.
Design
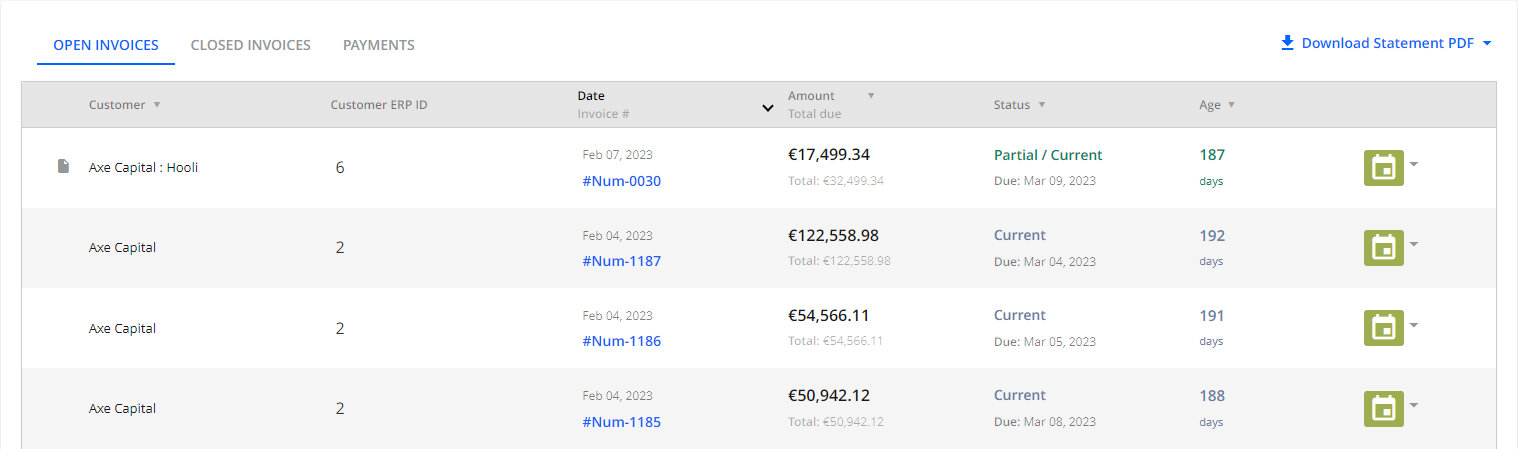
Our Customer Portal web page has undergone a design improvement to bring it in alignment with the user interface of YayPay.
| Previous Version | Current Version |
|---|---|
|
|
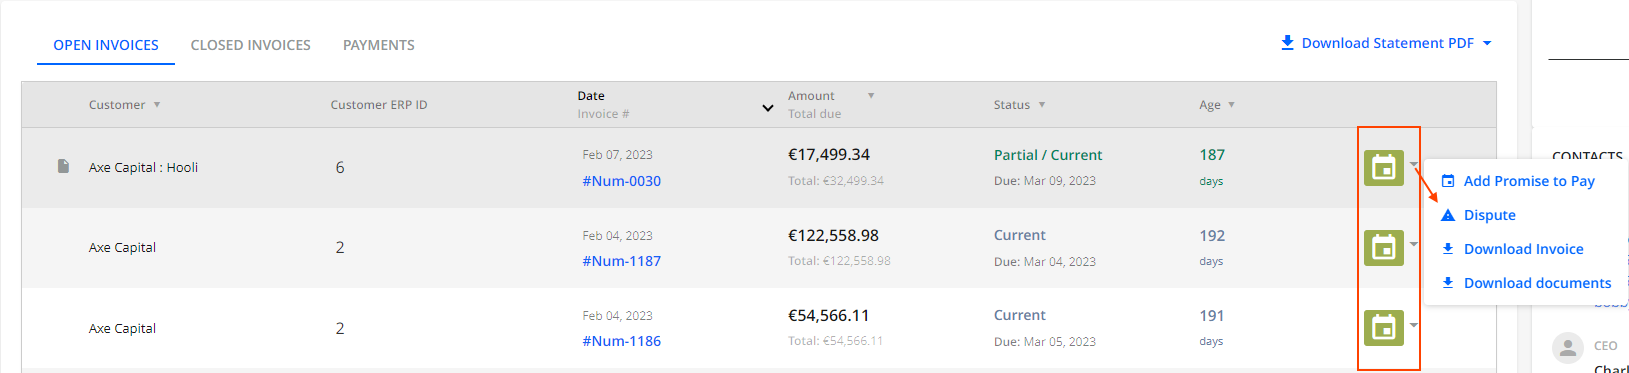
Action Bar
In the current version, we moved the action bar above the grid. When selecting invoices, only relevant actions are accessible.
| Previous Version | Current Version |
|---|---|
|
Actions are located on the right side of the grid after you click on the green Actions button. |
Actions are located above the grid. When selecting invoices, relevant actions become accessible on the action bar. |

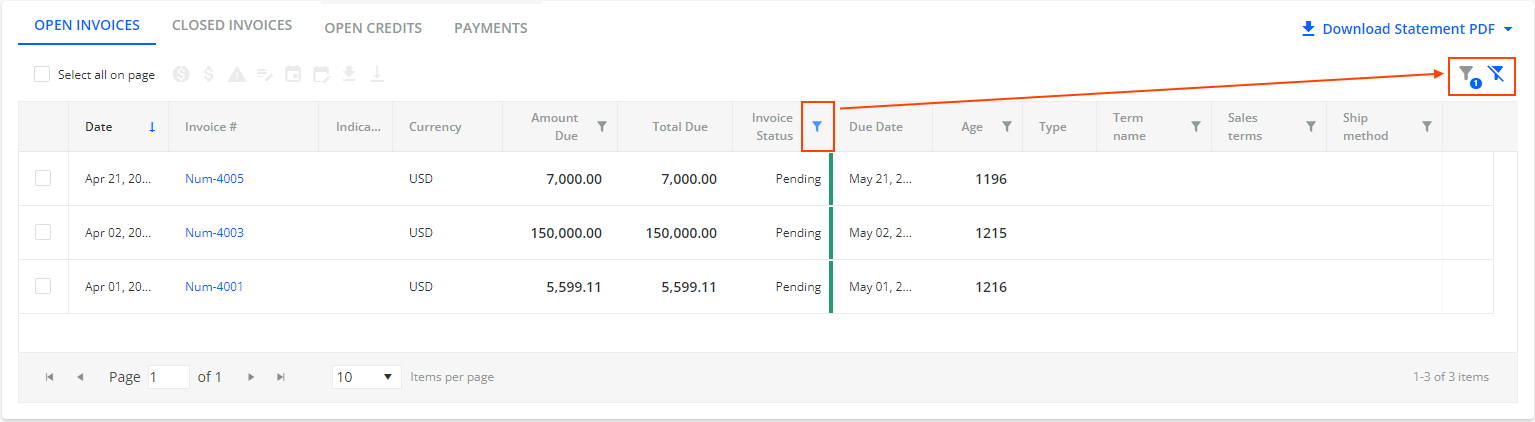
Grid Columns
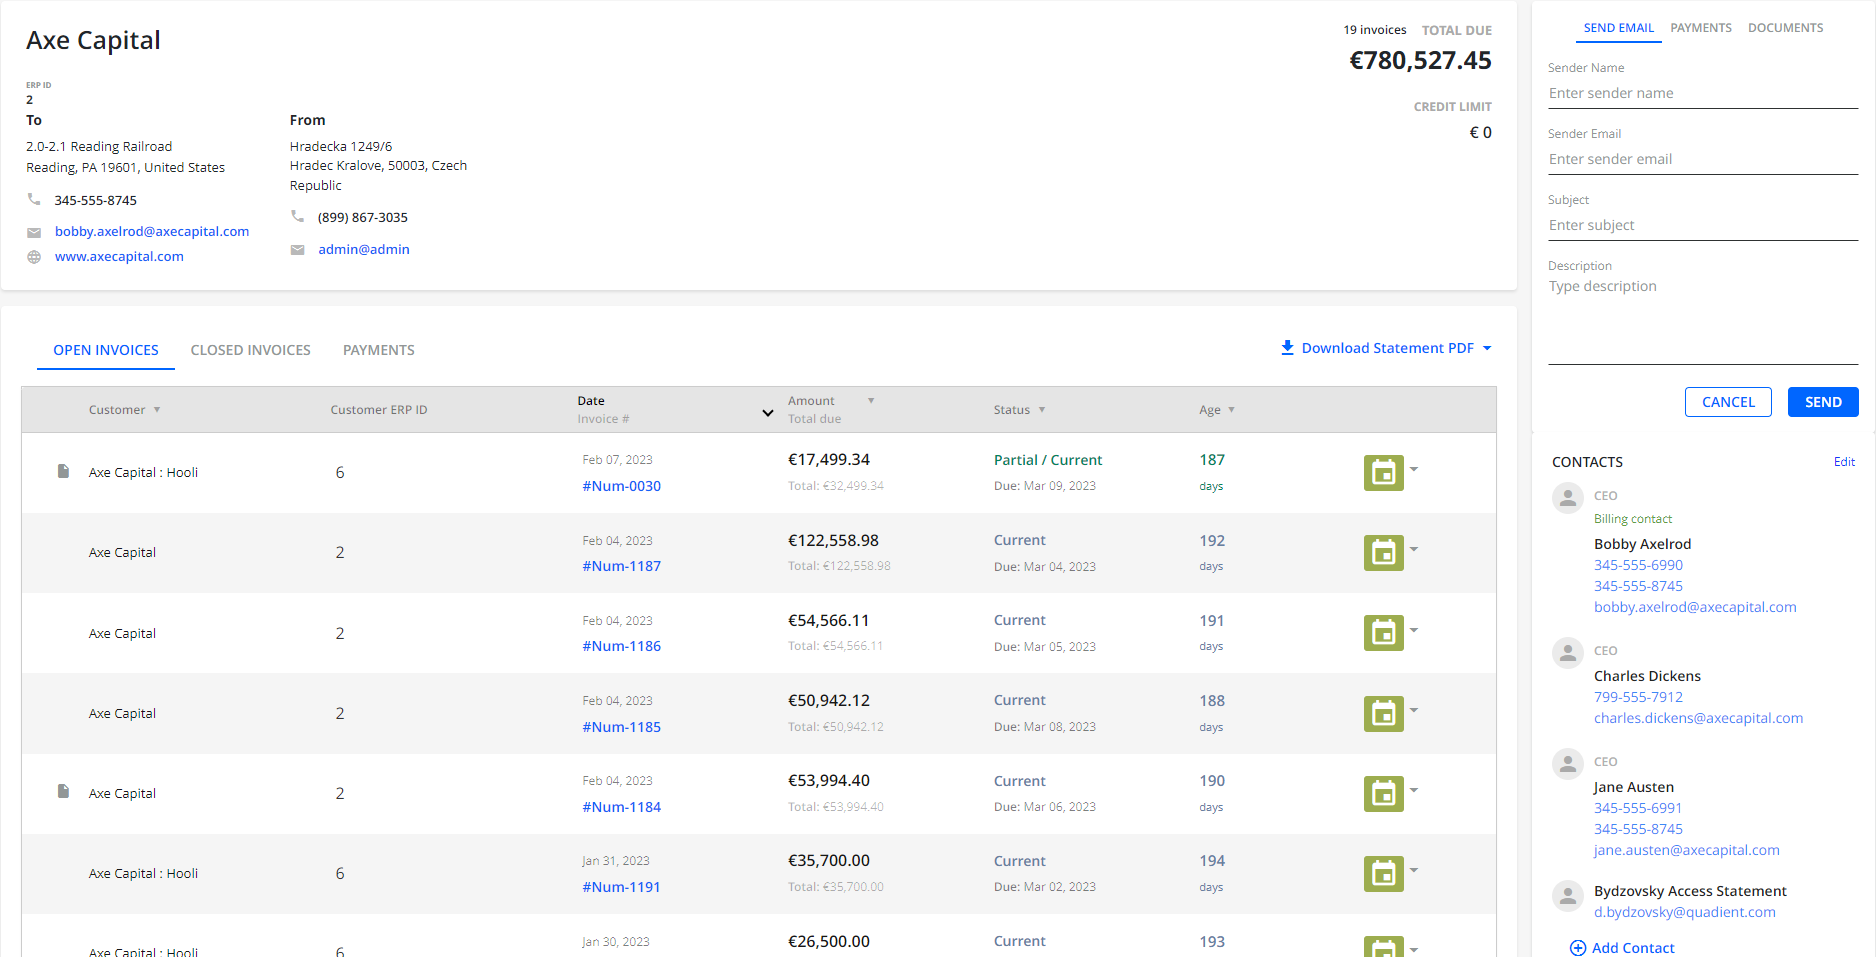
In the current version, the grid offers more detailed information and you can sort and filter the data in some of the columns.
| Previous Version | Current Version |
|---|---|
|
The grid now offers more detailed information, along with sorting and filtering options for some of the columns. |
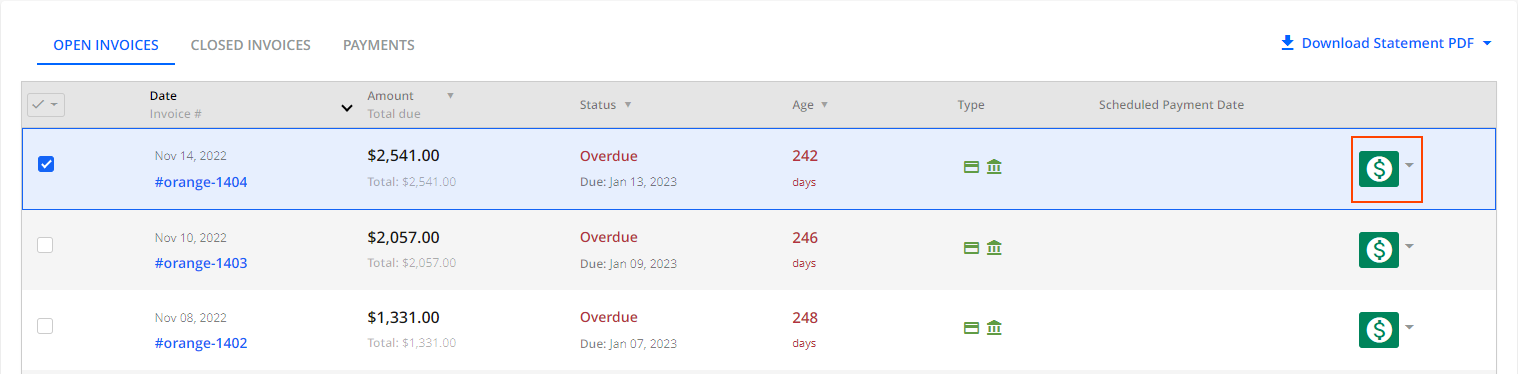
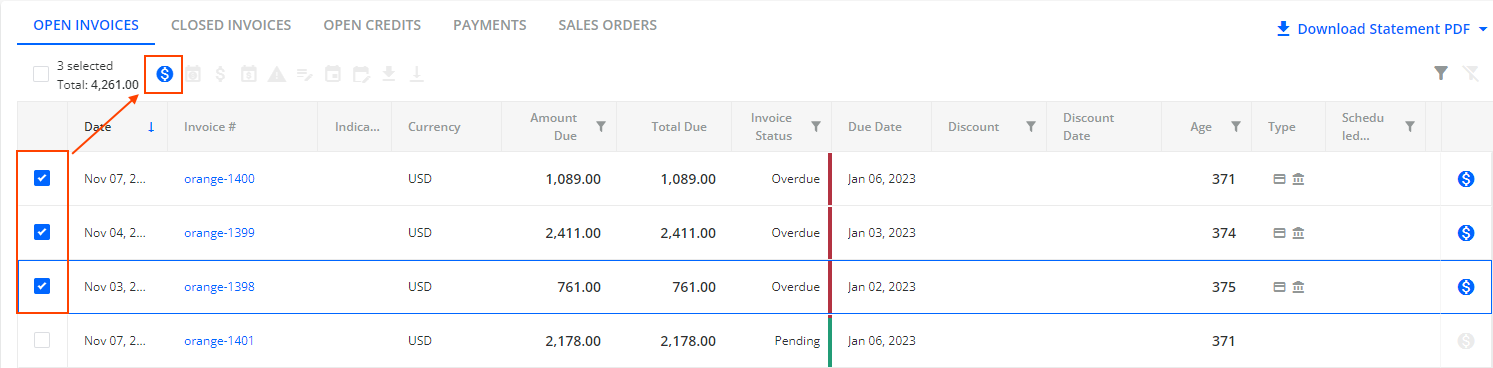
Making Payments
In the current version, the Pay action is located in the action bar above the grid and on the right side of the selected invoices.
To make a payment, select the invoices and click on the Pay icon.
| Previous Version | Current Version |
|---|---|
|
Located in the action bar and on the right side of the selected invoices. The total amount of selected invoices is displayed above the grid. |
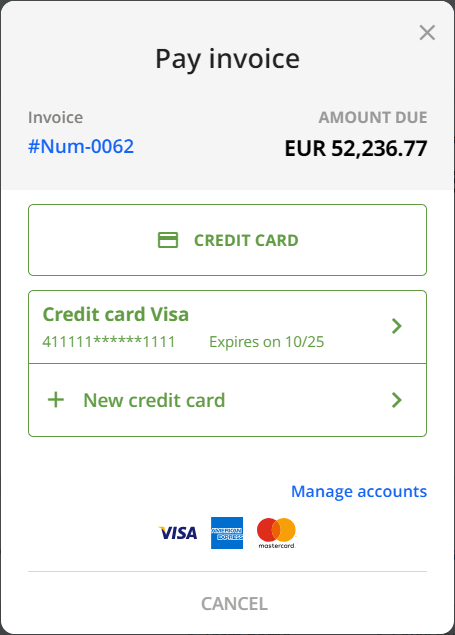
Paying Single Invoice
In the current version, we improved the Payment dialog when paying for a single invoice.
To make a payment, select an invoice and click on the Pay icon located in the action bar above the grid or on the right side of the selected invoice.
| Previous Version | Current Version |
|---|---|
|
|
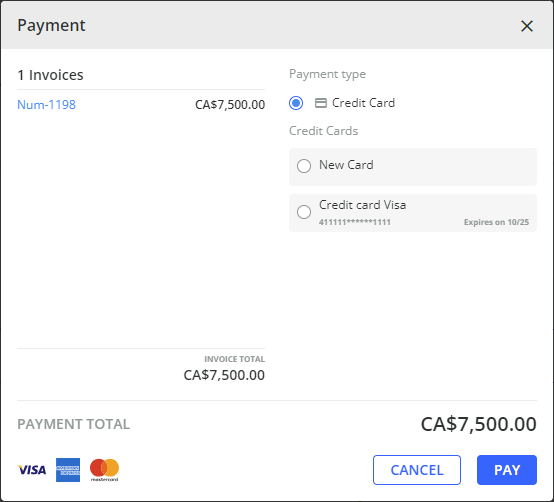
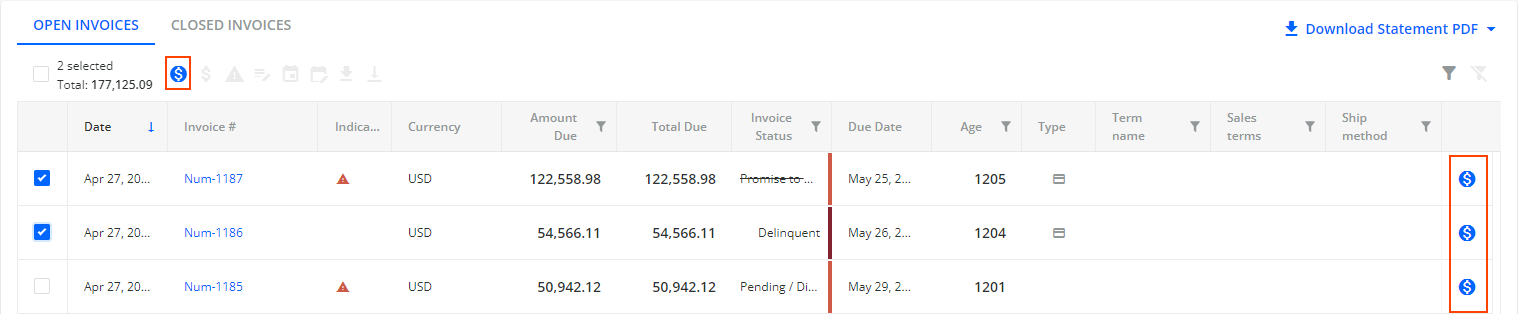
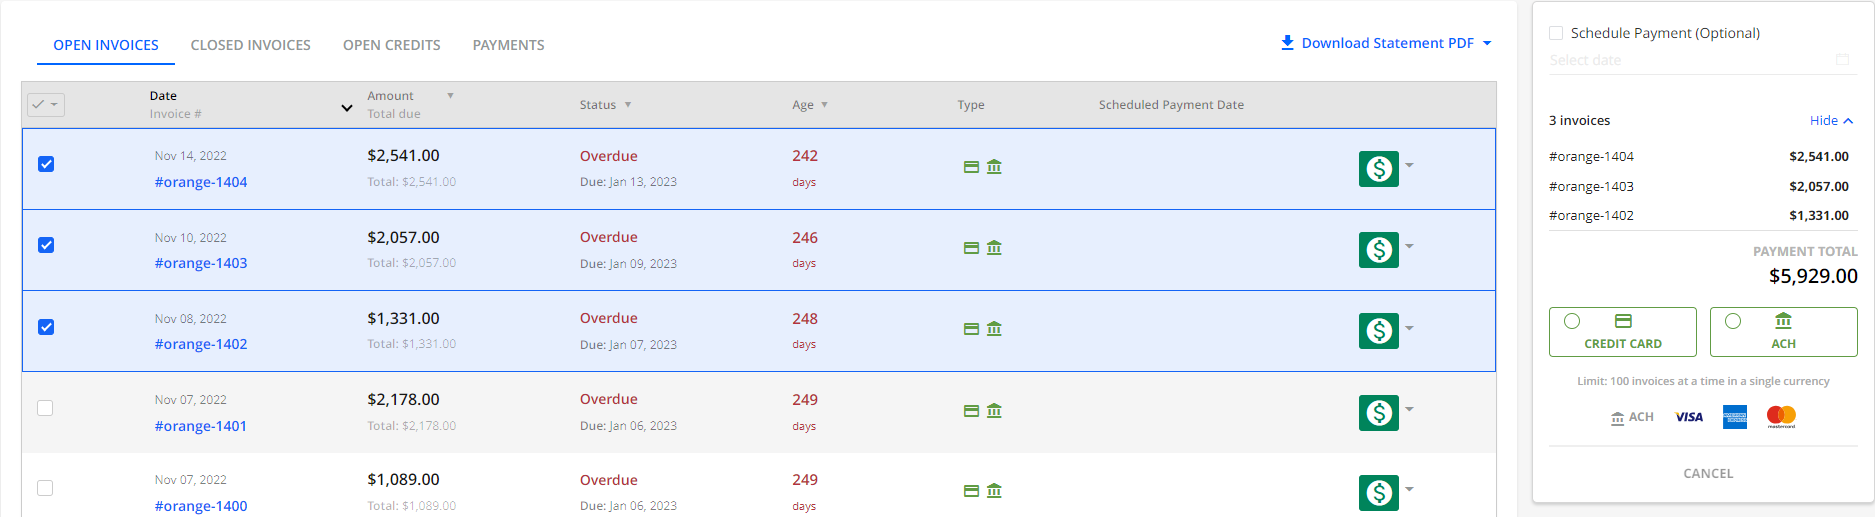
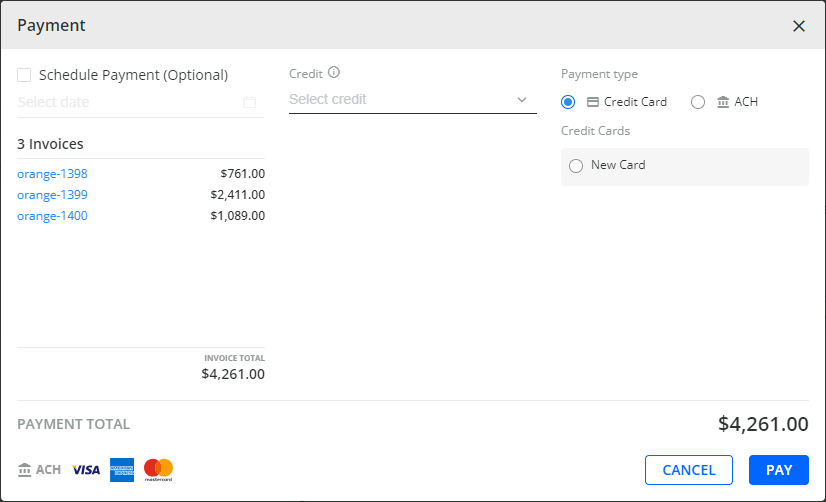
Paying Multiple Invoices
In the current version, we improved the Payment dialog when paying for multiple invoices.
To pay for multiple invoices, check the respective check boxes next to the invoices you want to pay and click on the Pay icon located in the action bar above the grid.
In the Payment dialog that opens, choose a payment method, i.e. Credit Card or ACH, depending what is available. Then proceed to complete the payment process.
| Previous Version | Current Version |
|---|---|
|
|
|
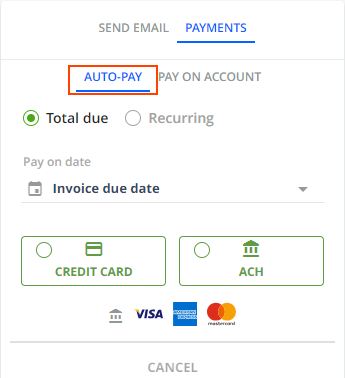
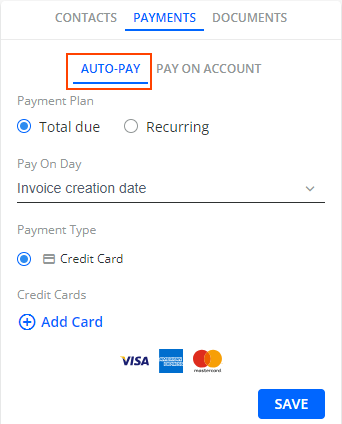
AUTO-PAY Payments
In the current version, we improved the design of the AUTO-PAY tab located on the right side of the page.
| Previous Version | Current Version |
|---|---|
|
|
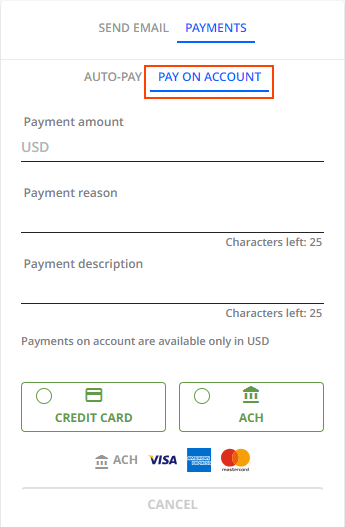
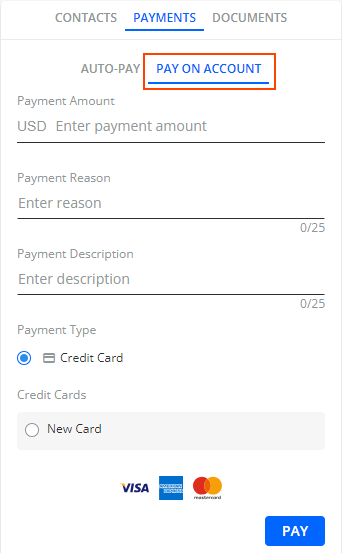
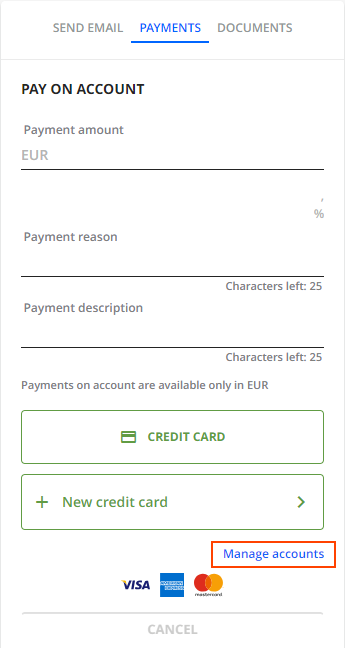
Pay on Account Payments
In the current version, we improved the design of the PAY ON ACCOUNT tab located on the right side of the page.
| Previous Version | Current Version |
|---|---|
|
|
Manage Payment Accounts Option
In the current version, we moved the Manage Payment Accounts option to the header of the Customer Portal web page for easier access.
| Previous Version | Current Version |
|---|---|
|
The Manage Payment Accounts option accessible from different parts of the portal, for example the PAYMENTS tab. |
The Manage Payment Accounts option located in the header at the top of the page.. |

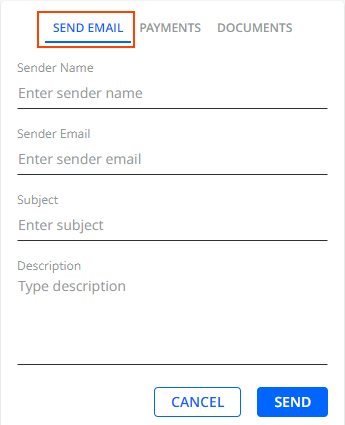
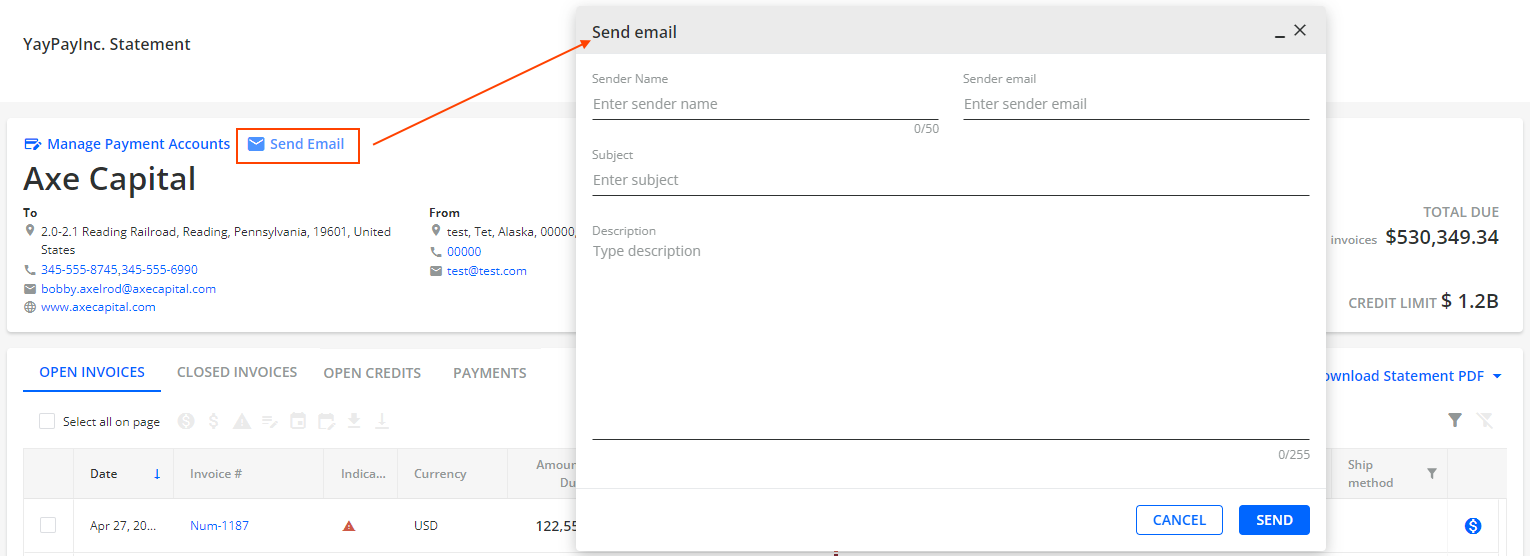
Send Email Option
In the current version, we moved the Send Email option to the header of the Customer Portal web page for easier access.
| Previous Version | Current Version |
|---|---|
|
The Send Email option located on the right side of the page.. |
The Send Email option located in the header at the top of the page. |
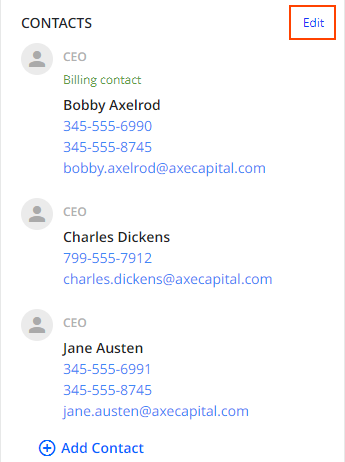
Contacts
In the current version, you can edit contacts individually.
| Previous Version | Current Version |
|---|---|
|
Contacts can be edited individually. |

For more details about the Customer Portal web page and its functionality, see the Customer Portal Overview section.
