You can record and maintain one or more Customer contacts in YayPay. Some of these contacts may also be marked as "Billing Contacts" which can be brought over from your ERP.
The Customer Billing Contact in YayPay can be pulled from NetSuite, Intacct and also imported via CSV, which is then used as part of the collection workflows in YayPay, e.g.
- Customer Billing Contact(s) become the recipients of email reminders in collection workflows, or
- Customer Billing Contacts can also be included as CC when reminders are sent to the Invoice level billing contact instead
The record structure of a Customer Billing Contact in YayPay consists of a First Name, Last Name, email, and Phone Number (if any).
Pulling the Customer Level Billing Contact from NetSuite
Depending on how you use NetSuite to maintain your customer billing contact(s), the configuration steps below outline how to bring these same billing contacts from NetSuite to YayPay:
Scenario #1: Standard Email maintained in NetSuite
To bring over the standard email address maintained for the customer in NetSuite, check the "Auto create billing contact" checkbox. This is found in the Settings > Integrations page of YayPay:

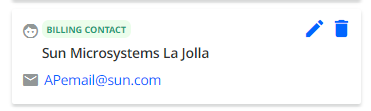
The customer's email address will be synced into YayPay, and the Company name is used as the 'First Name' of the contact (the Last Name will be left blank). This contact in YayPay will also be marked as the Billing Contact.
Scenario #2: Contacts maintained under Relationships in NetSuite
You can also bring over one or more contacts that you maintain under the Customer record in NetSuite. These contact(s) are listed in the Relationships tab in NetSuite:

By default, all these contacts maintained under the Customer in NetSuite will be synced and brought over to YayPay, but they will not be marked as ‘Billing Contacts'.
The exception will be the contact record in NetSuite labeled with Primary Contact Role. This record will be created and labeled as a "Billing Contact" in YayPay.
The configuration/setting to enable all Relationship contacts from Netsuite to be labeled as Billing Contacts in Yaypay can be found under the Settings > Integrations page in YayPay (NetSuite Integrations panel). Check the "Sync all contacts as billing" checkbox prior to commencing the NetSuite sync:
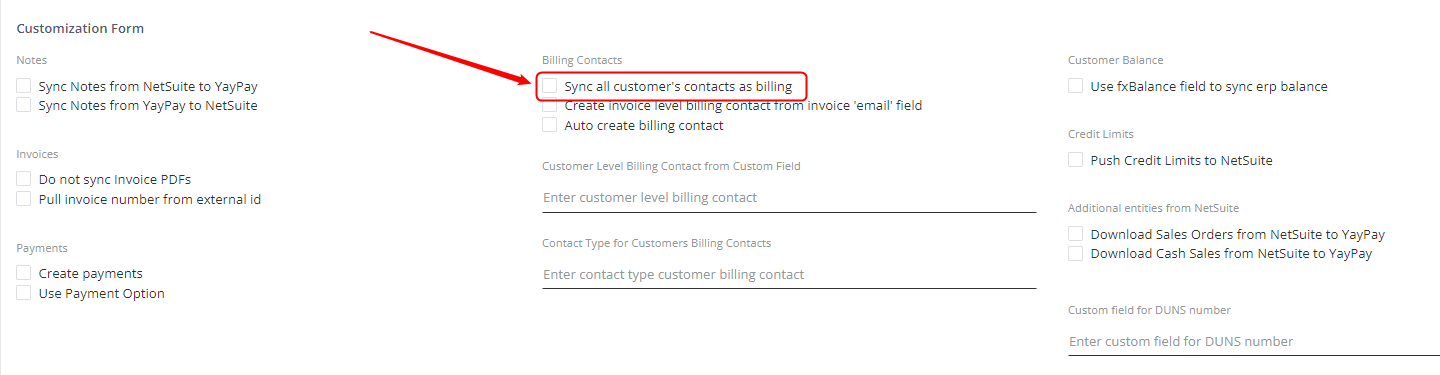
Marking this checkbox will ensure ALL contacts maintained under the Relationship tab of the Customer record in NetSuite will be labelled as ‘Billing Contacts' after the sync into YayPay.
%202020-10-27%2013-14-58.png)
Scenario #3: Email contacts maintained using a NetSuite Custom Field for the Customer
In addition to the standard customer email field, if you use 1 or multiple custom fields in NetSuite to capture multiple email addresses, you can also configure YayPay to create multiple Billing Contacts from the custom field(s).
The sync with NetSuite will:
- Create a Billing Contact in YayPay from each NetSuite custom field (if there are 3 custom fields, there would be 3 Billing Contacts in YayPay)
- Each Billing Contact's email address in YayPay will contain the email address maintained in NetSuite
- If you have one NetSuite custom field that has multiple, comma-separated email addresses, then 1 billing contact will be created in YayPay where the email field of the contact will contain multiple email addresses also
These are the configuration steps involved:
In NetSuite:
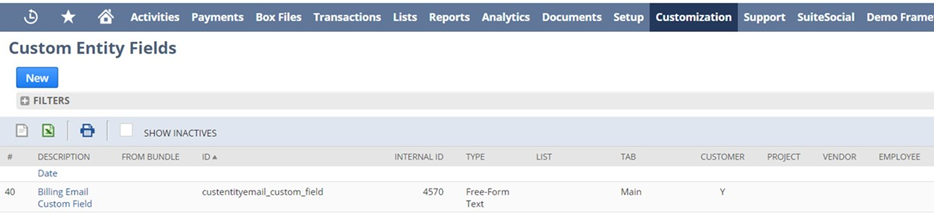
This custom field could be how your Netsuite Administrator has created the custom field for the customer, in order to record one or multiple email addresses:
In YayPay:
The Netsuite field ID name should be entered in YayPay. This is located in the NetSuite panel (Settings > Integrations):
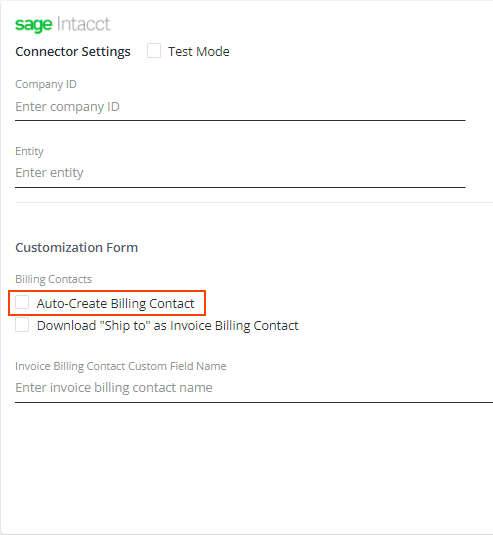
Pulling the Customer Level Billing Contact from Intacct
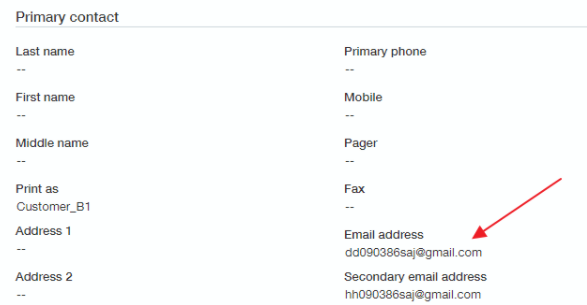
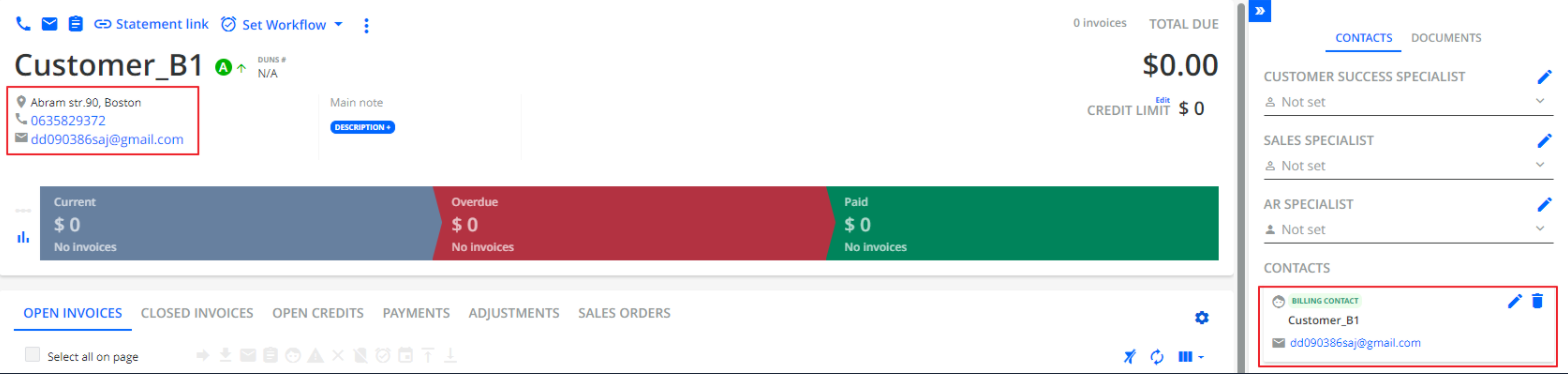
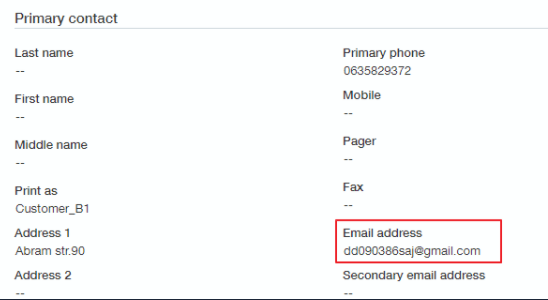
You can synchronize the customer's primary email address from Intacct as their billing contact in YayPay.
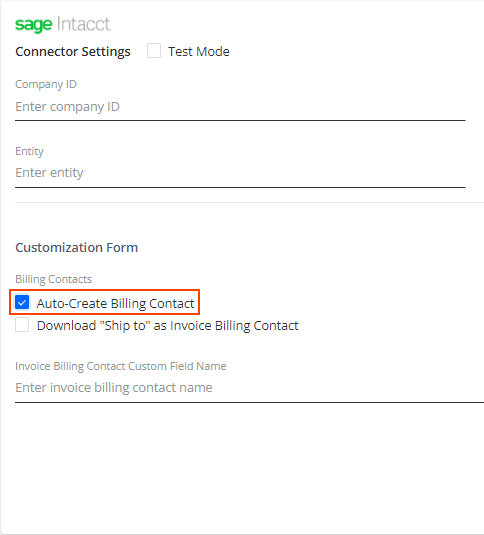
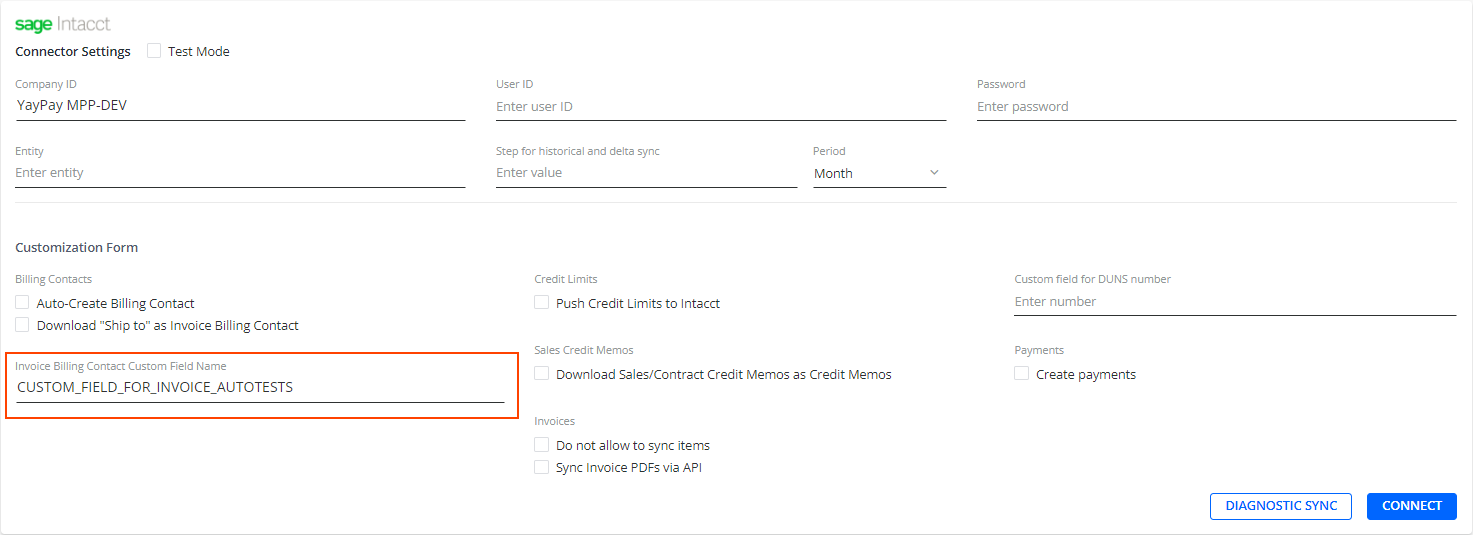
To do so, go to Settings | Integrations, click Manage Business Systems and select Sage Intacct from the list. In the panel that opens, check the Auto-Create Billing Contact check box.
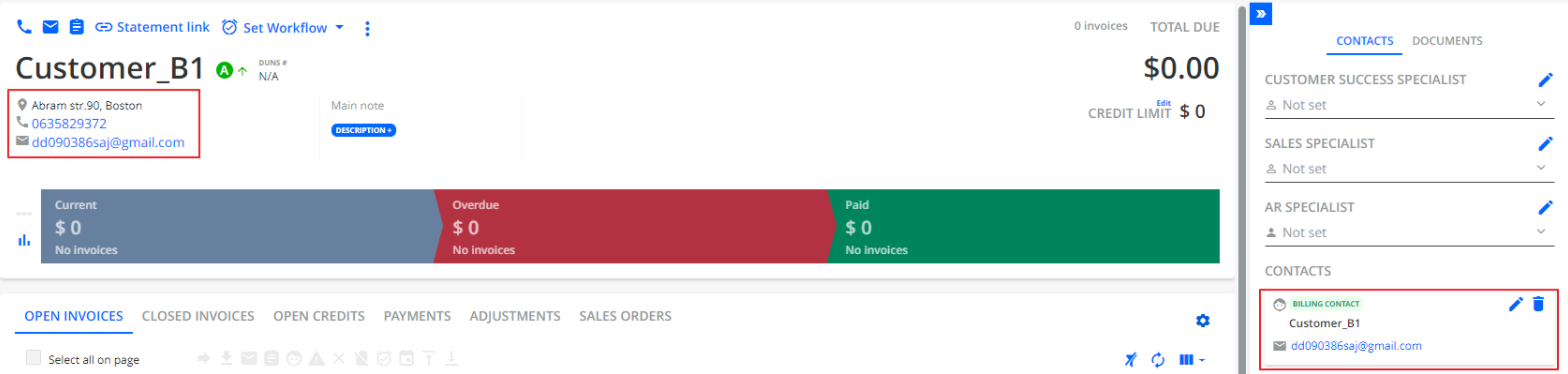
The primary email address of the Customer will be synced from Intacct into YayPay.

This is how the Customer Contact will be created in YayPay:
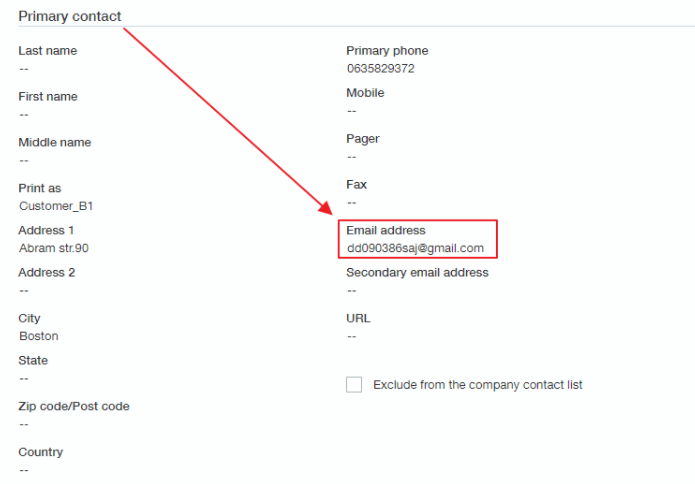
- The Company name will be used as the 'First Name' of the contact, the Last Name will be left blank
- The Email field of the Customer Contact in YayPay will contain the email address maintained in Intacct
- This contact will also be marked as the "Billing Contact" (for the Customer) in YayPay
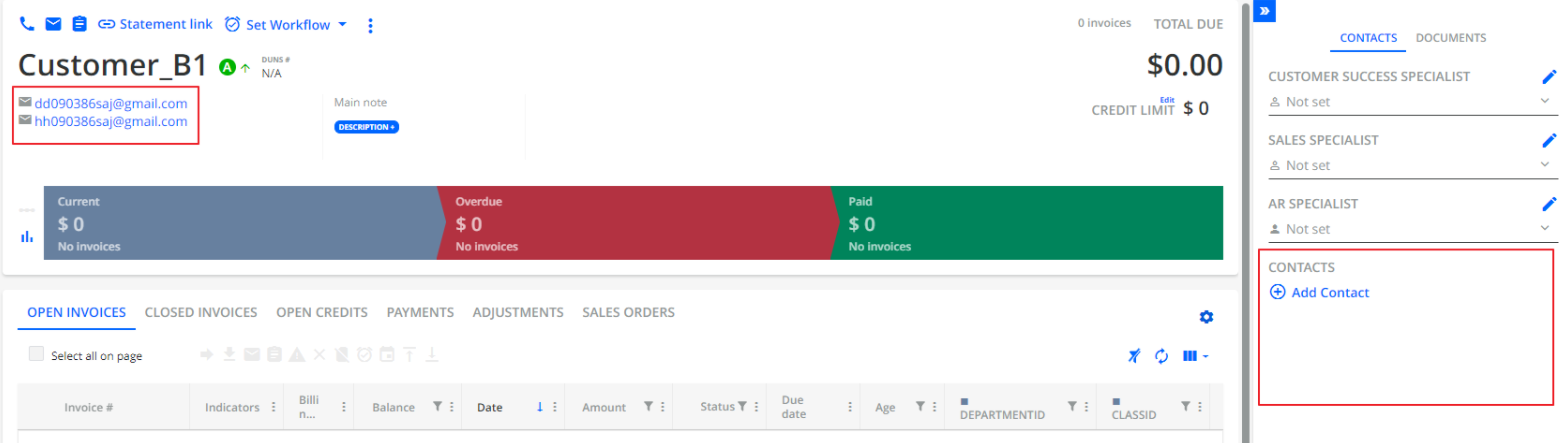
- If you also use the Secondary Email address field in Intacct stored against the customer, this email address will also be brought over under the same Billing Contact. The Email field of the Customer Contact in YayPay will contain 2 email addresses separated by a comma
In addition, the cases below outline how the Auto-Create Billing Contact option works with different Sage Intacct settings.
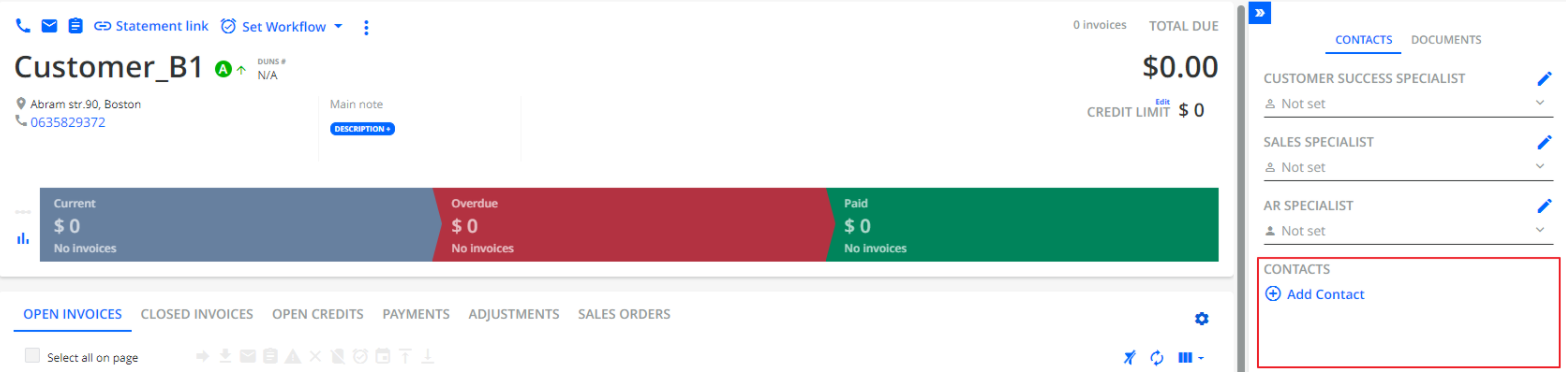
Auto-Create Billing Contact is unchecked
-
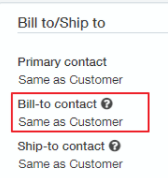
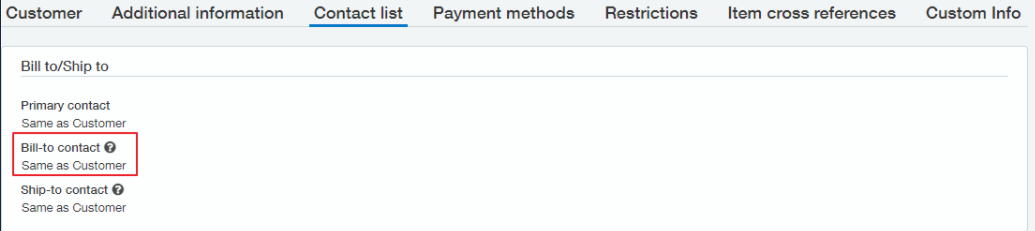
If the customer does not have the Bill-to contact field specified and the customer's primary email addresses are indicated in Sage Intacct, then the connector will not sync the primary email address as the billing contact with YayPay.
Settings in Sage Intacct
Result in YayPay
-
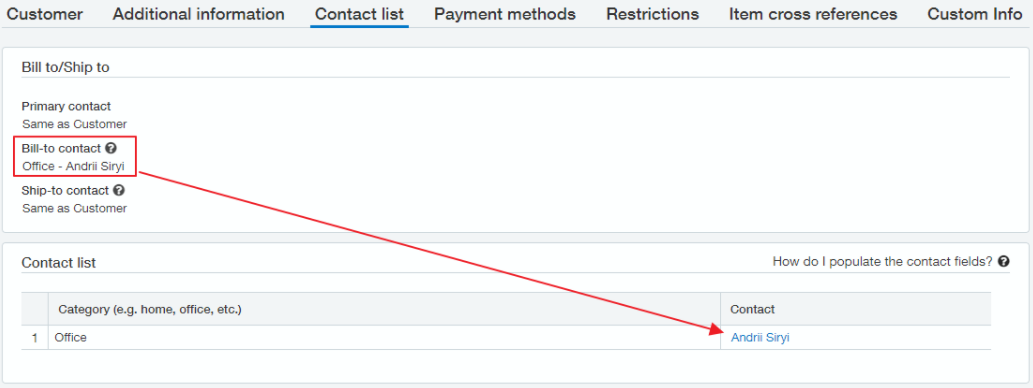
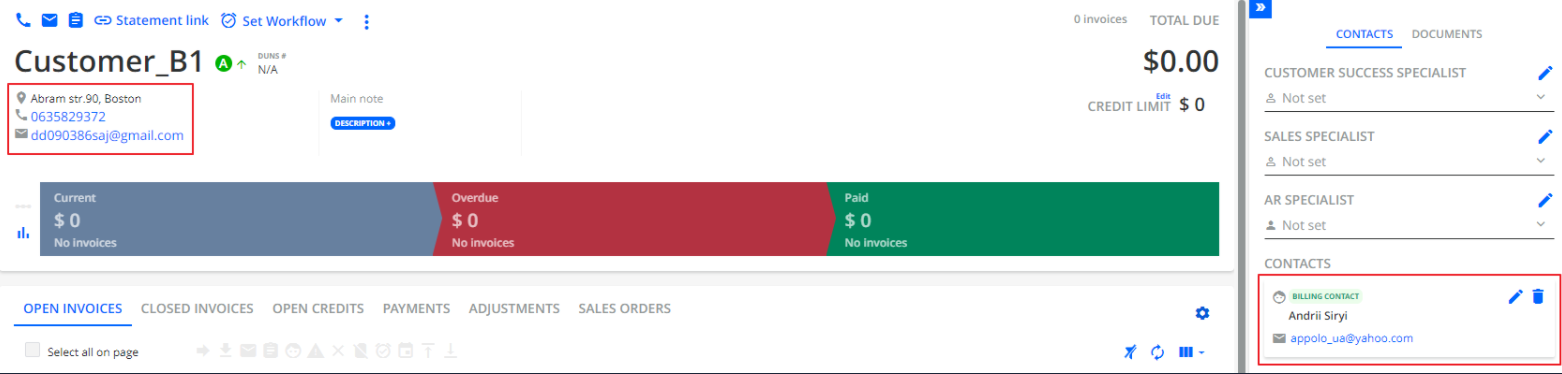
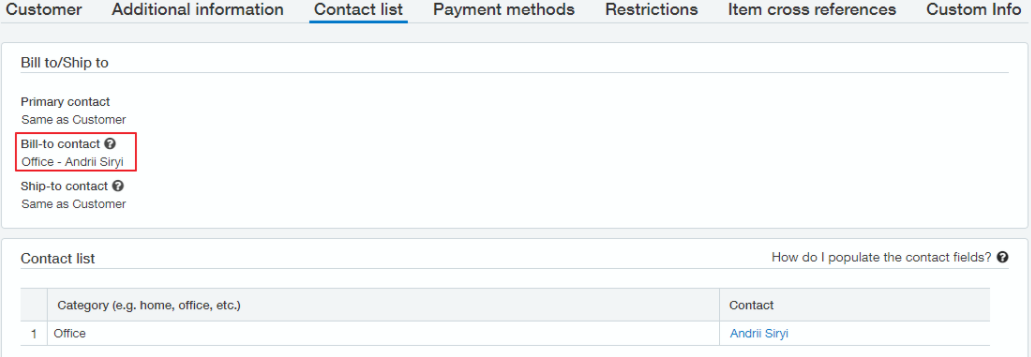
If the customer has the Bill-to contact field specified, and the customer's primary email addresses are indicated in Intacct, then the connector will not sync the primary email address as the billing contact with YayPay. However, it will synchronize the contact from the Bill-to contact field as the billing contact. Additionally, the connector will synchronize the primary contact as a general contact.
Settings in Sage Intacct
Result in YayPay
Auto-Create Billing Contact is checked
-
If the customer does not have the Bill-to contact field specified and the customer's primary email addresses are indicated in Intacct, then the connector will sync the primary contact as the billing contact.
Settings in Sage Intacct
Result in YayPay

-
If the customer has the Bill-to contact field specified and the customer's primary email addresses are indicated in Intacct, then the connector will sync the primary contact as the billing contact:
Settings in Sage Intacct
Result in YayPay
-
If the customer has the Bill-to contact field specified but the customer's primary email addresses are not indicated in Intacct, then the connector will not sync the contact from the Bill-to contact field as the billing contact.
Settings in Sage Intacct
Result in YayPay


Defining Customer Level Billing Contact(s) in CSV file imports
As part of the overall data preparation and extraction to import your AR data into YayPay, the contact.csv is one of the 6 CSV files that will include the contact details associated with the Customer record from your ERP (See CSV Article link)
Use the "primary" column to differentiate each contact in the contact.csv file, either as a billing contact (true) or a non-billing contact (false):

Defining Customer Level Billing Contact(s) by calling YayPay APIs
Very similar in nature to the CSV file approach, you can also create Customer Level Billing Contacts in YayPay by calling the /contact API to push and integrate your Customer Contact record into YayPay when there are new, updated, or deleted contacts in your ERP. See API Article link.
