To make data management and bulk updates in YayPay more convenient, you can use the Excel mapping functionality. This is located on the Excel Mapping page in Settings.
To use this functionality, follow the steps described in the Common Steps for All Excel Mapping Types section.
Common Steps for All Excel Mapping Types:
- Choose the required option from the Mapping Excel Type drop-down menu.
For a description of the individual Excel mapping files, see the following sections. - Click on Download Current Mapping button to download an Excel file with the current mapping, e.g. system custom fields that are defined in Settings | System Custom Fields. Their names then appear as column titles in the downloaded Excel file.
- Save the file on your device.
- Modify the file and save the changes. Read the details for each mapping type below.
- Go back to the Excel Mapping page in YayPay and click on Select File.
- Select the modified file on your device to upload it to the system.
- After the file is uploaded, click Save to apply the changes.
- Check the MAPPING IMPORT LOGS section which displays a list of changes and make sure it does not contain any issues.
Please find details and notes for each type of mapping below:
AR Mapping Excel
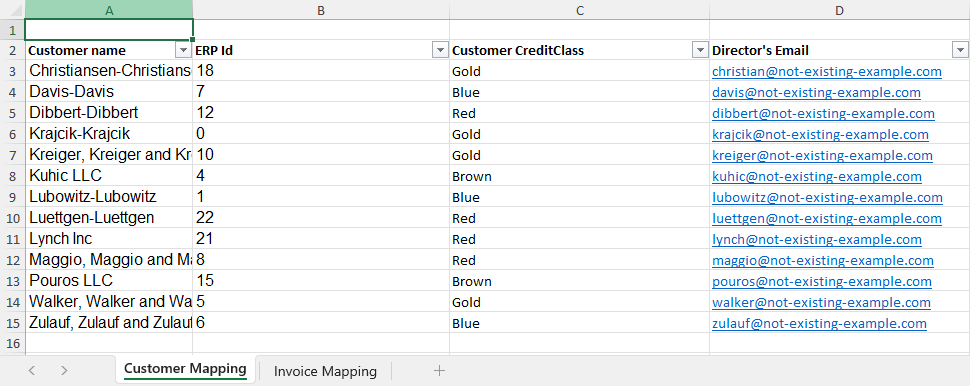
There are two tabs in the AR Mapping Excel file: Customer Mapping and AR Managers

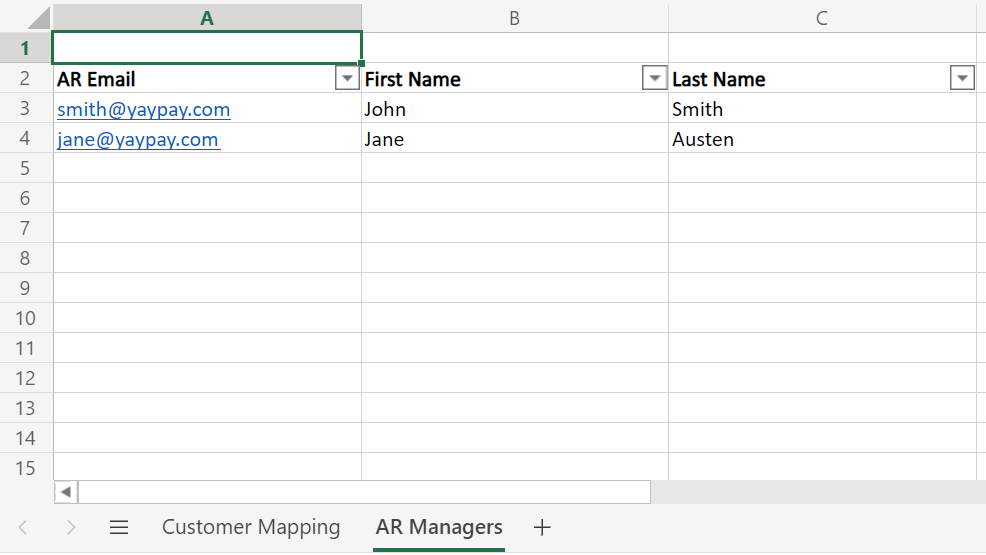
When you make any changes to the file, please note that you should leave only the records that have been edited.
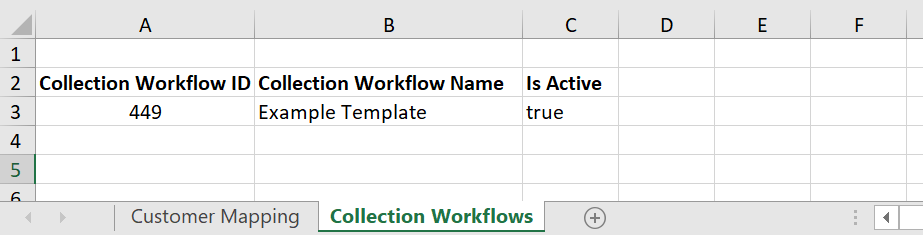
Collection Workflow Mapping Excel
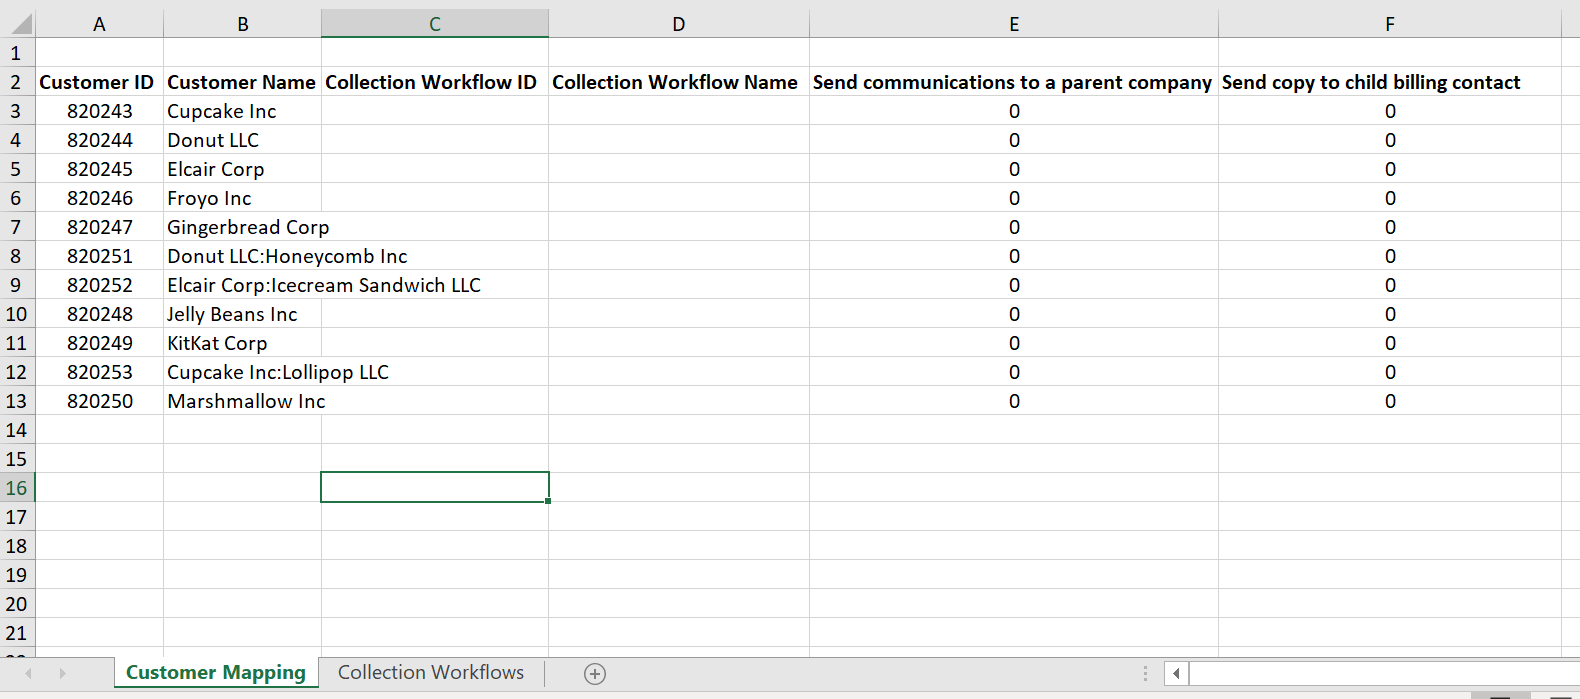
Customer mapping tab: Column E: 0 = no 1 = yes
Companies mapping excel
This is a deprecated feature that used to map customer companies synced from your ERP system to the same customer/companies maintained in your Salesforce system.
Because this feature is deprecated, you should not use this file any longer. Instead, use the mapping and sync features of the Salesforce connector instead.

Contacts Mapping Excel
Select Contacts mapping from Mapping Excel Type to manage customer contacts.
You can use this mapping file alongside the contacts synced from your ERP. However, it may happen that duplicate contacts will be created. Additionally, this file can be used in situations where your IT team is not preparing contact data via the contacts.csv file imported to YayPay via an FTP server.
However, you cannot use this file to:
- Delete contacts, i.e. you can only add new ones.
- Modify the contact’s email (column C).
If you modify the email, the import will add a new contact in YayPay with the modified e-mail address.
Additionally, for the Email column (column C), the following applies:
- If you add an email address to the Email column and it does not exist in YayPay, a new contact will be created using this email address.
- If an email address already exists in YayPay before the import, the first contact in YayPay with a matching email address will be updated with the imported one.

You can use these values in the following columns:
- Role (column H):
| Role in app UI | Role to populate Column H |
|---|---|
| CEO | CEO |
| CFO | CFO |
| Head of department | HEAD_OF_DEPARTMENT |
| Main billing | MAIN_BILLING |
| Secondary Billing | SECONDARY_BILLING |
| Accounts Payable | ACCOUNT_PAYABLE |
| Invoice Delivery | INVOICE_DELIVERY |
| Admin | ADMIN |
| HR | HR |
| Controller | CONTROLLER |
-
Is Billing Contact (column I):
The possible values are 0 indicating that the contact is not a billing contact or 1 indicating that the contact is a billing contact.
Credit Mapping Excel
Select Credit mapping from Mapping Excel Type to Manage Credit Limit inside YayPay.
The Credit Mapping Excel file contains the following columns:
Customer ID
Shows unique ID of a customer.
Customer name
Shows name of a customer.
Credit limit
Shows credit limits.
Credit limits can be updated through Excel mapping but not through ERP or CSV integration in YayPay.
Credit risk
Shows information on credit risk which is categorized into three levels: High, Medium, and Low.
ERP ID
Shows ID of a customer in the ERP system.
DUNS number
Shows the DUNS number.
The DUNS number is initially obtained from the ERP system and you can manually update it in YayPay using this excel mapping file. To ensure that changes made via excel mapping are saved and not removed during the next sync, you can enable the Use YayPay as the system of record for DUNS numbers check box in Settings | Business.
Other columns
The remaining columns display the credit provider IDs and rates for each credit provider:
- D&B PAYDEX – from 0 to 100.
- Creditsafe ID
- Creditsafe Rate – from 0 to 100.
- Experian ID
- Experian Rate – from 0 to 100.
- Year Started – from 1900 to the current year.
- Coface ID
- Coface Rate from 0 to 10.
Sales Mapping Excel
Select Sales mapping from Mapping Excel Type to assign a Sales Specialist and/or Customer Success Specialist to your customers in YayPay. This is similar to the assignment done on the Statement page.
The Sales Mapping Excel file has two tabs:
- Customer Mapping
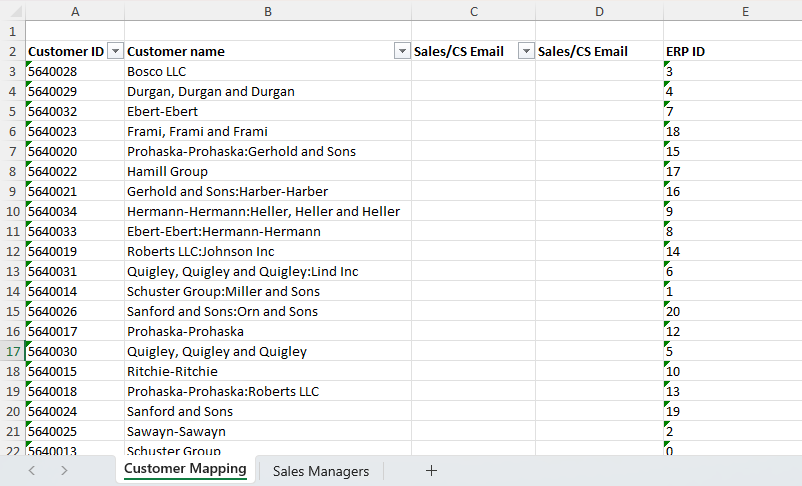
- Sales Managers
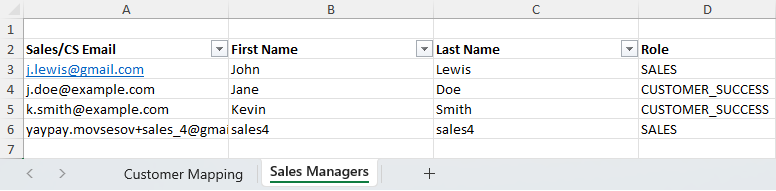
To assign or manage Sales or Customer Success Specialists:
Go to the Sales Managers tab.
Specify your Sales Specialist and/or Customer Success user in YayPay, including their unique email addresses and the appropriate role. Role names must be written in upper case, i.e. SALES or CUSTOMER_SUCCESS.
Go to the Customer Mapping tab.
-
Assign Sales or Customer Success Specialists to your customers by pasting their email address into the Sales/CS Email column, use one column for Sales Specialist and another one for the Customer Success Specialist.
For example, to assign John Lewis as a Sales Specialist and Kevin Smith as a Customer Success Specialist for Bosco LLC, enter their email address into the Sales/CS Email columns in any order.
The email address must match to the one defined in the Sales/CS Email column on the Sales Managers tab.
However, the same email address can only be used once in either columns, i.e. a person cannot be linked as both a Sales and Customer Success Specialist at the same time.
Save the changes and continue by following the steps described in the Common Steps for All Excel Mapping Types section.
Notes Mapping Excel
Select Notes mapping from Mapping Excel Type to upload customer or invoice level notes to YayPay. 
To upload customer or invoice level notes:
- Configure the following fields as needed:
Type – Enter Invoice for invoice level notes or Customer for customer level notes.
-
ERP ID – Enter the invoice ERP ID for invoice level notes or the customer ERP ID for customer level notes..
To find the Invoice ERP ID, go to the Invoices page and add the Invoice ERP ID column using the column picker.
If you have the OPEN DOCUMENTS tab enabled on your Statement page, you can also use the Document ERP ID value of the invoice. The values for Invoice ERP ID and Document ERP ID are the same.To find the customer ERP ID, go to the Aging Report page and add the ERP ID column using the column picker.
Text – Enter the note's details.
Date – Enter the creation date of the note in either the yyyy-mm-dd or mm/dd/yyyy format.
This field is required and must be specified for each line.
Save the changes and continue by following the steps described in the Common Steps for All Excel Mapping Types section.
System Custom Fields Mapping Excel
Using the System custom fields mapping option, you can easily map and update/delete system custom fields for individual customers and/or invoices.
There are two sheets in the downloaded SystemCustomFieldsMapping.xlsx file: Customer Mapping and Invoice Mapping. These sheets contain system custom fields that are defined in Settings | System Custom Fields. Although the names of these system custom fields appear as column titles in the downloaded Excel file, their values are empty.
