The Disputes page located in Settings sets up Dispute/Deduction codes, SubCodes, and Resolution Codes according to your needs.
Managing Dispute Codes
YayPay application offers the ability to use codes and subcodes while creating or updating disputes:
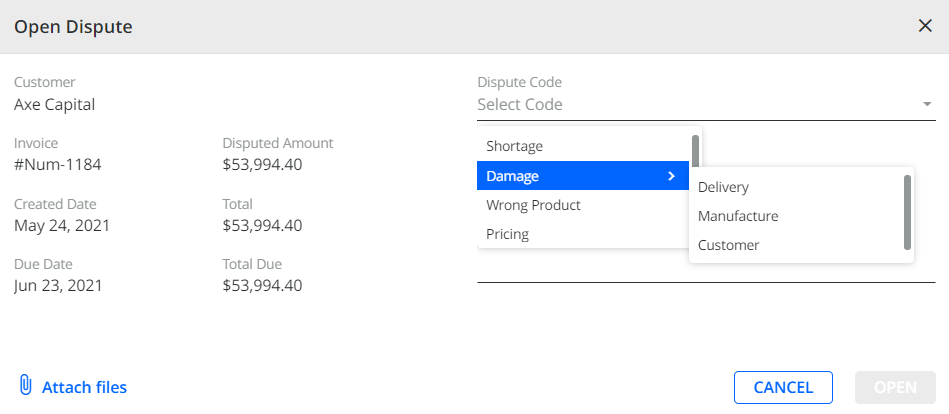
You can manage Dispute/Deduction Codes and SubCodes (non-mandatory) in Settings inside the YayPay application
1. Go to Settings > Disputes
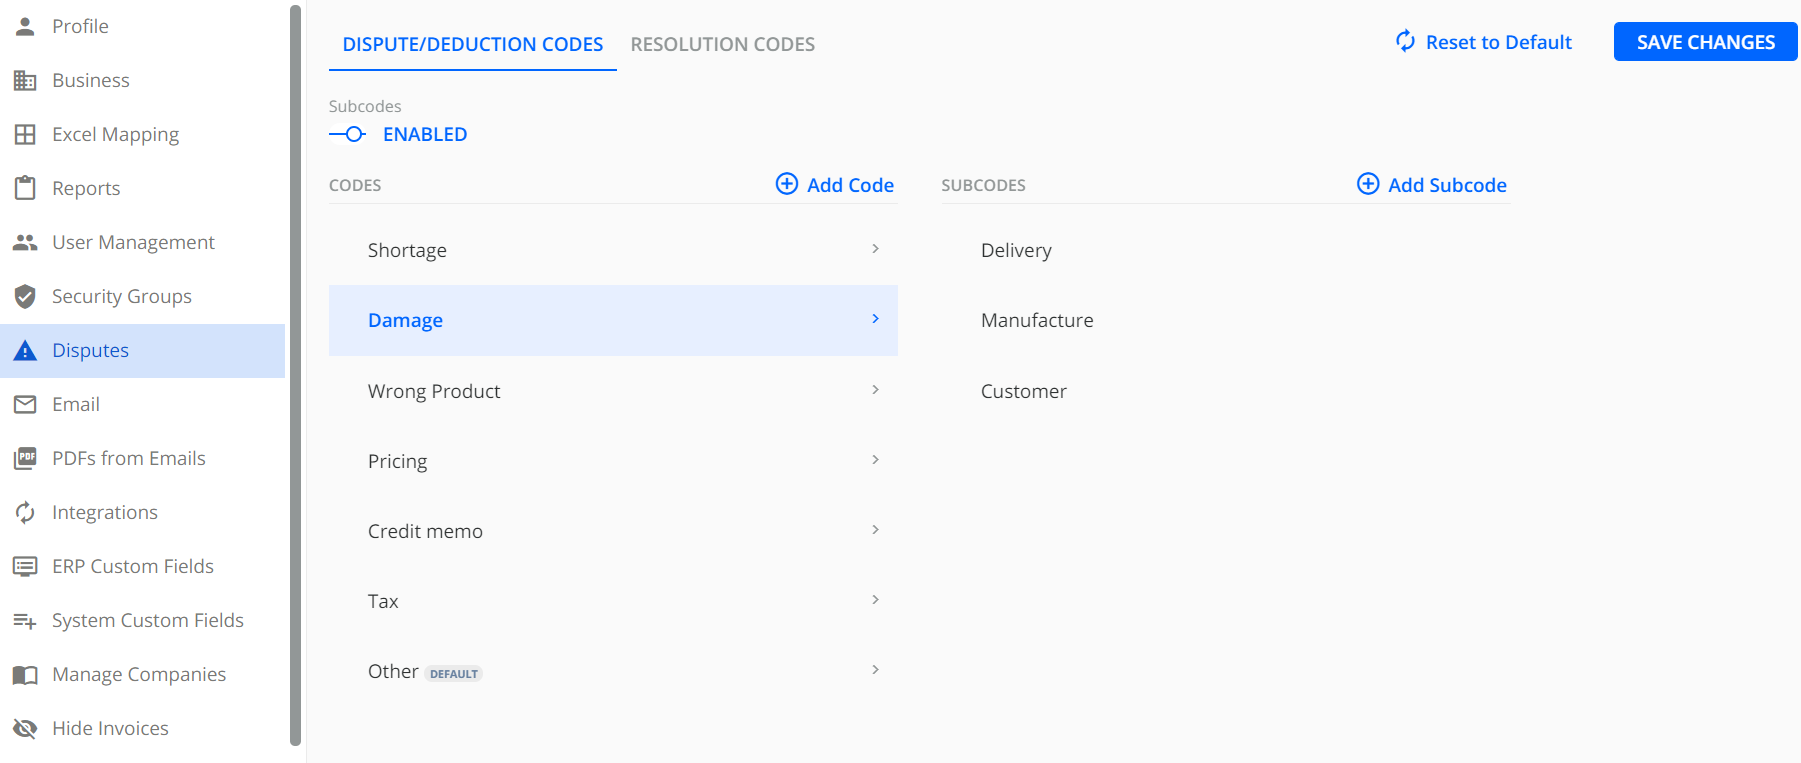
2. In the Dispute/Deduction Codes tab you can either Rename/Delete/Set as default existing codes offered by the system or add your customized codes:

3. When you click on Add Code, a new window pops up

4. Enter a new code and click Save.
When you enable Set as default checkbox, the code you add becomes the default one, and previously default code discards the setting.
5. After you make all the changes for the setting, click on SAVE CHANGES
Managing SubCodes
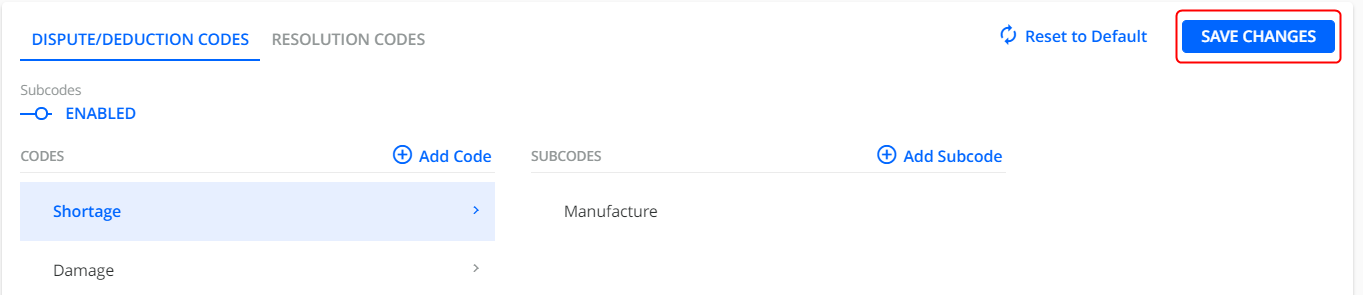
If you need to extend the codes hierarchy within the system, you can enable them in Settings=> Disputes - Dispute/Deduction Codes tab :
1. Enable Subcodes
2. Click on the code you want to extend
3. Click on Add Subcode

4. In a new pop-up window enter a subcode and click Save.

5. After you make all the changes for the setting, click on SAVE CHANGES.
Manage Resolution Codes
In order to apply resolution codes when resolving disputes, you should set them in Settings first.
1. Go to Settings > Disputes
2. Switch to Resolution Codes tab
3. Enable Codes
4. Click on Add Code, Set as Default, Delete, Rename, Edit
5. After you make all the changes click on SAVE CHANGES.

- Default resolution codes are used for automatically resolved disputes

Security Groups - Disputes
There is an option to restrict the ability to access Dispute Codes page for the particular groups in Admin and AR Specialist Roles:
- Go to Settings > Security groups
- Enable/disable the Manage Disputes checkbox for the group you want to adjust the setting for
- Click Apply changes

Tracking and Review of Disputes
You can track and review disputes including their dispute codes, sub-codes, and resolution codes in multiple locations:
-
Statement page:
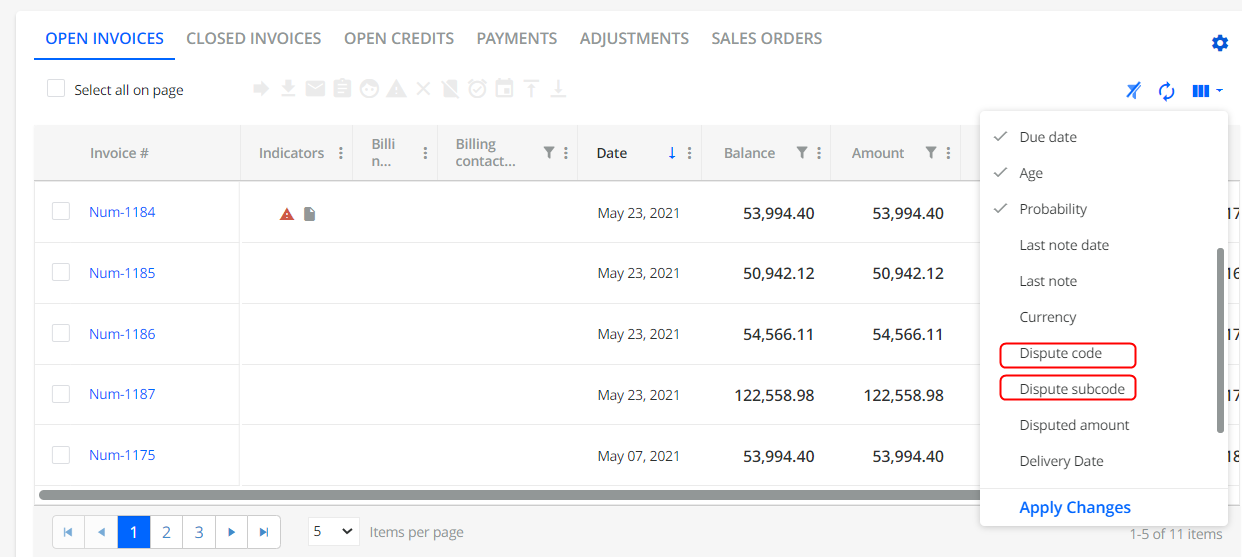
- On the Open Invoices tab, you can add the Dispute code and Dispute subcode as additional columns.
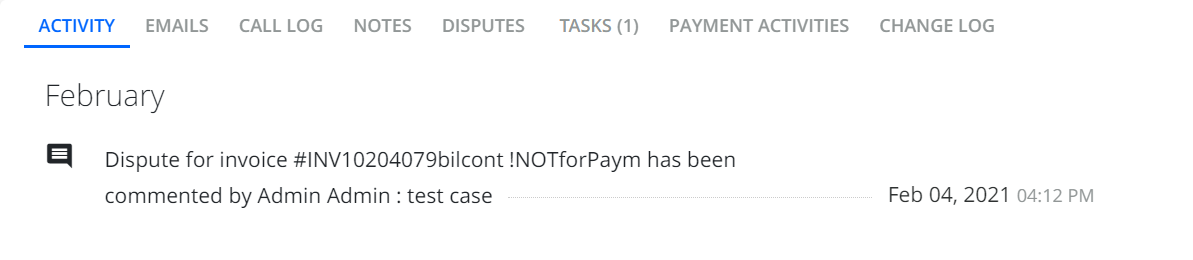
- On the Activity tab, you can see the audit trail of disputed invoices.
- On the Dispute tab, you can view specific invoices that have an open dispute.

- On the Open Invoices tab, you can add the Dispute code and Dispute subcode as additional columns.
-
Aging Report and Invoices pages:
- Use the Filter located in the top-left part of the Aging Report page to display customers with open disputes and associated dispute codes that you selected in the filter.
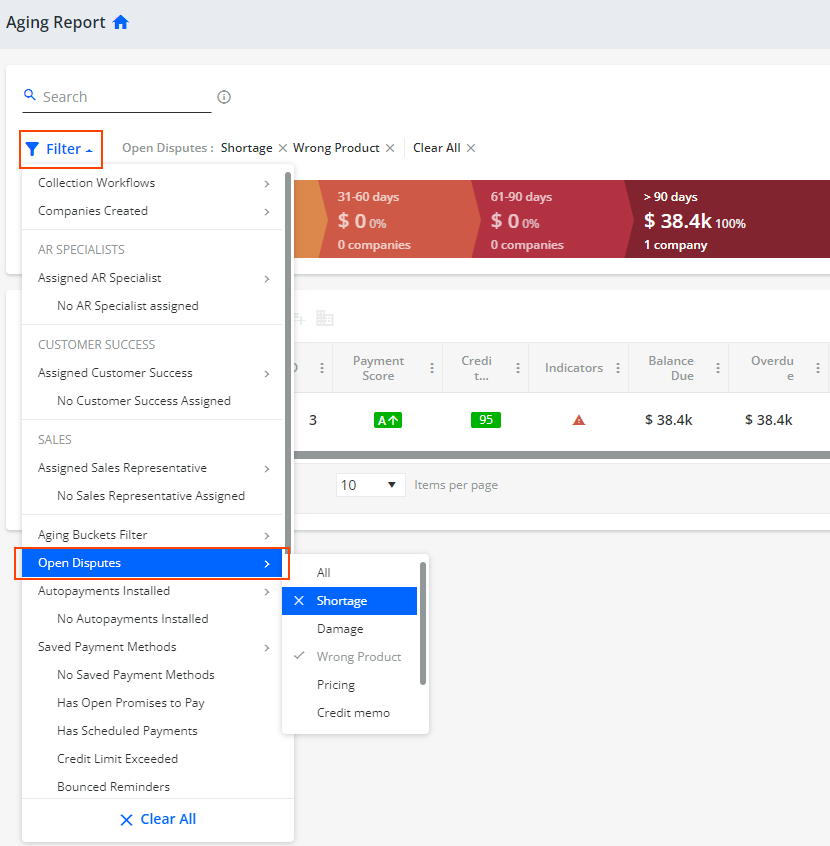
Similarly, you can use the Filter on the Invoices page to display customers with open disputes and associated dispute codes that you selected in the filter.
- Use the Filter located in the top-left part of the Aging Report page to display customers with open disputes and associated dispute codes that you selected in the filter.
-
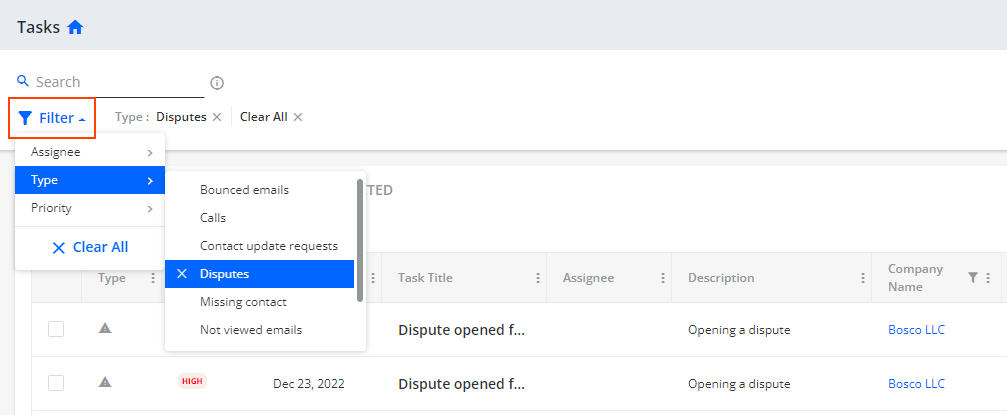
Tasks page:
You can add the Dispute code and Dispute subcode as additional columns.
- You can use the Filter and set the Type option to Disputes to display tasks related to open disputes.
-
Dashboard page:
You can use the Dashboard tab to view dispute statistics, i.e. total number of open and closed disputes over a selected time period aggregated by each assigned AR Specialist.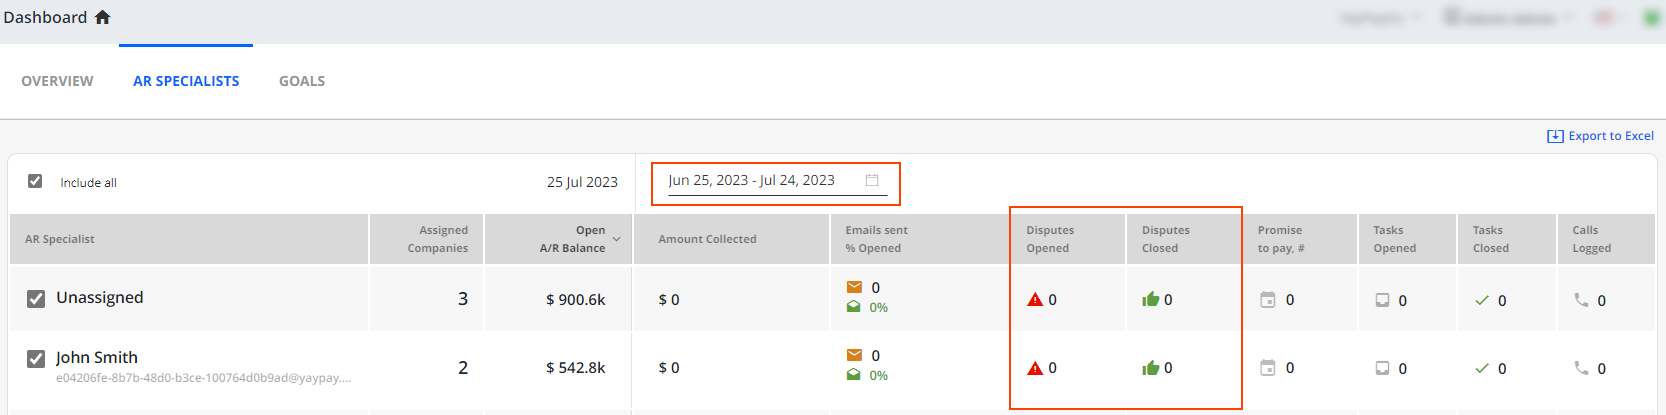
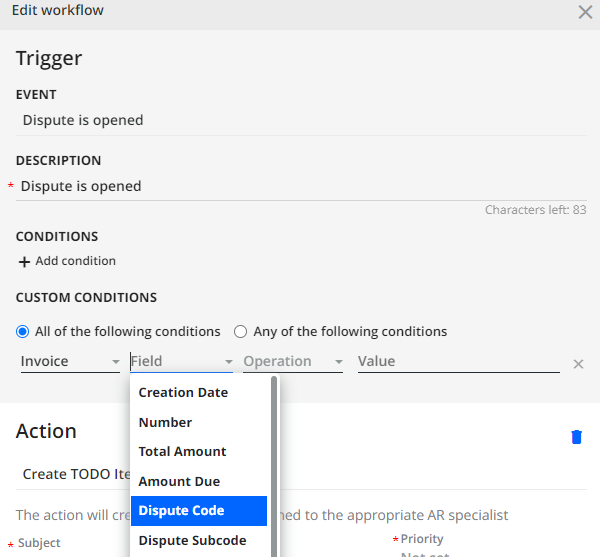
Workflow Events/Actions involving Disputes
You can also add/configure your Workflow or Global Rules to include some Automation considerations, e.g.
Temporarily exclude (suspend) the Invoice from further Workflow Email Reminders while the dispute is being resolved/addressed
Create an internal Task based on the new Dispute opened, narrowing it down further to a specific Invoice Dispute Code or Subcode illustrated below
 Refer also to the Global Rules article for more details.
