You can customize the appearance of Customer Portal to display information in a way that suits your customers.
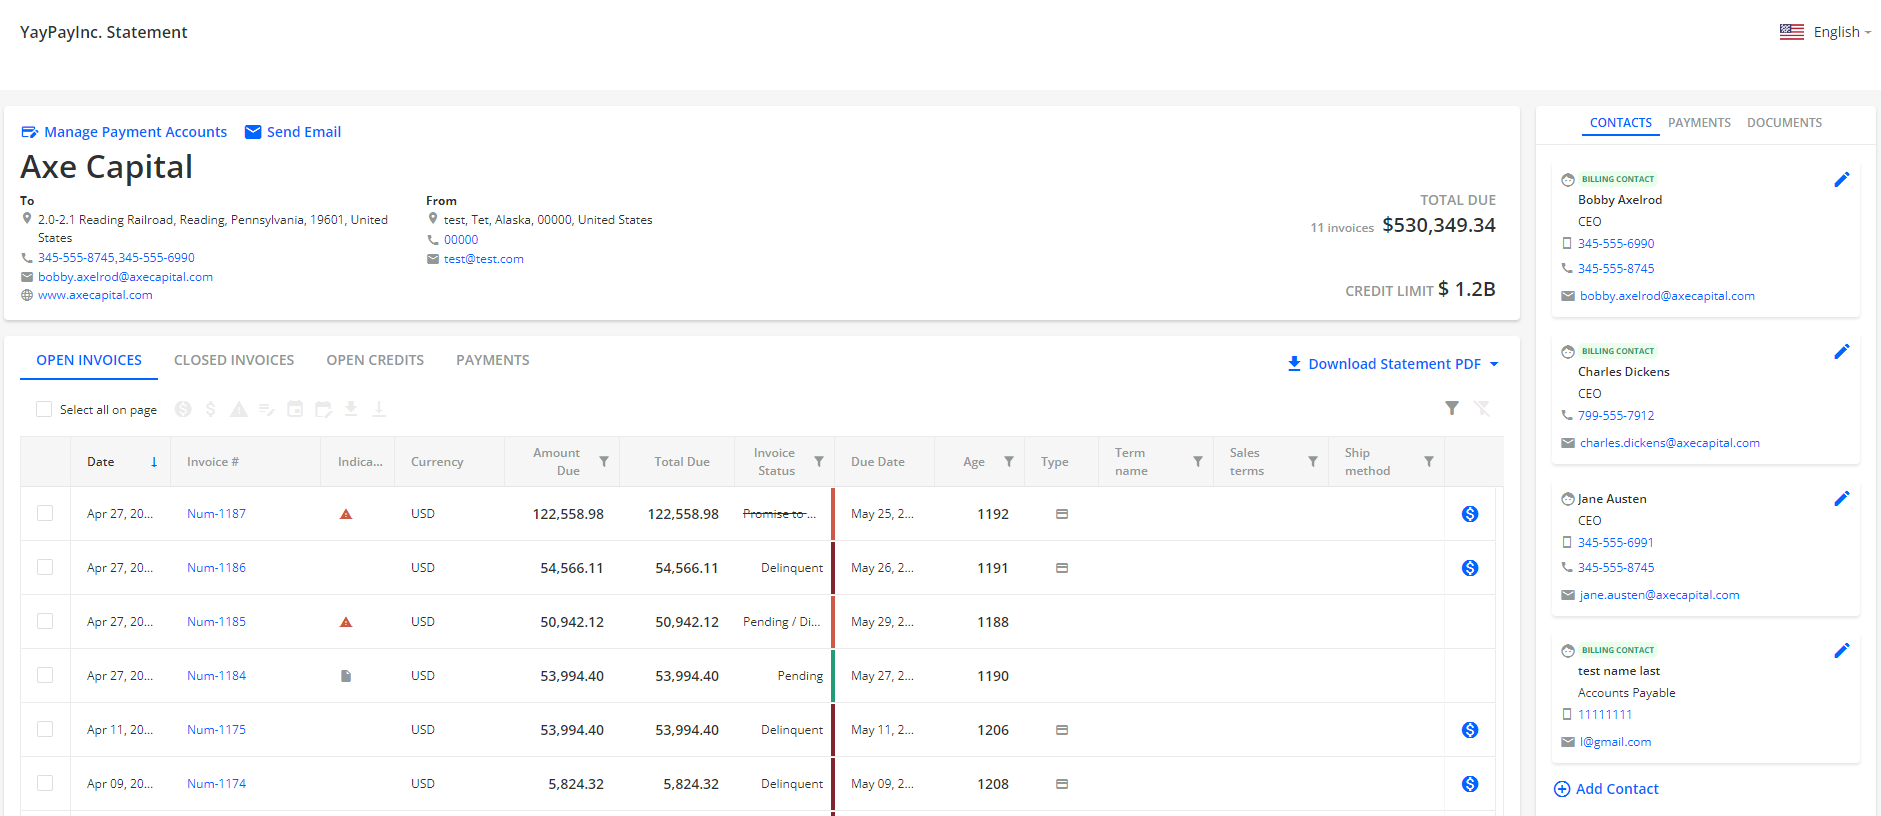
To access the Customer Portal web page, use the Statement Link from the Statement page located on the top left part of the page. This will copy a URL link to your clipboard.
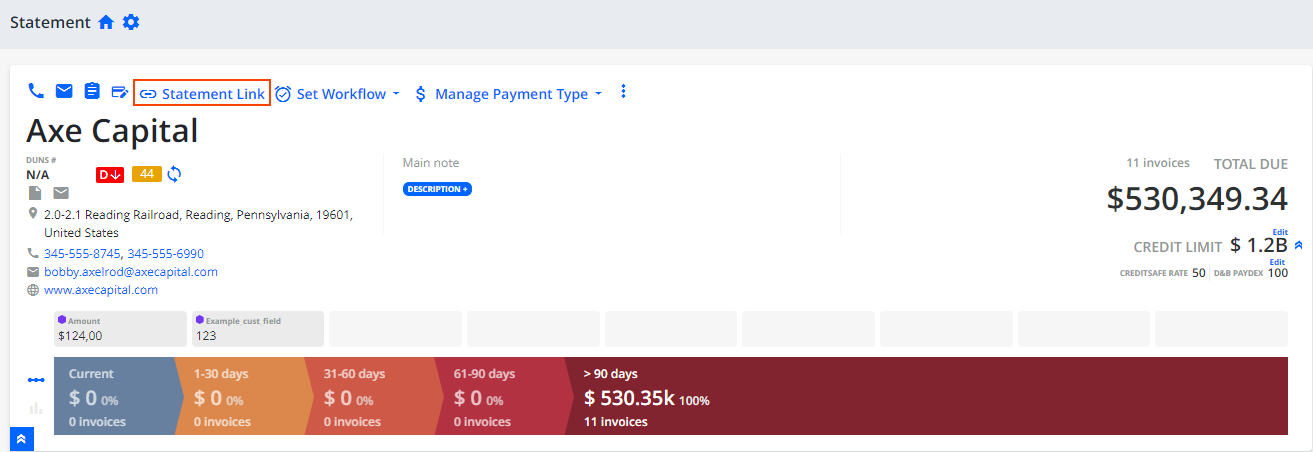
You can find all the Customer Portal settings in Settings | Business.
You can adjust the appearance by modifying multiple settings as needed. After making changes, click SAVE CHANGES at the bottom of the Business Account page to apply them. To see the changes reflected on the Customer Portal page, refresh the page after saving your settings.
The following settings are available:
