You can customize a variety of settings to support making payments through YayPay. You can find these settings on the Settings | Business page.
Adding a Subdomain
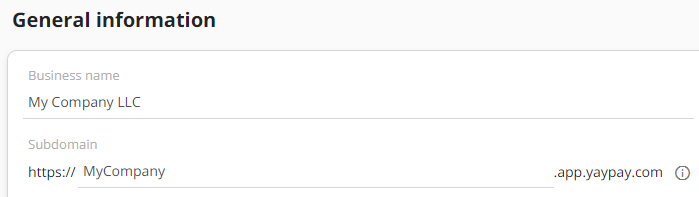
This is an optional field that allows you to configure a Subdomain for the YayPay platform and Customer Portal. The value entered here will be included in the Application URL.
NOTE: This field is required if you are using Merchant eSolutions as your Merchant Service Provider.
Refer to: https://yaypay.helpjuice.com/payments/adding-a-subdomain for more background.
Default AR Account
If you have multiple AR accounts in NetSuite, select the default one from this Default AR Account drop down menu. This account will be used for pushing payments to NetSuite.
If you don't select the default AR account, check the Use System Preference option in the NetSuite customer record. As a result, the last AR account used in an accounts receivable transaction will be used for the pushed payment. Otherwise, the payment creation in NetSuite will fail.
Additionally, if you have documents allocated for the payment (such as invoices or credit memos), the AR accounts for those documents must be the same as the selected default AR account. Otherwise, the payment will not be pushed to NetSuite.
For more details, see NetSuite: Payment Integration
Default Bank Account for ACH
Select a default bank account from the Default Bank Account for ACH drop down menu that will be used for automatic money transfers.
As a result, ACH payments will be sent to this account when payments are pushed from Basic and/or Advanced Cash Application to NetSuite, Intacct or Microsoft Dynamics GP.
Additionally, make sure to link this account to a bank account in NetSuite or Intacct.
Default Bank Account for CC
Select a default bank account from the Default Bank Account for CC drop down menu that will be used for automatic money transfers.
As a result, credit card payments will be sent to this account when payments are pushed from Basic and/or Advanced Cash Application to NetSuite, Intacct or Microsoft Dynamics GP.
Additionally, make sure to link this account to a bank account in NetSuite or Intacct.
Setting Time Zone for Auto Payments
Configure the time zone you want to use for determining when to trigger auto and recurring payments set up on the Statement page or Customer Portal. Do that using the Payment Plan Timezone setting in Settings | Business.

YayPay checks every hour whether any business with configured auto or recurring payments has entered the due date (in the given time zone) defined for the given payment. If any payment is due, YayPay triggers the payment for the given business.
Customer Statement – Allow applying open credits on payment transactions
When this setting is enabled, then your customers will have the ability to include any open credits that they have on their account as part of their payment, reducing the money you will be receiving.
NOTE: This setting is only available if Customer Statement – Display “Open credits” is turned on.
Customer Statement – Allow payment on account on Customer Portal
When this setting is enabled, then your customers will have the ability to make an on account payment without specifying any invoices.
Allow saving payment account on Customer Portal
This setting will allow your end customers to save their Payment information (Credit Card and/or ACH profile) for use in future transactions so they do not need to reenter the information each time.
The profile saved by your end customers looks like this, and it can be selected to be reused. The Saved Profile can also be deleted under “Manage Accounts”
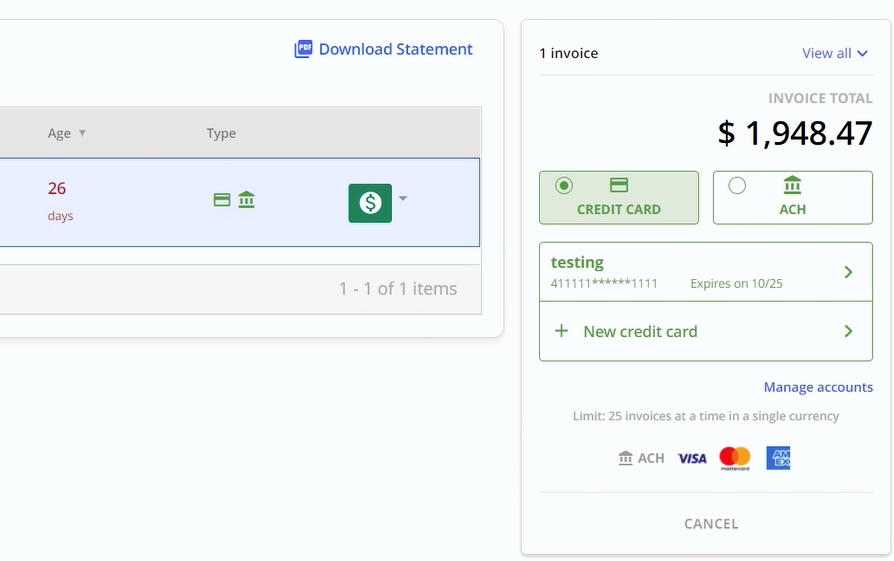
This profile is tokenized for subsequent reuse. The only value that is saved in the YayPay platform is the token from the payment provider so this is completely secure and compliant.
Payments - Use Parent Auto-Pay Total Due Plan for Child Companies
When enabled, the Auto-Pay Total Due plan set up for a parent company is used for its child companies.
Allow/enable terms and discounts for payments
When enabled, the existing discounts are displayed in the invoices grid of the Statement page (columns Discount and Discount Valid to). Also, the available discounts are applied when making a payment.
Customer Portal - Show Discounts in Grid
(becomes visible only after the Allow/enable terms and discounts for payments setting is enabled)
When enabled, the discounts are displayed in the invoices grid on the Customer Portal and applied during the payment process.
Allow CP payment method on Statement
This setting will allow you to utilize a customer’s saved payment account when processing payment transactions on their behalf.
NOTE: This setting can only be enabled by YayPay to make sure that our users understand the implications here that their customers may not have authorized this behavior. If you would like this enabled, please contact support@yaypay.com.
Customer Statement page: Credit card flexibility
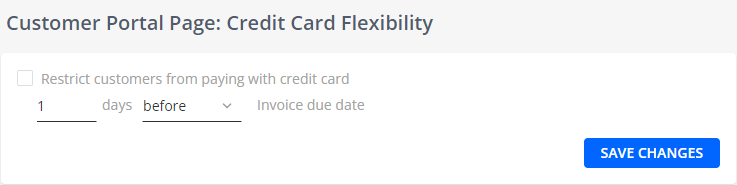
This setting will allow you to determine if there are any restrictions in allowing your customers to pay with a credit card based on the number of days an invoice is past due.
Example: You want to encourage your customers to pay on time by offering them the ability to pay with a credit card as long as the invoice is not past due, however, you do not want them to pay with credit card if an invoice is past due since there are charges associated with credit card processing. You can enable this setting and restrict customers from paying with credit card 1 day after the invoice due date.
Credit Card Payment Limits
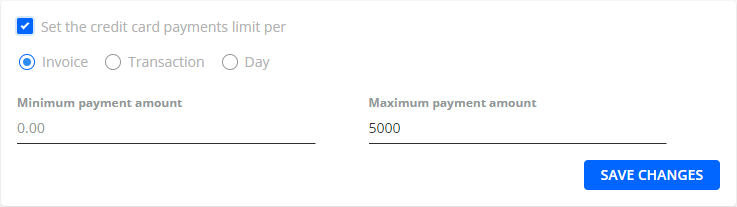
Set minimum and maximum payment amounts for credit card payments
Per Invoice – Each invoice must meet the min/max setting to be paid via credit card
Per Transaction – Each transaction total must meet the min/max setting to be paid via credit card
Per Day – Each customer will be able to make payments via credit card each day until they hit their daily limit
Allow partial payment on Customer Portal
This setting enables your customers to pay a partial amount of an invoice from the customer portal. If this is not configured, then your customers will not have the partial payment option and then will be required to pay the full invoice amount.
When making a partial payment, your clients have to indicate the reason for it:
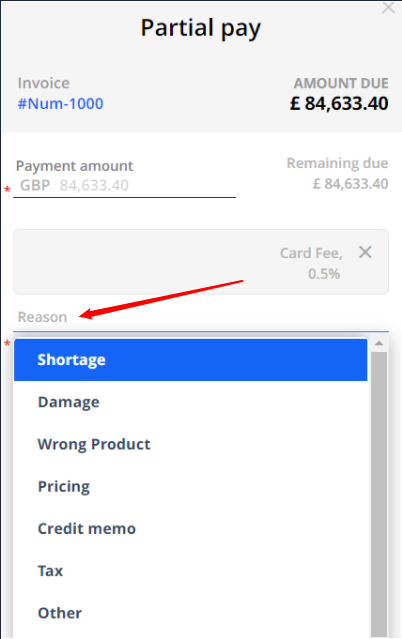
The list of reasons can be configured under Dispute/Deduction codes in Settings > Disputes. Add/remove/edit the default items as required (also see the related Disputes article).
Bank Payment Type Label
This option in the Business Settings page will allow you to change the default Bank Payment Type Label from "ACH" to "EFT" or "Bank" to suit your operating requirement and nomenclature used:
Control to Pause and Resume payment methods
You have the ability to determine which Payment Type your Customers will be allowed to use when making payments from the Customer Portal - Credit Card, ACH, or both.
From the Aging Report as a Group Action or via the internal Statement page, there are options to set the Payment Type to control this for your Customer. This control does not affect nor impact the AR Team's ability to accept Payments on behalf of the Customer in both types.
By default, both payment types are enabled for all Customers on their Customer Portal page:
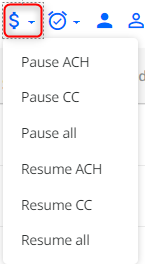
- Pause CC – Disables the Customer(s) from being able to pay via Credit Card
- Pause ACH – Disables the Customer(s) from being able to pay via ACH
-
Pause all – Disables the Customer(s) to pay via any Payment type/method
-
Resume CC – Enables the Customer(s) to pay via credit card
- Resume ACH – Enables the Customer(s) to pay via ACH
- Resume all – Enables the Customer(s) to pay via Credit Card and ACH
Use Customer’s currency for saving payment methods
This setting is useful if your YayPay business utilizes both a primary and secondary payment provider. By default, the primary provider is automatically assigned to each saved payment account.
This default behavior is ideal for most businesses as most primary payment providers can:
- Process credit card transactions in any currency.
- Process ACH transactions in USD.
Enabling this setting instructs YayPay to link each saved payment account with a payment provider that can process transactions in the customer's currency.
To learn more about how to utilize this setting, see the Configuring Payment Providers for Saved Payment Accounts section.
