You can use YayPay to send outgoing emails to your customers, and also read their responses (as inbound emails) that they send to your AR mailbox.
To achieve this, YayPay needs to connect to an AR mailbox. This allows emails sent to your AR mailbox to be displayed on the respective tabs on the Communications page in YayPay.
Once YayPay is connected to your AR mailbox, you can use the following features:
-
Send and reply to emails from YayPay.
This eliminates the need to switch back and forth between your AR mailbox and YayPay. When you send emails to customers using YayPay, the emails will be sent using your AR mailbox's email address.
-
Track your customer communications in one place.
You can access your AR mailbox emails on the Communications page. This serves as an inbox for your AR mailbox emails synced for example from Gmail or Outlook.
-
Use other features on the Communications page.
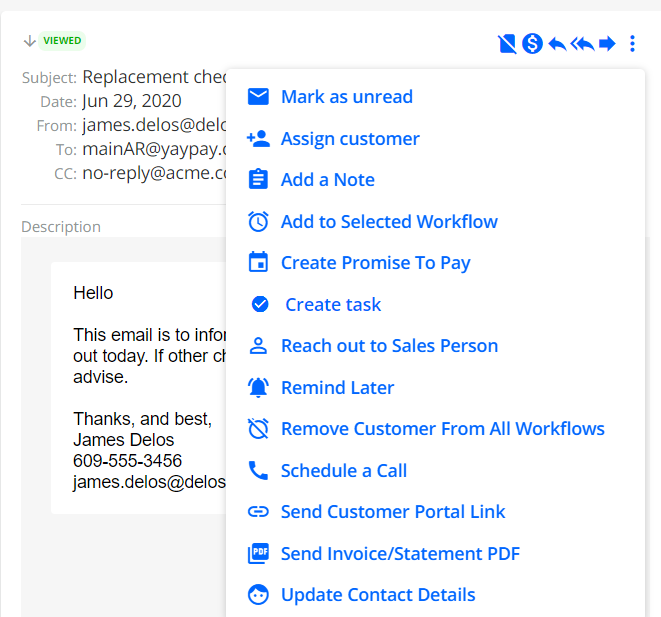
You can use the Communications page to manually assign/re-assign emails, create tasks, create Promise To Pay from the email, etc.
Emails read from your AR mailbox into the platform are assigned to the customer based on the principles described in the Assigning Emails to Customers section.
To learn more about the Communications page and its features, see the Communications Page - Overview article.
Connecting YayPay to Your AR Mailbox
This section describes how to connect YayPay to your AR mailbox. Once connected, you can send emails to your customers and read their responses directly on the Communications page in YayPay.
To achieve this, work with your internal IT team to identify an AR mailbox. If you already have one, you can reuse it. If not, create a new AR mailbox with a name like ar@yourcomanydomain.com or collections@yourcompanydomain.com. This has to be a physical mailbox with folders like Inbox, Sent, etc.
Each YayPay instance can have its own AR mailbox connections. You can connect to:
- One outbound AR mailbox that will be used as the sender for outgoing emails initiated from YayPay.
- The same or different mailbox to sync and receive email responses as inbound emails.
To configure the connection between YayPay and your AR mailbox:
Log in to YayPay as an admin user.
Navigate to the Settings | Email page.
- Enter the required information, such as the server address, port number, username, password, etc. For more details, see:
Click SAVE AND TEST CONNECTION.
System-Wide Email Settings
Once you've established that YayPay is connected to your designated AR Mailbox for both Outgoing and Inbound Emails, there are several Email Settings that can be configured across the platform, depending on your preference.
These settings are found in the Settings > Business page of YayPay.
After you have connected YayPay to your AR Mailbox, there are some User-Driven Email settings across the platform that can be configured.
These settings are found in the Settings > Business page of YayPay, and they define how the Email delivery functions across the platform, including Email Reminders, sent as a result of your Collection Workflow Actions.
Refer to these articles on the email delivery/connectivity with your AR Mailbox and Collection Workflows:
Collection Workflows & Rules Engine (see the section on "Collection Workflow Settings")
Test your Email Connection
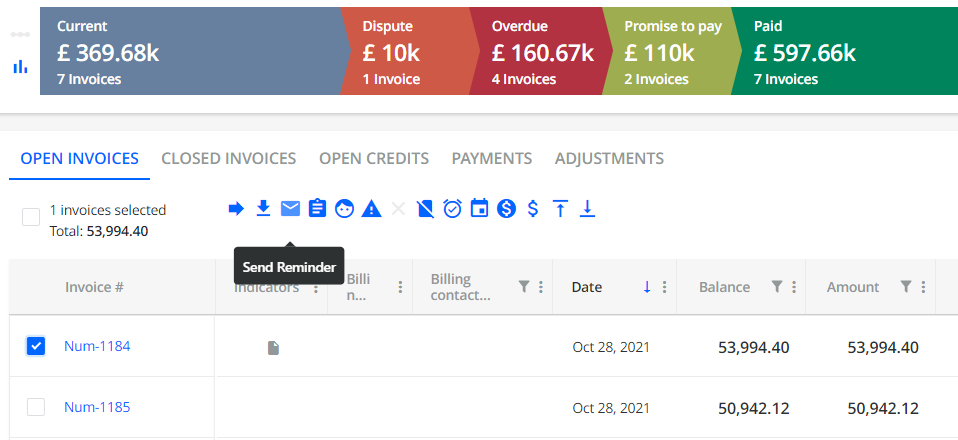
Choose a customer in YayPay and select an invoice. Click on the Send Reminder icon to send yourself a test email:
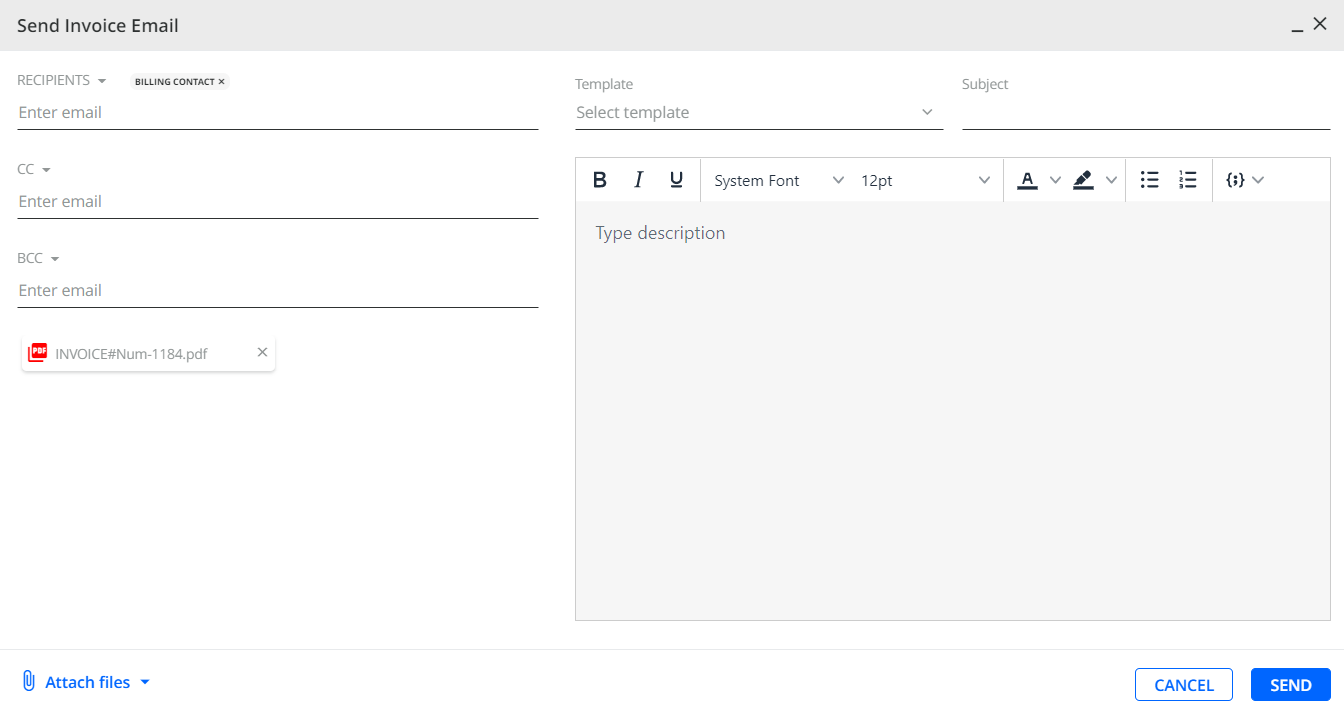
Enter your own email address with a Subject line, as well as the body of the message. Click on the "SEND" button.
Look at the Communications page in YayPay or your personal inbox to review your test message, along with the Sender information, your company logo, etc (refer to: https://yaypay.helpjuice.com/communications/316023-communications-page for more information).
SPF & DKIM Protocols
Sender Policy Framework (SPF) and DomainKeys Identified Mail (DKIM)
This section is optional.
SPF and DKIM are additional email authentication protocols that you can work with your IT Administrator to configure on your email server. These protocols decrease the chances of your emails being blacklisted by spam filters, and "legitimize" your emails from that domain during delivery.
To learn what is SPF and DKIM, refer to this article, or this article.
In addition, these articles below relate to the setup for different email services:
Common / Known Issues with Gmail Setup
If you are getting errors setting up the STMP connection with Gmail, or if you see outgoing email attempts sent out from YayPay with Authentication Errors, review the following points:
- Use the following SMTP settings:
- SMTP server: smtp.gmail.com
- Gmail SMTP Port (SSL): 465 or
- Gmail SMTP port (TLS): 587
- Use 'imaps' (instead of IMAP) for the IMAP Protocol for Gmail
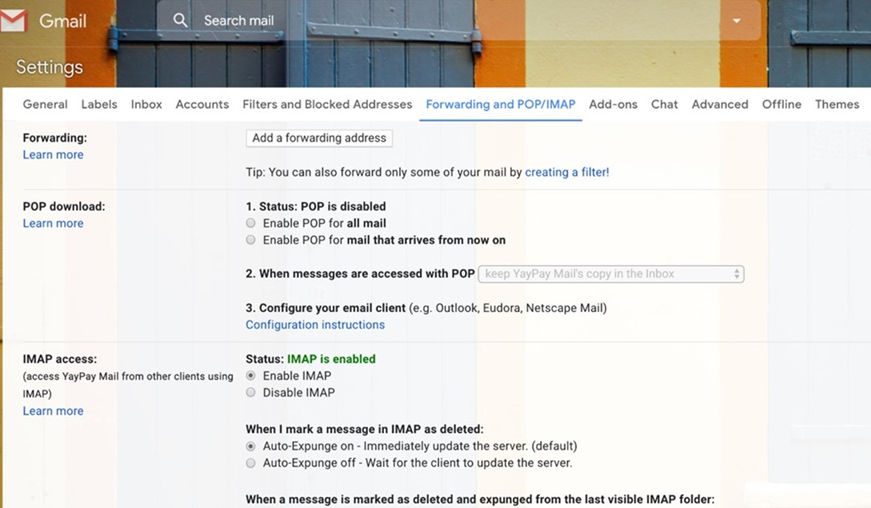
- Activate IMAP in Gmail - choose "Enable IMAP" in your Gmail settings (under IMAP access)
- If 2-Step-Verification (2-Factor Authentication) is activated for your Gmail account, you should generate an App password (for Yaypay) as described in this Google Help article so as to avoid this error from being displayed in YayPay.

- If 2-Step-Verification is not activated but you still get an Authentication error, you should turn on the "Allowing less secure apps to access your account" option as described in this Google Help article.
- If you have issues receiving messages from your Gmail account - refer to this Google Help article.
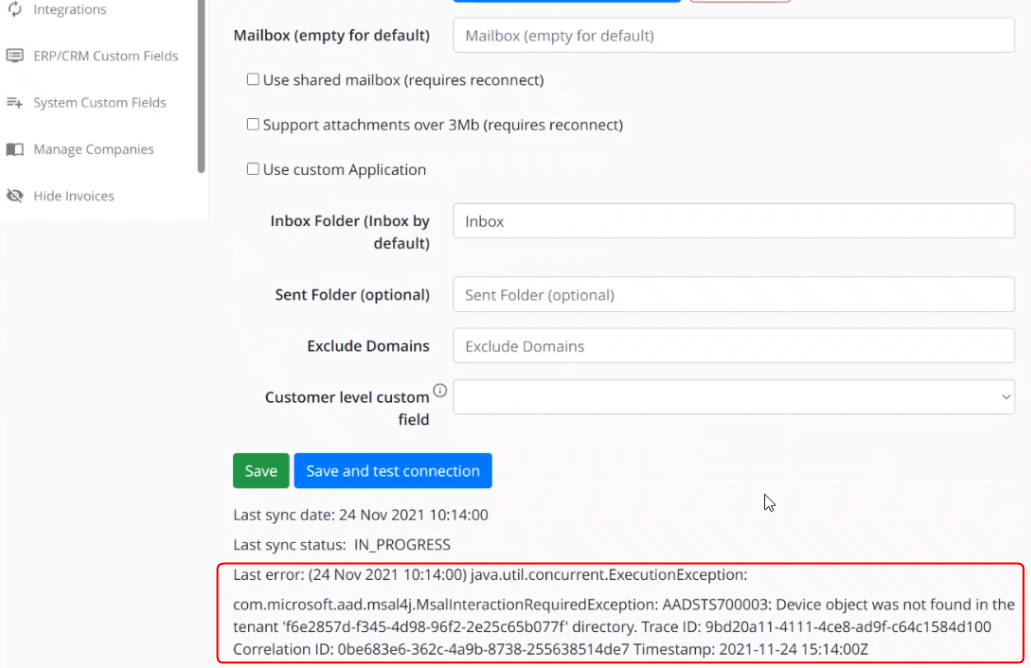
- If you happen to see the following error (which might be due to internal changes in the settings, e.g. in the Microsoft Entra ID application used for SSO), you are advised to reconnect your mailbox. If the problem persists, contact YayPay support.