The following procedure outlines the setup of YayPay and your Intacct system to support the integration of payment information from YayPay to Intacct. This integration happens soon after a payment attempt has been made in YayPay and validated by the Payment Processor to be successful.
This procedure builds on what was summarized in the Payments Overview Article. For more information on using YayPay for Payments, refer to: https://yaypay.helpjuice.com/payments.
The prerequisite for this setup outlined is that your Payment Processor Gateway / Merchant credentials have been approved and issued to you (as well as configured in YayPay under the Settings > Integrations page).
1. Configure YayPay to create and send the Payment information to Intacct
Configure YayPay to create and send payment information to Sage Intacct®:
- Connect YayPay to Sage Intacct® by following the instructions in the Intacct: Configure Account for YayPay Integration article.
- Configure the following payment-related settings when configuring the Sage Intacct Connector Settings:

Push Credit Limits to Intacct: If checked, Credit Limits saved in the YayPay system are pushed to Sage Intacct®.
By default, Credit Limits are pulled to YayPay from ERP. When YayPay is used as a system of record for credit limits, they are not pulled from ERP and are managed inside YayPay.
Download Sales Credit Memos as Credit Memos: https://yaypay.helpjuice.com/en_US/88168-sage-intacct/download-sales-credit-memos-as-credit-memos
Create Payments If checked, the connector will automatically push any created payments from YayPay to Sage Intacct®.
To push a payment to Sage Intacct via Cash App, the payment must meet specific criteria, including a specified Payment date. In Sage Intacct, this date will be recorded as the Date received field, which is used for determining the discount application. Thus, changing the Payment date in Cash App will affect the discount application in Sage Intacct. Additionally, the Payment date will correspond to the date the payment was created in YayPay.
However, if a user creates a payment from the Statement page or Customer Portal, the Payment date in Sage Intacct will correspond to the current date.
Sync saving accounts Check this setting if you want to sync the saving accounts configured in your Sage Intacct® instance to YayPay. Once synced, you will be able to use them within the following YayPay features:
- Business Settings – You will be able to select the saving accounts as the default bank accounts for ACH and card payments.
- Cash Application Basic and Cash Application Advanced modules – You will be able to select the saving accounts as bank accounts when creating payments.
2. Selecting accounts to create Payments in Intacct
Select the Intacct Checking or Saving Account in YayPay
You can also configure YayPay to send the card or ACH payment to a specific checking or saving account. This list of drop-down values is sourced from your Intacct system after the appropriate Intacct permissions is adjusted (see next section).
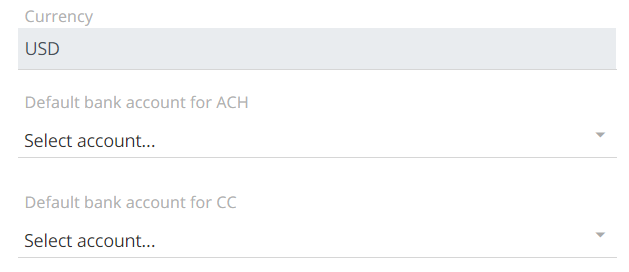
Go to your Business Settings page in YayPay (Settings > Business) to select the appropriate Bank Account for both ACH and Card Payments from the 2 drop-down lists:
(These checking or saving accounts should also be linked to a bank account in Intacct):
During the sync process, the connector syncs bank accounts (checking or saving accounts) from Intacct:
-
Intacct:

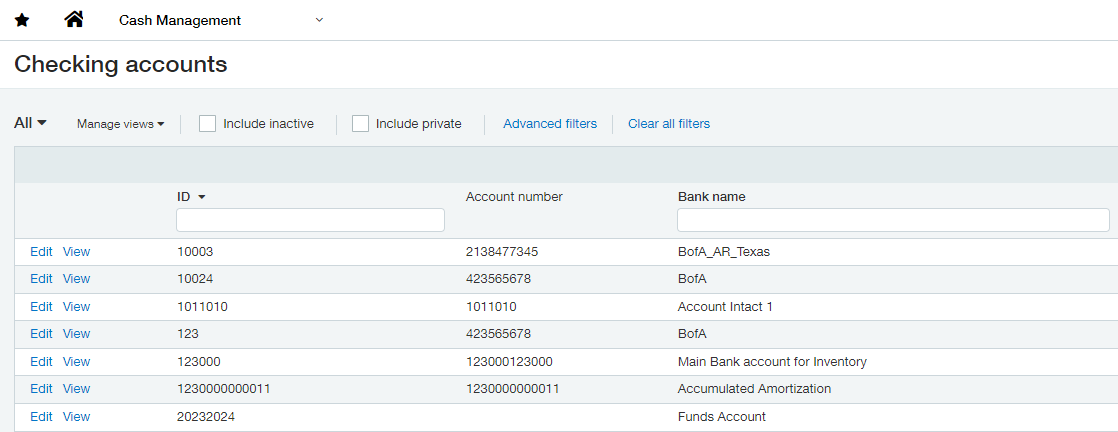 NOTE: If the Client specifies the Entity ID on the Connector Settigns page in YayPay, the Connector syncs checking accounts by Entity ID from Intacct.
 -
YayPay:
In YayPay, the client should use bank accounts (checking or saving accounts) to create a payment.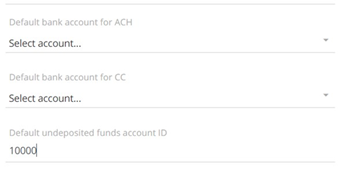
Select the Undeposited Funds Account in YayPay
If you prefer that the Credit Card or ACH payment be sent instead to Undeposited Funds, enter the Account in the Default undeposited funds account ID field". You must not leave this parameter empty. Otherwise, YayPay will not successfully create and integrate the payment info in Sage Intacct.
(Note: if you don't have an undeposited account setup in Intacct, one has to be set up first)

Select the GL Account for Payments on Account in Intacct
This option makes use of Intacct's Receive Advances feature to receive a payment from your customer without having created an invoice.
In YayPay, this is the equivalent of allowing your end customers to make Payments at the Account level (refer to the article: On Account Payment for example)
To enable YayPay to create and sent the payment not linked to an invoice, ensure your Intacct system has an Account selected for "Customer advances" under the GL accounts section.
Navigate to this menu path in Intacct: Company > Subscriptions > Configure Accounts Receivable and select the appropriate account for "Customer advances":
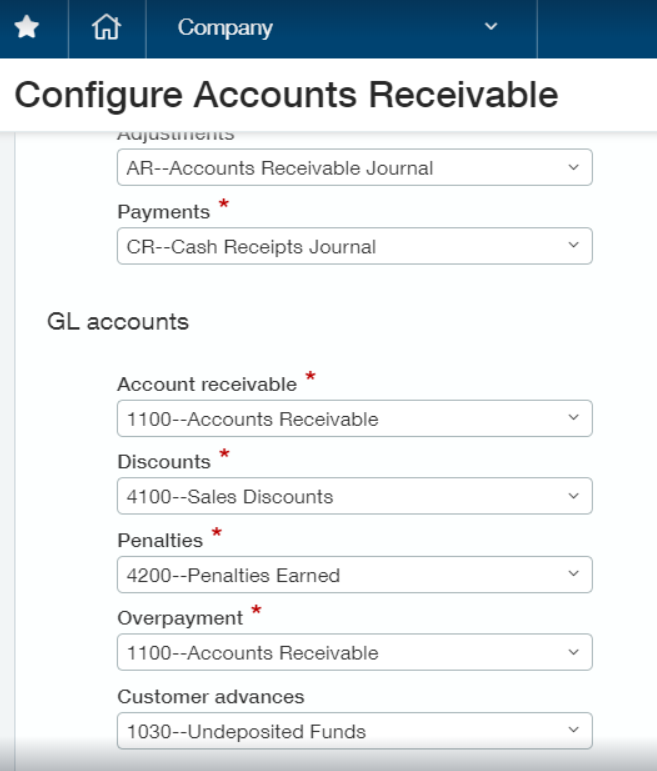
Without this configuration Intacct, this error/failure could result when YayPay attempts to send and create payments in Intacct:
BL03000211 Creating an advance payment requires an offset account. Select Company -> Services -> Configure Accounts Receivable. Choose a GL Account for Customer Advances and click Save. Offset account not selected.
Contact support@yaypay.com if you have any questions.
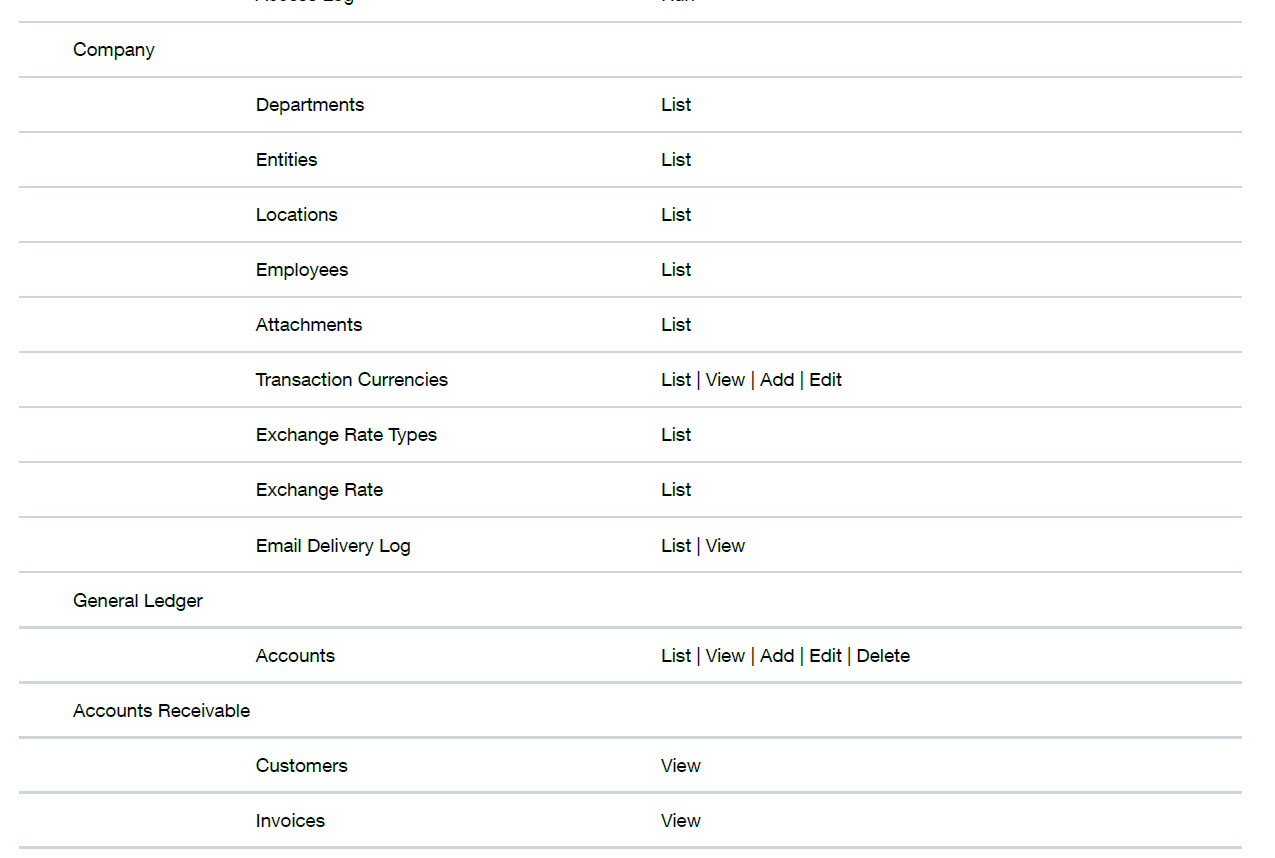
3. Update and Adjust Permissions in Intacct
This section builds on the permissions previously set up for the YayPay Web Services User in your Intacct system (see Use Role Permissions Necessary for Integration).
As it is not always possible to cover every client’s Intacct environment, there may be further permission adjustments required depending on the situation. Please reach out to YayPay Support (support@yaypay.com) if you encounter difficulties.
4. How Payment information is sent to Intacct
Payments captured through YayPay can take place in a few ways. As a recap, they are:
-
Payment made against one or several invoice(s)
Refer to: https://yaypay.helpjuice.com/payments/payment-flow-from-internal-statement-page -
A payment made at the Account level
Refer to: https://yaypay.helpjuice.com/payments/auto-recurring-payments
After the Payment Amount is captured through YayPay, and processed by the Processor, this information is automatically created and integrated from YayPay to Sage Intacct. The manner in which YayPay sends the payment information to Intacct is similar to you using your Intacct system to accept/receive a payment.
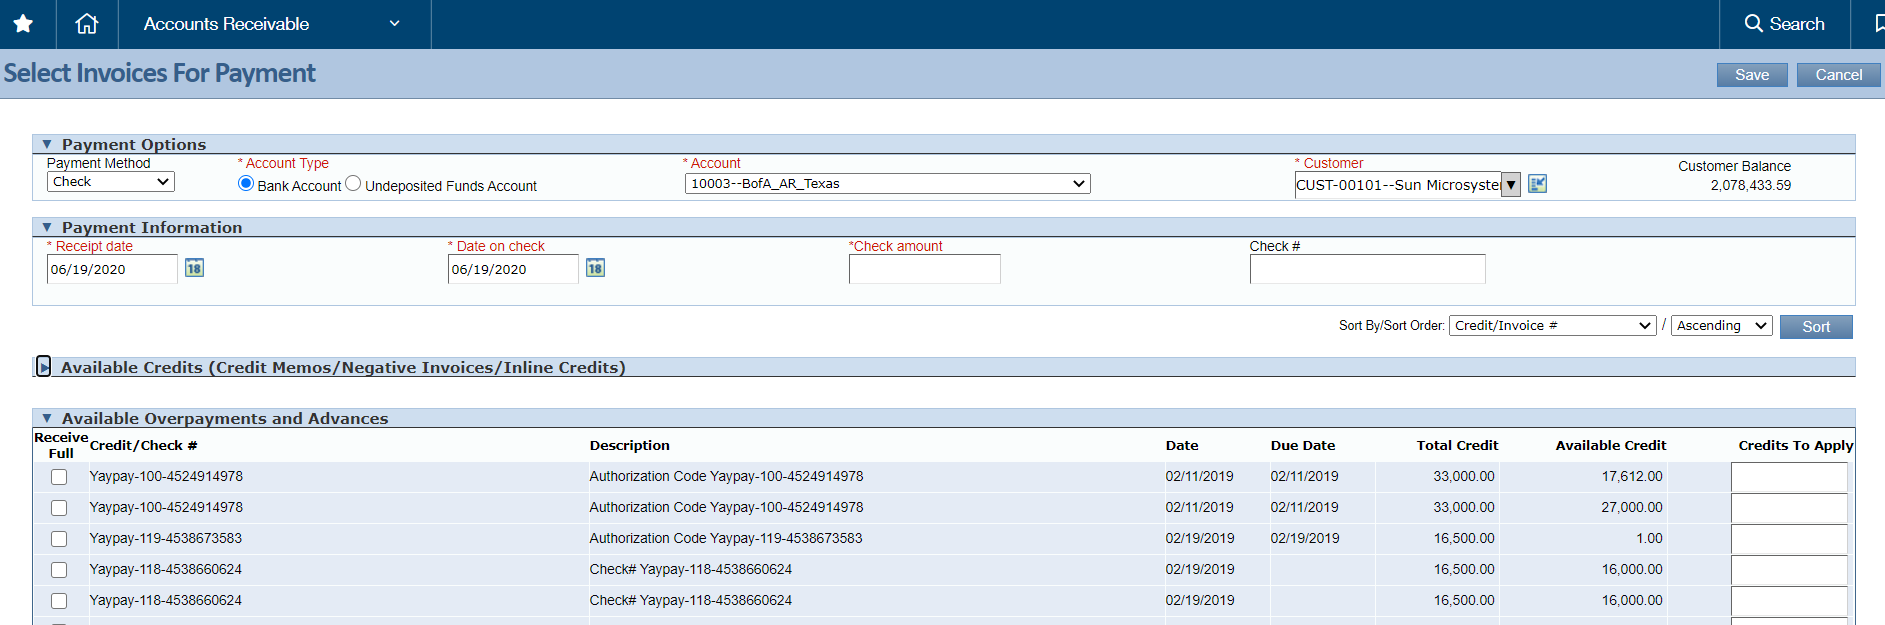
For example, in Intacct, go to the menu path: Accounts Receivable > Receive a payment:

After that, you may select the Customer for example:
Mapping of Payment Method Values from YayPay to Intacct
In YayPay, the payment mode maps to the following values in Intacct:

- If a Credit Card Payment was made in YayPay, the Payment Method in Intacct will be "Credit Card"
- If an ACH (or EFT) Payment was made in YayPay, the Payment Method in Intacct will be "Check"
- YayPay will also send the payment information to the appropriate Account Type & Account (this is configured under the Business Settings page in YayPay)
5. Viewing the Payment information in Intacct
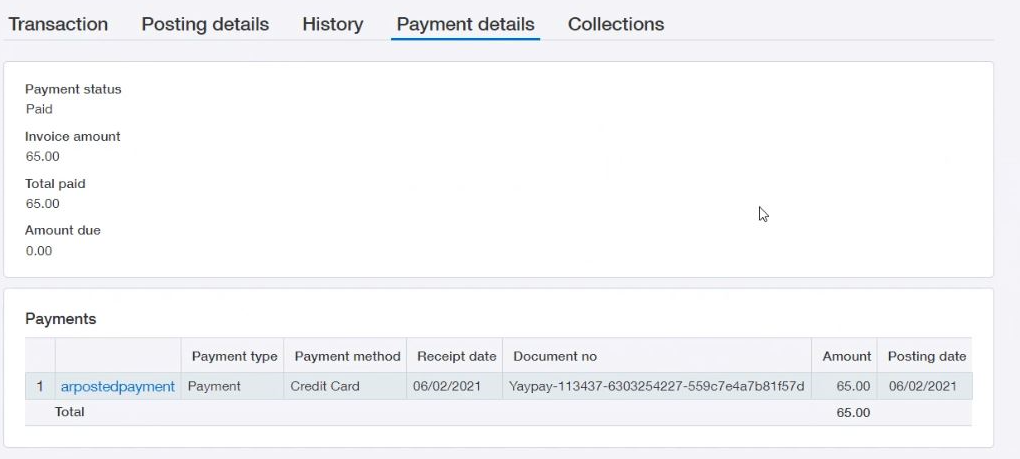
Go to the Payment details tab of the invoice to look up the payment created in Sage Intacct. The Document no column contains the prefix “YayPay - xxxxx…” to denote that this was created from YayPay. For example, this invoice payment was captured in YayPay for $65 and also processed successfully by the Payment Processor:
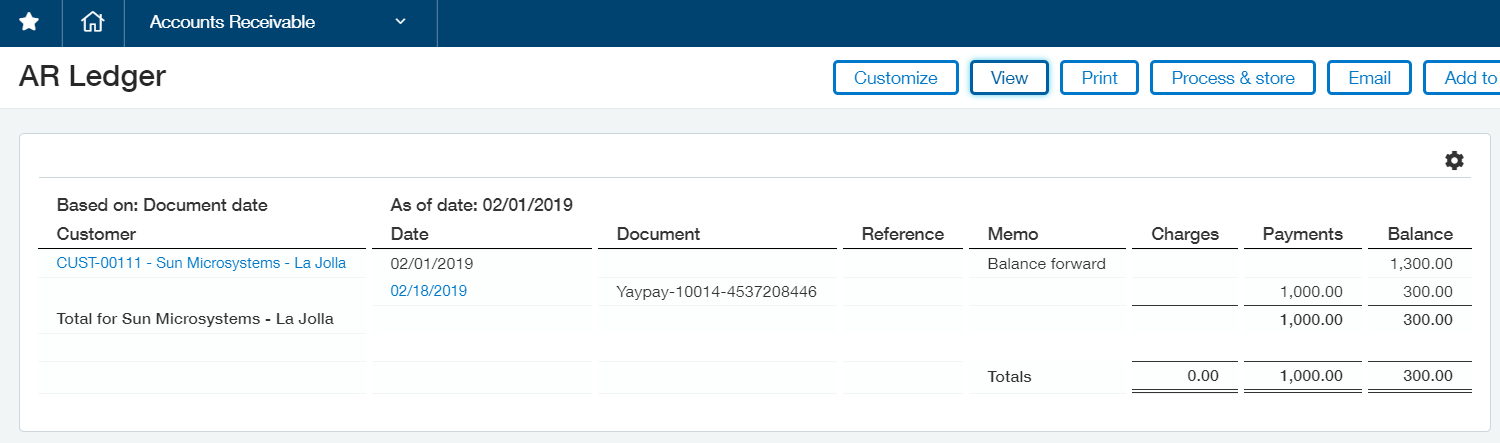
Or you can also use your Intacct AR Ledger (under Accounts Receivable > AR Ledger) to view the payments sent from YayPay.
YayPay payment transactions have a "YayPay" prefix, followed by a series of numbers (refer to the Document column)
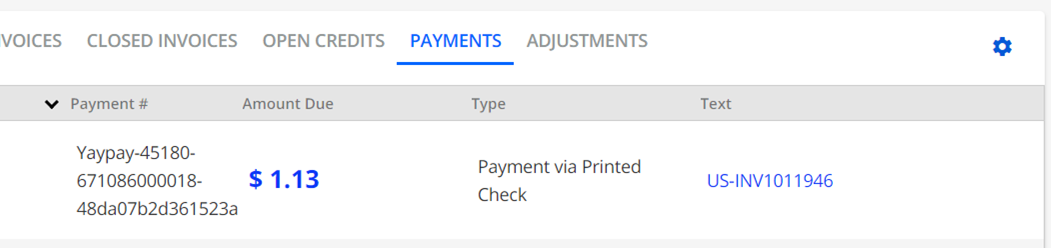
After the next sync with Intacct, the applied payment will be shown under the PAYMENTS tab in YayPay (and if the invoice was fully paid, you will find the invoice move from being shown under Open Invoices to Closed Invoices).
For example:
Frequently Asked Questions
Is the Payment Integration to Sage Intacct affected if the "PAUSE ALL" button is pressed (the button is found in the Settings > Integrations page of YayPay)
Yes, the Pause All operation pauses both the AR Sync from Sage Intacct to YayPay and the Payment creation from YayPay to Sage Intacct
403 error code
If you see a 403 (Cloudflare) error code, this may point to a wrong Merchant credential used to configure YayPay. Check with your YayPay Rep and/or the Payment Processor.
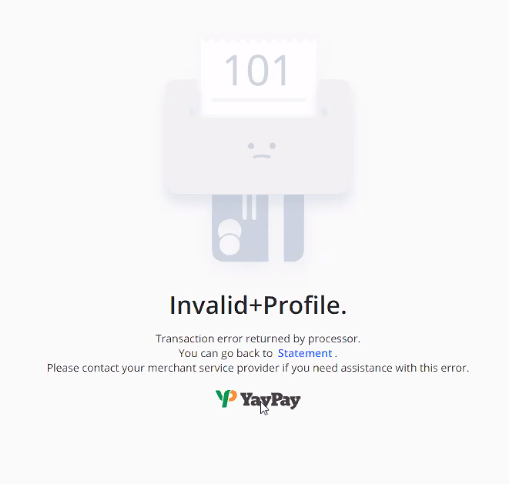
101 error code
If you see a 101 error code, this usually means the Payment Type (e.g. ACH Payment) linked to your Merchant Profile provided by the Payment Processor may not be established yet, hence the ACH payment transaction captured via YayPay is shown to be not successful, and no transaction will also be pushed to Intacct.
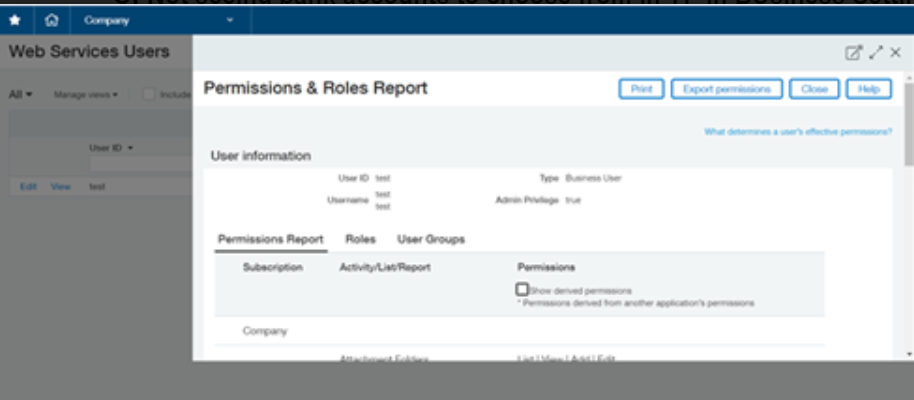
How to handle payment push/integration issues?
If there are issues encountered during the payment push/integration to Intacct, go to the Web Services Users page in Intacct to retrieve the Permissions & Roles. Print the full list of permissions to a PDF file and provide this to YayPay Support or your Account Rep