This document provides a summary of the most significant new features, enhancements, and changes we have made to the software. For further details regarding Localization, Supported Software or Recommended Limits, review the Accounts Receivable by YayPay Release Notes.
Cash Application
Enhanced Customer-Payment Association
We have streamlined the process of assigning customers to payments uploaded in the Cash Application module via payment files.
YayPay now uses historical payment upload data to automatically assign the same customers to new payments that were assigned to similar previous payments.
This eliminates the need for manual selection of customers, saving time and reducing the potential for errors.
To learn how the new feature works, see the Importance of the 'customerIn' Property section of the Cash Application Settings article.
Enhanced Remittance Auto-Allocation
When YayPay creates a remittance from an email that contains valid invoice numbers and amounts but lacks matching payment numbers, it now automatically allocates the remittance to corresponding invoices. This allocation is based on the valid invoice numbers and amounts found in the email.
This feature will greatly reduce manual input and increase accuracy, saving our users valuable time and manual effort.
To learn more about remittance auto-allocation, see the Allocating Remittances to Invoices section of the Remittances Allocations article.
Processing BILL Remittances Enhanced
We have upgraded YayPay's remittance processing for a smoother experience.
Now, when YayPay receives a remittance email from the BILL® payment platform, it automatically extracts the following details from the email:
- Payment amount
- Invoice number
YayPay auto-populates each remittance record (that it creates from such emails) with the extracted information and allocates it to the relevant invoice. The enhancement is designed to save you time and minimize manual data entry errors, ensuring more accurate and efficient financial management.
To learn more about remittance auto-allocation, see the Allocating Remittances to Invoices section of the Remittances Allocations article.
Managing Payments and Remittances Enhanced
We have made several user experience improvements across the Cash Application module to make managing payments and remittances smoother:
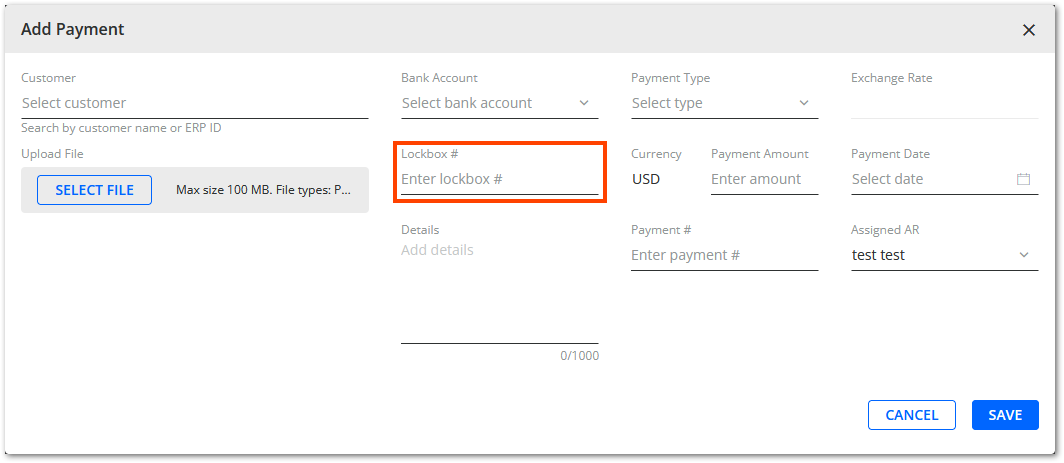
- The Add Payment pop-up now includes a Lockbox # field. This allows you to enter a specific lockbox number when manually adding a payment to Cash Application.
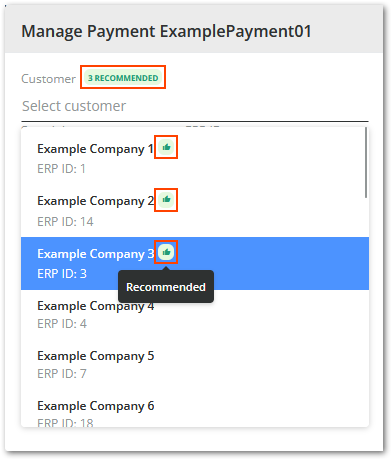
- The Manage Payment and Manage Remittance pop-ups now show a RECOMMENDED label next to the Customer drop-down menu. This indicates that YayPay has identified some customers as potential matches for the given payment or remittance. Additionally, the recommended customers are highlighted with a new icon at the top of the Customer drop-down menu.
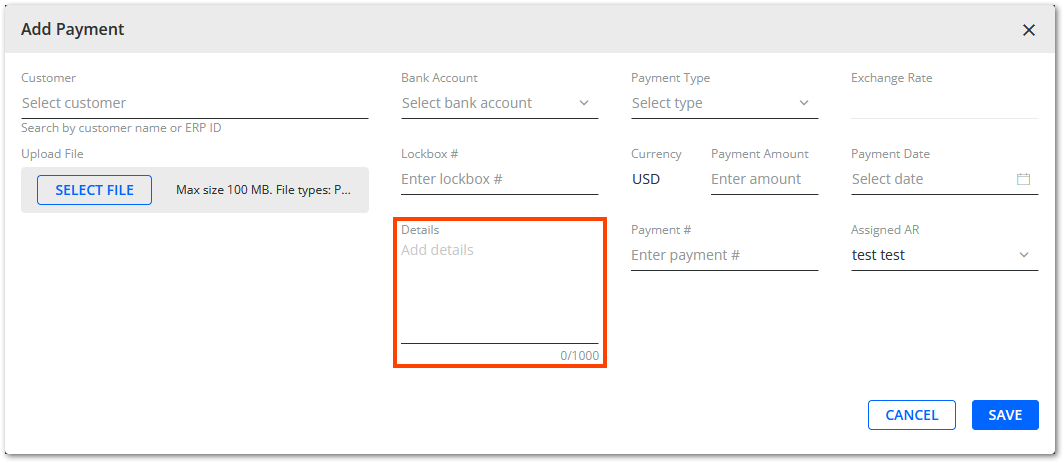
- The Add Remittance and Manage Remittance pop-ups now include a Details field, allowing you to record any additional details associated with a each remittance.
Customer Portal
Customer Portal – Download Child Statement Links
We have enhanced the Customer Portal web page to provide parent companies with the option to download a list of statement links for all first level child accounts. This feature allows easy access and management of the child accounts.
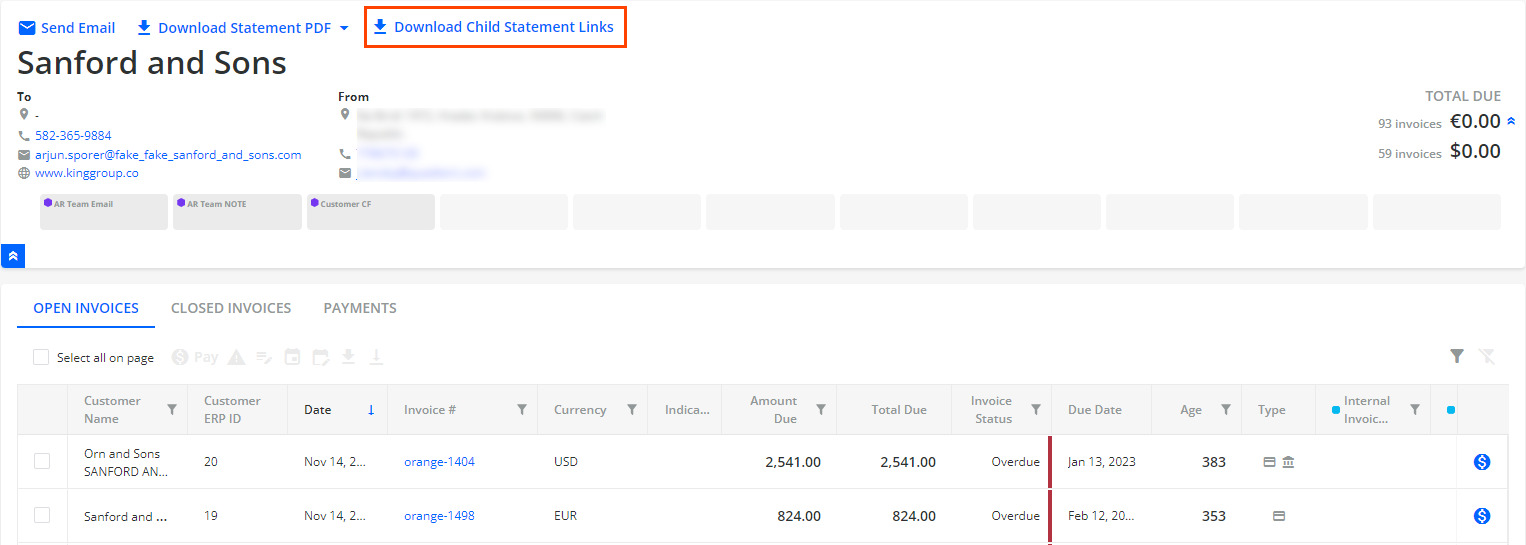
To display the Download Child Statement Links button on the Customer Portal web page, you must configure it.
For more information, see Customer Portal Overview.
Customer Portal - Invoice Level Custom Fields in Statement Excel
We have made further improvements to enhance the invoice information displayed on the Customer Portal web page. Now, when you click the Download Statement Excel button, the Excel file will also include the invoice level system custom fields created in YayPay.
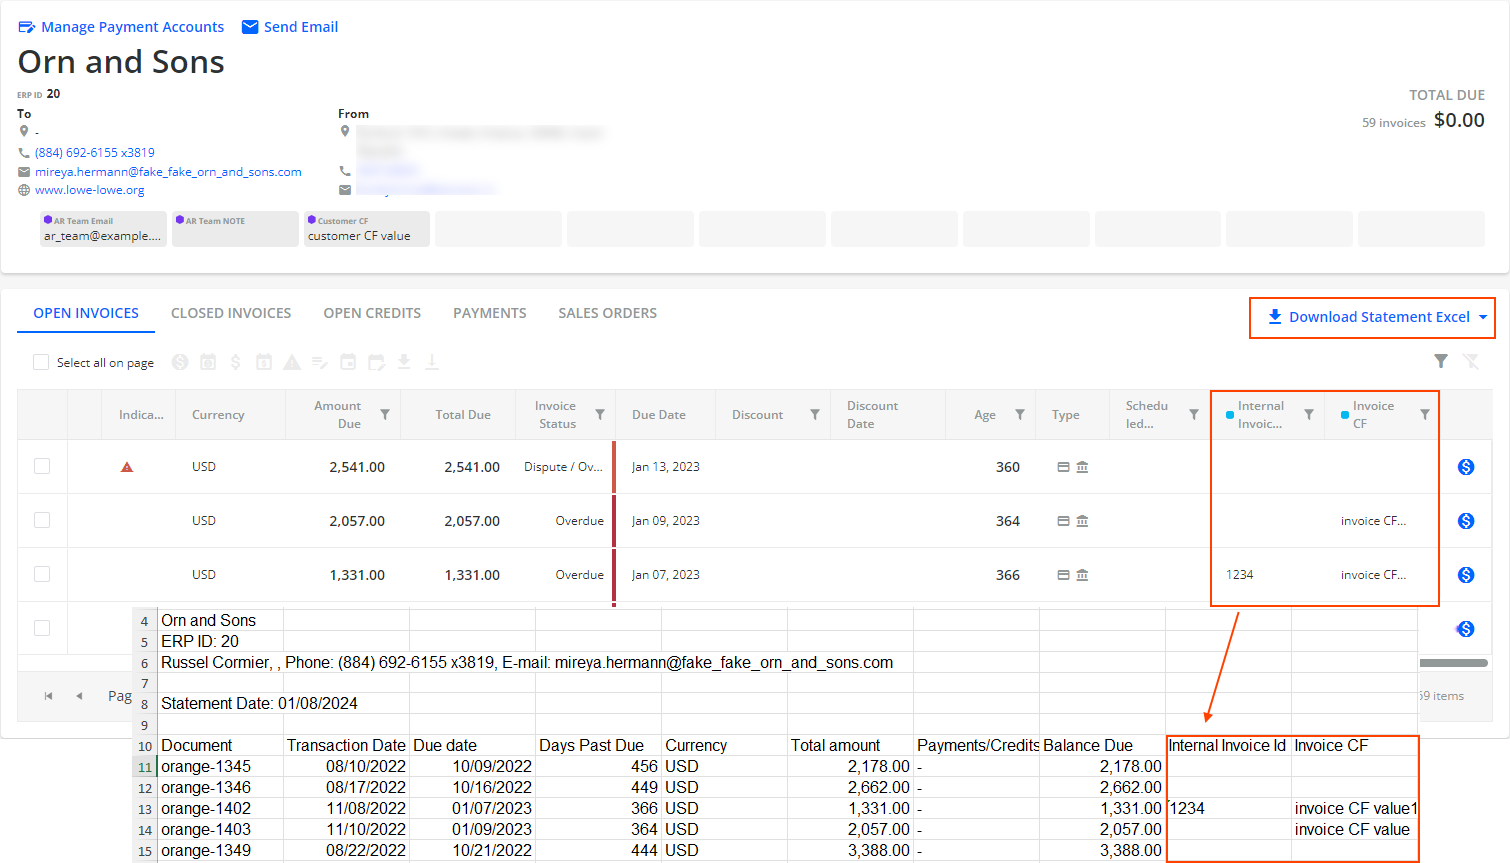
For more details, read the Downloading Excel Statements from the Customer Portal section.
Customer Portal Improvements
We have implemented additional enhancements to the Customer Portal web page. As a result, you can now easily filter the content of the grid for selected columns on the OPEN INVOICES, CLOSED INVOICES and OPEN CREDITS tabs.
Additionally, you can download a maximum of 10 selected invoice PDF files at a time.
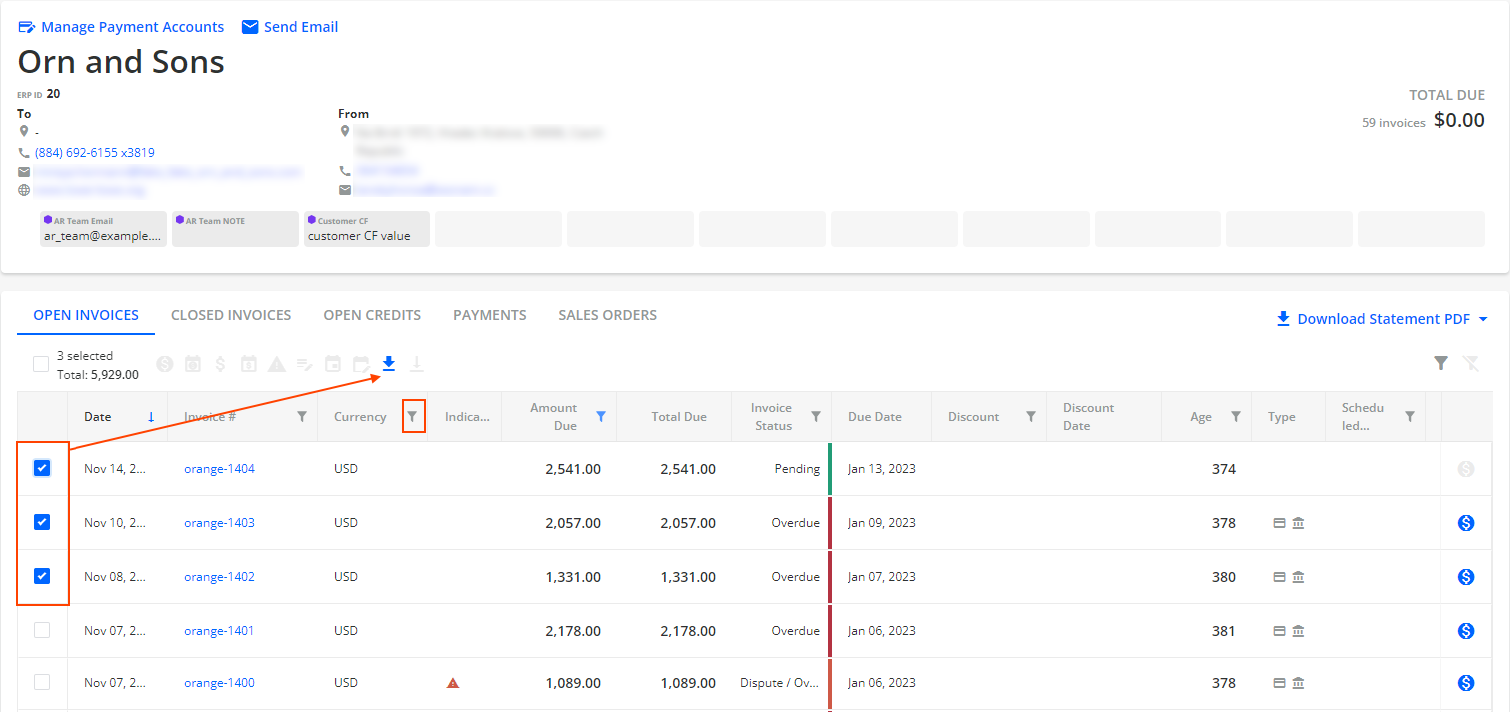
The same improvements are also available on the page that opens if users click on the {InvoiceBillingContactStatementLink} dynamic tag sent in their email reminders. Clicking on this link will lead customers to a page where they can view and manage their open invoices.
For more information, see Customer Portal Overview.
Credit
Credit - Financial Score Variable
To asses the financial stability and creditworthiness of a company, you can now use the new Financial Score credit scorecard variable.
The score is determined by considering multiple factors and indicates the likelihood that a business will experience financial distress or default on its obligations. The financial score is widely used to evaluate the risk associated with engaging in business transactions with a particular company.
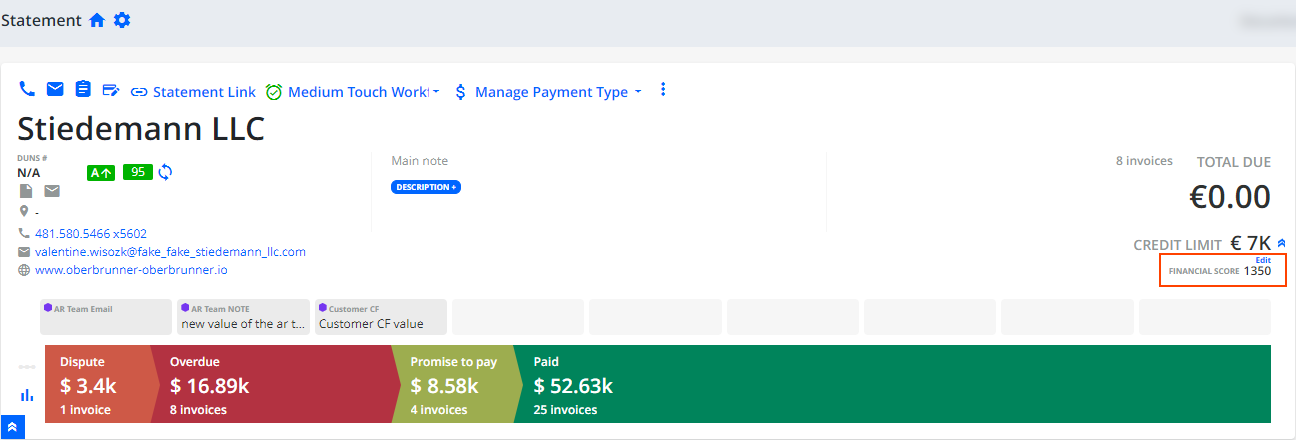
Once set up, the financial score is displayed on the following places:
Statement page.
Manage Application Form dialog opened from the Credit Application page.
CREDIT SCORE LOG tab on the Statement page.
For more details, read the Credit Scorecards section.
Credit Form Builder – Text Area Component
When designing a credit application form, you can newly include a Text Area component that will be displayed on the form. You can use the area to provide space for more elaborate responses to your questions.
You can find this component in the Custom Components category on the COMPONENTS panel.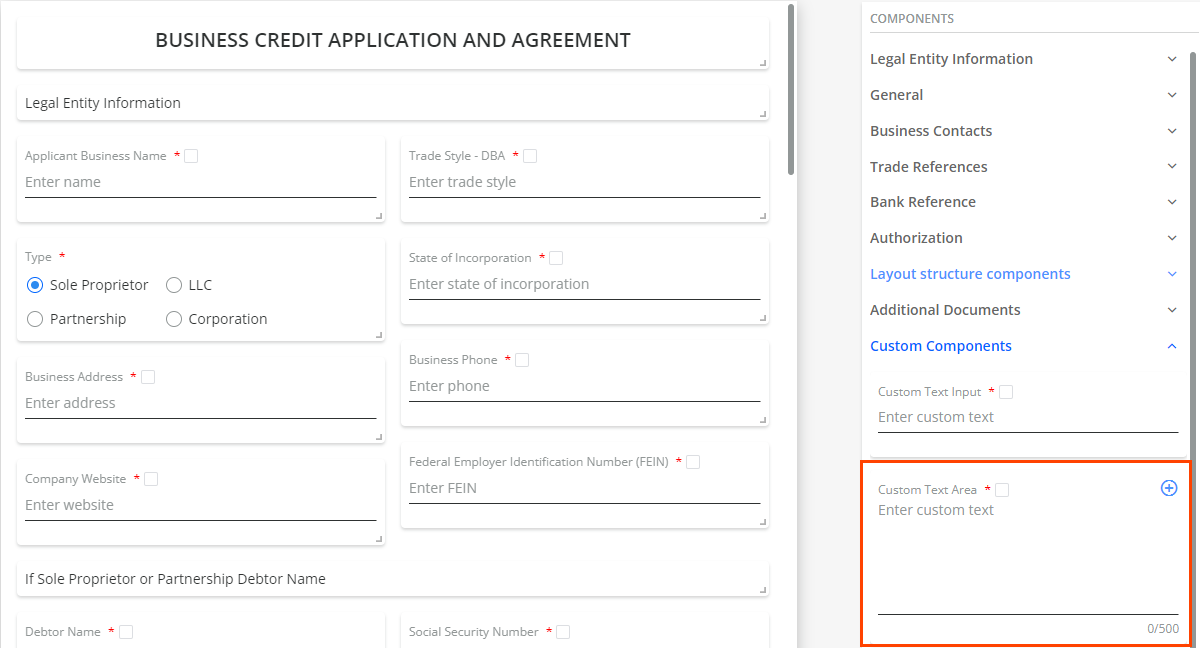
For more information, see Credit Form Builder.
Disputes
Adjust Disputed Amount for Single Disputes
We have further enhanced the possibilities you have when handling disputes. Now, you can manually change the disputed amount when opening, managing or reopening a single dispute.
In the corresponding dialogs, you can edit the Disputed Amount field.
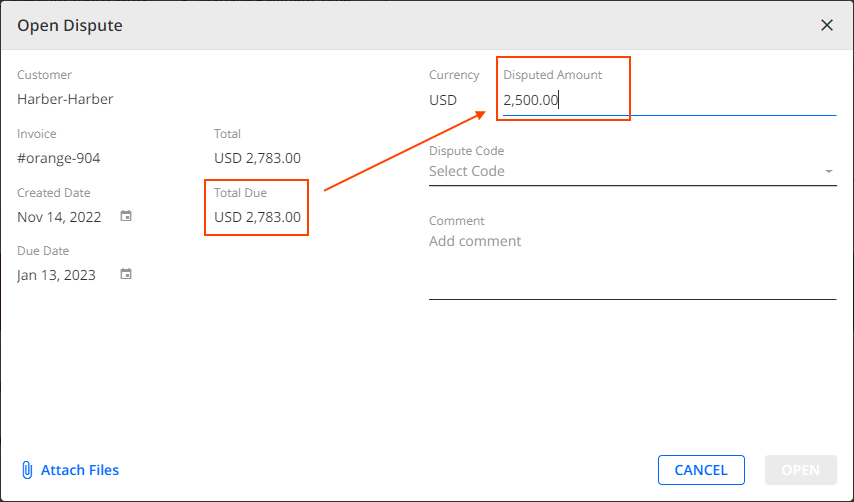
This feature is available for Advanced Disputes only.
For more information about disputes, see the Disputes page.
Business and Account Settings
Hide Invoice Functionality Enhanced
When using the Hide Invoice functionality in Settings, the Is empty and Is not empty operators are now available when configuring rules using the following fields:
- invoice custom status
- invoice system custom field
- invoice custom ERP field
- customer system custom field
- customer ERP custom field
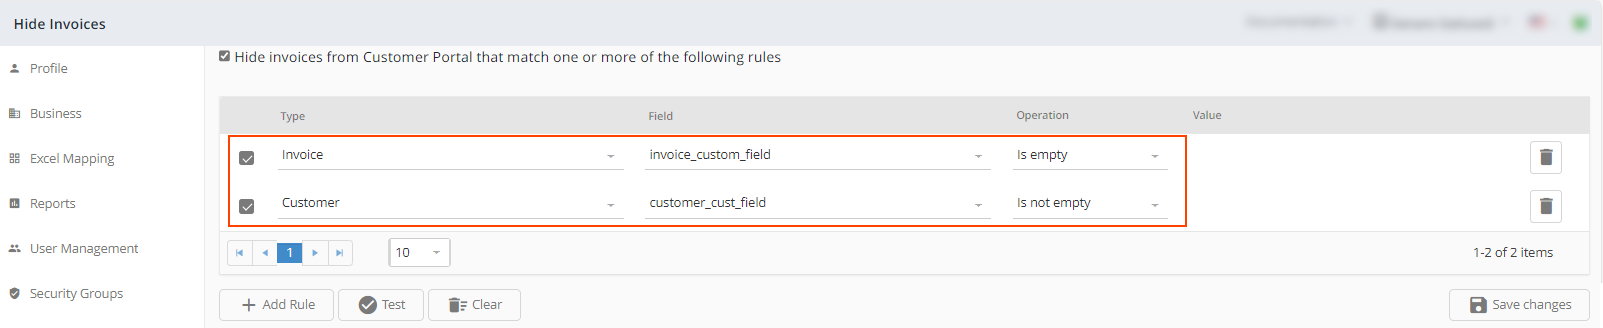
With these operators, you can tailor your hide invoice rules to meet your specific requirements more accurately. Whether you want to hide invoices with an empty custom status, filter out invoices with a specific custom ERP field, or any other combination. These operators provide more options for customization.
As a result, all invoices that match the defined rules are hidden from the Customer Portal web page.
For more information about this functionality, see the Hide Invoice page.
Exclude Future Invoices from Dynamic Tag Tables
We have extended the functionality of the Exclude future invoices from the system business setting.
Enabling the setting will now automatically exclude all invoices with a future creation date from the tables generated by the Customer Open Invoices Table and Open Documents Table dynamic tags.
This improvement ensures that you have a clear and accurate view of your current open invoices, without any future invoices cluttering the tables.
Integration Features
AI-Powered Assistance with Errors in Logs
To address the challenge of understanding vague and abstract error messages that you might receive from ERP systems during synchronization, YayPay has implemented artificial intelligence (AI) to recognize and interpret errors.
This is available on the details page of the LOGS tab. Click on the AI icon in the row with an error to see the AI powered details.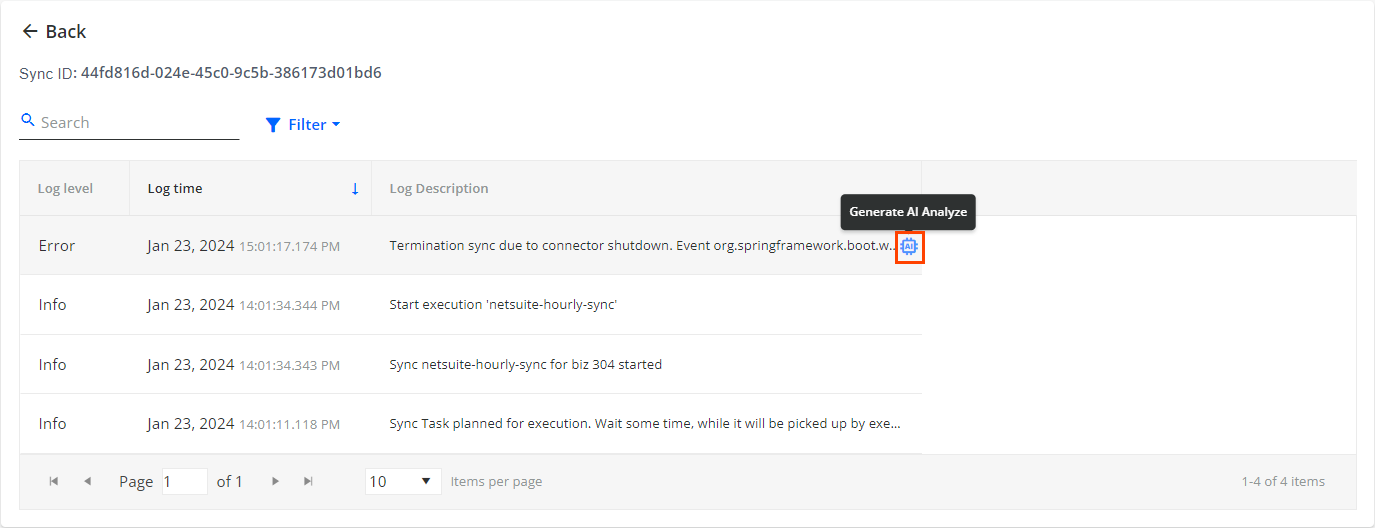
This feature enhances efficiency and reduces downtime for clients, support teams, and onboarding specialists by enabling them to quickly understand the necessary actions needed to address any encountered errors.
For more details, see the AI-Powered Assistance with Errors in Logs section.
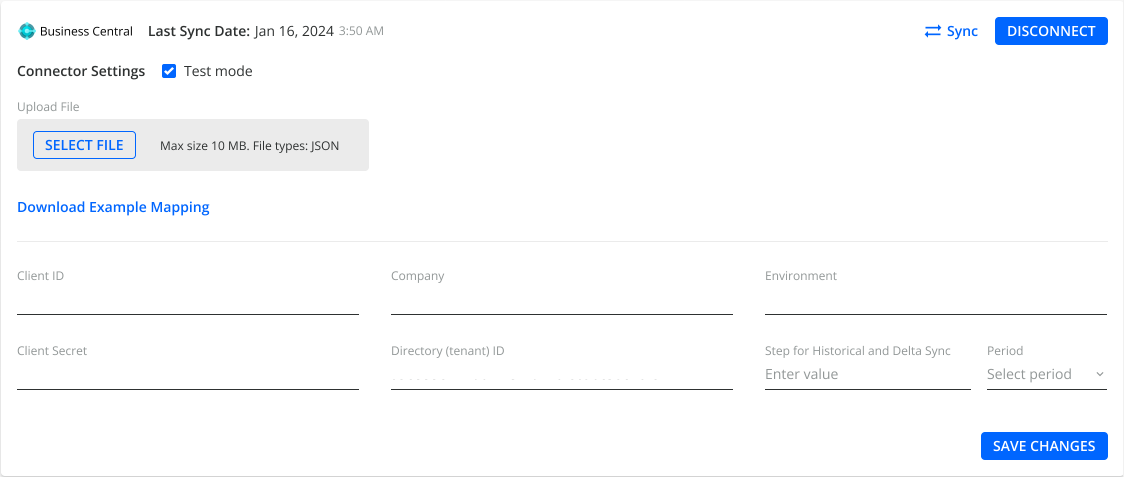
New Business Central Connector
To further expand the range of ERP systems that can synchronize data with YayPay, we have developed a new Business Central connector. With this connector, you can now take full advantage of YayPay's integration capabilities, allowing effortless transfer and management of data across various ERP systems.
For more details about integrations with Business Central, see the Business Central: Configure Account for YayPay Integration section.
QuickBooks Online® Connector Improved
We're continuously enhancing the QuickBooks Online® connector so you can make the most out of the integration between YayPay and QuickBooks Online®.
Now, you can specify the Step for historical and delta sync and Period settings to split the retrieved data into batches based on a specific time period.

For more details about integrations with QuickBooks Online®, see the QuickBooks Online: Configure Account for YayPay Integration section.
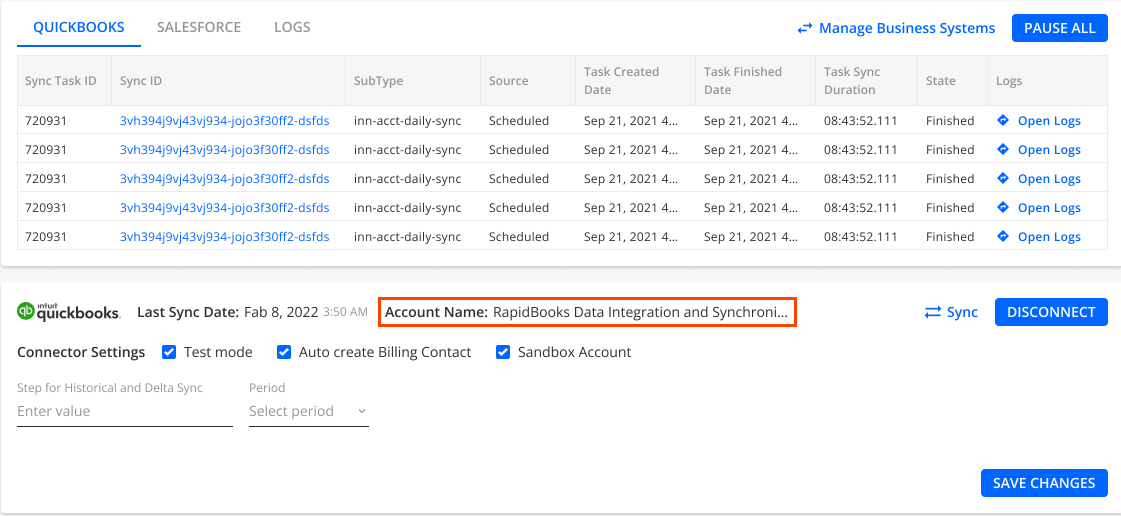
QuickBooks Online® Connector - Account Name
We have further enhanced the QuickBooks Online® connector so the Connector Settings page now displays the account name you selected during the Quickbook and YayPay connection configuration. The connector will use this account to synchronize data.
For more details, see the QuickBooks Online: Configure Account for YayPay Integration section.
NetSuite Connector – Extended Subsidiary Synchronization
We have further extended the synchronization capabilities of the NetSuite connector for subsidiaries. Now, you can easily synchronize data from multiple subsidiaries by listing their subsidiary IDs and separating them with commas.
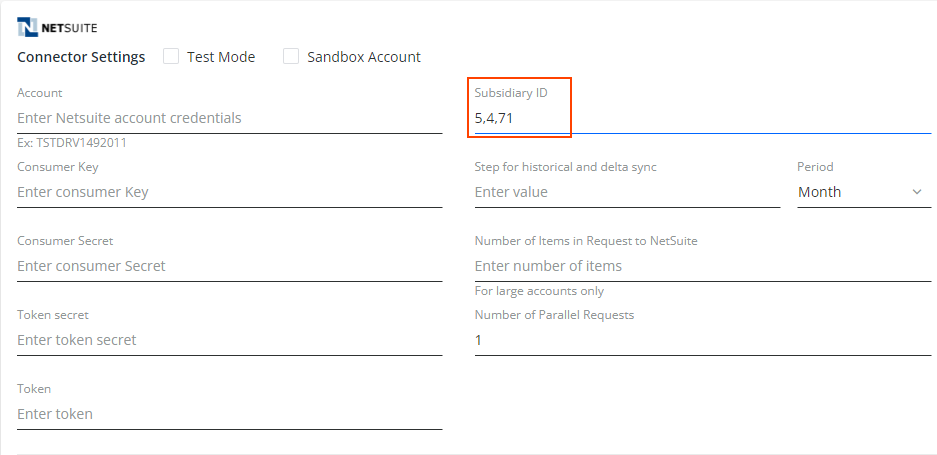
Previously, only one subsidiary could be specified.
For more details, see the Oracle NetSuite: How To Configure Account for YayPay section.
CSV Connector Improved
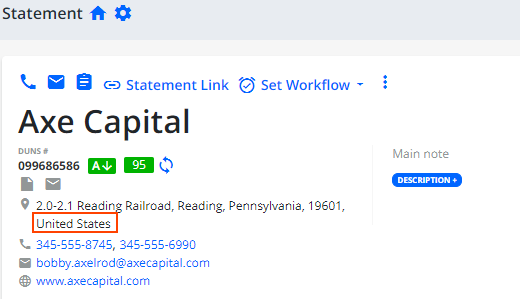
To ensure correct country name identification during CSV synchronization, it is important to also include the new country's ISO code in the customer.csv file.
By providing the country_iso_code and state fields, the customer's address will be displayed correctly on the Statement page.
For more details about the CSV connector, see the CSV ZIP File Requirements section.
