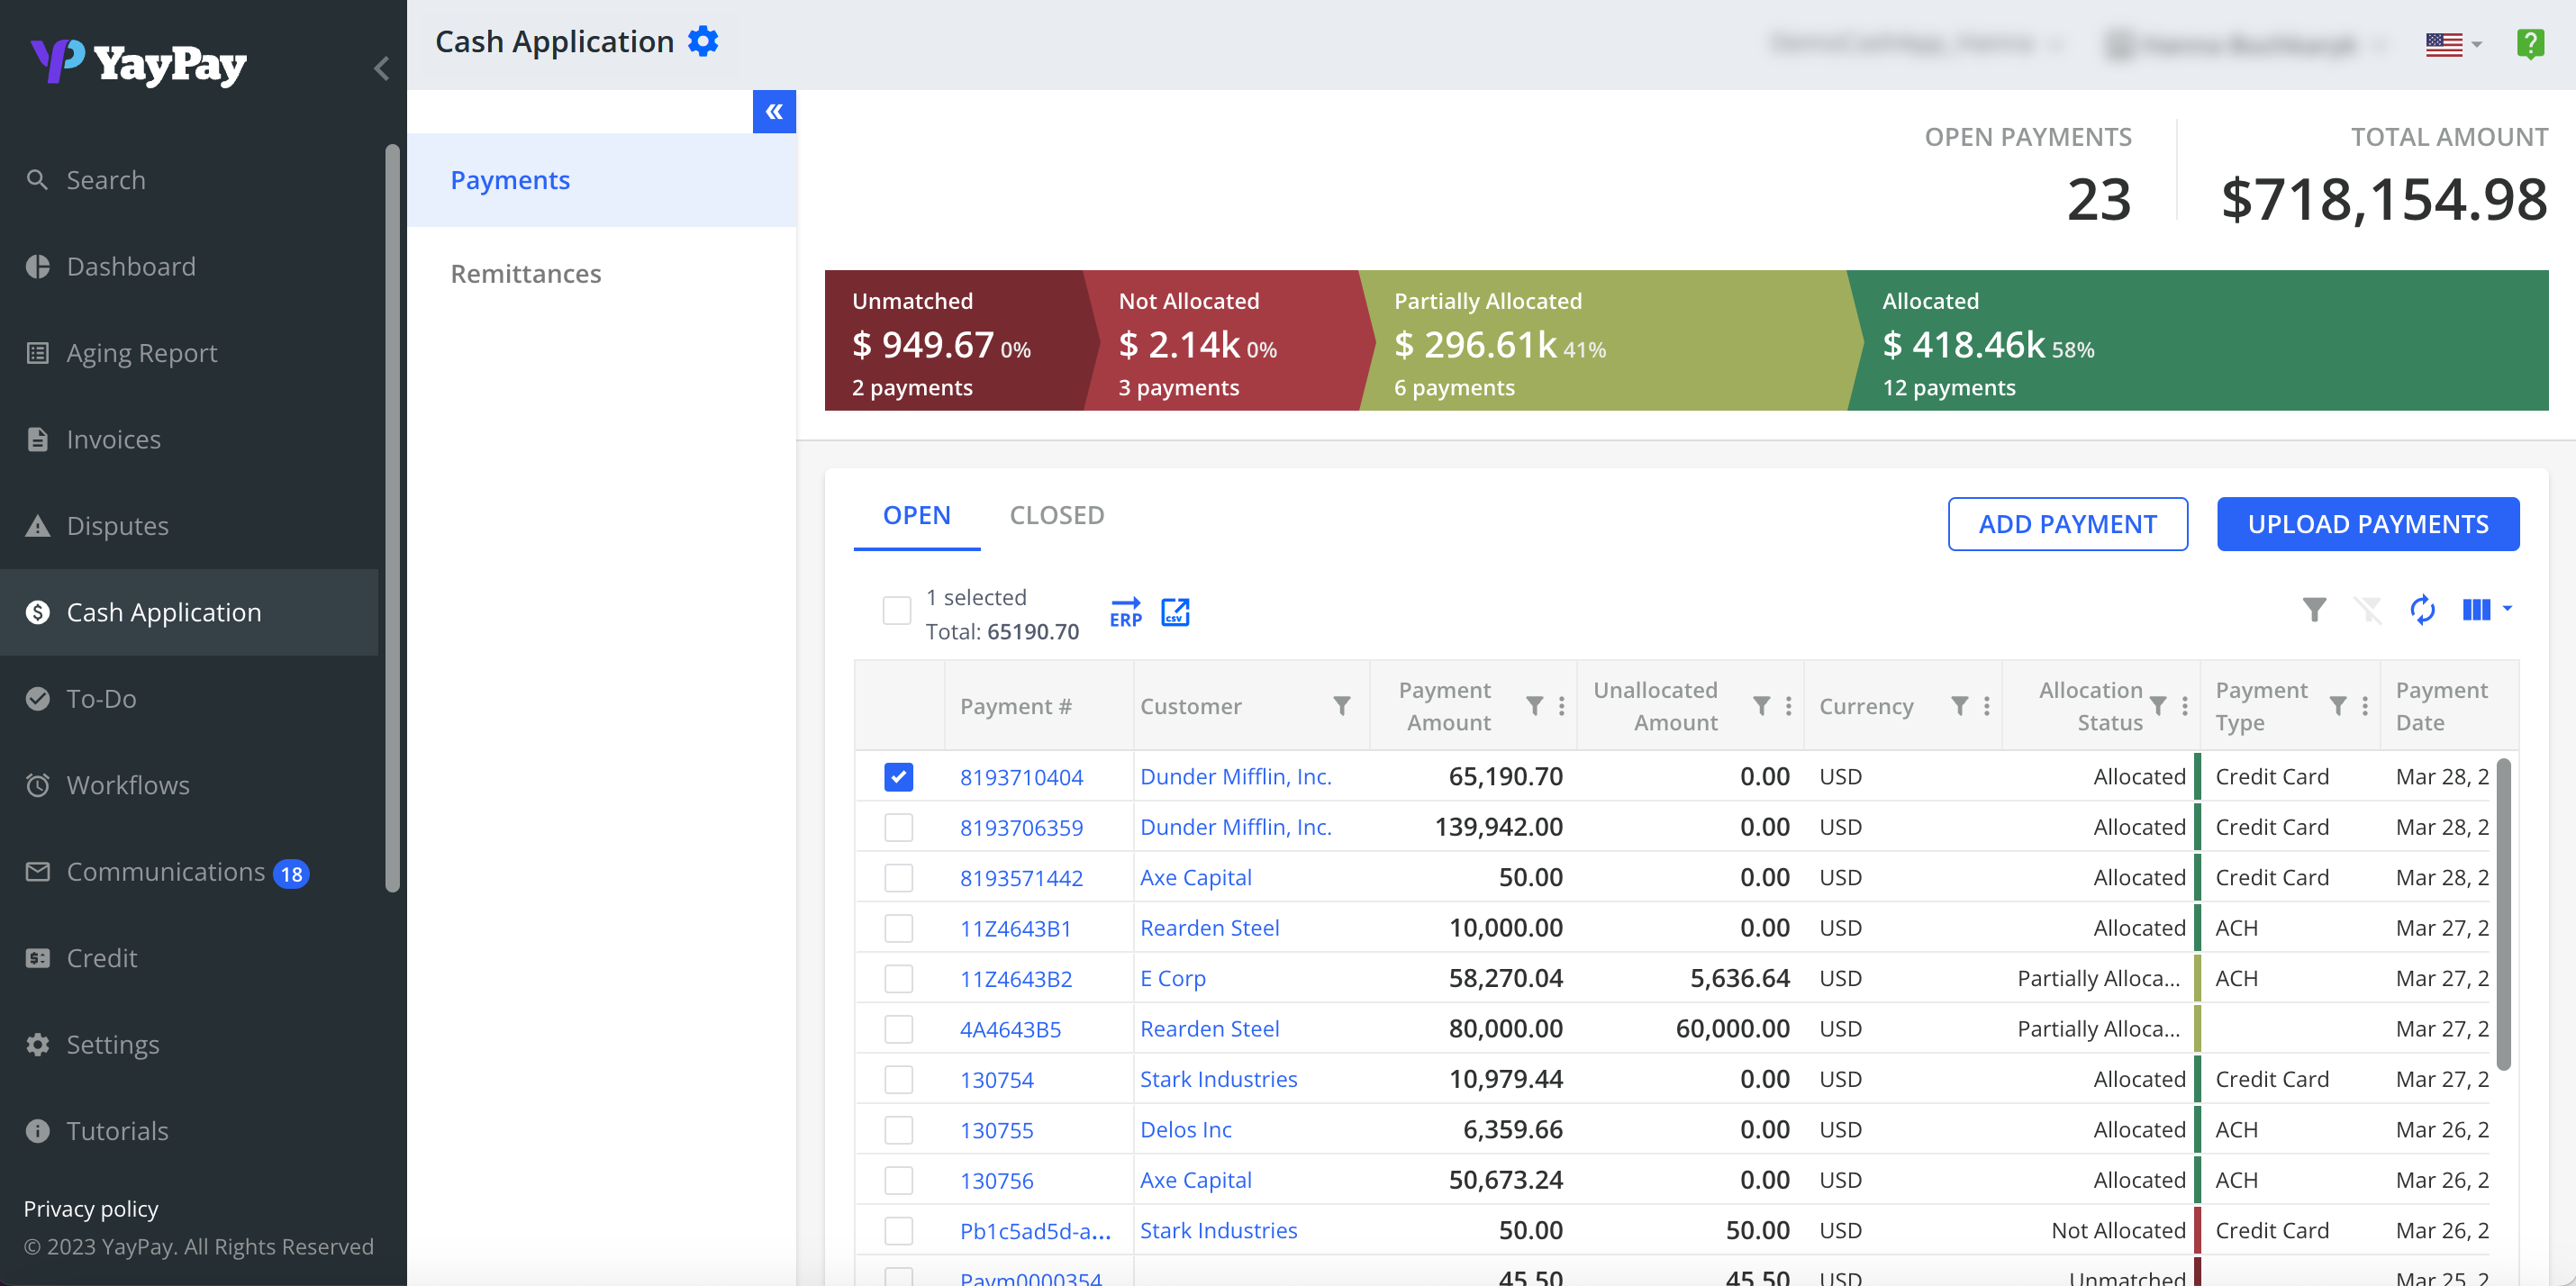
Cash Application
We're excited to announce the release of our latest module, Cash Application! This powerful tool is designed to help businesses apply payments more quickly, accelerate cash flow, and improve operational efficiency.
What It Brings to Our Customers
- Apply payments faster and eliminate the need for labor-intensive manual processes.
- Reduce operating costs by automating processes that would otherwise require a significant amount of time and effort.
- Minimize human error and mistakes that often occur with manual cash application processes.
- Improve employee satisfaction by freeing up their time to focus on more rewarding, high-value tasks.
- Enhance customer satisfaction by providing clear visibility into the AR process end-to-end.
- Scale your business more effectively with automated processes that provide operational efficiency and cost savings.
Module Features
Here is a list of some of the most important features brought to you by the Cash Application module:
- Importing payment files via CSV/XLS/XLSX/TXT.
- Generating payments automatically from YayPay payments.
- Matching payments to customers automatically.
- Generating remittances automatically from emails and YayPay payments.
- Associating payments with remittances automatically or manually.
- Allocating payments to invoices automatically via rules or based on remittances.
- Identifying customers automatically for payments uploaded via a file, or for payments made via YayPay.
- Exporting payment allocations to CSV.
- Pushing payments to ERP systems (Sage Intacct and Oracle Netsuite for now).
- Integrating with a custom mailbox designated for remittance advice and syncing each email from that mailbox as a remittance record into Cash Application.
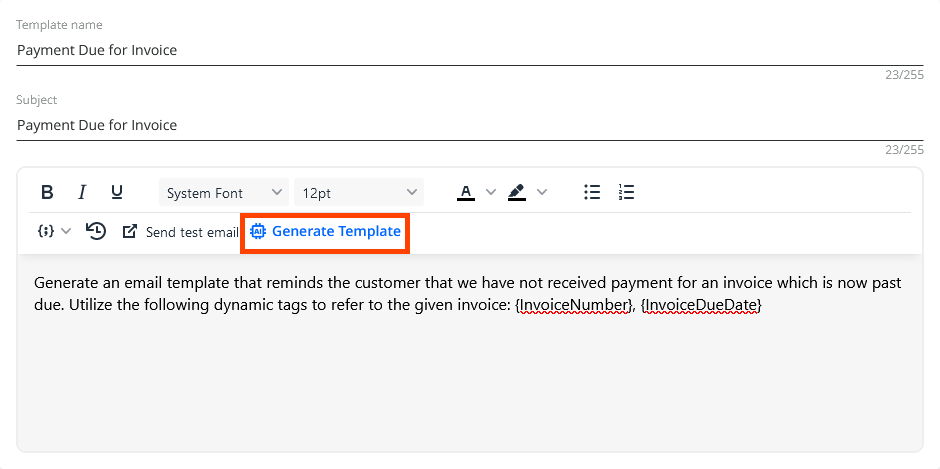
Generating Emails Using AI
You can now utilize the power of AI when composing emails (or email templates) in YayPay.
What It Brings to Our Customers
- Saves time and effort on crafting new emails from scratch. This is especially useful for repetitive or routine communications, such as payment reminders or invoice follow-ups.
- Ensures that your emails are consistent and professional if you base them on pre-defined prompts. This can help to improve your brand image and customer relations.
How It Works
- Open YayPay's email editor from any feature that supports it (e.g. email templates, email reminders, email replies etc.).
- Fill out the mandatory fields to provide the AI with prompt information:
- Email subject and template name
- Email body (the AI will take into account any prompt or context that you enter in the email body)
- Click on one of the following buttons (depending on the email feature you are using) to generate the email:
- Generate Template
- Generate Email
- Generate Reply
- Review the generated email and customize it to suit to your needs.
Application Features
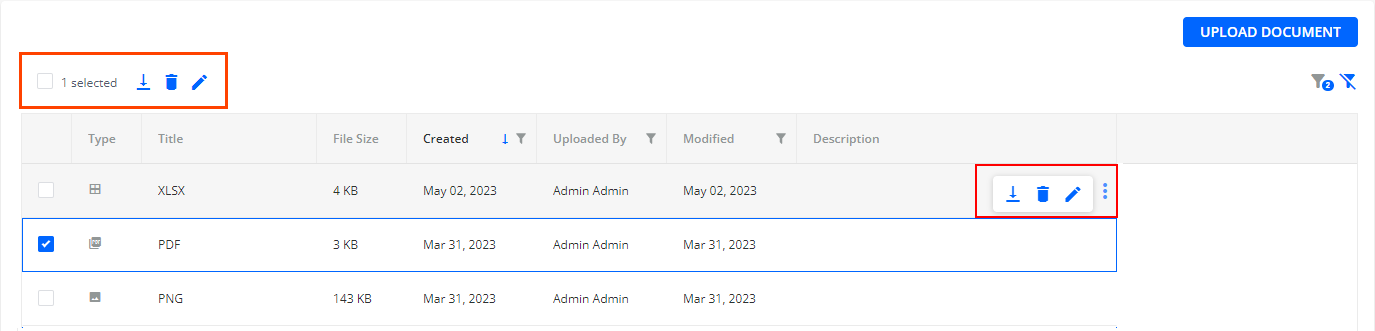
Business Level Supplemental Documents
-
You can now download, delete or edit a single Business Level Supplemental document by clicking on the three vertical dots that appear when you hover your mouse pointer over a specific document:
-
If you configure a Credit Application received rule in Workflows | Global Rules and set its Action to Send an email reminder, then you can now attach business level supplemental documents to the email reminder.
This event is automatically executed when a business receives a credit application from a customer.
Customer and Invoice Level Supplemental Documents
For Customer level supplemental documents / Invoice level supplemental documents, we have added the following enhancements:
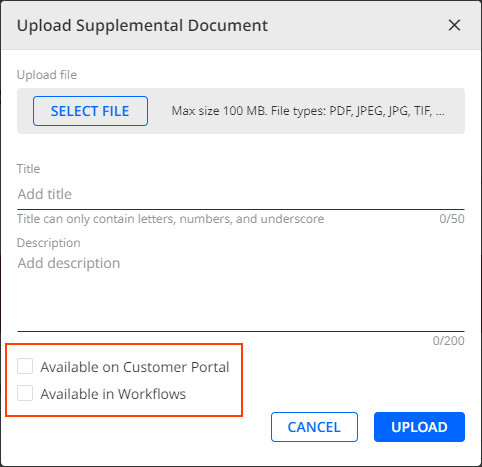
- When uploading/editing Customer level supplemental documents / Invoice level supplemental documents, you can now make them available on the Customer Portal and/or in Workflows by checking the respective check boxes, i.e. Available on Customer Portal and Available in Workflows :
Alternatively, you can change the default settings so that these check boxes are always checked for all supplemental documents. To do so, go to Settings | Business and check Supplemental Documents - Enable Available on Customer portal setting by default and Supplemental Documents - Enable Available in Workflows setting by default check boxes.
Additionally, to better reflect its purpose, we have renamed the Make available on the Customer Portal check box in all the dialogs to Available on Customer Portal.
-
We also introduce a new and efficient way how to select multiple customers and attach all their previously uploaded customer level supplemental documents to an email/mail reminder. As a result, each customer receives a personalized reminder containing only their own set of supplemental documents.
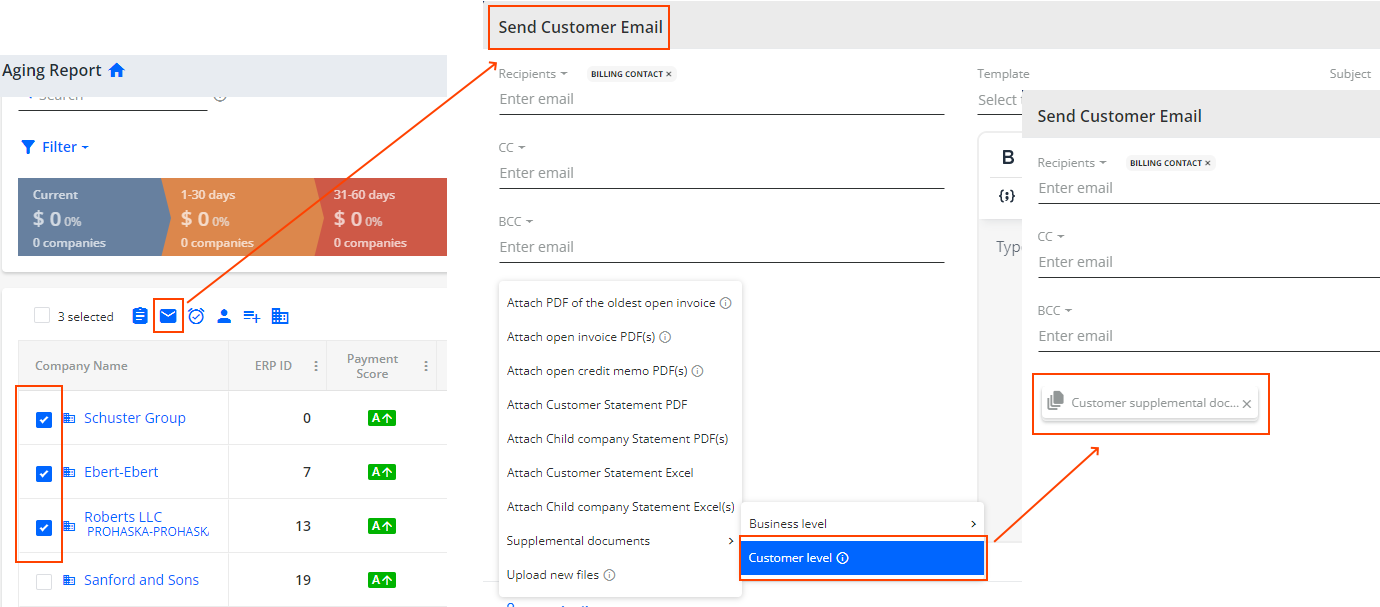 The customer level supplemental documents are attached as a group which contains all the documents with the Available in Workflows check box checked. By clicking on the cross icon you can remove only the whole group of attached documents, not the individual ones.
You can attach the supplemental documents on all pages where you can send email/ mail reminders, for example:- Aging Report
- Statement page
- Invoices
To be able to use this feature, go to Settings | Security Groups and ensure that the Manage Customer/Invoice Supplemental Documents check box is checked for your role.
-
Similarly, you can select multiple invoices and attach all the previously uploaded Invoice level supplemental documents to an email/mail reminder. As a result, each customer receives a personalized reminder containing only their own set of invoices and attached supplemental documents.
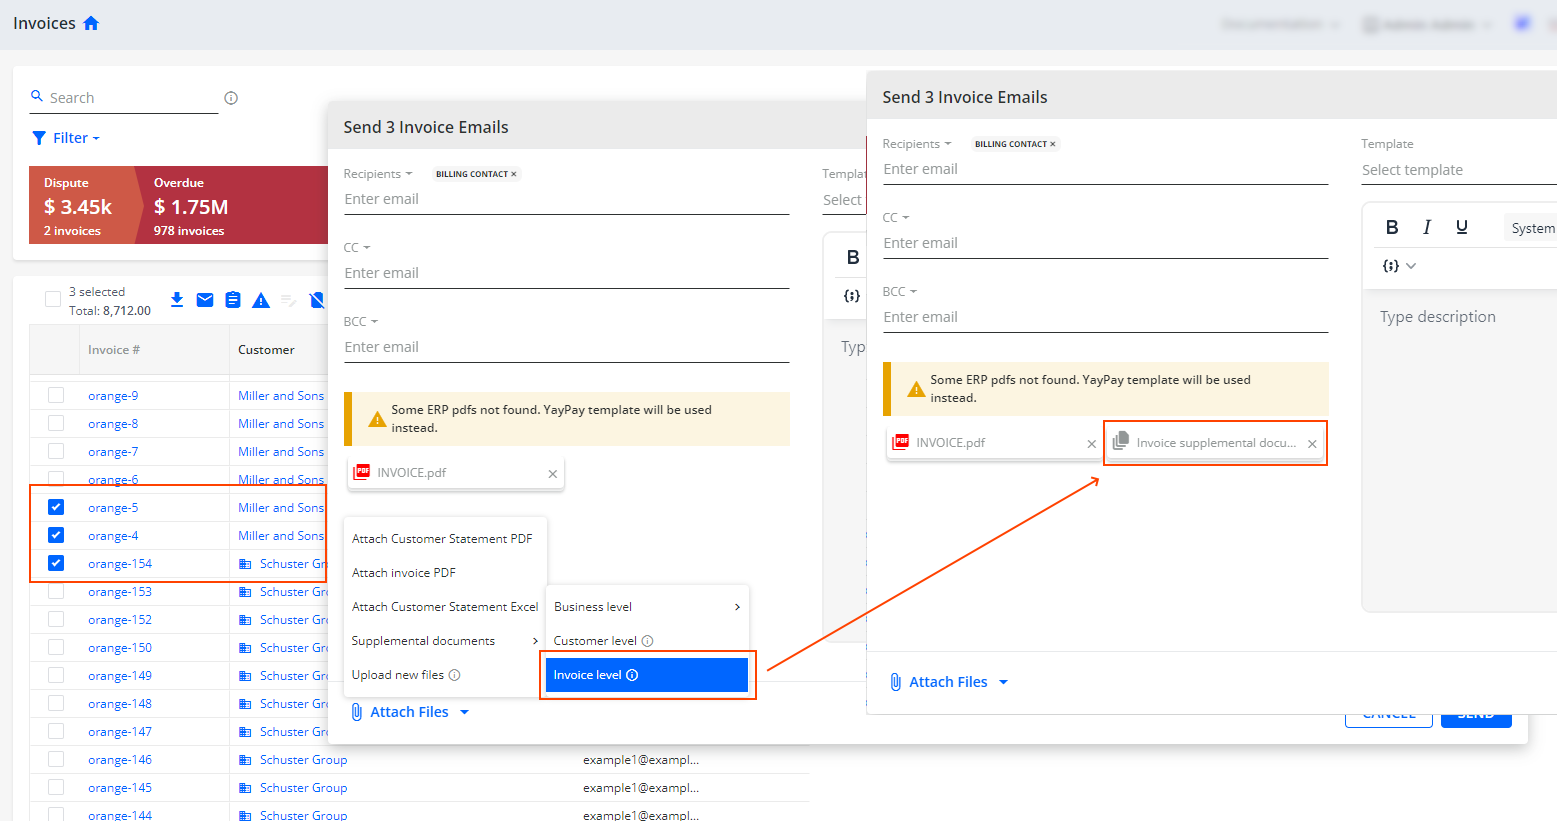
The invoice level supplemental documents are attached as a group which contains all the documents with the Available in Workflows check box checked. By clicking on the cross icon you can remove only the whole group of attached documents, not the individual ones.
You can attach the supplemental documents on all pages where you can send email/ mail reminders, for example:Statement page
Invoices
Disputes
To be able to use this feature, go to Settings | Security Groups and ensure that the Manage Customer/Invoice Supplemental Documents check box is checked for your role.
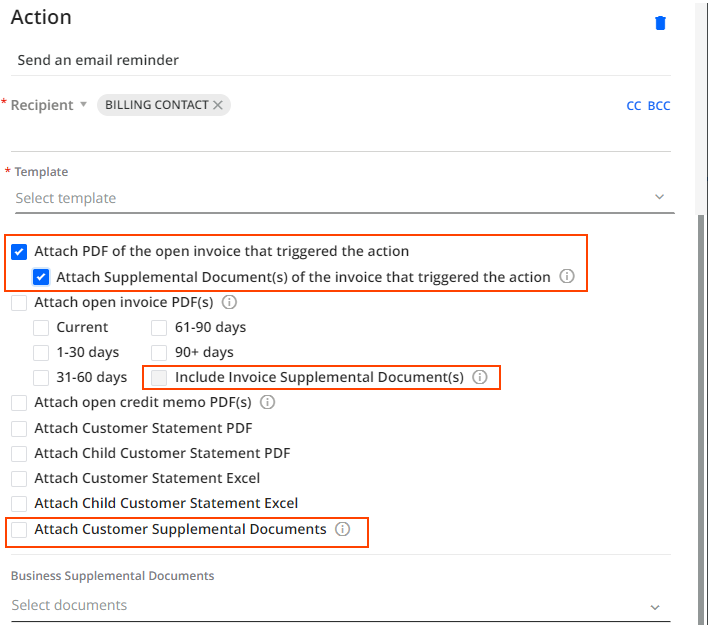
- In addition, using rules you can automatically include customer level and/or Invoice level supplemental documents (only those with Available in Workflows checked) in mail and email reminders. You can do so on all the pages where you can configure rules with the Send mail and Send email reminder Action types, for example:
- Collection Workflows (including Rules and Timelines)
- Global Rules
For this purpose, the Add new rule dialog now includes the following check boxes:
- for customer level supplemental documents:Attach Customer Supplemental Documents
- for invoice level supplemental documents:Attach Supplemental Document(s) of the invoice that triggered the action and Include Invoice Supplemental Document(s)
For automatic mail reminders (i.e. Send mail Action), only PDF documents can be attached.
- When configuring sending of physical mail reminders (manual), you can now attach Customer level supplemental documents / Invoice level supplemental documents. However, you can select PDF files only.
You can attach supplemental documents on all pages where you can send mail, for example:
- Aging Report
- Statement page
- Invoices
For more details, see the Customer level supplemental documents / Invoice level supplemental documents articles.
Upload Supplemental Documents via FTP/FTPS/SFTP Server
You can now upload customer level and/or invoice level supplemental documents to the FTP/FTPS/SFTP server. Using the CSV connector, the uploaded documents are subsequently synced and imported to YayPay.
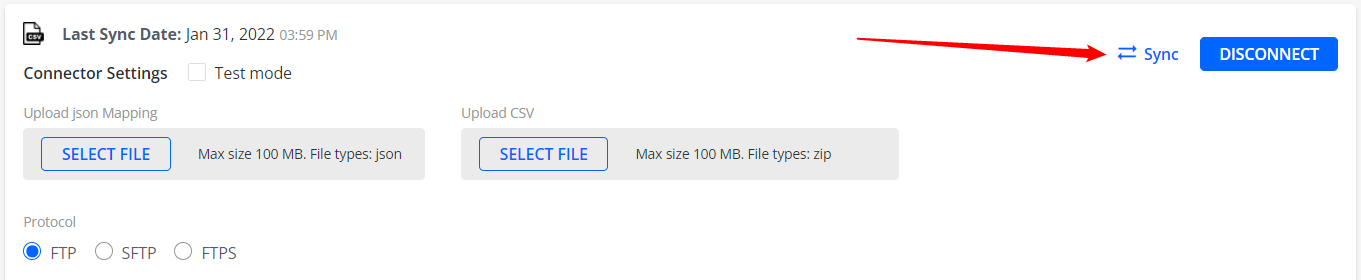
To ensure successful syncing, it is necessary to set up a specific folder structure on the server.
Once the sync process is complete, YayPay will display the uploaded customer and/or invoice level supplemental documents on the Statement page.

For more details, see the Sync Supplemental Documents From FTP Server article.
Scheduled Payments
To provide your customers more payment flexibility, one-time payments can now be scheduled for a specific day in the future. This also reduces the risk of late payments and eliminates the need for notes and reminders to request manual payments.
To schedule a payment, simply follow the same steps as when you want to make full/ partial payments, for example via the Statement page. There are only a couple of extra steps needed for scheduling a payment:
- In the Pay invoice / Partial Pay dialog, check the Schedule Payment (Optional) check box.
- Select a date when the payment should be made from the date picker.
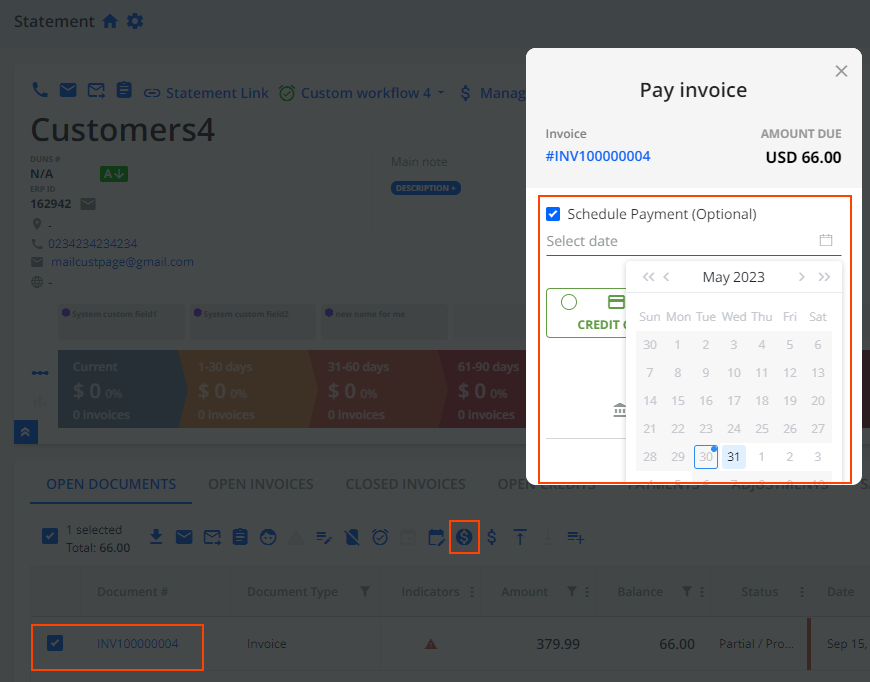
You can adjust the default date range available in the date picker when scheduling a payment by going to Settings | Business and editing the number of days in the Available date range for scheduled payments edit box. You can set it to 60 days maximum.
Fill in the other payment details as usually.
On the Payment page, click on the Schedule Payment button to confirm the future payment.
Once a payment is scheduled, this information also appears on the Payment Activities tab on your Statement page.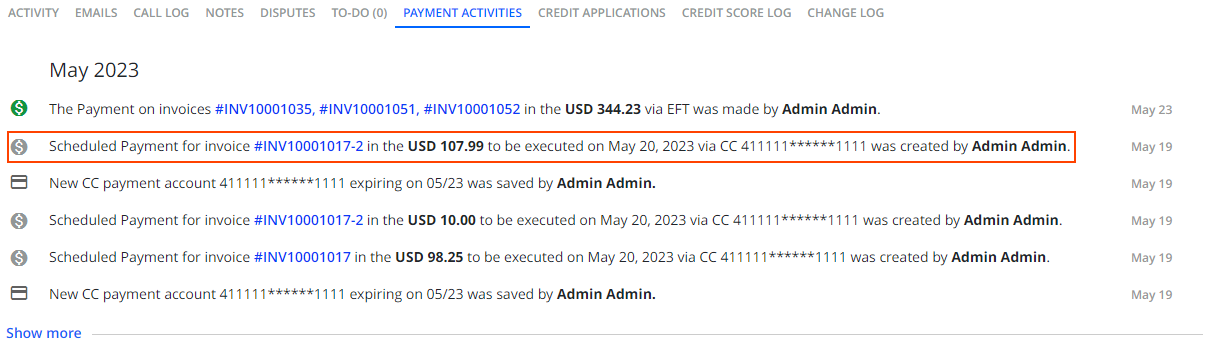
What is more, when a payment is scheduled, you can manage it by clicking on the Manage Scheduled Payments icon located above the invoice grid. This opens the Manage Scheduled Payment dialog where you can view and edit details, such as the payment date, payment method or delete the scheduled payment.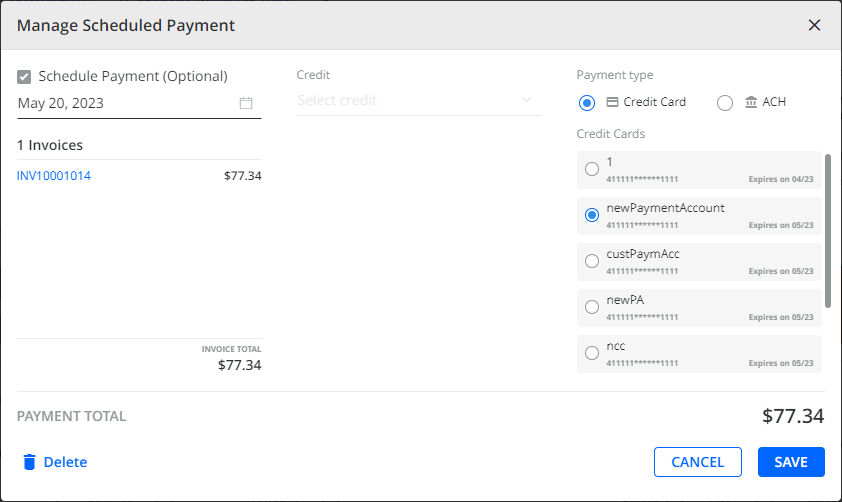
On the Statement page, the functionality for scheduling and managing full/partial payments is enabled by default.
Optionally, you can also enable it for full payments made via the Customer Portal. To do so, go to Settings | Business and check the Allow Scheduled Payments on Customer Portal check box. 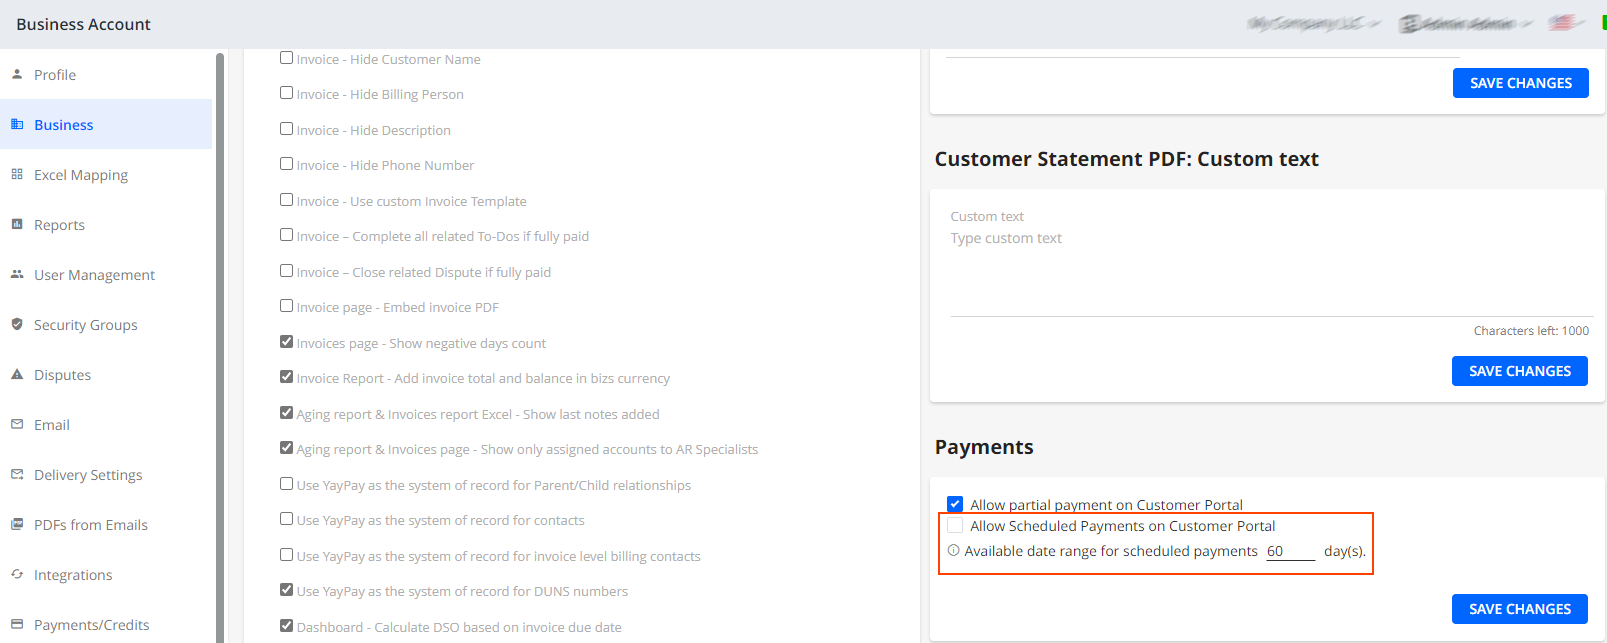
For more details, see the Scheduled Payments article.
In upcoming releases, we will continue to improve and enhance this feature to maximize its functionality for your benefit.
Search by Customer ERP ID
We have improved the Search functionality on the Aging Report page so you can now search customers also by their ERP ID.
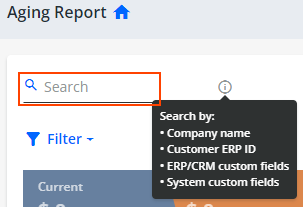
For more details, see the Aging Report - Overview article.
Indicators Column Improved
To improve your user experience, the Indicators column is now resizeable and has always its title displayed. In this column, you can see various indicators that should draw your attention, for example the "credit limit exceed", "open dispute", etc.
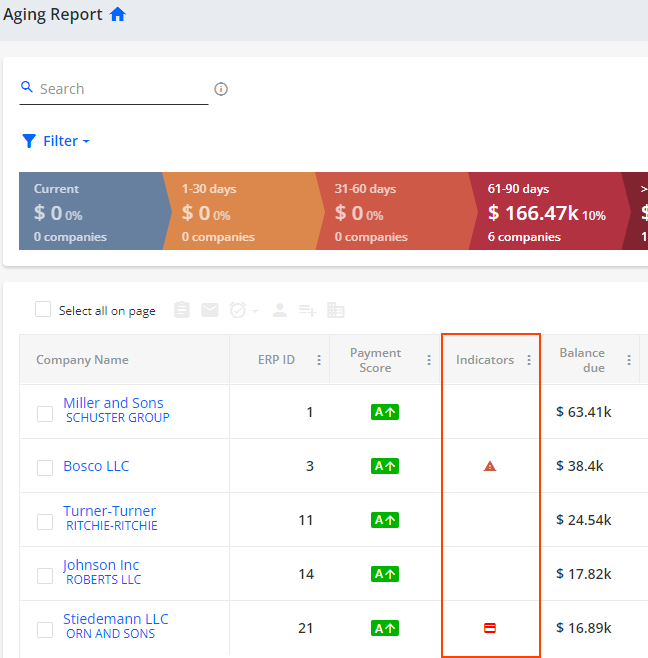
You can find Indicators column on all pages with grids, for example:
- Aging Report
- Invoices
- Disputes
- Statement
- Customer Portal
Communications Page - Order of Tabs
To make your work more efficient, we have changed the order of tabs when you open the Communications page. Now, the order is the following: INBOX, SENT and ALL.
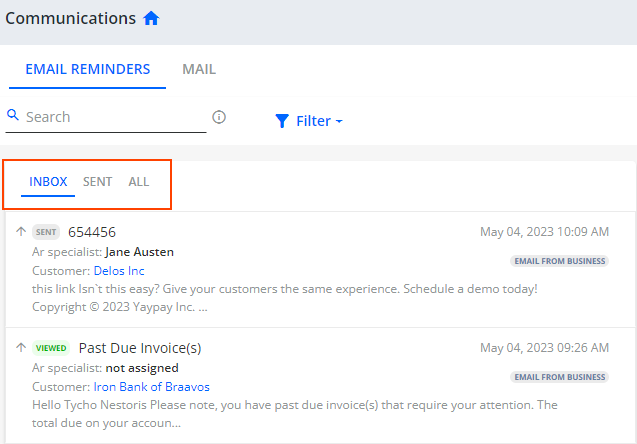
For more information, see the Communications Page - Overview article.
Export Customer Statement Links
You can now easily export an Excel file that contains active Statement Links along with other customer related information for all your customers. Subsequently, you can upload this file to your ERP system to keep it up to date.
To do so, go to Settings | Reports | Customer Statement Links and click Generate to download the Excel file. It will include details such as Customer ERP ID, Customer Name as well as customers' Statement Links and their expiration dates.
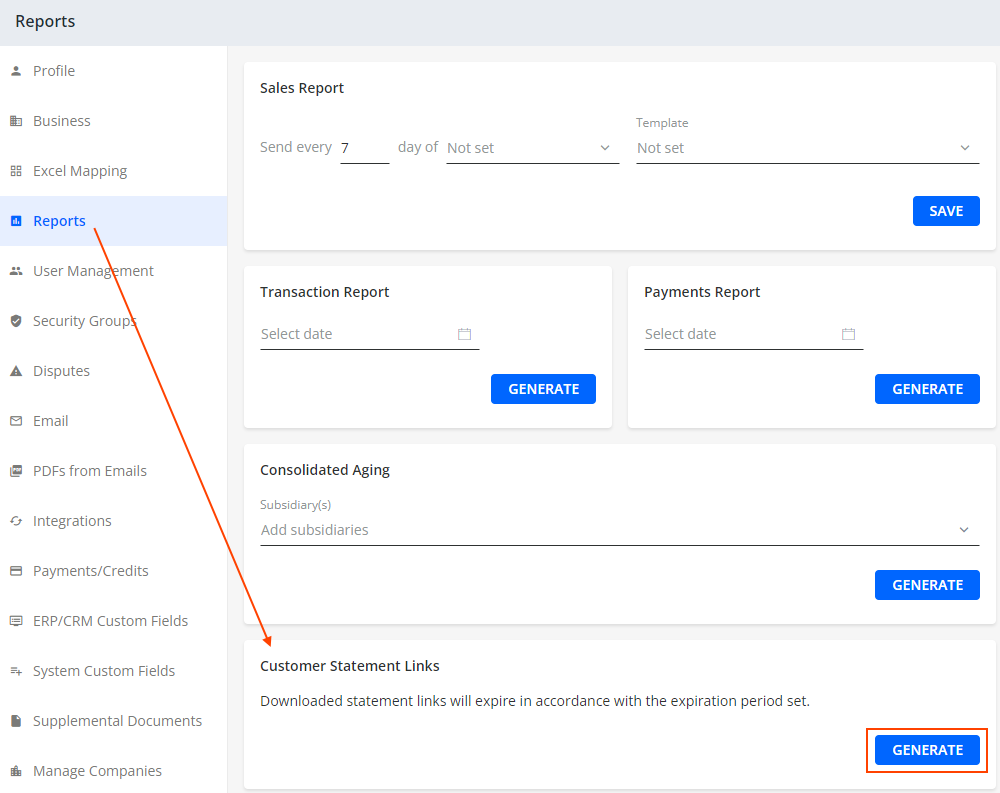
To be able to see this Customer Statement Links panel, make sure that you have checked the Customer Portal - Enable authentication check-box located on your Business settings page.
For more information, see the YayPay Reports article.
Copy Global Rules Functionality
Please note that when your Global Rules, configured on the Global Rules tab of the Workflows page, include a rule for the Credit Application received event, then clicking on the Copy Global Rules icon will not copy this rule to the target business.
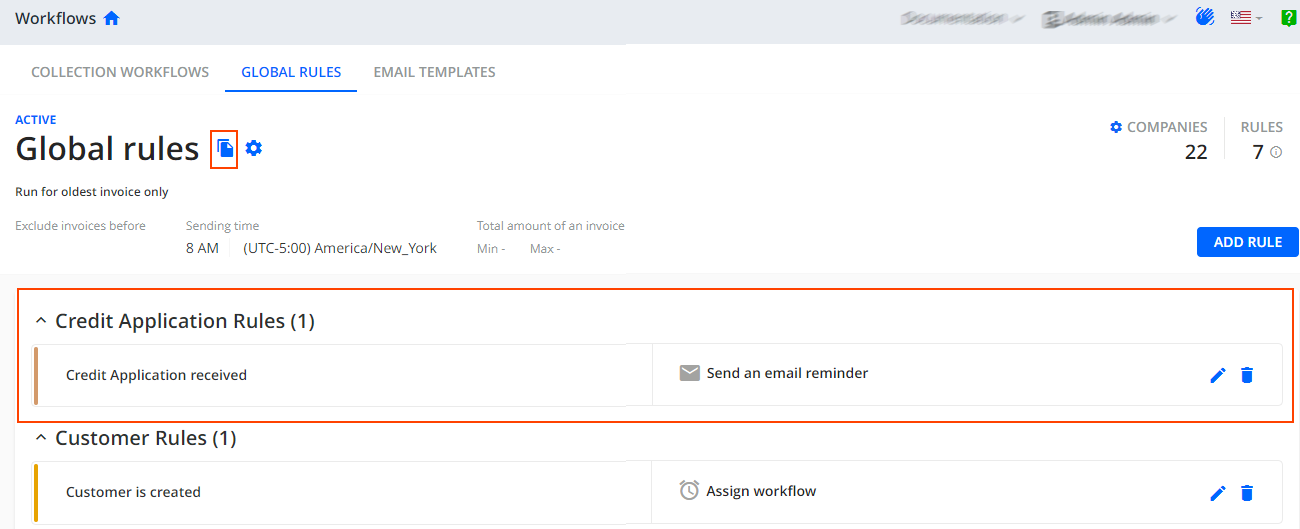
For more information, see the Copy Global Rules article.
Add Your Business Logo to Verification Emails
When the Customer Portal - Enable authentication setting in Settings | Business is enabled, YayPay sends an email with a verification code to users who try to access their Customer Portal.
To personalize this email with your business logo, simply upload your logo in the Logo panel in Settings | Business.
Customer Names on Activity Tab
To further enhance your customer experience, the Activity tab on your Statement page now reflects the settings of the Customer Portal - Enable authentication option in Settings | Business.
If you check this option, then the list of activities will include names of users who performed a given action in their Customer Portal, for example Email sent from Customer Portal by John Doe. If left unchecked, generic names like Customer Portal will be used instead of user names, for example Email sent from Customer Portal.
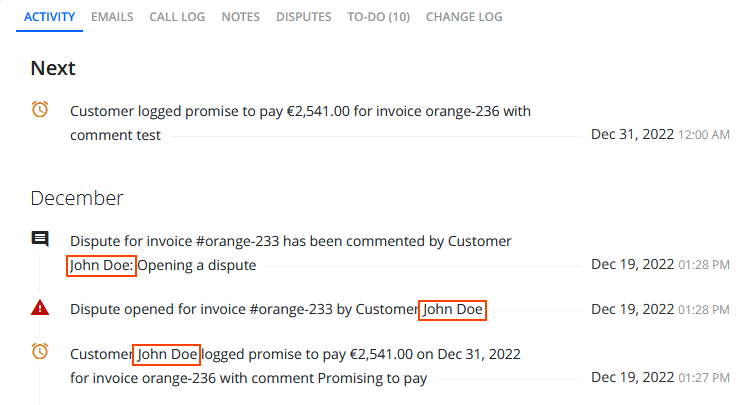
For more information, see the Statement Page article.
Do Not Create To-Do When Dispute Is Opened
To customize YayPay according to your preferences, you can now disable the automatic creation of to-do tasks when a dispute is opened.
You can do so by going to Settings | Business and checking the Do not create to-do when dispute is opened check-box.
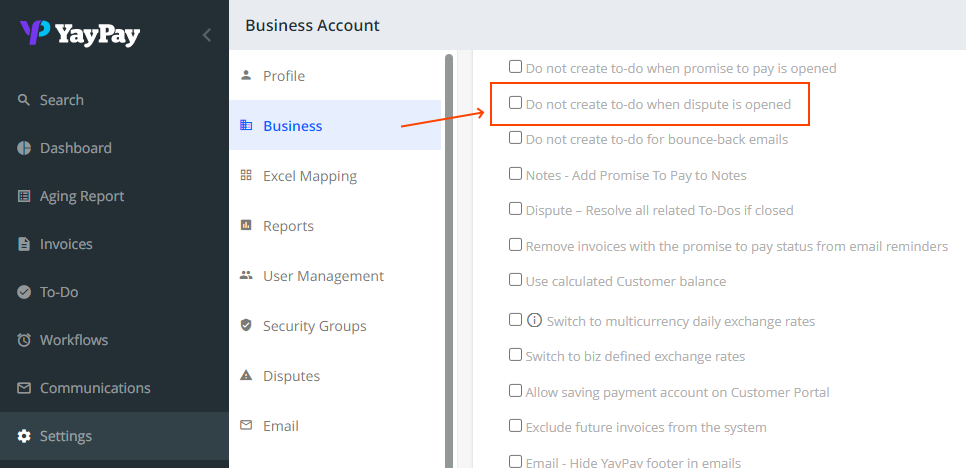
For more information, see the Business Settings article.
Security Groups - Restrict to See Assigned AR/Sales/CS on the Statement Page
You can now enable Sales/CS roles to view assigned Customer Success Specialist, Sales Specialist and AR Specialist on the Statement page (hidden by default).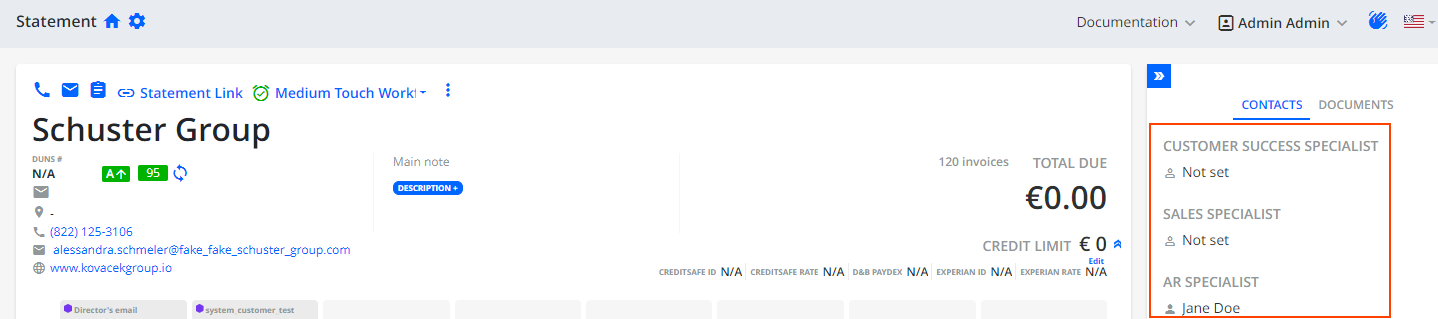
By allowing Sales/CS roles to access this information, they can have a better understanding of the roles and responsibilities of each specialist and it can also help Sales/CS roles to make more informed decisions and provide better assistance to customers. Thus, it can improve efficiency, effectiveness, and customer satisfaction.
To do so, uncheck the Restrict to see assigned AR/Sales/CS on Statement check box in Settings | Security Groups | Sales/CS.
For more information, see the Statement Page article.
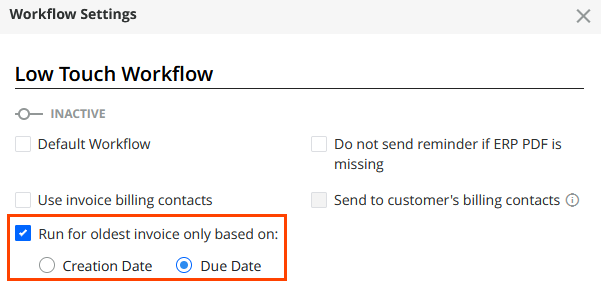
Worklfows / Global Rules Settings Enhanced
We have renamed the Run for oldest invoice only rule to Run for oldest invoice only based on and extended the rule's functionality.
You can now select whether you want to trigger the rule for the invoices with the oldest creation date or the oldest due date. Previously, that rule only worked with the creation date.
Sorting Email Templates
You can now sort email / mail templates based on their name, creation date or update date.
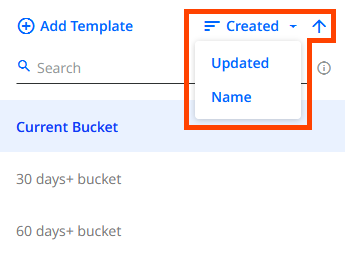
The current sorting state influences the order of the templates displayed within features that support email / mail template selection (e.g. email reminders, rule engine actions, etc.).
API Features
POST /contents Endpoint Enhanced
We have enhanced the POST /contents endpoint which you can use for uploading supplemental documents via API. The endpoint now includes the new attach_to_auto_reminders parameter in the body of the API request.
Using this parameter, you can control whether the uploaded/edited supplemental document should be available in Workflows or not. To make the supplemental document available in your collection workflows and rules, set the parameter's Boolean value to true, for example:
{
  "items": [
    {
      "content": {
        "base64_content": "ENTER BASE64 STRING HERE",
        "file_name": "INV_43212342.pdf",
        "content_type": "application/pdf",
        "integration": {
          "internal_id": "entity_internal_id"
        },
        "supplementary_type": "ERP_INVOICE_PDF",
        "show_on_customer_portal": false,
        "attach_to_auto_reminders": true
      },
      "integration": {
        "internal_id": "content_internal_id"
      }
    }
  ]
}
This parameter is equivalent to the Available in Workflows check box in the user interface.
GET /customers Endpoint Updated
We have updated the GET /customers endpoint to include the new main_note property. The property returns the customer's main note text from the Statement page. For example:
{
  "customers": [
    {
      "balance": 543566.1123,
      "company_name": "Apple Inc.",
      "credit_limit": 10000000,
      "currency": "USD",
      "custom_fields": {
        "SF_ID": 3214234,
        "TERMS": "NET 30"
      },
      "system_custom_fields": {},
      "duns_number": "string",
      "parent_id": "parent_id",
      "payment_terms": "NET30",
      "tax_id": "3425543",
      "internal_id": "some_uniq_id",
      "address": {
        "city": "Cupertino",
        "country": "United States",
        "country_iso_code": "USA",
        "email": "example@email.com",
        "line1": "1 Apple Park Way",
        "line2": "string",
        "mobile": "string",
        "phone": "1800-900-3454",
        "state": "California",
        "www": "https://www.apple.com/",
        "zip": "10001"
      },
      "created_at": "2023-03-01T13:34:07",
      "updated_at": "2023-05-10T11:38:03",
      "main_note": "text"
    }]
}